You have multiple options for previewing an experience before you activate it to ensure the WHAT action or actions work as you expect. In some situations you must first activate the experience so that you can then test it, specifically to test certain types of WHO settings.
Previewing an Experience Before Activating It
For most experience types, you can preview the experience before activating it. First, click PREVIEW at the top of Experience Editor.

A new browser tab opens in which your site loads so that you can preview how the experience appears for site visitors.
Previewing an Experience with a Single Action
If the experience has only one action, then you can preview it a few different ways. First, click the drop-down arrow to the right of PREVIEW, and then select one of the options:
- Preview this Experience Alone — Provides the same functionality as clicking PREVIEW
- Preview with All Active Experiences — Launches a new browser tab that displays how your site looks with the experience you've built and all experiences that are currently active
- Share via Public Preview — Allows you to share a preview of the experience with other people at your company who may not have access to the Monetate platform using either a link or a QR code

See Sharing via Public Preview section for more information about allowing people without access to the Monetate platform to preview the experience.
Previewing an Experience with Multiple Actions
The preview options are slightly different if the experience has multiple actions.
- Preview A Alone — Preview only action A in a new browser tab
- Preview A with All Active Experiences — Launches a new browser tab that displays how your site looks with the experience's action A along with all experiences that are currently active
- Preview B Alone — Preview only action B in a new browser tab
- Preview B with All Active Experiences — Launches a new browser tab that displays how your site looks with the experience's action B along with all experiences that are currently active
- Update Preview URL — Create a custom preview URL by entering the address for the specific page on your site where you like to direct the preview link
- Share via Public Preview — Allows you to share a preview of the experience with other people at your company who may not have access to the Monetate platform using either a link or a QR code

See Sharing via Public Preview in this documentation for more information about allowing people without access to the Monetate platform to preview the experience.
Sharing via Public Preview
Follow these steps to create a link or QR code that you can share so that other people within your company can preview an experience.
- Click the arrow to the right of PREVIEW and then select Share via Public Preview.

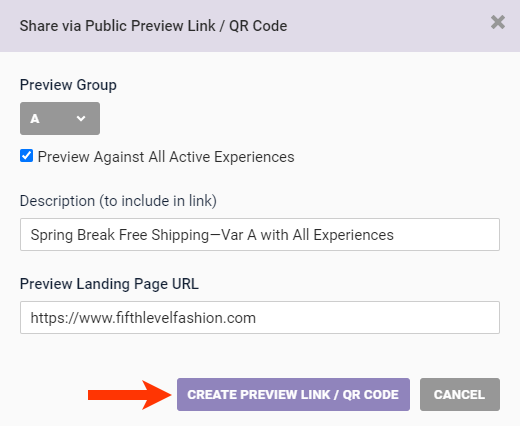
- In the Share via Public Preview Link/QR Code modal, select from Preview Group the variant you want previewed if the experience has variants. If the experience doesn't have variants, skip this step.
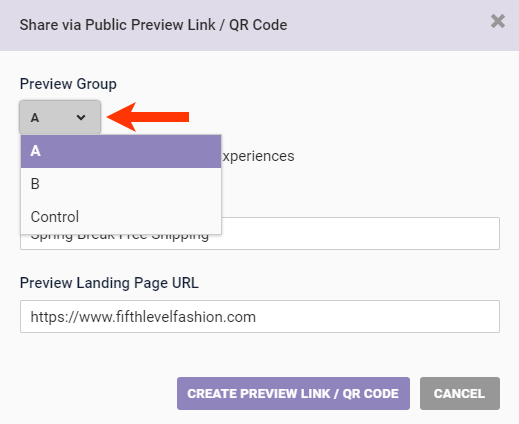
- Click to select Preview Against All Active Experiences if you want the preview to include all other active experiences running on the page.
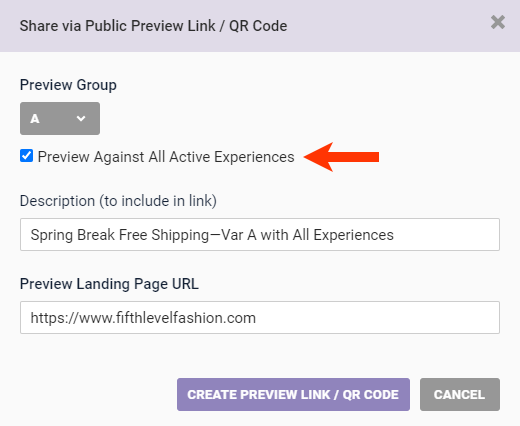
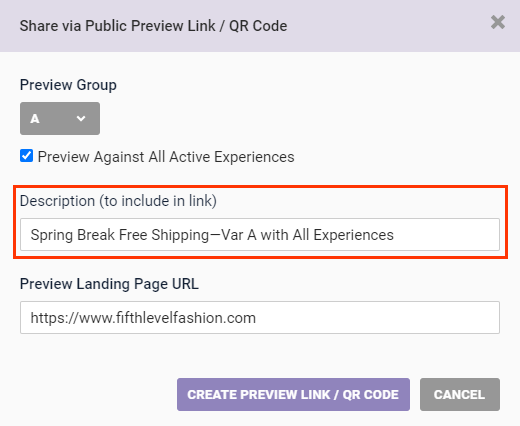
- Revise the text that appears in Description (to include in link) as necessary. If the preview you're sharing is a variant or is a variant with all other active experiences, consider including that information in the description.
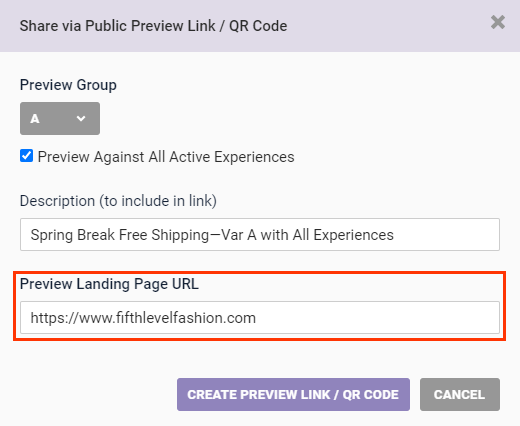
- Paste into Preview Landing Page URL the URL for a specific page on which anyone who clicks the link can preview the experience.
- Click CREATE PREVIEW LINK/QR CODE.
- Click COPY URL to copy the preview link onto your device's clipboard to paste and then send to the recipients in the communications application of your choice. Alternately, scan the QR code to preview the experience on a mobile device.
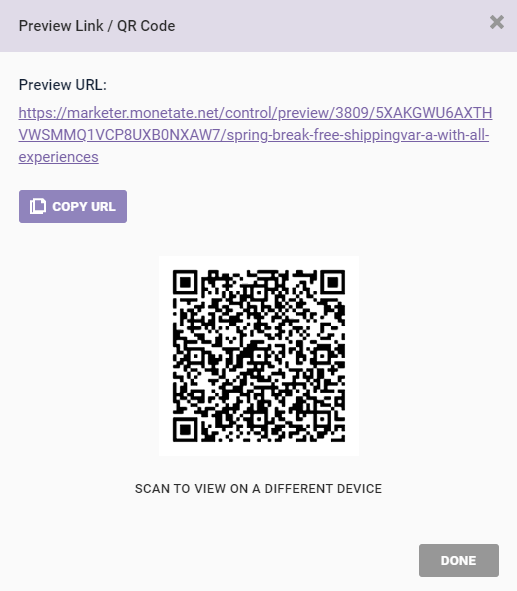
- Click DONE to dismiss the modal and return to the Experience Editor page.
Repeat these steps as necessary to create previews of each variant if the experience has multiple variants.
Testing an Experience After Activating It
Experiences with certain types of configurations require that you activate them before you can test them.
By adding an IP address or initial URL query string WHO target to the experience allows you to test it when activated and ensuring that only you can see the changes.
You must activate an experience to test it if it contains any of the following:
- A WHO Behavior target that relies on cart information, such as Abandoned cart, Amount in cart, or Product in cart
- The Landing page match WHO target
- A WHO custom target
- Actions that include dynamic text
- An action condition that uses any one of the four Cart value options
- An action condition that uses the Is landing page or the Is not landing page option
- Recommendations actions that use a recommendation strategy configured with a collaborative recommendation algorithm, such as Purchased and Also Purchased, Viewed and Also Viewed, and Viewed and Later Purchased
Using an IP Address WHO Target
Follow these steps to add an IP address WHO target to an experience to test it once activated.
- If you don't already have it open, navigate to the experience and open it in Experience Editor.
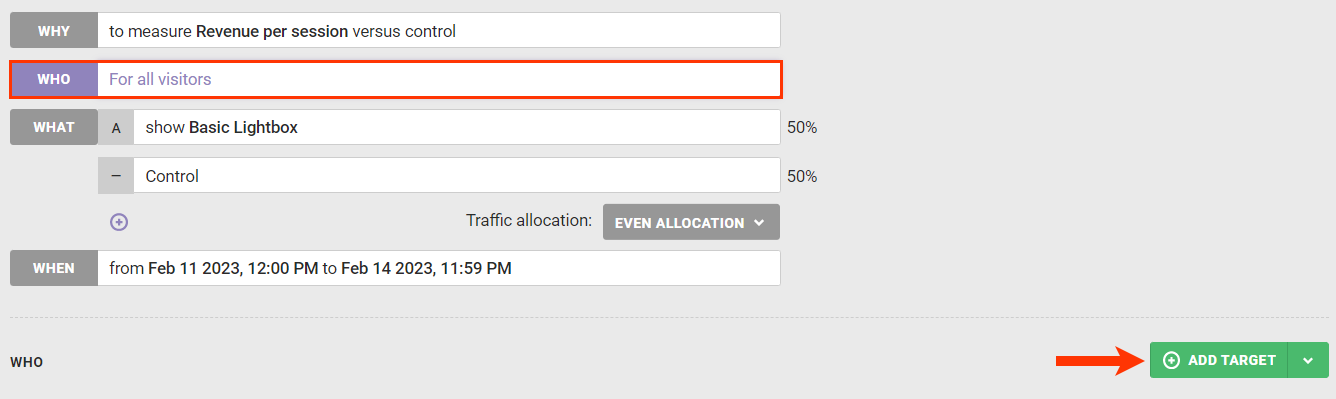
- Click WHO and then click ADD TARGET.
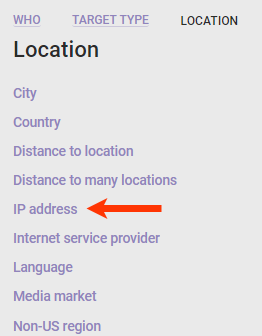
- Click Location.

- Click IP address.
- Enter your IP address in the appropriate field, keep visitors matching this target set to INCLUDE, and then click SAVE.

- Click ACTIVATE on the Experience Editor page.
Once you test the experience, you must remove the IP address target. Otherwise, only visitors with that IP address can view the experience.
Using an Initial URL Query String Match
- If you don't already have it open, navigate to the experience and open it in Experience Editor.
- Click WHO and then click ADD TARGET.
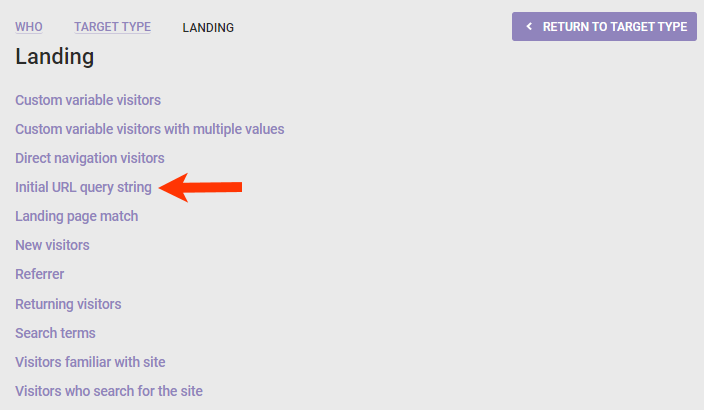
- Click Landing on the Target Type panel, and then click Initial URL query string.
- Enter the query string name and the matching value into their respective fields. Keep visitors matching this target set to INCLUDE.
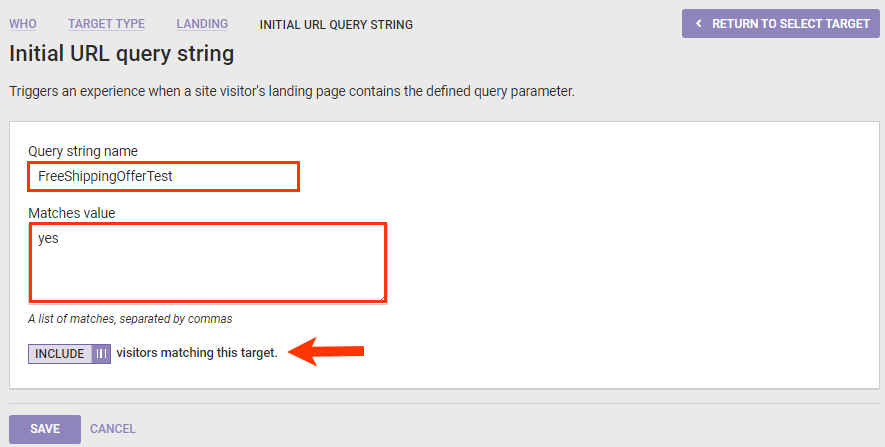
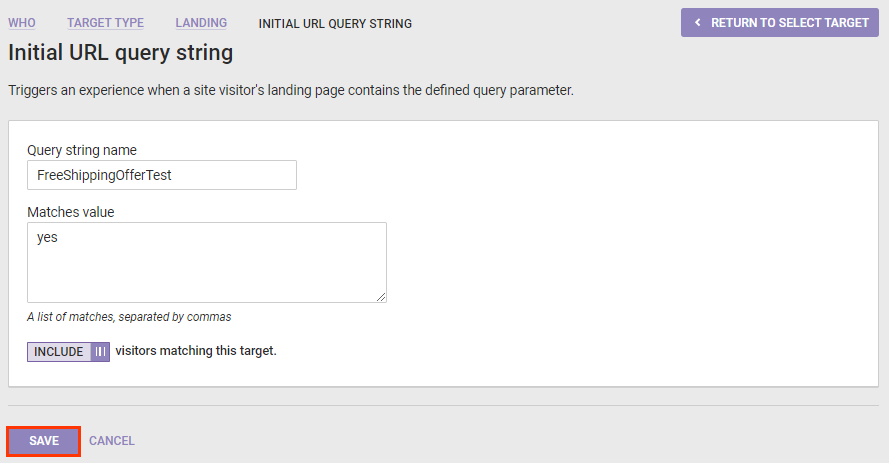
- Click SAVE.
- Click ACTIVATE on the Experience Editor page.
Once you activate the experience, clear your browser's cookies and cache. Navigate to your website and append its URL with the query parameter you defined in the WHO target. For the experience shown in the screenshots, the URL would be as follows:
http://www.example.com/?FreeShippingOfferTest=yes
Once you test the experience, you must remove the initial query string match target. Otherwise, no visitors can view the experience.