Prerequisites
On July 1, 2023, Google's standard Universal Analytics properties stopped processing data. If you didn't do so before that date, you must create a custom report in the Monetate platform that uses one of the code samples written for Google Analytics 4 (GA4) with Google tag and then use that custom report for any active experiences.
You must have a GA4 property before you can create the custom report in Monetate. Refer to Google's Make the switch to Google Analytics 4 documentation to learn how to create the property.
If you don't create a GA4 property, then your existing Google Analytics integration with Monetate used the legacy version of Google Analytics until July 1, 2023, when Google's standard Universal Analytics properties stopped collecting data.
Creating the Custom Report
Follow these steps to create a custom Google Analytics report that's compatible with your GA4 property.
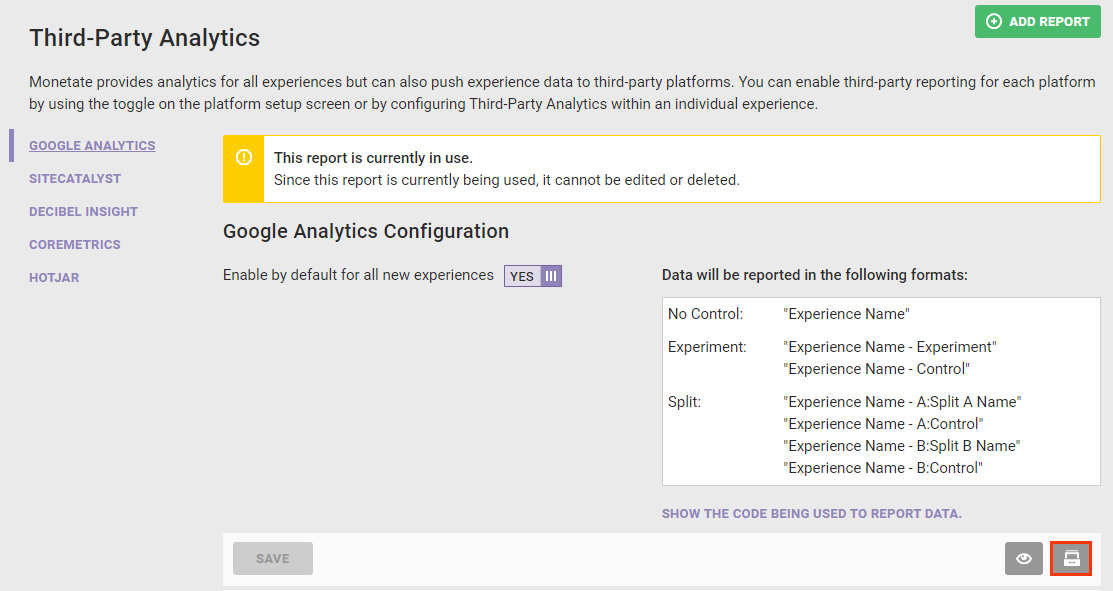
- Click the settings icon in the top navigation bar and then select Integration.
- Click GOOGLE ANALYTICS in the list of third-party analytics reports.
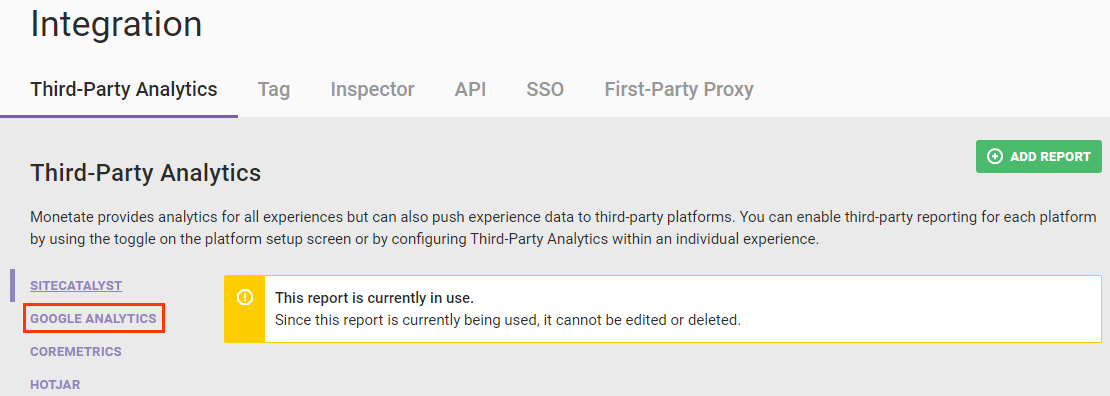
- Confirm that the existing Google Analytics report uses a legacy version of Google Analytics.
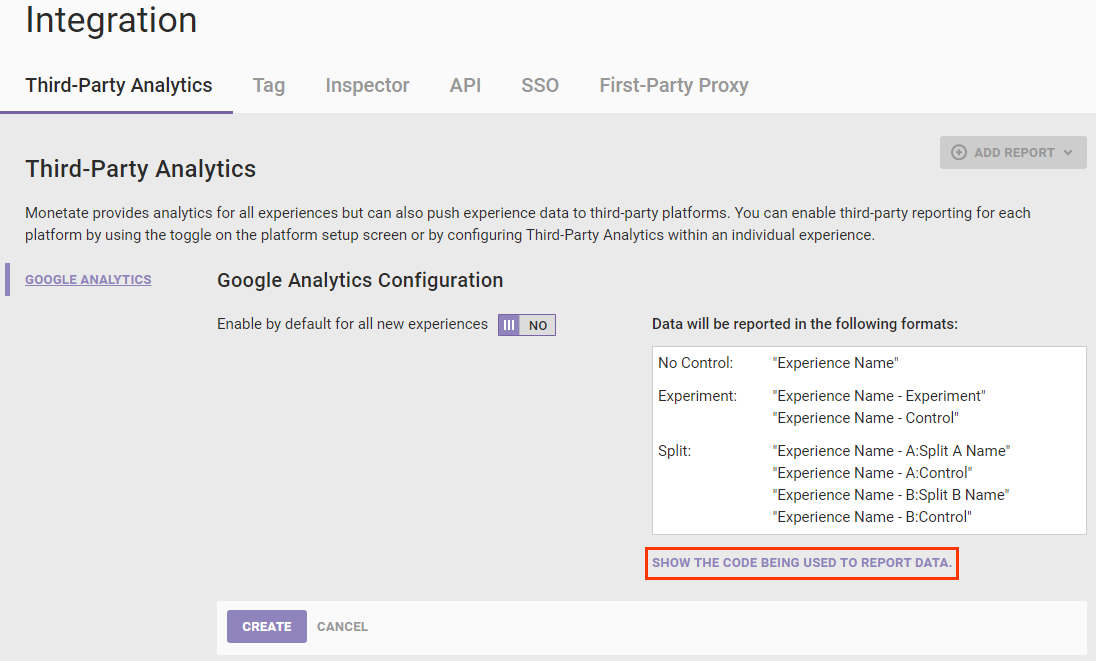
- Click SHOW THE CODE BEING USED TO REPORT DATA.
- Confirm that the code does not include
gtag.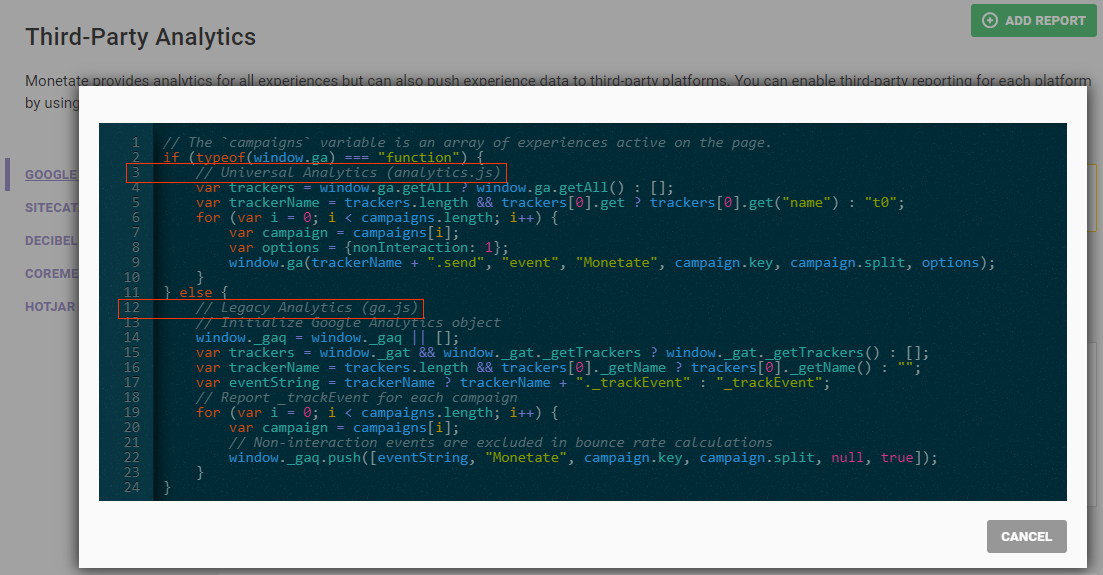
- Click SHOW THE CODE BEING USED TO REPORT DATA.
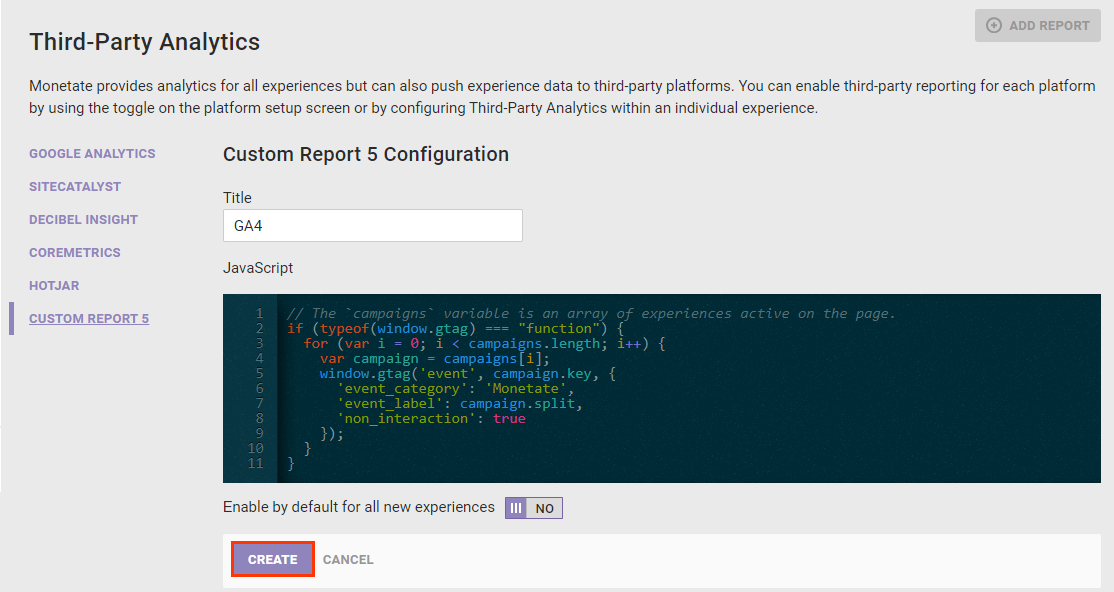
- Click ADD REPORT and, if necessary, select Custom.
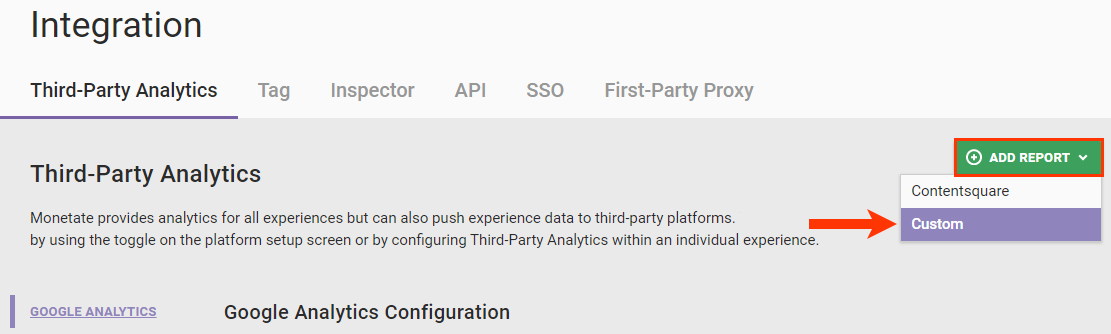
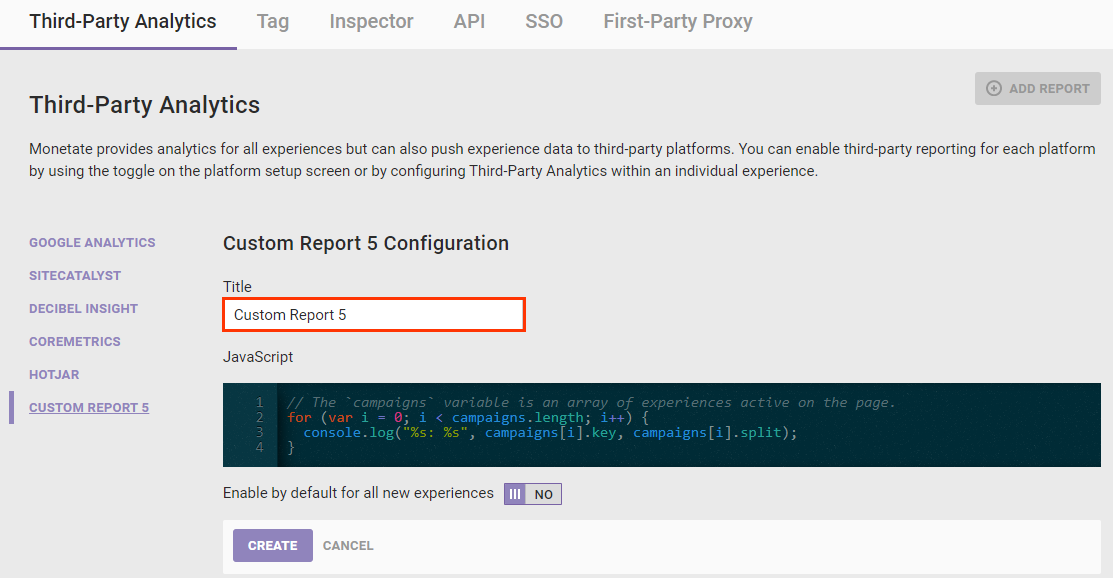
- Give the report a name that differentiates it from the existing Google Analytics report.
-
Copy one of the code samples for GA4 from Google Analytics 4 Code Samples, and then paste it into the code editor.
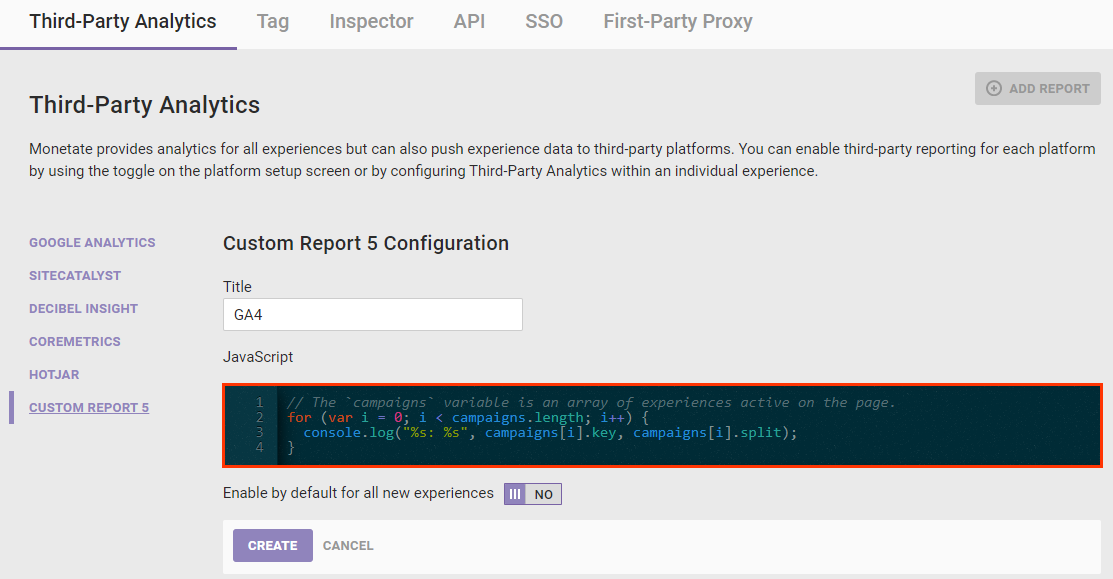
- Leave Enable by default for all new experiences set to NO.
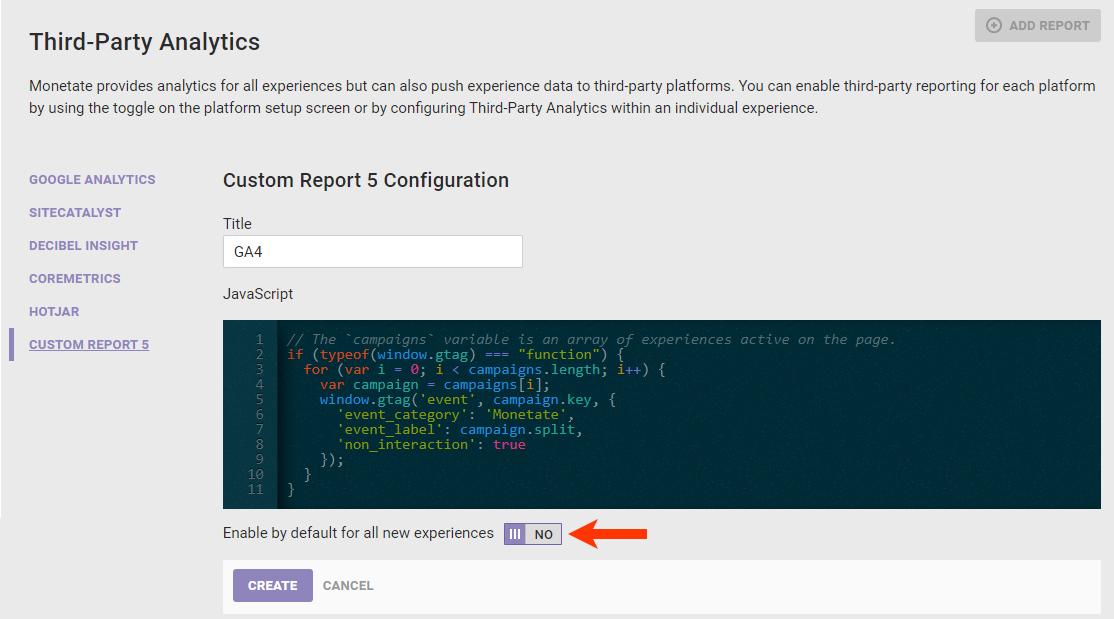
- Click CREATE.
Test the new report configuration to ensure it works as expected. Do not add it to any active Web experiences nor enable it for all new Web experiences until you test it.
If you have multiple legacy Google Analytics reports in one domain, ensure that you create and test a new GA4-compatible report for each of them.
Google Analytics 4 Code Samples
Copy and paste one of these code samples into the code editor in step 6 of Creating the Custom Report.
Google Analytics 4 with Google Tag
Use this code if you've transitioned to Google Analytics 4 and the Google tag (gtag.js), formerly called the global site tag.
This code requires no special modifications.
var max = 50;
setTimeout(function() {
  if (typeof(window.gtag) === "function") {
    for (var i = 0; i < campaigns.length; i++) {
      var campaign = campaigns[i];
      window.gtag('event', campaign.key, {
        'event_category': 'Monetate',
        'event_label': campaign.split,
        'non_interaction': true
      });
    }
  } else if (max--) {
    setTimeout(arguments.callee);
  }
}, 100);
Google Analytics 4 with Google Tag (Minimal)
This code is the most basic one for implementing Google Analytics 4 and the Google tag (gtag.js), formerly called the global site tag.
// The `campaigns` variable is an array of experiences active on the page.
if (typeof(window.gtag) === "function") {
  for (var i = 0; i < campaigns.length; i++) {
    var campaign = campaigns[i];
    window.gtag('event', campaign.key, {
      'event_category': 'Monetate',
      'event_label': campaign.split,
      'non_interaction': true
    });
  }
}
Google Analytics 4 with Universal Analytics Compatibility
Use this code if you have already created a GA4 property but are still using Universal Analytics for reports.
// The `campaigns` variable is an array of experiences active on the page.
if (typeof(window.gtag) === "function") {
  for (var i = 0; i < campaigns.length; i++) {
    var campaign = campaigns[i];
    window.gtag('event', campaign.key, {
      'event_category': 'Monetate',
      'event_label': campaign.split,
      'non_interaction': true
    });
  }
} else if (typeof(window.ga) === "function") {
    // Universal Analytics (analytics.js)
    var trackers = window.ga.getAll ? window.ga.getAll() : [];
    var trackerName = trackers.length && trackers[0].get ? trackers[0].get("name") : "t0";
    for (var i = 0; i < campaigns.length; i++) {
        var campaign = campaigns[i];
        var options = {nonInteraction: 1};
        window.ga(trackerName + ".send", "event", "Monetate", campaign.key, campaign.split, options);
    }
} else {
    // Legacy Analytics (ga.js)
    // Initialize Google Analytics object
    window._gaq = window._gaq || [];
    var trackers = window._gat && window._gat._getTrackers ? window._gat._getTrackers() : [];
    var trackerName = trackers.length && trackers[0]._getName ? trackers[0]._getName() : "";
    var eventString = trackerName ? trackerName + "._trackEvent" : "_trackEvent";
    // Report _trackEvent for each campaign
    for (var i = 0; i < campaigns.length; i++) {
        var campaign = campaigns[i];
        // Non-interaction events are excluded in bounce rate calculations
        window._gaq.push([eventString, "Monetate", campaign.key, campaign.split, null, true]);
    }
}
Testing the New Report
You can ensure the new GA4 report works from the report configuration page by adding the JavaScript console.log() method to whichever GA4 report code you input into the code editor.
The following example is the Google Analytics 4 with Google Tag (Minimal) code with the console.log() method added.
if (typeof(window.gtag) === "function") {
  for (var i = 0; i < campaigns.length; i++) {
    var campaign = campaigns[i];
    window.gtag('event', campaign.key, {
      'event_category': 'Monetate',
      'event_label': campaign.split,
      'non_interaction': true
    });
  }
  console.log("Google Analytics 4");
}
Follow these steps to test the new report.
- Add the
console.log()method to the GA4 report code.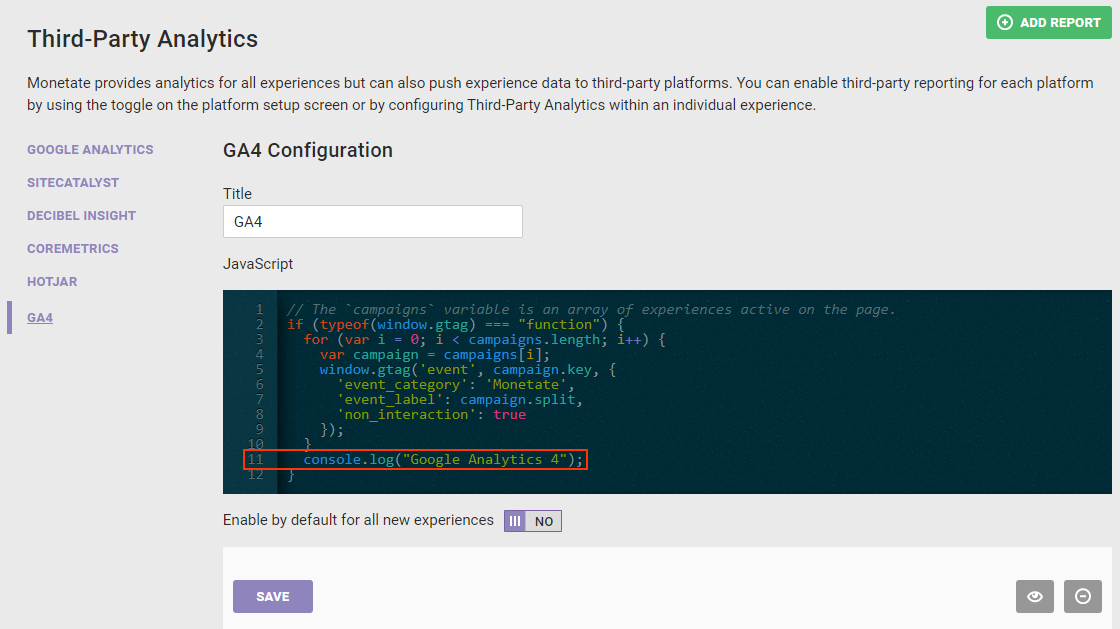
- Click the preview icon.
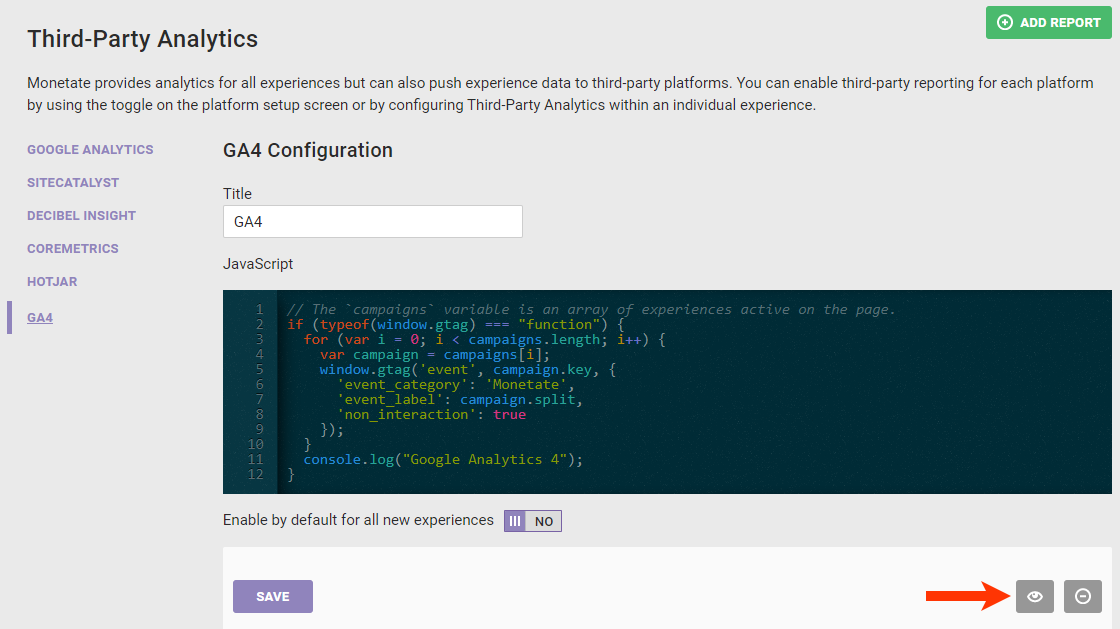
- While viewing the new browser tab or window in which your site loaded in Preview Mode, open your browser's developer tools and then switch to its console.
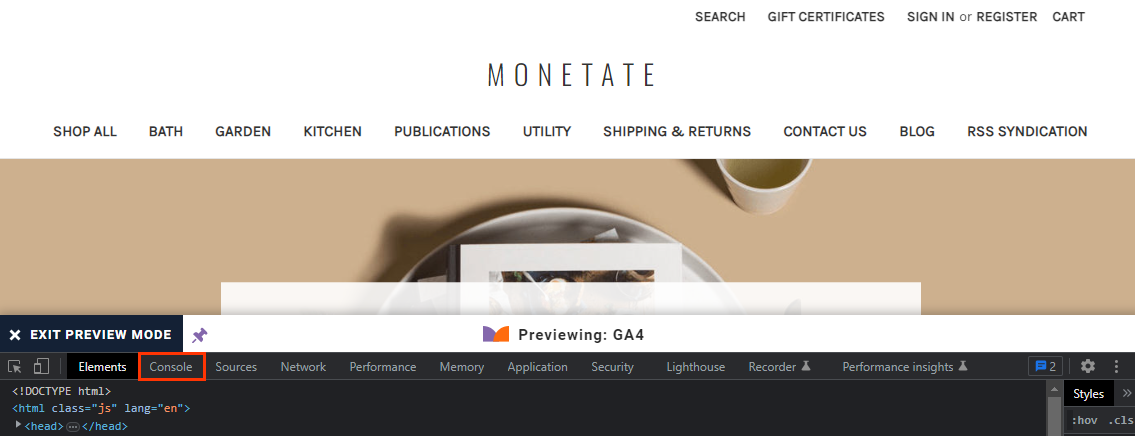
- Ensure the message that you used with the
console.log()method in the GA4 report code is present in the console.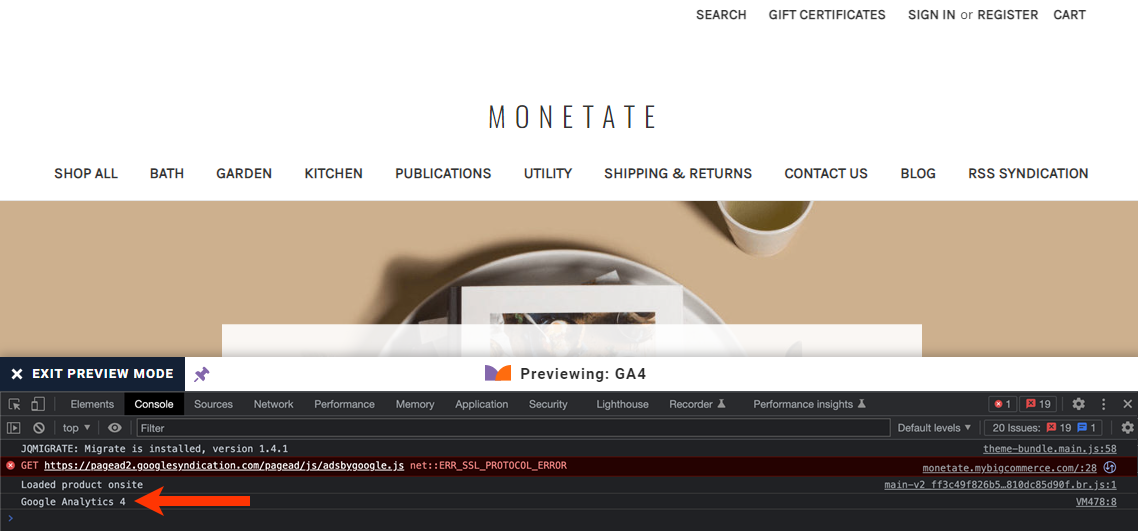
- In the Monetate platform, remove the
console.log()method from the GA4 report code, set Enable by default for all new experiences to YES, and then click SAVE.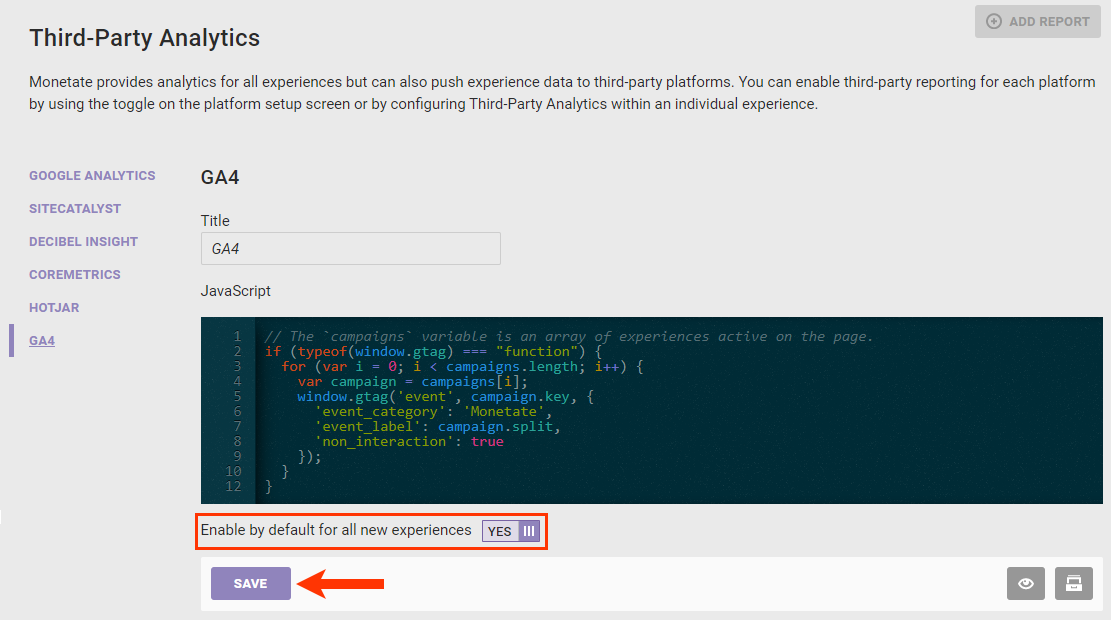
After you've created and tested the new GA4-compatible report, you can enable it for each active Web experience for which the legacy Google Analytics report is enabled.
Enabling the New Report in Active Experiences
Follow these steps to add the new GA4 report to an individual Web experience.
- Click the settings icon in the top navigation bar and then select Integration.
- Click the entry for the legacy Google Analytics report in the list of third-party analytics reports.
- Scroll down to the View Associated Experiences table.
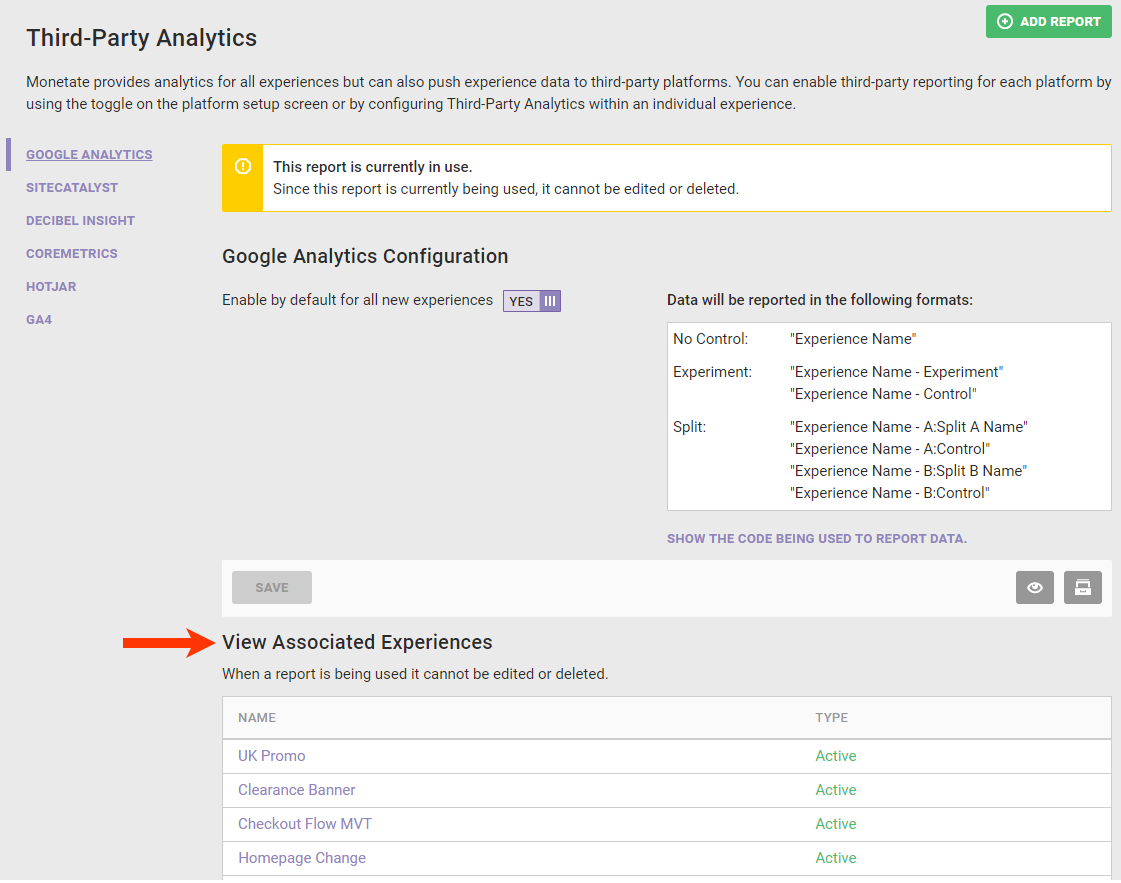
- Click the name of an experience in the table to open it in Experience Editor.
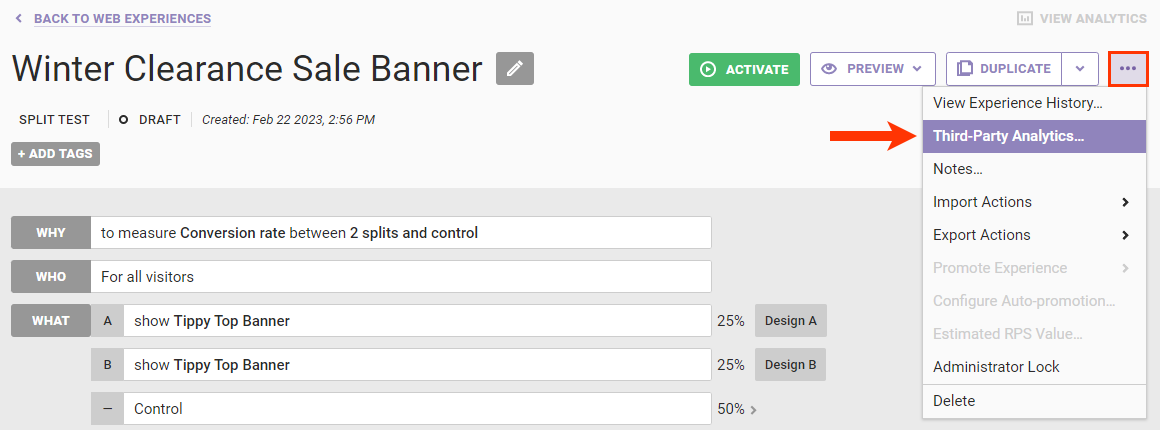
- Click the additional options menu (...) on the Experience Editor page, and then click Third-Party Analytics.
- Find the new GA4-compatible report on the Third-Party Analytics modal, and then toggle its setting to YES.
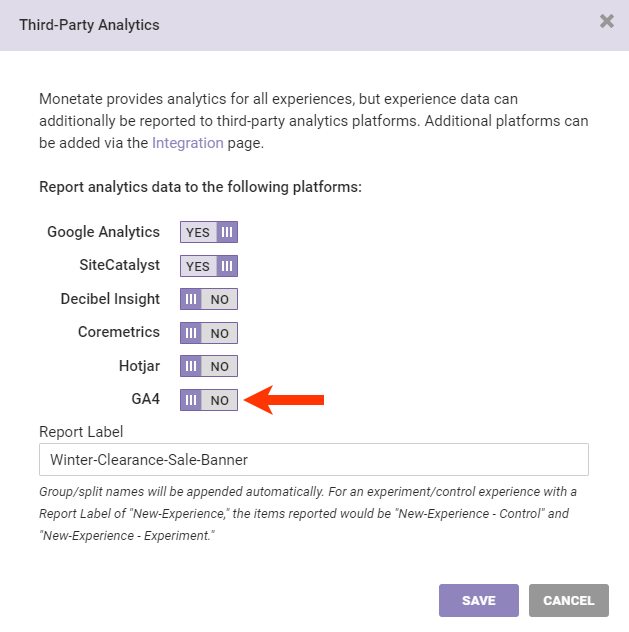
- If you don't plan to archive the legacy Google Analytics report and if it's currently enabled for this experience, then toggle its setting to NO.
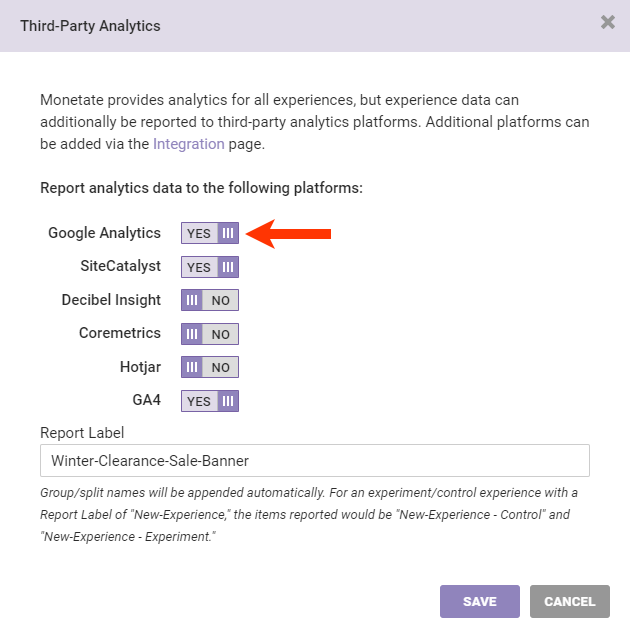
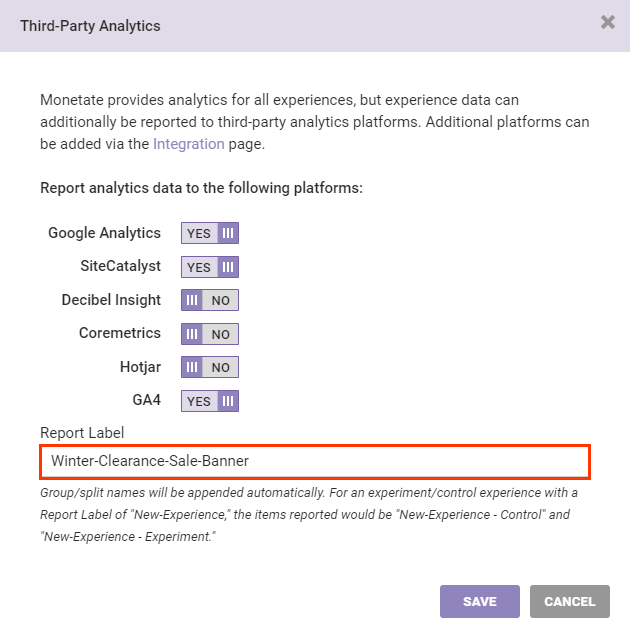
- If you want to see a specific string for this specific experience in all the third-party analytics platforms enabled for it, enter that string into Report Label.
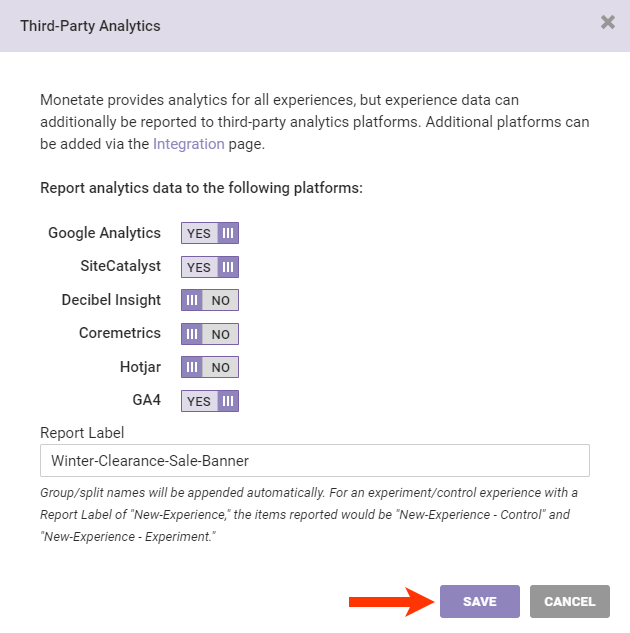
- Click SAVE to close the modal.
Repeat these steps for each active Web experience in the View Associated Experiences table that you want reported to your GA4 setup. After you've added the new report to all active Web experiences that you want reported to your GA4 setup, you can then archive the legacy Google Analytics report.
You can view a table of experiences that Monetate is reporting to the new GA4-compatible report on its respective custom report configuration screen of the Third-Party Analytics tab of the Integration page of the Monetate platform settings.
At any time you can remove reporting to the new GA4-compatible report. Click the experience name in this table to open it in Experience Editor, then click the additional options menu (...), and then click Third-Party Analytics. In the Third-Party Analytics modal, toggle to NO the setting for the GA4-compatible report.
Archiving a Legacy Google Analytics Report
After you've enabled the new GA4-compatible report for each active Web experience, you can optionally archive the legacy Google Analytics report(s).
Follow these steps to archive a legacy Google Analytics report.
- Click the legacy Google Analytics report in the list of third-party analytics reports.
- Click the archive icon.
- Click OK to confirm that you want to archive the report.
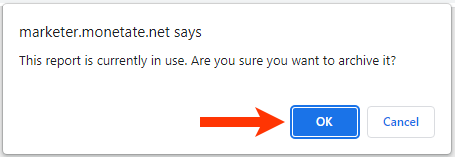
After you click OK, Monetate disables and removes the legacy Google Analytics report from the Third-Party Analytics modal for all existing experiences.