The first step of uploading a new product catalog to Monetate is creating a product catalog schema. A schema is the organization or structure of the data in the product catalog and must be present in the platform before you send a full catalog file. It can consist of two or three lines of sample data and does not need to be a full product catalog file.
Follow these steps to create a product catalog schema.
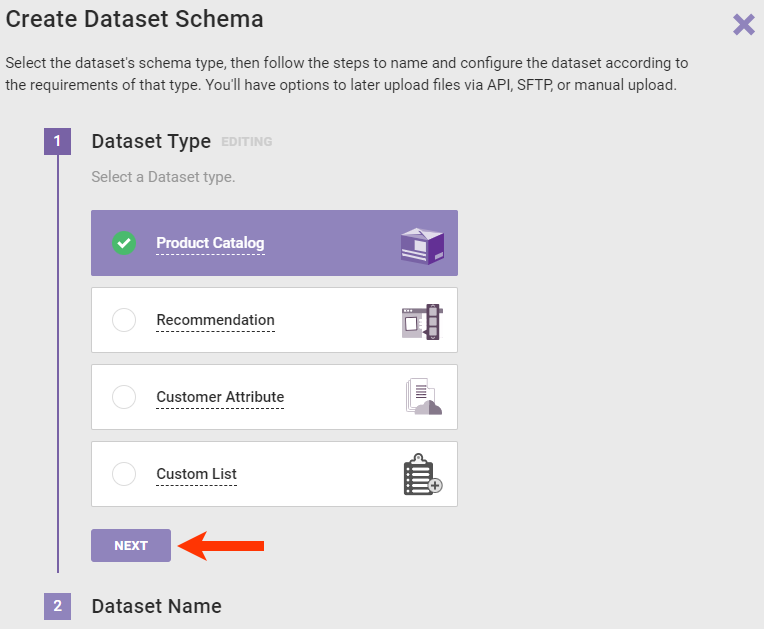
- Click Datasets in the left-hand navigation, and then, if necessary, select Product Data.
- Click CREATE DATASET.

- Select Product Catalog and then click NEXT.
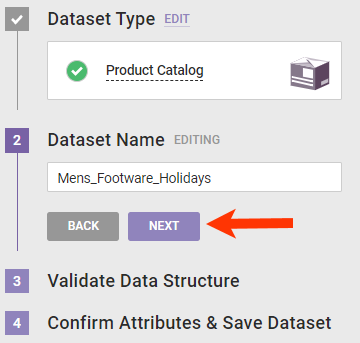
- Name the product catalog and then click NEXT.
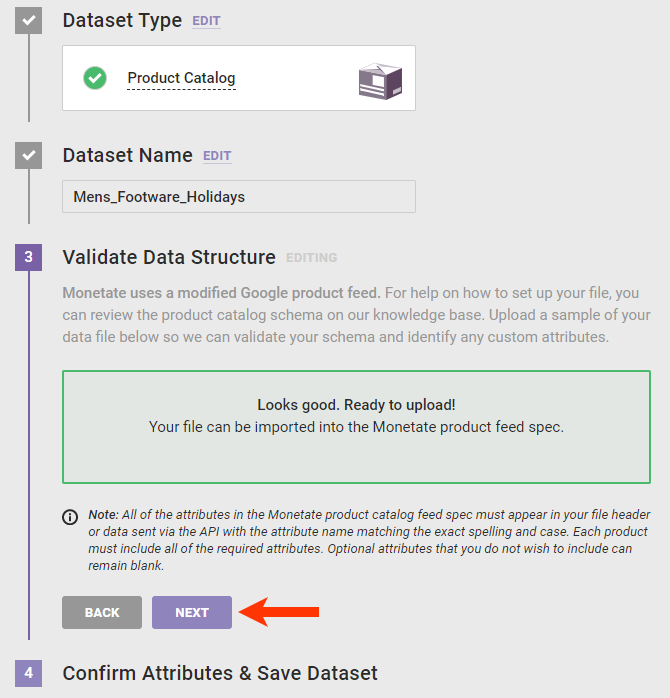
- Drag and drop the file into the upload area, and then wait for the platform to validate the data.
- If no errors are detected, then click NEXT.
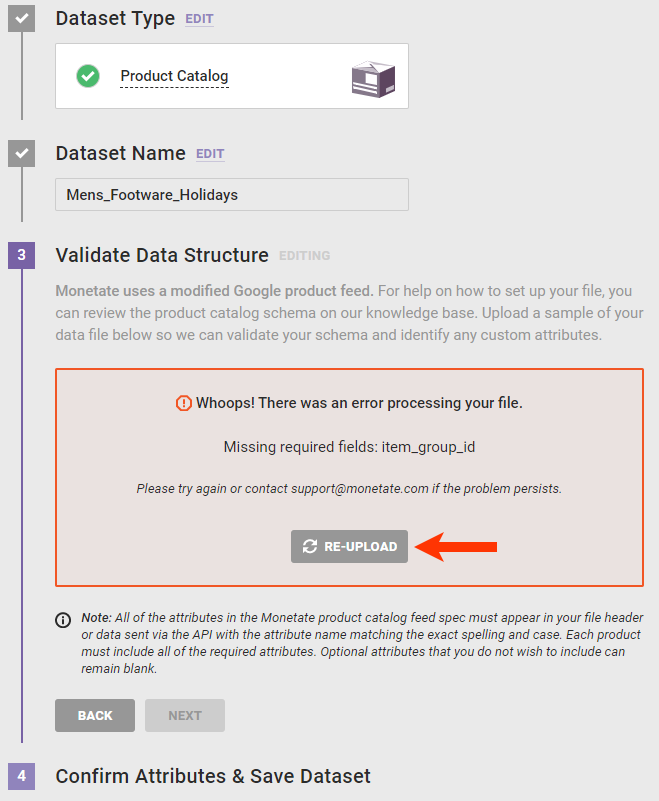
- If the file is missing information, an error message appears stating what data is missing. Revise the file, click RE-UPLOAD, and then drag and drop the revised file into the upload area.
- If no errors are detected, then click NEXT.
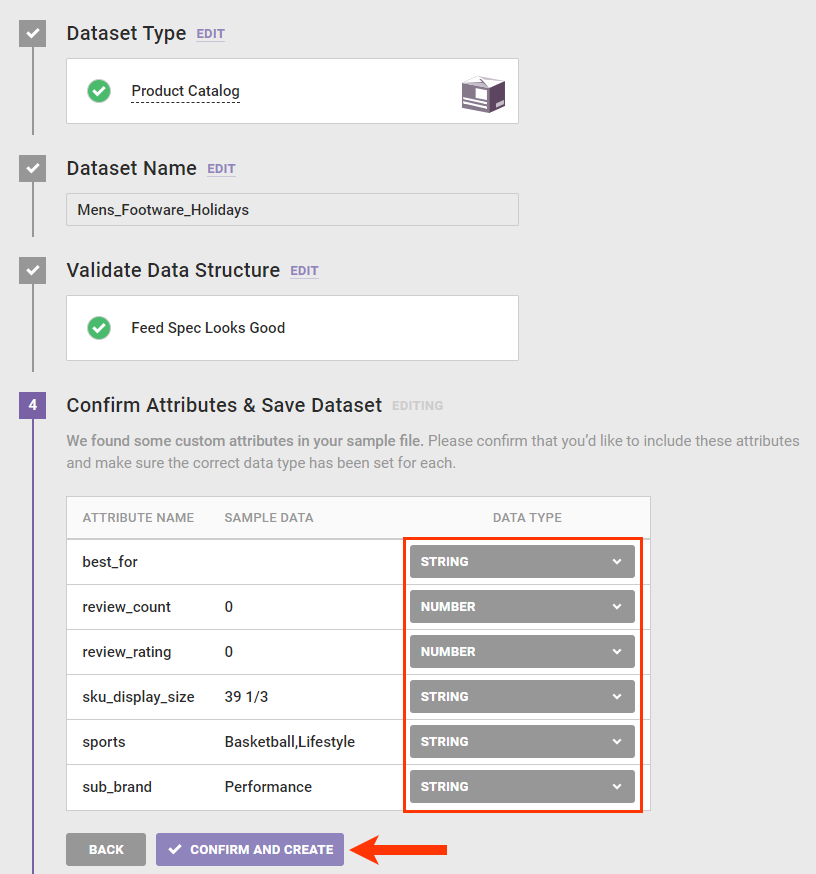
- Confirm that any custom attribute that you included in the file appears in the table and that the data type selected is correct, and then click CONFIRM AND CREATE.
Once the product schema and catalog upload to the platform, the new product catalog's details page loads. The PENDING status appears to the right of the detail page's tabs table until the platform finishes processing the dataset.

Once processing is complete, the status changes to show how much time has elapsed since the product catalog was updated. In the UPLOAD DATE column of the Update History table appears the exact date and time.
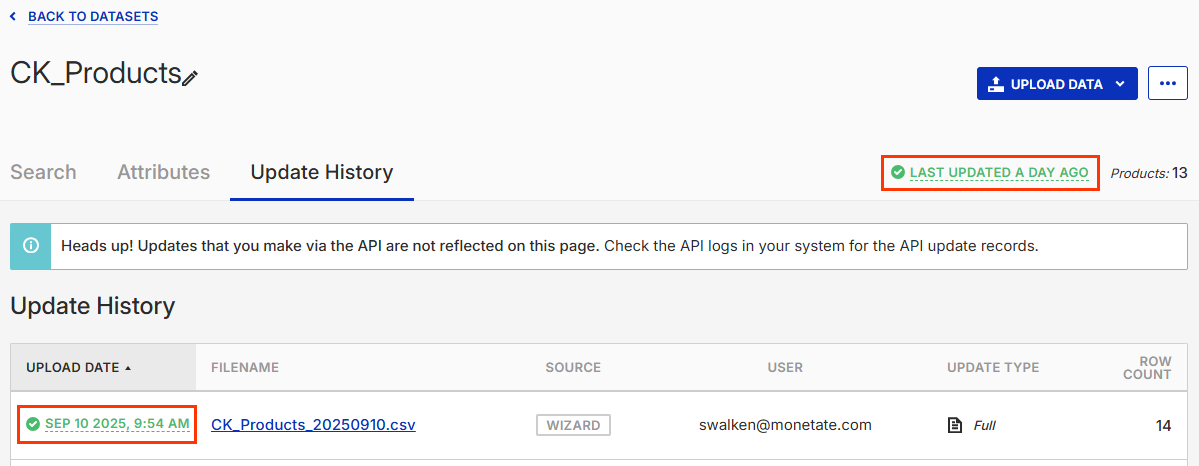
The number of rows in the processed file also now appears in the table. The number of products in the dataset appears next to the status.
When you need to modify the product catalog, you can upload full or partial updates using one of these three methods:
You can download a file from a product catalog's Update History tab. You can download files successfully uploaded to the platform as well as files that resulted in one or more upload errors.
If a file is available for download, its filename appears in blue in the Update History table.
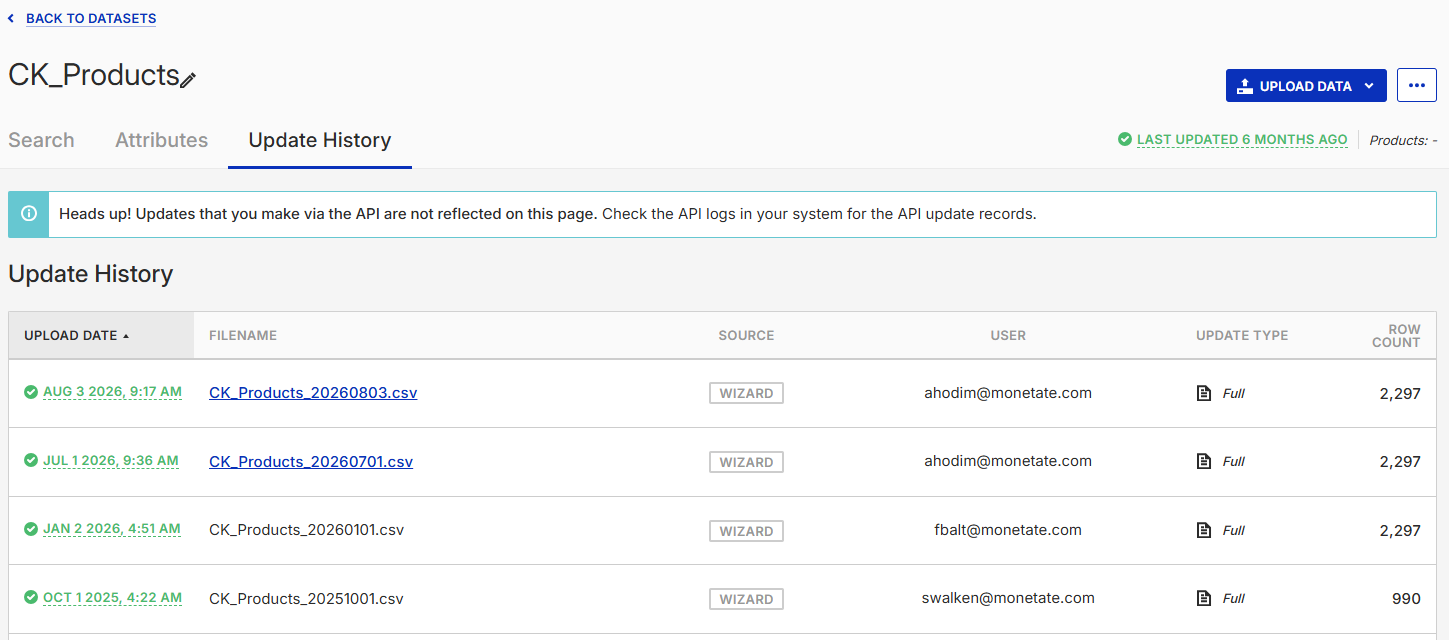
Click the filename and then save it to a location on your computer.