You can set up an engagement-based goal metric to use with a recommendations action with a URL parameter name and a URL parameter value that you can track in a custom event built in Event Builder.
Creating the Custom Event
Follow these steps to create an event to track the URL parameter name and value.
- Click COMPONENTS in the top navigation bar and then select Events.

- Click CREATE EVENT.

- Click the Page URL tab, and then click Contains.
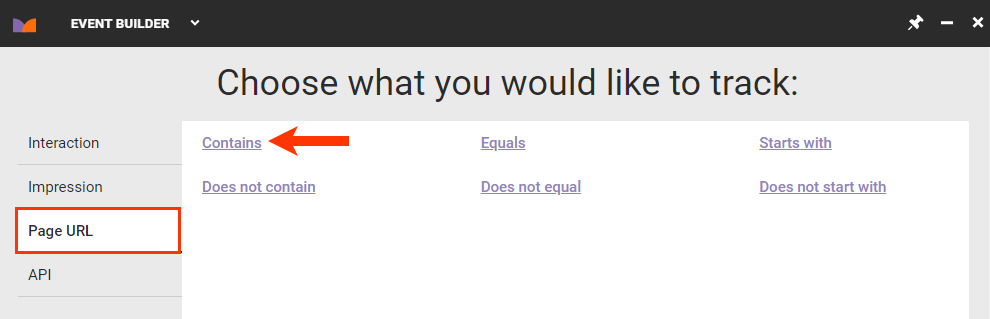
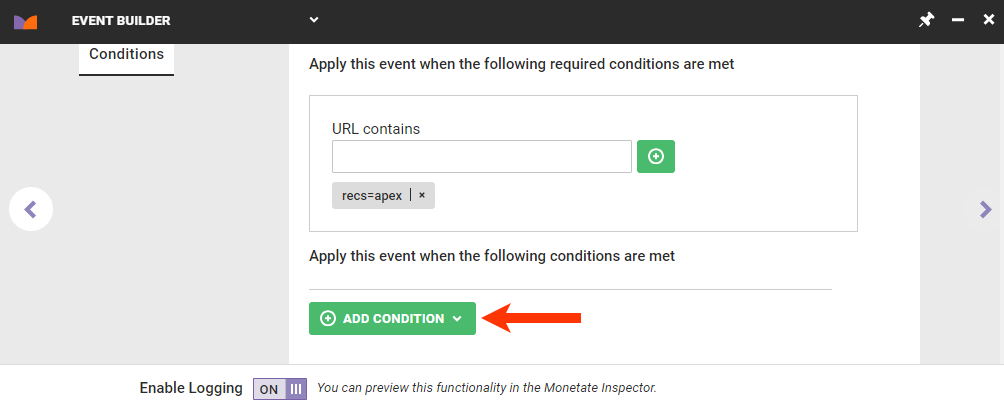
- Type into URL contains a parameter name and value that is not used elsewhere on your site, and then press Enter.

- Optionally, click ADD CONDITION, select a category, select an option from that category, and then complete the condition. See Action Conditions for more information.
- Type a title and description into the Event Title and Description fields, respectively. Optionally, type a subcategory into its respective field. Finally, click CREATE & EXIT.

Continue to the next section to add the event to a Web experience with a recommendations action.
Adding the Event to a Web Experience
Follow these steps to set up an Automated Personalization experience with the tracking event.
- Click EXPERIENCES in the top navigation bar and then select Web.

- Click CREATE EXPERIENCE.

- Click the pencil icon to the right of the placeholder name, give the new experience a name, and then click the green checkmark.
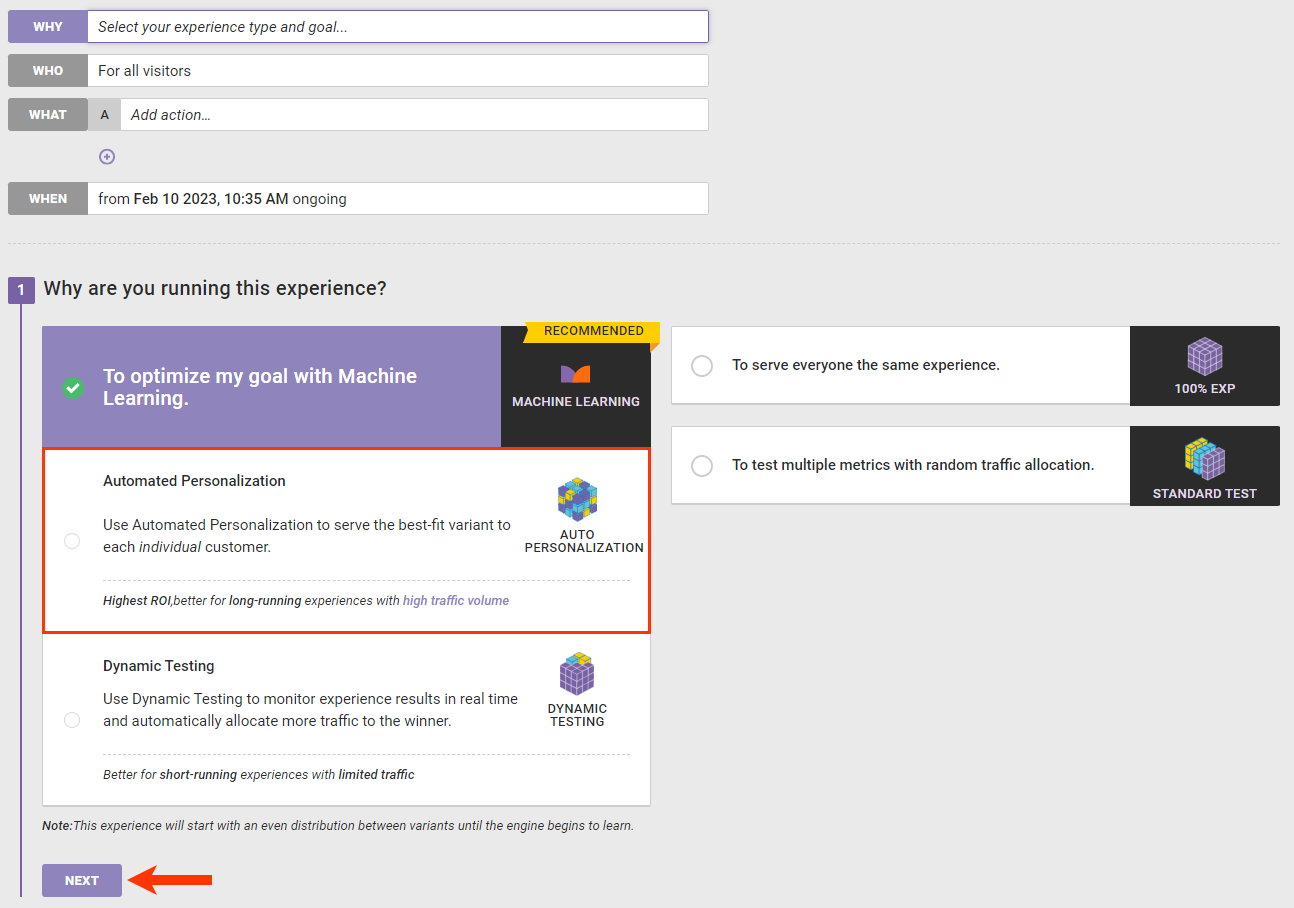
- Click WHY, select Automated Personalization, and then click NEXT.
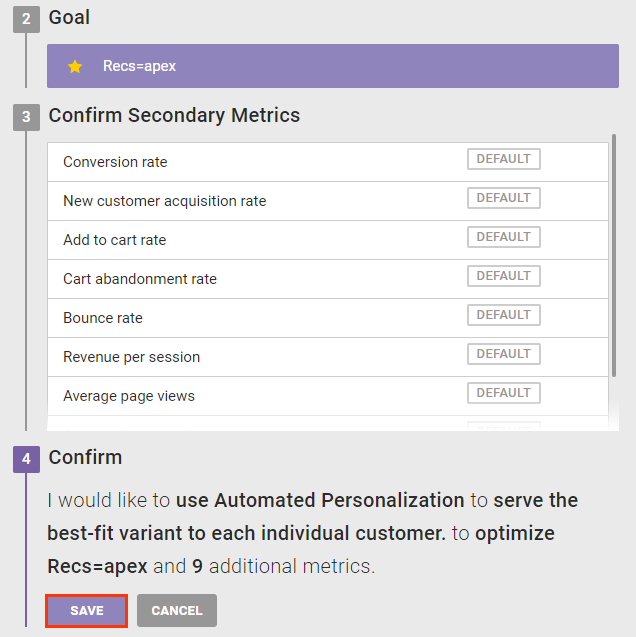
- Select the event metric you created in Event Builder and then click NEXT.

- Click NEXT to confirm the secondary metrics.

- Click SAVE to confirm the WHY settings.
Continue to the next section to add a recommendations action to the experience.
Adding the Recommendations Action to the Web Experience
Follow these steps to configure the recommendations action for the Automated Personalization experience you created in the previous section.
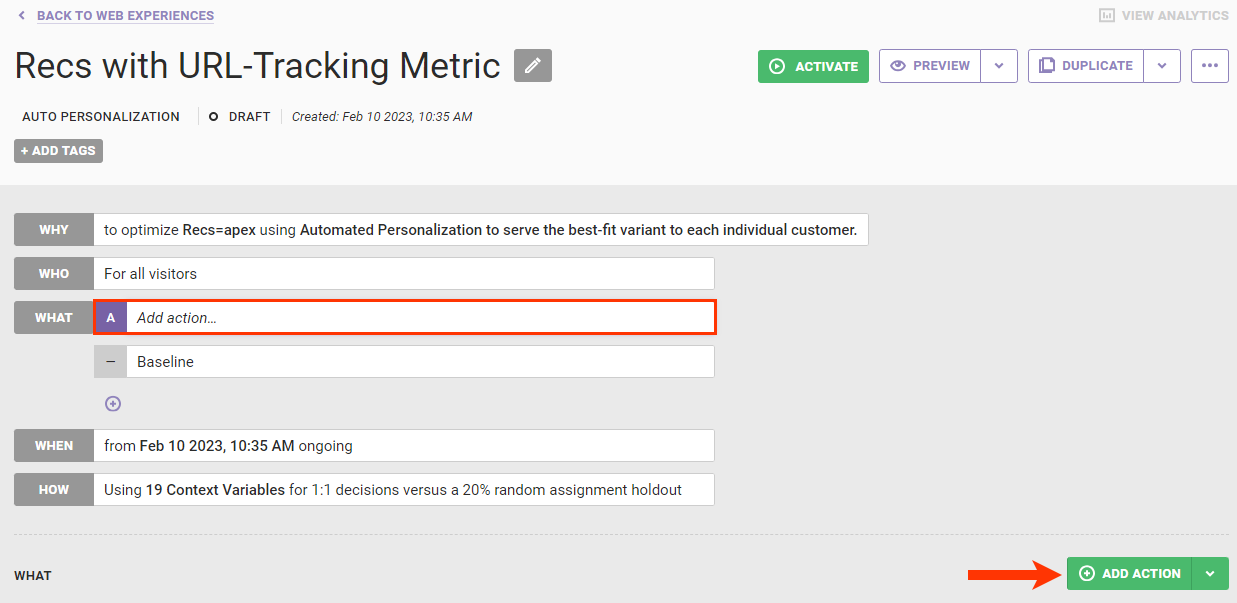
- Click A of the WHAT settings, and then click ADD ACTION.
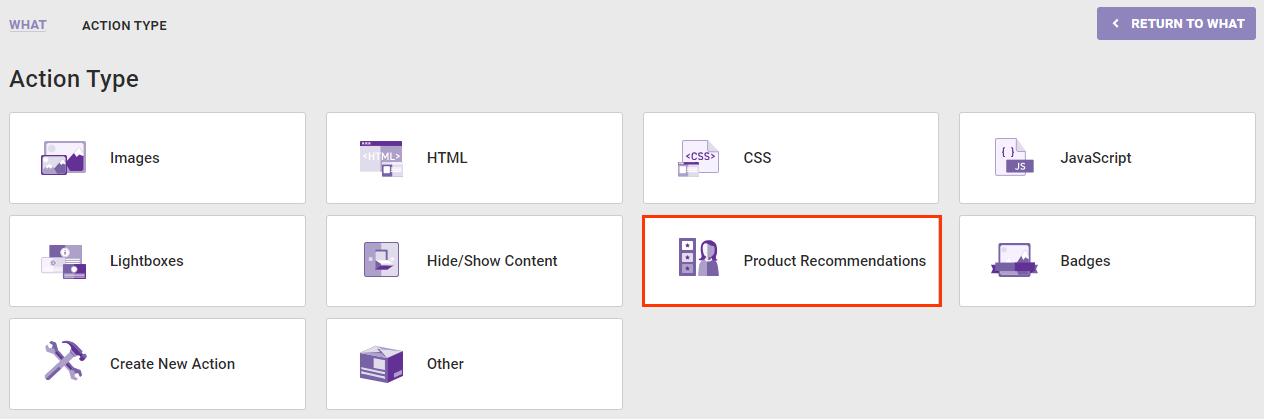
- Click Product Recommendations.
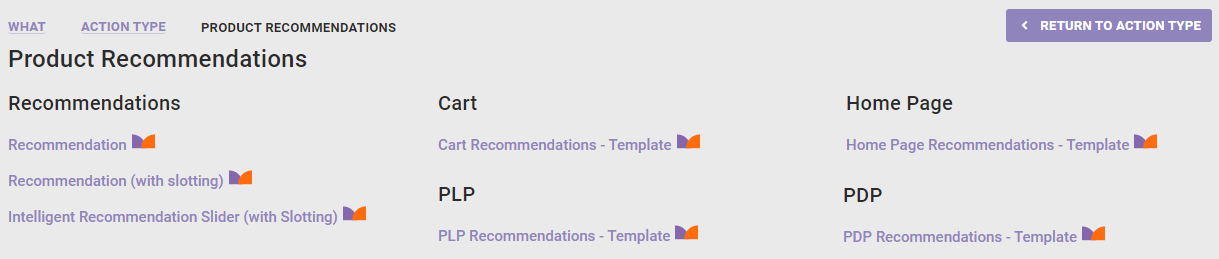
- Click a recommendations action template that includes the URL Parameter and URL Parameter Value fields, and then configure the settings in the Required Inputs section. See Configure a Recommendations Action for more information about the settings and options.
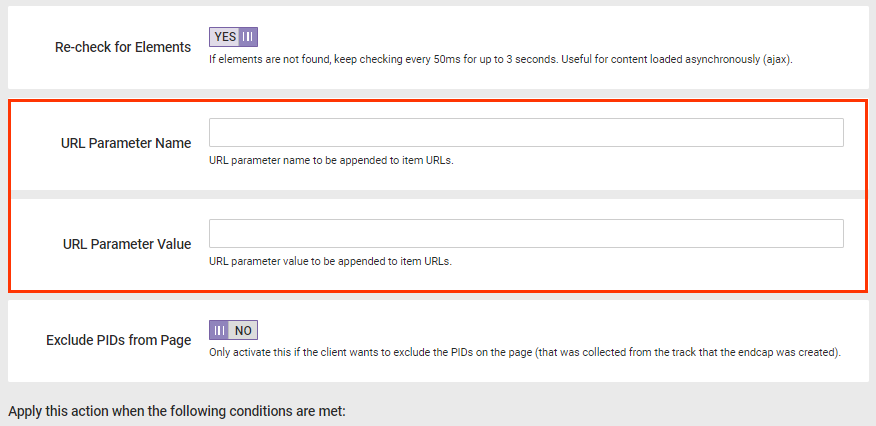
- In the Optional Inputs section, type the parameter name you used when creating the tracking event into URL Parameter Name, and then type the parameter value into URL Parameter Value.
- Configure any of the other Optional Inputs settings as needed, add any action conditions, and then click CREATE.
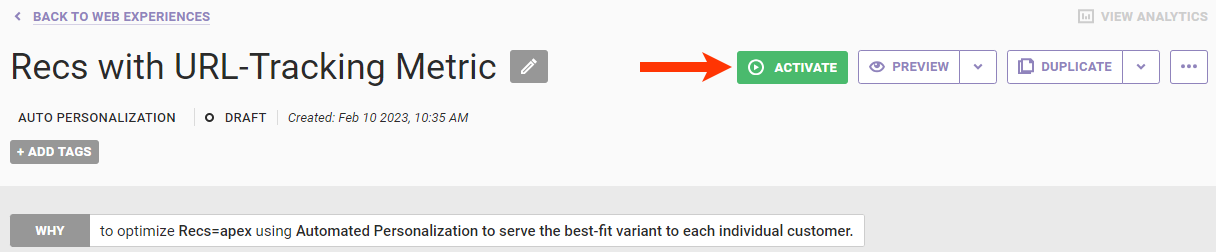
- Configure the WHO, WHEN, and HOW settings of the experience as necessary, and then click ACTIVATE.
With this configuration the experience leverages each customer's contextual attributes to automatically optimize their chances of engaging with the recommendations.