HTML is the language of the Web and provides a way to give structure and meaning to your content. Monetate actions use HTML. Action Builder and the Monetate experience editor include tools that will help you create without touching HTML code, but it is useful to have a basic understanding of the language to help make more complex changes.
Why Learn About Semantic HTML
Basic tag types provide a generic HTML structure and are important for SEO purposes. A web robot or crawler does not view any rendered HTML and CSS. It only looks at the raw HTML structure.
Familiarize yourself with the most commonly used tags. Properly formatted tags allow you to semantically define your content in a way that will help your site work better for both SEO and accessibility.
Content Elements
Headings
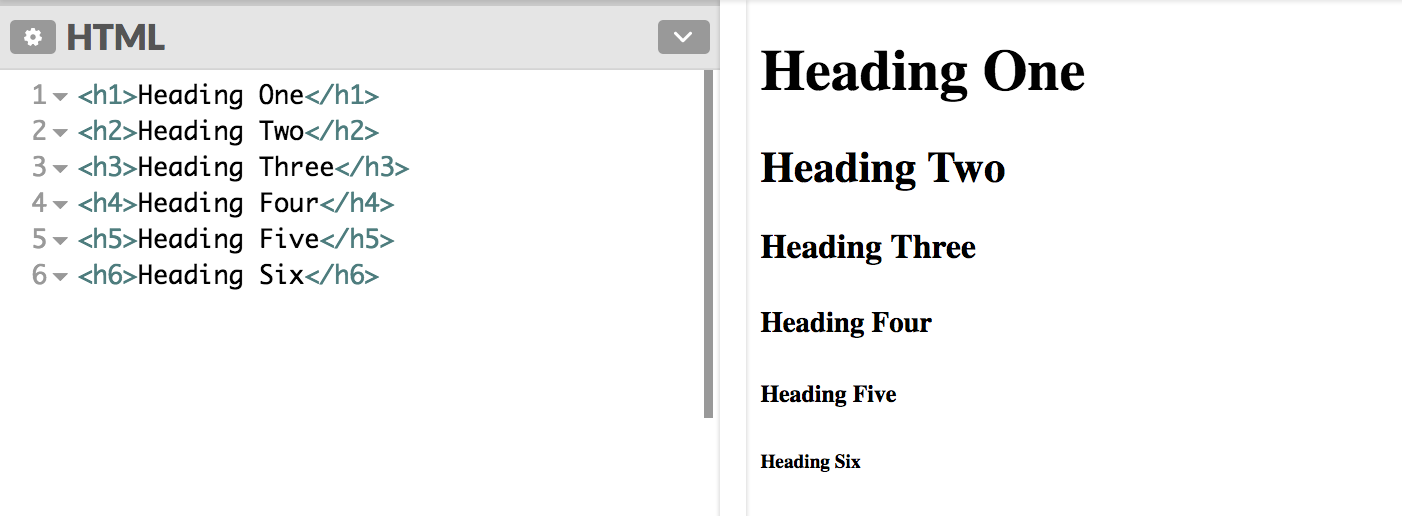
Headings are block-level elements and they come in six different rankings: <h1> through <h6>. Headings help to quickly break up content and establish hierarchy and they are key identifiers for users reading a page. They also help search engines to index and determine the content on a page.
Use headings in an order that is relevant to the content of a page. Mark up the primary heading on a page or section with an <h1> element and subsequent headings should use <h2> and so forth.
Use heading levels to give semantic value to an element and not to make it big and bold—there are other ways to do that.
Paragraphs
A paragraph is a basic text container used to markup text content on your webpage. Define paragraphs with the <p> block-level element. Paragraphs can appear one after the other to add information to a page as desired.
<p>This is a paragraph of text. It can be long or short and can span multiple lines.</p>
<p>This is a second paragraph of text!</p>
Bold and Italics
Make text bold by surrounding the text you want to emphasize with the <strong> tags.
<strong>This text is bold</strong>, while this text is normal weight.Make text italicized with the <em> tag surrounding the text you wish to italicize.
When we want to <em>emphasize</em> some text, we can <em>italicize</em> it.You may sometimes see boldface and italics written as follows: <b>bold text</b> or <i>italic text</i>. This is an older, outdated method of making your text bold and italic. Monetate recommends that you use the more semantic <strong> and <em>.
Lists
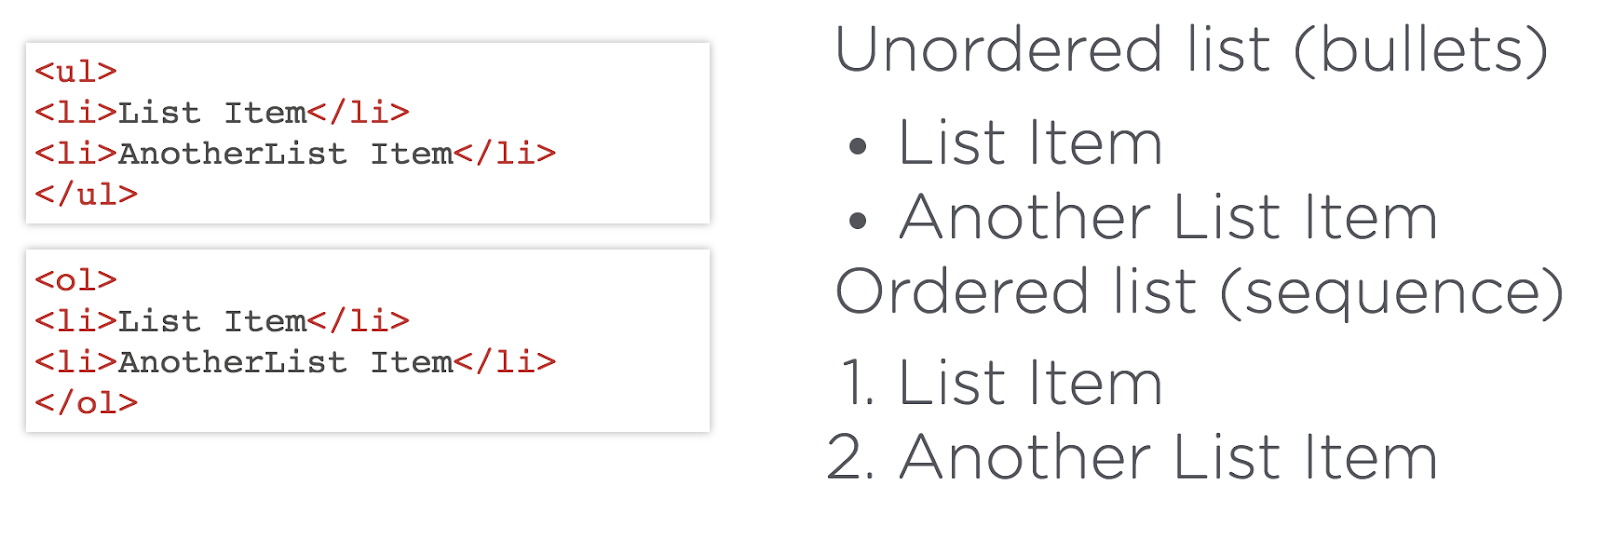
Style lists to appear with or without bullets. You’d be surprised how many things on the web (for example, menus) are structurally marked up as lists.
<li>This is a single list item</li>
<li>List items can include other <em>elements</em> including other lists!</li>
Within a list, each list item is marked up by starting the item with an <li>tag and then ending the item with an </li> tag.
Surround all of your list items with an <ol> element (for ordered/numbered lists) or a <ul> element (for bulleted lists).
Wrapper Elements
Div, Nav, Span, Section, Header: Generic Content Wrappers
Use the <div> element as a generic content wrapper. Its primary function is to be a container or "wrapper" for a child element or elements. The <span> element acts like an inline equivalent of the <div> element. One of the most common reasons why people may use <div> and <span> is to group other items together for styling or layout purposes.
HTML5 has many new variations of container elements in place of the traditional div tag which provide actual semantic structure. These new types of division provide additional SEO insight as well as performing the basic "containment" function of a <div>.
<nav><aside><section><main><header>
Links and Images
Linking Text
Create links with the <a> element. You can click on anything between the opening <a> tag and the closing </a> tag. Specify which page you want to link to with the href attribute.
<a href="http://www.google.com">My Link Text</a>You can wrap a link around an image too!
Be sure to include the full web address, including the http:// or https://. In some cases, you can begin your link with a slash href="/about/contact.html". This turns your link into a relative path as the page is now loaded relative your main domain.
Images
Use image tags to display photos and other graphical elements on your page. Image tags require the src attribute in order to define where the image exists on your server. Use the alt attribute to provide additional context to the image, especially for accessibility purposes.
To add an image to the page, you need to use an <img> element. This is an empty element (which means there is no closing tag). It must carry the following two attributes:
<img src="https://www.monetate.com/assets/about/imgs/puzzle-piece-logo.png" alt="The Monetate Logo">Putting It Together: Block vs Inline
Use block-level elements to contain content and other elements. You can nest other block-level elements or inline elements within a block level element.
Block vs. Inline Elements
Most elements are either block or inline-level elements. What's the difference?
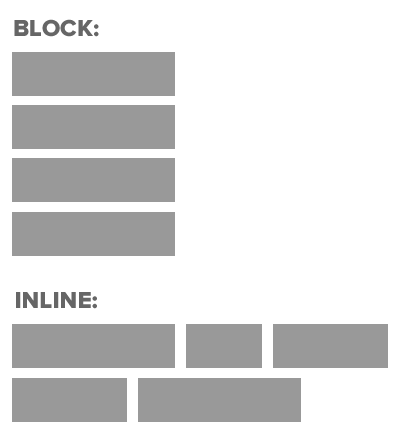
Block-level elements begin on a new line, stack one on top of the other, and occupy any available width. You may nest block-level elements inside one another and wrap inline-level elements. You'll most commonly see block-level elements used for larger pieces of content, like paragraphs.
Inline-level elements do not begin on a new line. They fall into the normal flow of a document, line up one after the other, and only maintain the width of their content. You may nest inline-level elements inside one another; however, they cannot wrap block-level elements. You'll usually see inline-level elements with smaller pieces of content (a few words, for example).
Consider the paragraph you're reading right now—it's a block-level element; each paragraph in this text stacks on top of the elements below and above it and takes up all the available width (in this case, the "available width" is the maximum width of the content wrapper that surrounds this paragraph).
This bold text is inline to the paragraph, as is "This Link." These elements fall in line with their parent element—one in line after another.