You have multiple options to update a custom list dataset in the Monetate platform.
Using the Upload Data Wizard
The Upload Data wizard has options to either drag and drop a file directly into it or to input a URL to a dataset file that you store on Amazon S3. Regardless of which of these two upload options you select, the file that you use must be in the CSV or TSV format and cannot contain a header row.
Uploading a File Directly
Follow these steps to upload a custom list update file within the Monetate platform.
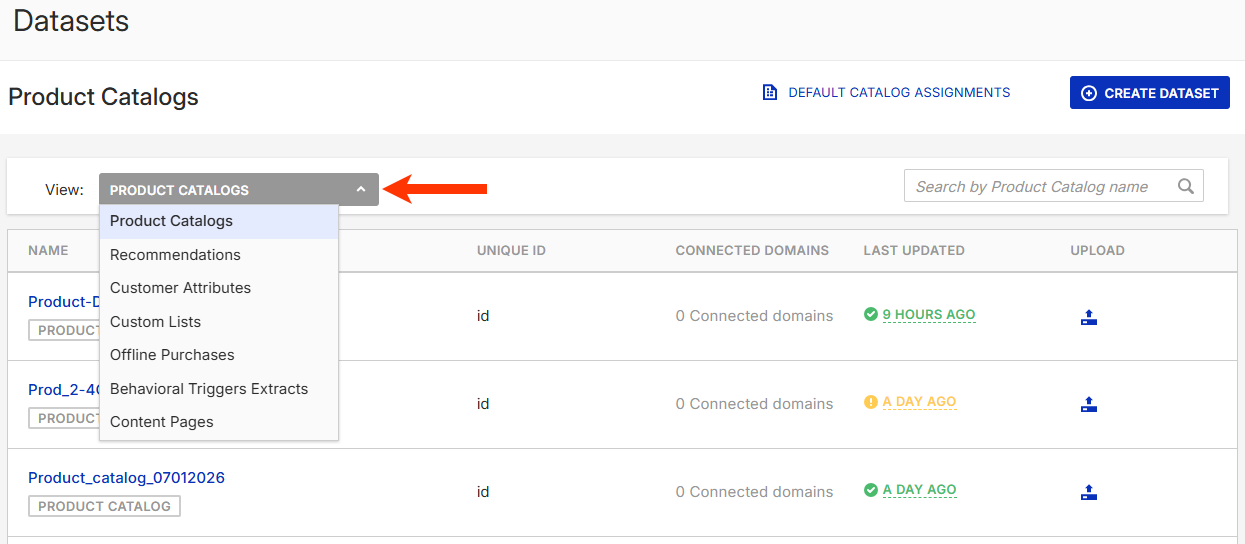
- Click Datasets in the left-hand navigation, and then, if necessary, select Product Data.
- Select Custom Lists from View on the Datasets list page.
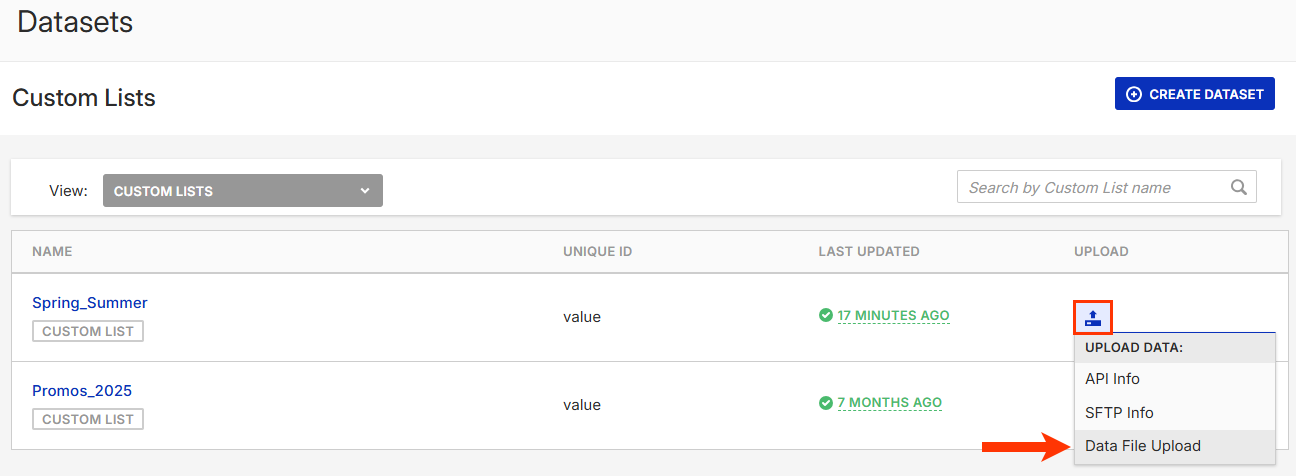
- Find the dataset that you want to update, click the upload icon that appears to the far right of its entry, and then select Data File Upload.
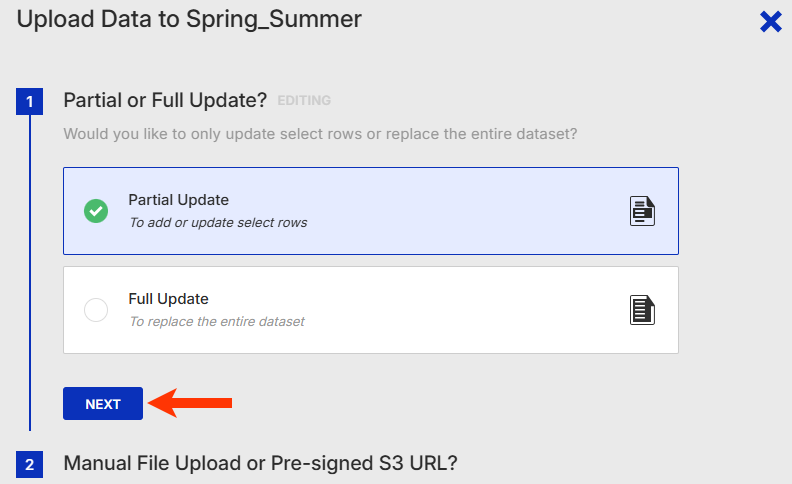
- Select the type of update you want to perform, and then click NEXT.
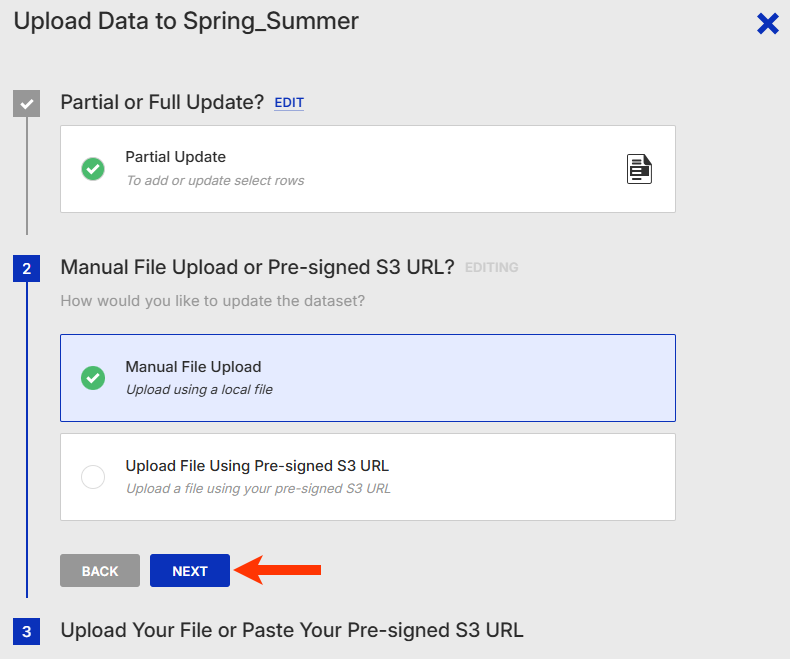
- Select Manual File Upload and then click NEXT.
- Drag and drop the file into the wizard.
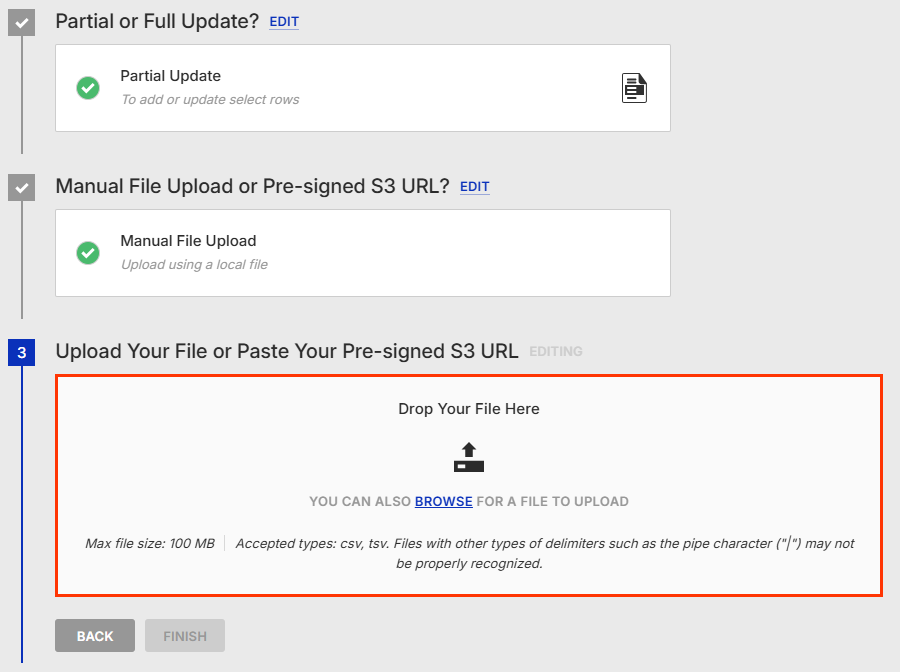
Monetate ingests the file and closes the Upload Data wizard. When the Update History tab of the dataset's's details page loads, PENDING appears where the timeframe of the last update normally appears as well as in the UPLOAD DATE column of the Current Updates table.
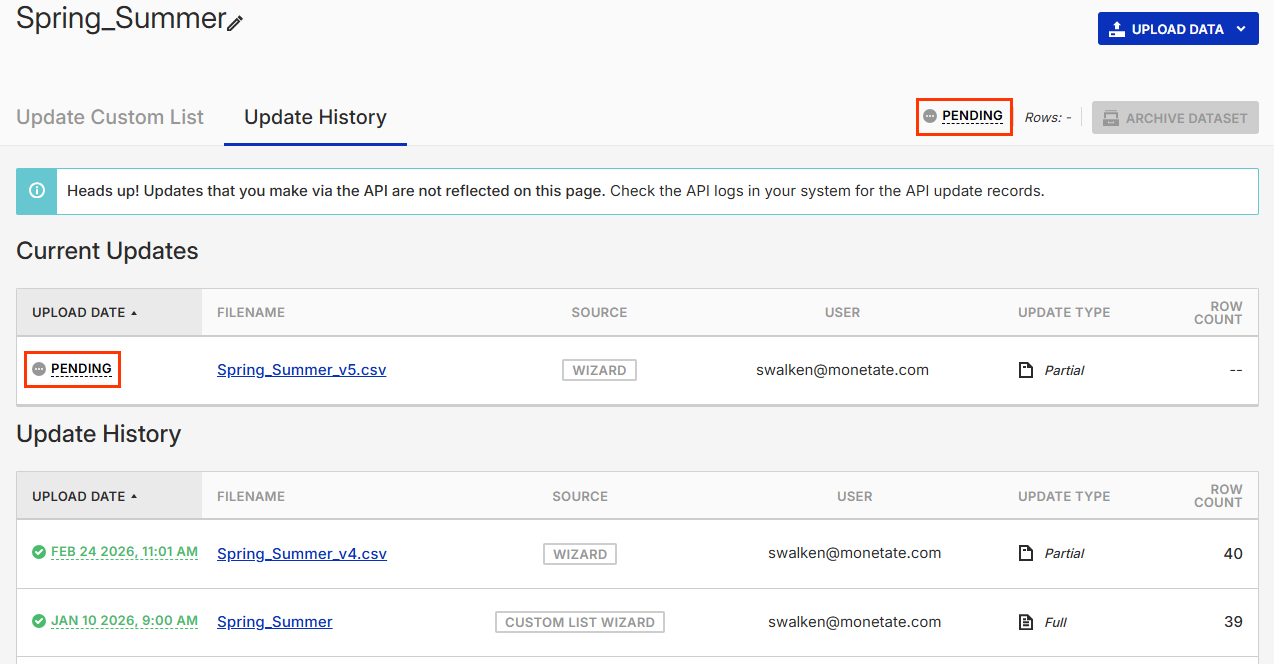
You also see PENDING in the LAST UPDATED column for the dataset when you navigate to the Custom Lists view of the Datasets list page.
Uploading a File Using an Amazon S3 URL
Follow these steps to update a custom list dataset by uploading a file using an Amazon S3 pre-signed URL.
- Generate the pre-signed URL for the file you want to upload.
- Click Datasets in the left-hand navigation, and then, if necessary, select Product Data.
- Select Custom Lists from View on the Datasets list page.
- Find the dataset that you want to update, click the upload icon that appears to the far right of its entry, and then select Data File Upload.
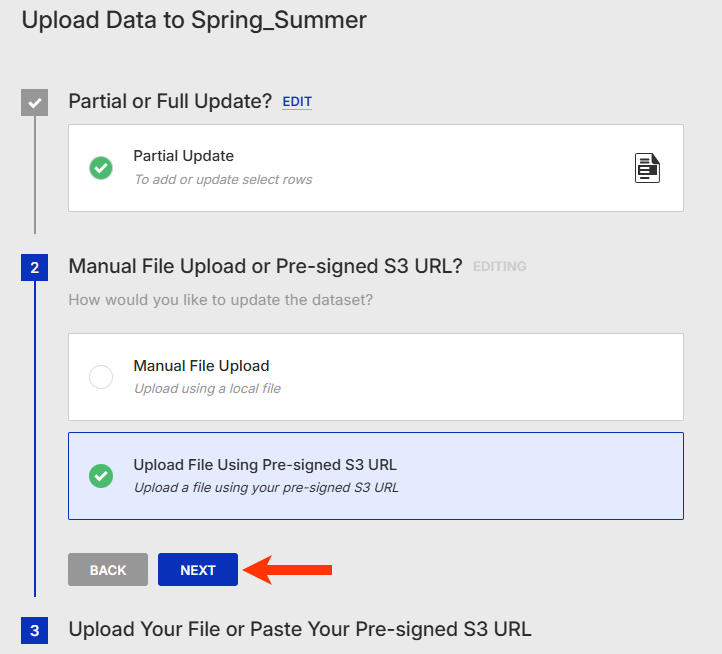
- Select the type of update you want to perform, and then click NEXT.
- Select Upload File Using Pre-signed S3 URL, and then click NEXT.
- Paste the Amazon S3 URL into the field, and then click FINISH.
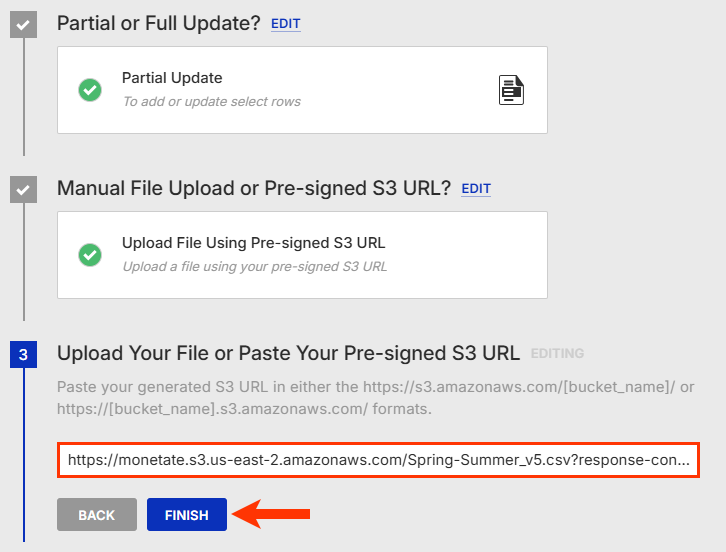
Monetate ingests the file and closes the Upload Data wizard. When the Update History tab of the dataset's's details page loads, PENDING appears where the timeframe of the last update normally appears as well as in the UPLOAD DATE column of the Current Updates table.

You also see PENDING in the LAST UPDATED column for the dataset when you navigate to the Custom Lists view of the Datasets list page.
Using the Update Custom List Field
If the custom list dataset that you need to update is relatively short, or if you need only to add or remove a manageable number of product IDs (PIDs), then you can perform the update in the Monetate platform without uploading a file.
- Click Datasets in the left-hand navigation, and then, if necessary, select Product Data.
- Select Custom Lists from View on the Datasets list page.
- Click the name of the dataset that you want to edit.
- Add, edit, or remove PIDs in the text field, and then click UPDATE.
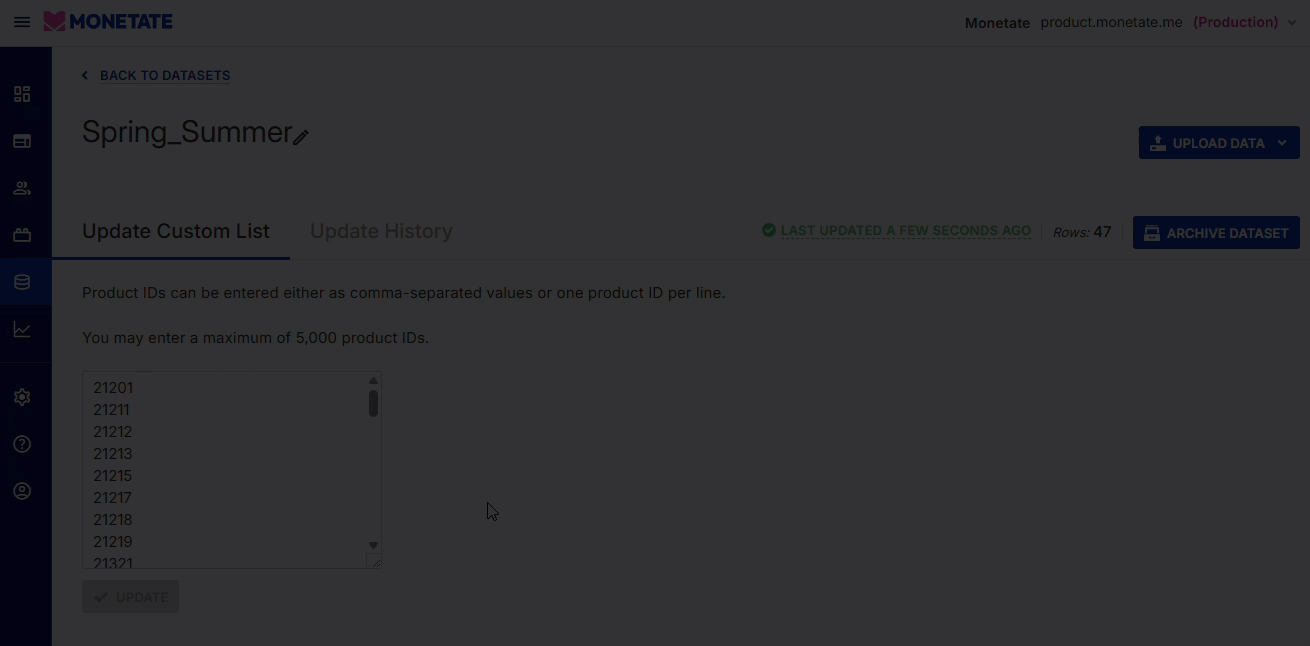
A message briefly appears that informs you that the dataset was successfully updated, and the row count to the left of ARCHIVE DATASET reflects the changes you made.
In the table on the Update History tab, this type of update has CUSTOM LIST WIZARD in the SOURCE column and is considered a full update.