When you exclude products using Monetate's Personalized Category Pages feature, you ensure the selected products don't appear on any of the category's pages.
Prerequisites
If you navigate to the Default Rules & Facets tab of the Visual Merchandising page for any site that's part of a cluster either by selecting Single Store from the Smart Category Merchandising menu in the left-hand vertical toolbar or by selecting the site from Store in the upper-right corner of the Personalized Search interface, then you see a message warning you that the site is part of a cluster.

If you want to override the cluster's excluded products settings for a single linked site that is not the primary site, then you have two options:
- Create a scheduled campaign by following the steps in Create Scheduled Campaigns
- Remove the linked site from the cluster by following the steps in Editing Cluster Membership in Create a Multi-Site Cluster
To override the cluster's excluded products settings for a cluster's primary site, you can create a scheduled campaign or delete the cluster.
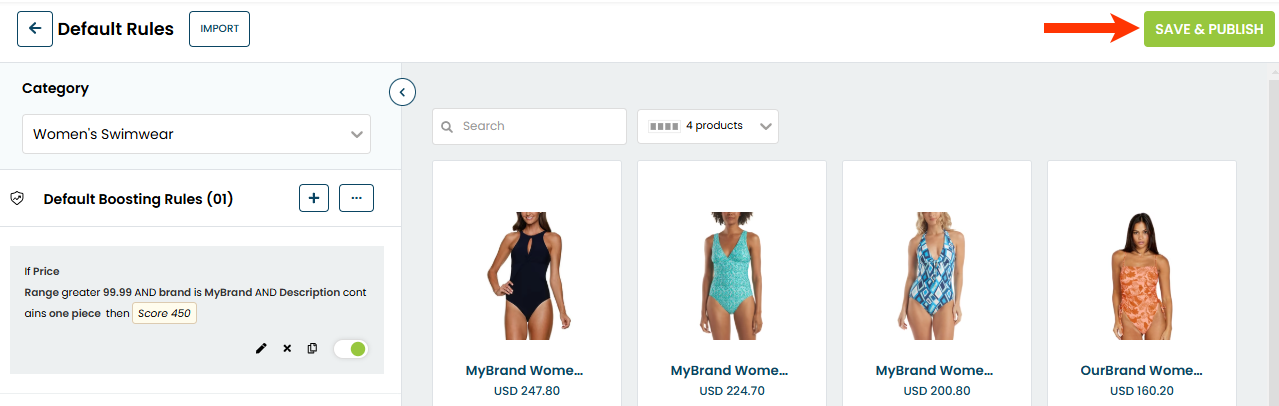
Excluding Products from a Category
Follow these steps to create a default rule that excludes one or more products from a category's pages for one site.
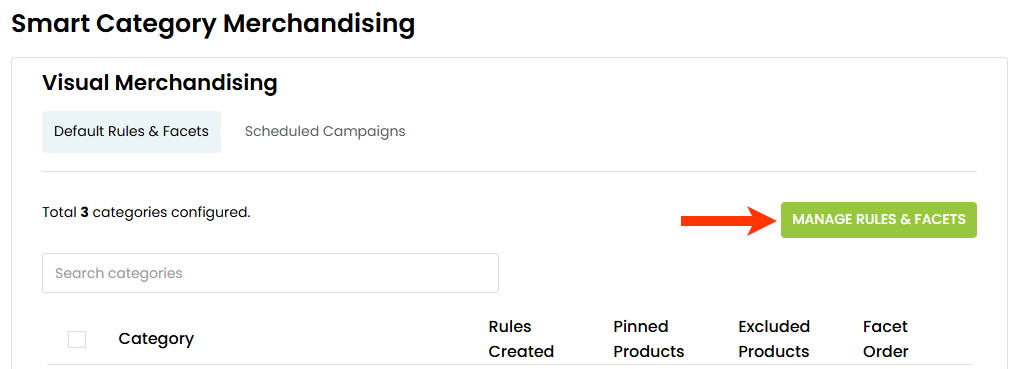
- Click COMPONENTS in the top navigation bar, select Personalized Search, and then click the appropriate product catalog on the Personalized Search list page.
- Click the Smart Category Merchandising icon in the left-hand vertical toolbar, and then select Single Store.
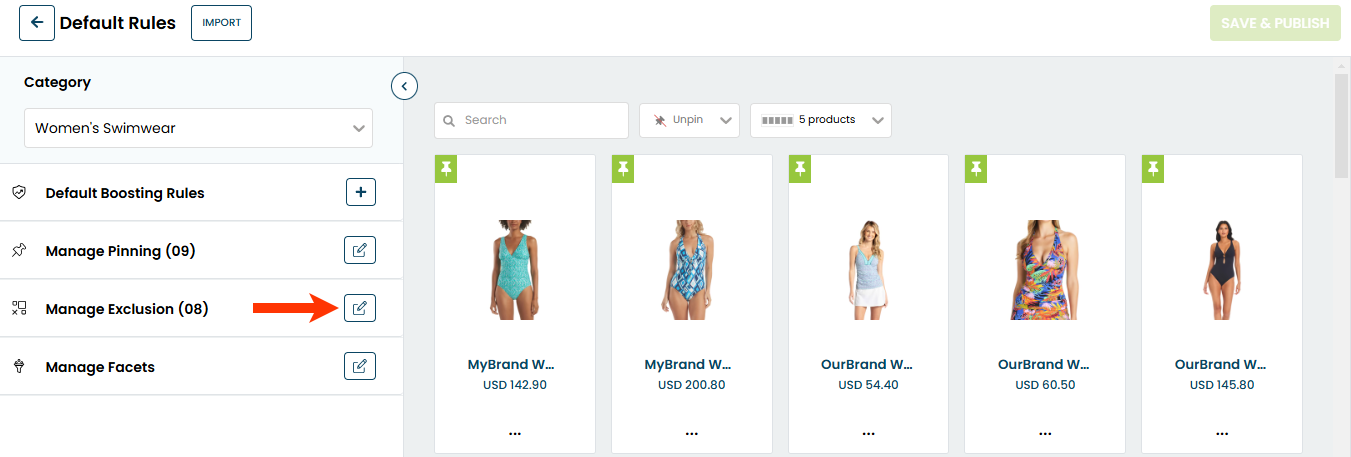
- Click MANAGE RULES & FACETS.
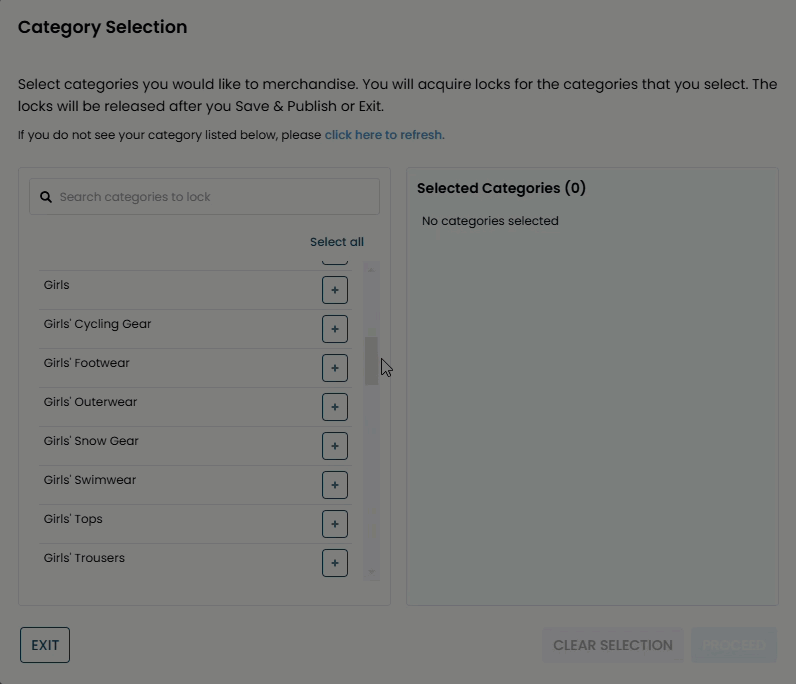
- On the Category Selection modal, click the plus sign icon (+) to select the product category for which you want to exclude products, and then click PROCEED.
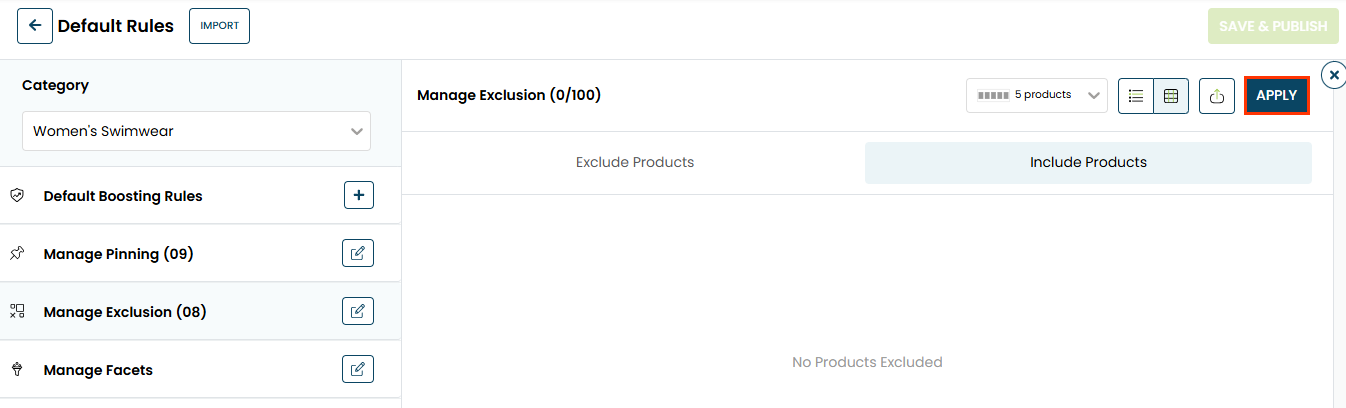
- On the Default Rules page, click the edit icon for Manage Exclusion.
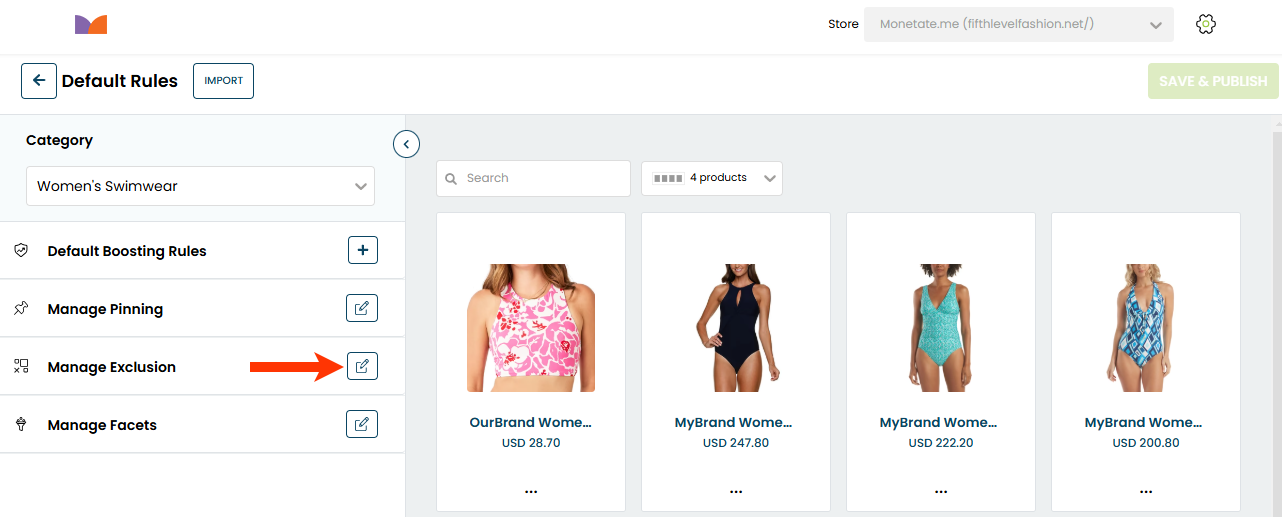
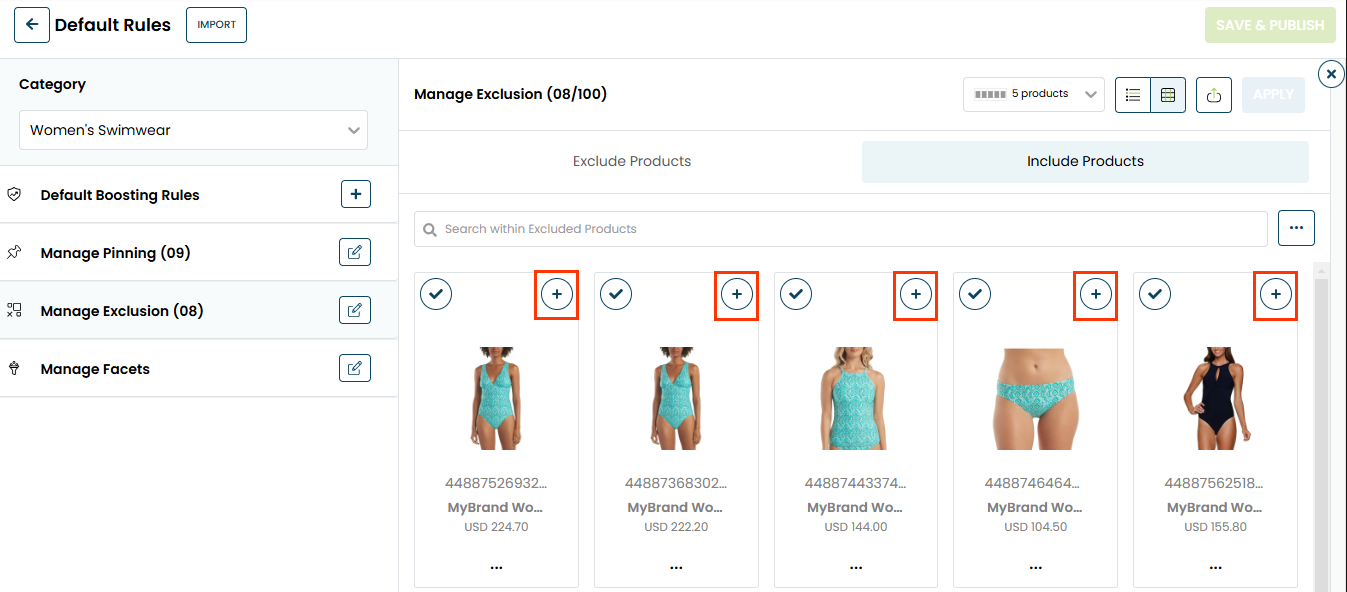
- Find one or more of the products that you want to exclude from the category's pages.
- Click View All Products, scroll through the listings of all the products in the category, and then click the checkmark in the upper-left corner of a product's entry to reserve it for exclusion.
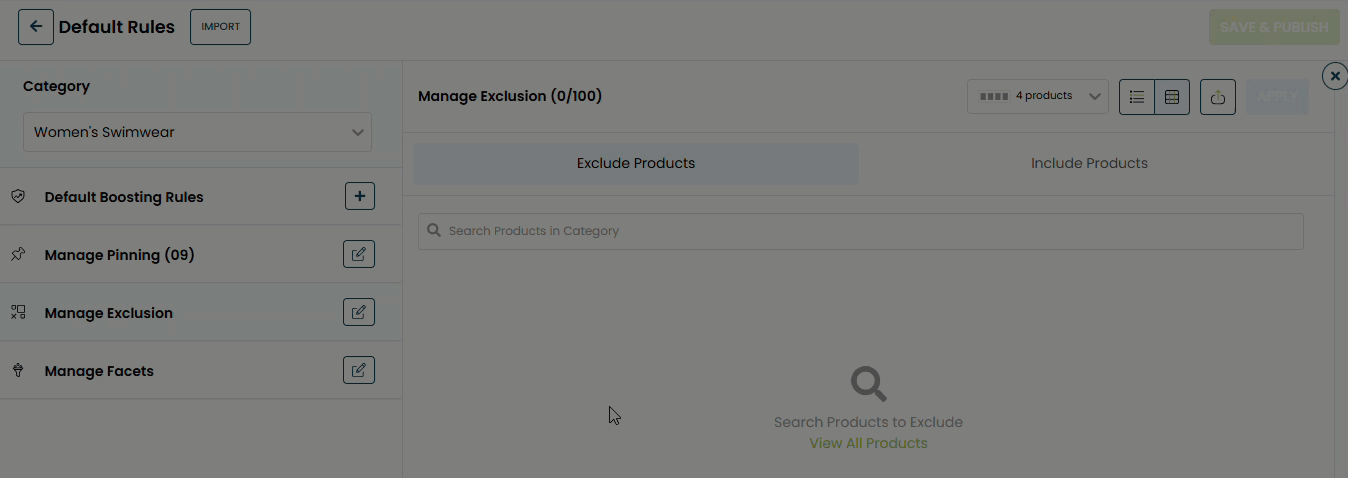
- Enter a word or phrase into the search field to view only those products in the category that have your search query in an attribute value, and then click the checkmark in the upper-left corner of a product's entry to reserve it for exclusion.

- Click View All Products, scroll through the listings of all the products in the category, and then click the checkmark in the upper-left corner of a product's entry to reserve it for exclusion.
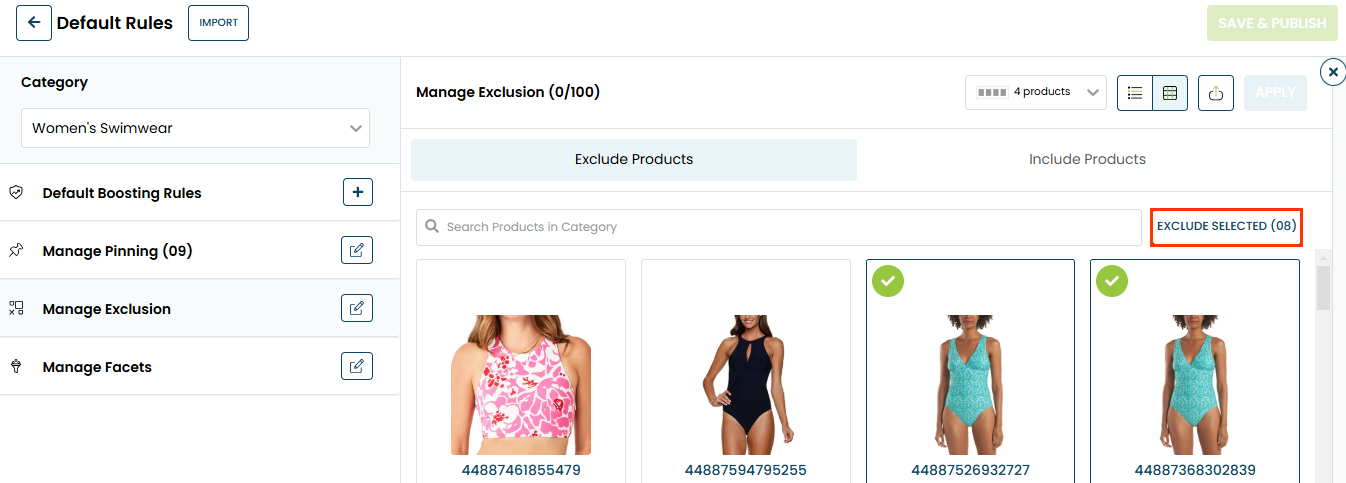
- Click EXCLUDE SELECTED.
- Click APPLY.
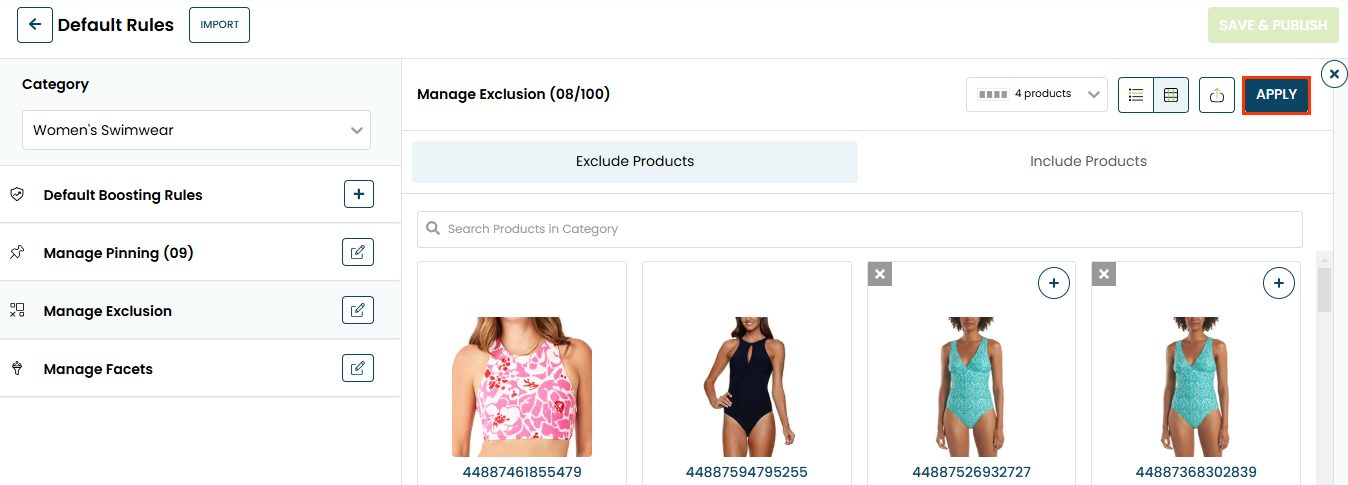
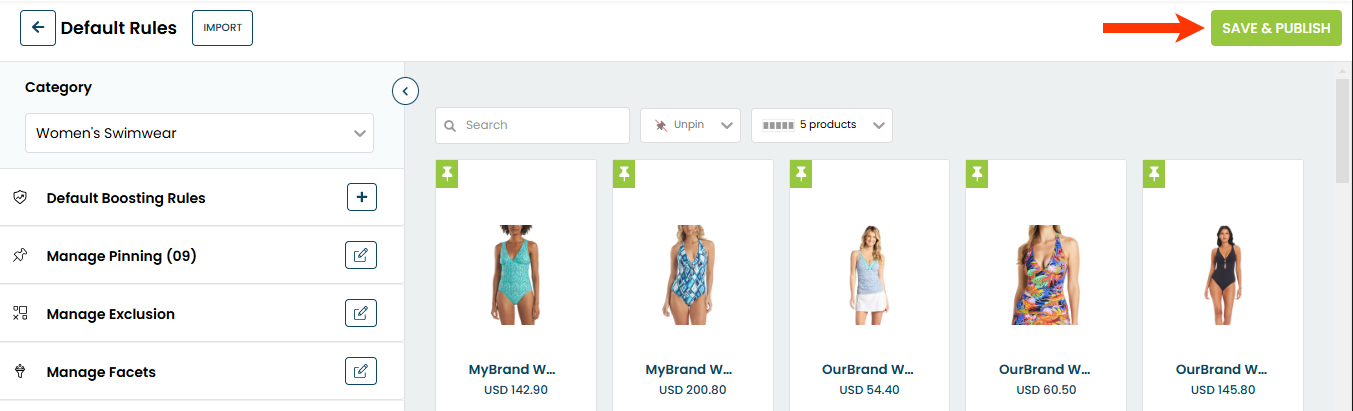
- Click SAVE & PUBLISH after you finish setting any additional rules.
You must wait up to 10 minutes before the excluded products no longer appear on their targeted category pages.
Restoring Excluded Products
Follow these steps to restore products that you've previously excluded to their category pages.
- Click COMPONENTS in the top navigation bar, select Personalized Search, and then click the appropriate product catalog on the Personalized Search list page.
- Click the Smart Category Merchandising icon in the left-hand vertical toolbar, and then select Single Store.
- Click MANAGE RULES & FACETS.
- On the Category Selection modal, click the plus sign icon (+) to select the product category for which you want to exclude products, and then click PROCEED.
- On the Default Rules page, click the edit icon for Manage Exclusion.
- Click the Include Products tab.

- Restore the product(s) to the category's pages.
- Click the plus sign (+) in the upper-right corner of each product's tile.
- Select All Products from the additional options menu (...) if you want to restore all the excluded products, and then click YES in the Confirm modal.
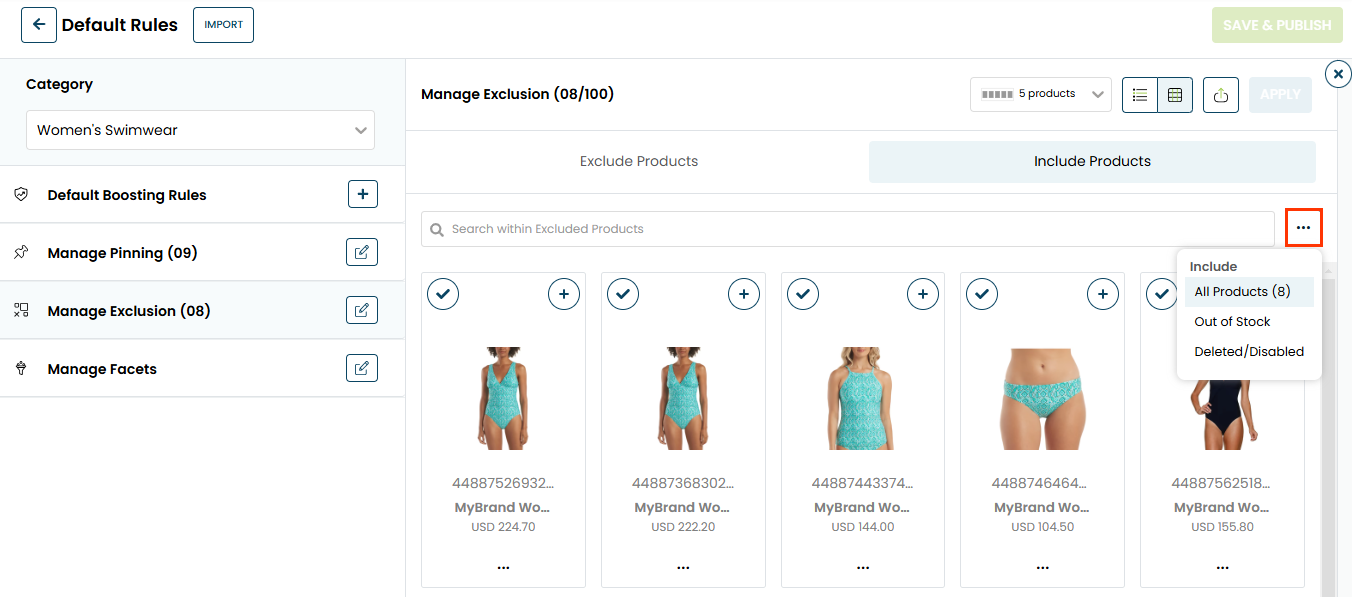
- Click the plus sign (+) in the upper-right corner of each product's tile.
- Click APPLY.
- Click SAVE & PUBLISH after you finish adding or revising any other default settings.
You must wait up to 10 minutes before you can see the restored products on their targeted category pages on your site.