The options available on Monetate's Personalized Site Search Promotions page allow you to influence the search results. Among these options are the ability to set rules to boost or bury products in all searches at the individual product level and at the product catalog attribute level.
In addition to the rules that you can set on the Promotions page, you can also boost or bury products by attributes at the time that your site makes the request to the Personalized Search API. Refer to Personalized Site Search Queries in the Monetate Developer Hub for more information.
Understanding Boosting Scores
Personalized Search assigns three boosting scores to every product:
- Product Level Score (PLS): A weighting to add to an individual product. The default value is 1. For each product you can boost the score up to 999, or lower it anywhere from –1 to –999. A score greater than 1 boosts the product in search results, causing it to appear higher. A negative score buries the product, causing it to appear lower.
- Rule Based Merchandising Score (RMS): A weighting applied to a set of products that share common attributes. The default value is 1. You can boost this score up to 999, or lower it anywhere from –1 to –999. An example use case for RMS is to boost products that are new arrivals or to bury out-of-season products.
- Self Learning Score (SLS): A score assigned automatically based on machine learning that determines which products are most relevant to search terms. The default value is zero and is automatically updated as customers use your site search.
When you aim to boost products within search results, then the final applied boosting score (FABS) can be calculated in one of the following ways:
- If the PLS isn't equal to (≠) 1.0, then the final applied boosting score is the sum of the PLS plus the SLS (PLS + SLS = FABS)
- If the PLS is equal to (=) 1.0 but the RMS isn't equal to (≠) 1.0, then the final applied boosting score is the sum of the RMS plus the SLS (RMS + SLS = FABS)
- If the PLS and the RMS each respectively is equal to (=) 1.0, then the final applied boosting score is the sum of the PLS plus the SLS (PLS + SLS = FABS)
When you aim to bury products within search results, then the FABS can be calculated in one of the following ways:
- If the PLS isn't equal to (≠) 1.0, then the final applied boosting score is the sum of the PLS added to the quotient resulting from the SLS divided by 100 (PLS + [SLS ÷ 100] = FABS)
- If the PLS is equal to (=) 1.0 but the RMS isn't equal to (≠) 1.0, then the final applied boosting score is the sum of the RMS added to the quotient resulting from the SLS divided by 100 (RMS + [SLS ÷ 100] = FABS)
You can set a product's PLS on the Product Level Boosting tab and set an attribute-level RMS on the Rule-based Merchandising tab of the Promotions page.
Product-Level Boosting Scores
On the Product Level Boosting tab of the Promotions page, you can create rules that are somewhat similar to Boost and Bury filters for Product Recommendations. Personalized Site Search results are returned in a ranked order using a score based on a product's relevance to the search term. You can create rules for individual products that modify their respective score to either increase or decrease its rank within the search results.
Setting Product-Level Scores
Follow these steps to change the Product Level Score (PLS) for a specific product to either boost or bury it in search results.
- Click COMPONENTS in the top navigation bar, select Personalized Search, and then click the appropriate product catalog on the Personalized Search list page.

- Click the Smart Search icon in the left-hand vertical toolbar, and then select Promotions.

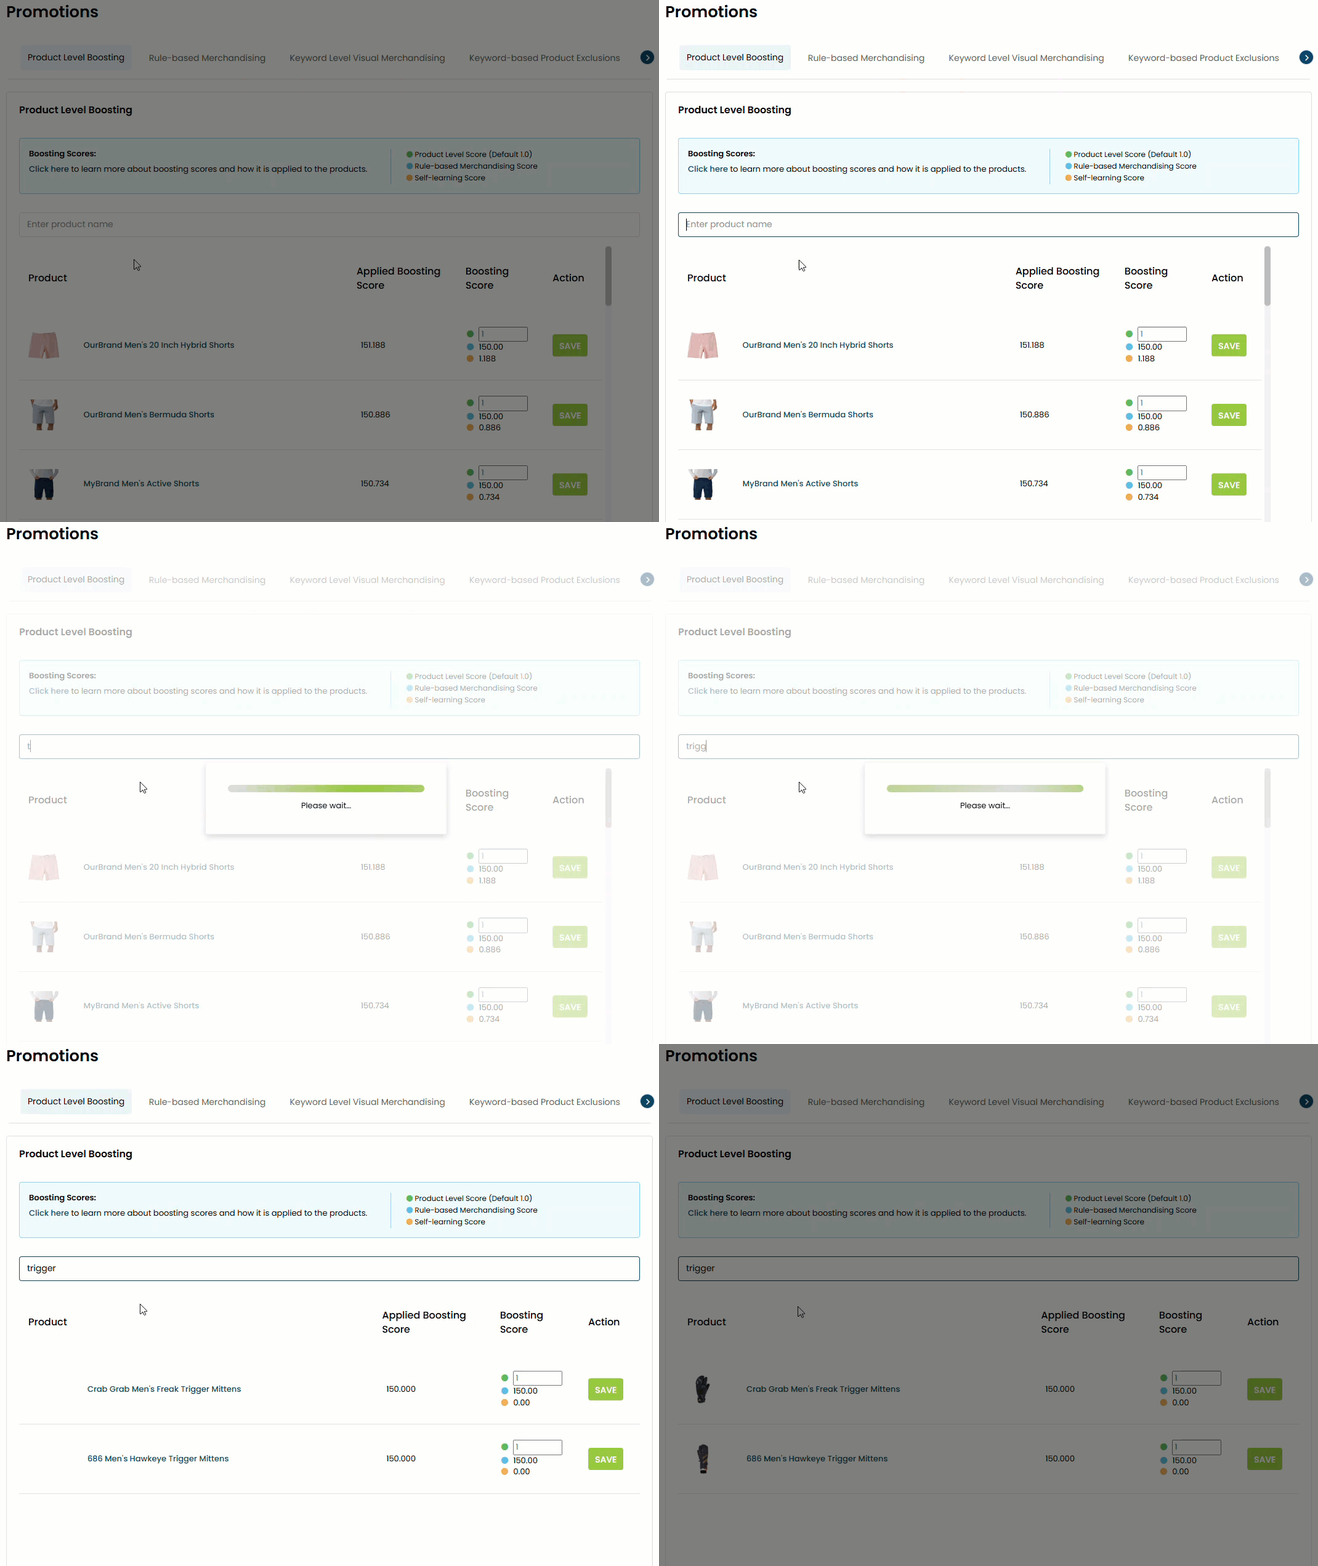
- Input the name of the product into the search field, and then, if necessary, scroll to find it in the results list.
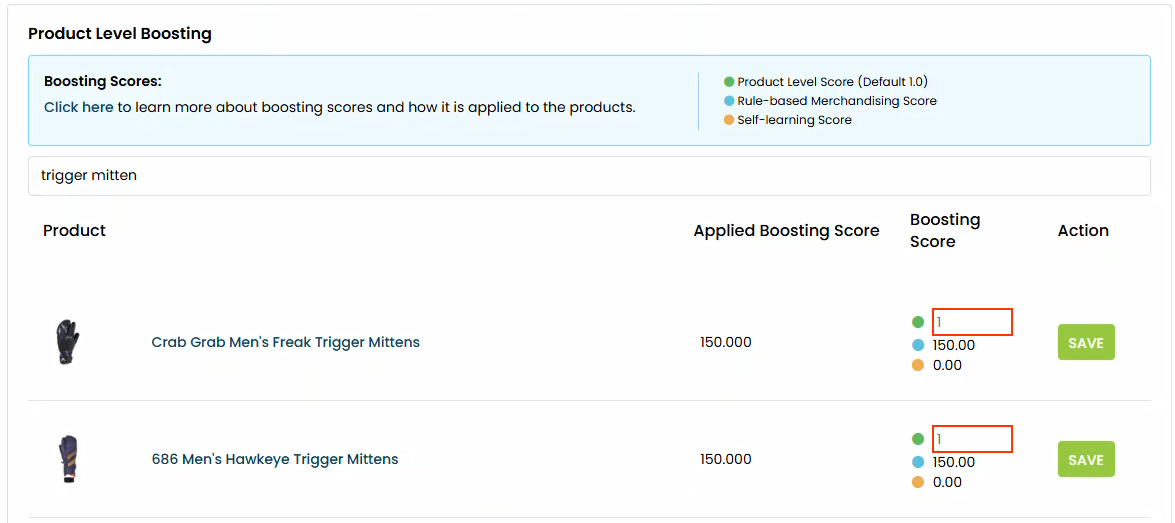
- Type into the PLS field (designated by a green dot to its left) a numeral from 1 to 999, if you want to boost the product or from –1 to –999, if you want to bury the product.
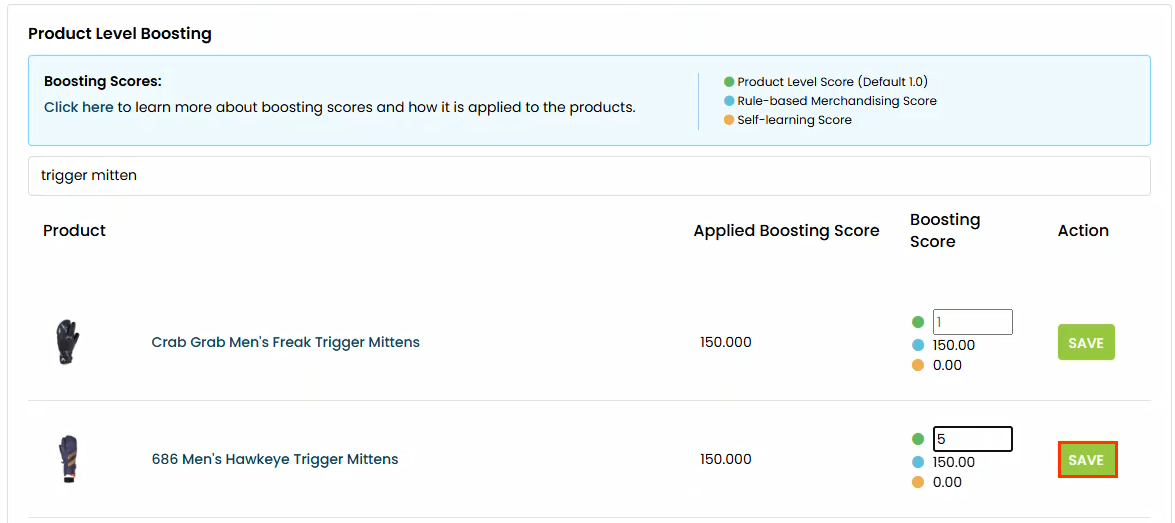
- Click SAVE.
You must wait up to 20 minutes before you can see the impact of the new RMS rule on search results in the store.
Rule-Based Merchandising Scores
While a Product Level Score (PLS) impacts a single product that appears in search results, a Rule Based Merchandising Score (RMS) impacts a set of products that share one or more specified values for one or more specified product catalog attributes. Like a product's PLS, an RMS can potentially modify the overall search results ranking for each identified product in the results that's subject to the rule by either increasing or decreasing that product's rank within the results.
You can use multiple product catalog attributes in an RMS rule as well as multiple values for any attribute that you specify as a condition within the rule. RMS rules use ANY/ALL logic not only at the attribute-value condition level but also at the rule level. The products identified by the attribute-value conditions that you establish are then promoted or demoted within the rankings based on the boosting score that you set.
If a product satisfies all the criteria you configure in the rule condition, then you can boost its RMS from its default value of 1.0 up to 999, or you can lower it from –1 to –999.
Rule Configuration Options
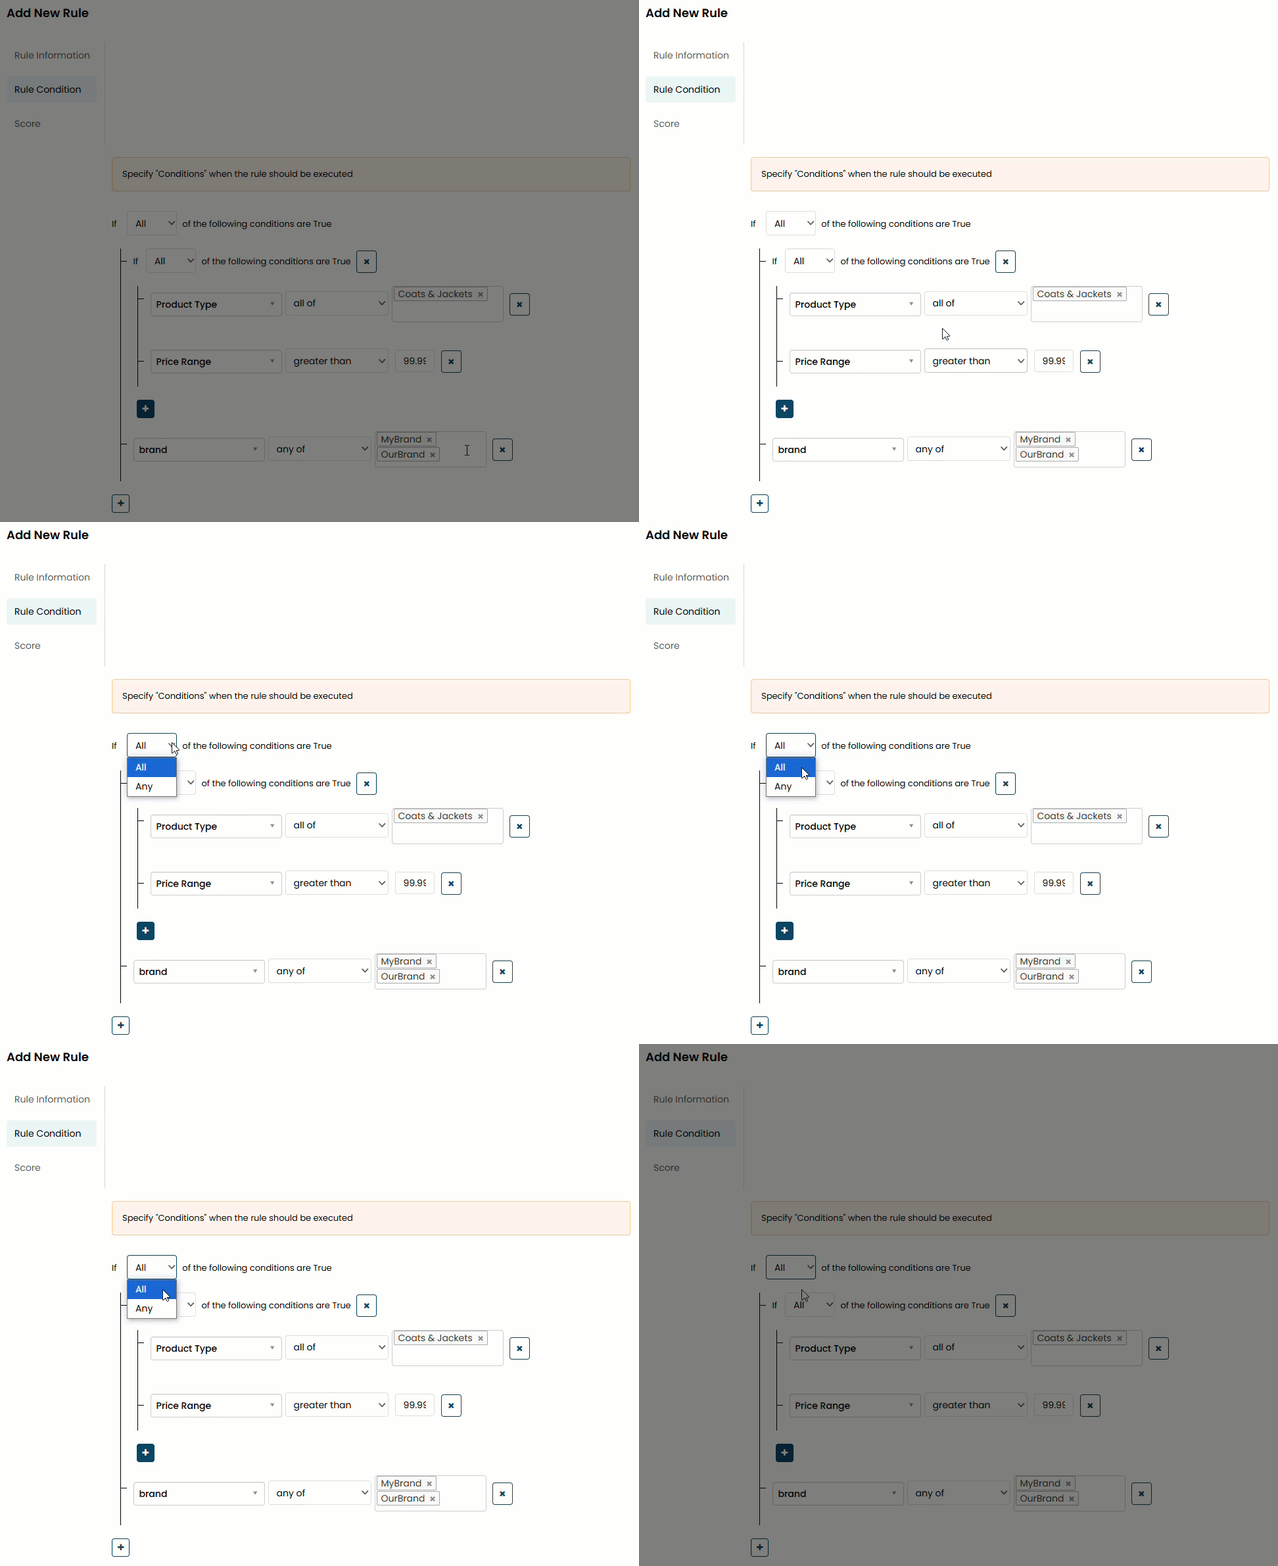
You can build two types of attribute-value conditions that serve as the rule condition when creating a rule on the Rule-Based Merchandising tab:
- Product Attributes: A filter-like condition equation that is [product attribute] + [operator] = [value(s)] (for example, Product Type is any of = Coats & Jackets, Gloves, Hats)
- Conditions Combination: Two or more attribute-based conditions that are combined into one only if Any or All of the subordinate conditions are true (for example, If All of the conditions are True: Price Range is greater than = 24.99 paired with Category is any of = Girls' Swimwear or Boys' Swimwear)
Even if you configure only one attribute-value condition on the Rule Condition panel (for example, Brand is any of = MyBrand, YourBrand, OurBrand), you must select if you want ANY logic or ALL logic to apply to it. Even if that lone condition has a single value (for example, Brand is all of = MyBrand), you still must select ANY or ALL logic for the rule condition.
Setting Rule-Based Merchandising Scores
Follow these steps to create a merchandising rule.
- Click COMPONENTS in the top navigation bar, select Personalized Search, and then click the appropriate product catalog on the Personalized Search list page.

- Click the Smart Search icon in the left-hand vertical toolbar, and then select Promotions.

- Click the Rule-based Merchandising tab.

- Click ADD NEW RULE.
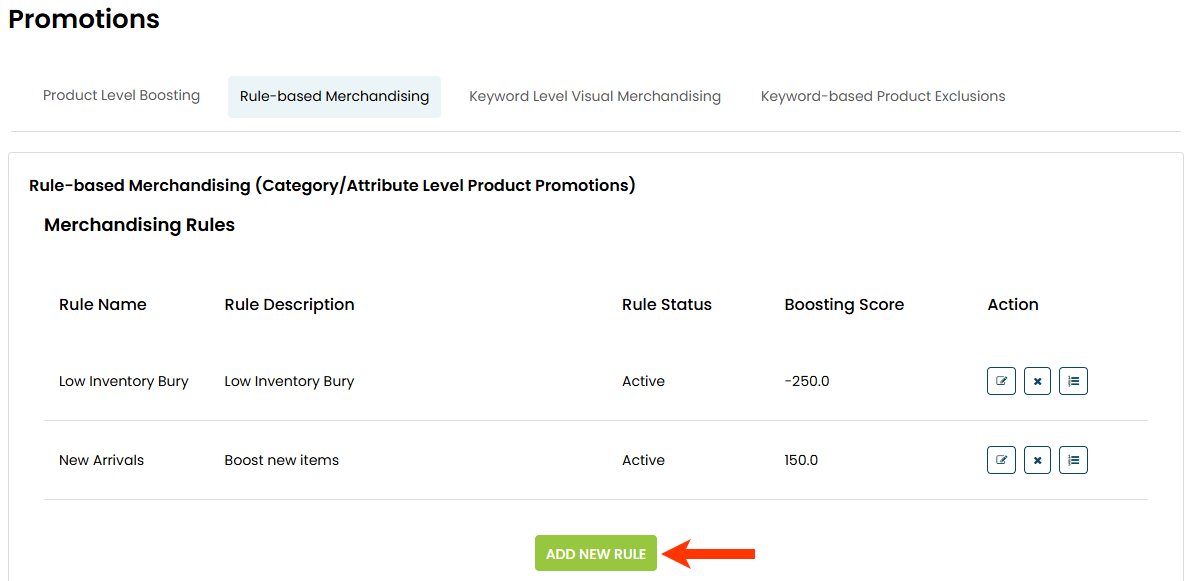
- Name the rule, optionally add a description, and then select an option from Status if you want the rule to be inactive or active as soon as you save it.
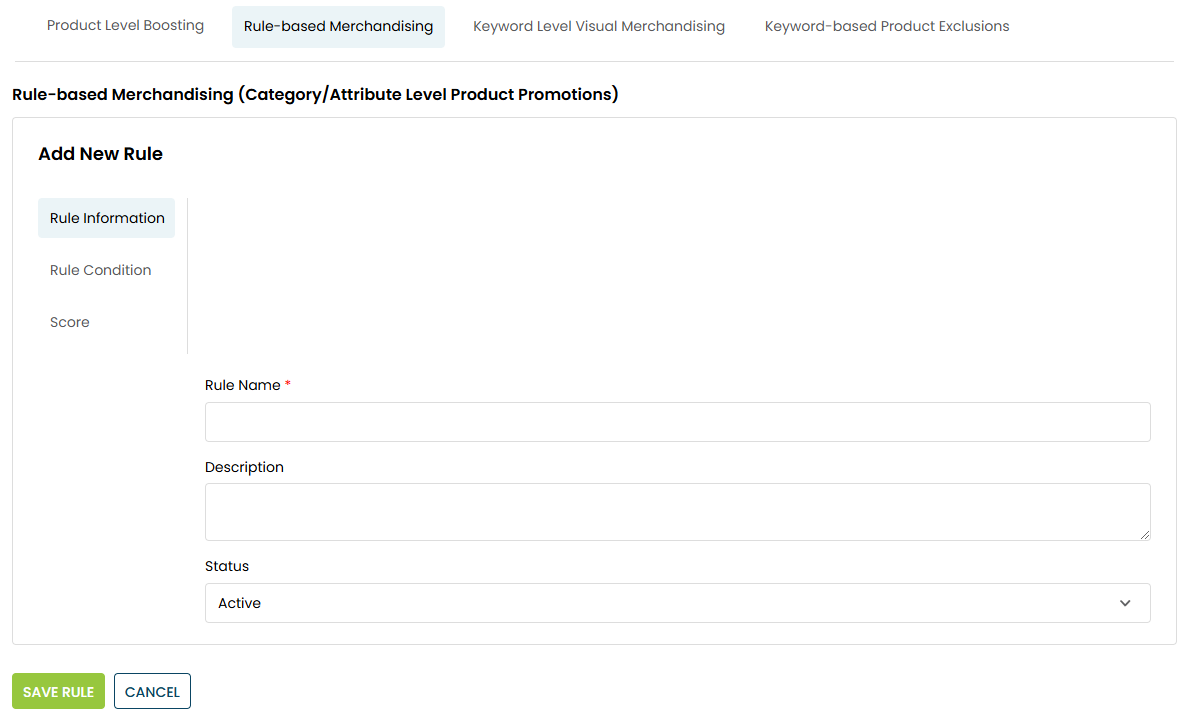
- Click Rule Condition and then create at least one attribute-based condition.
- Click the plus sign (+).
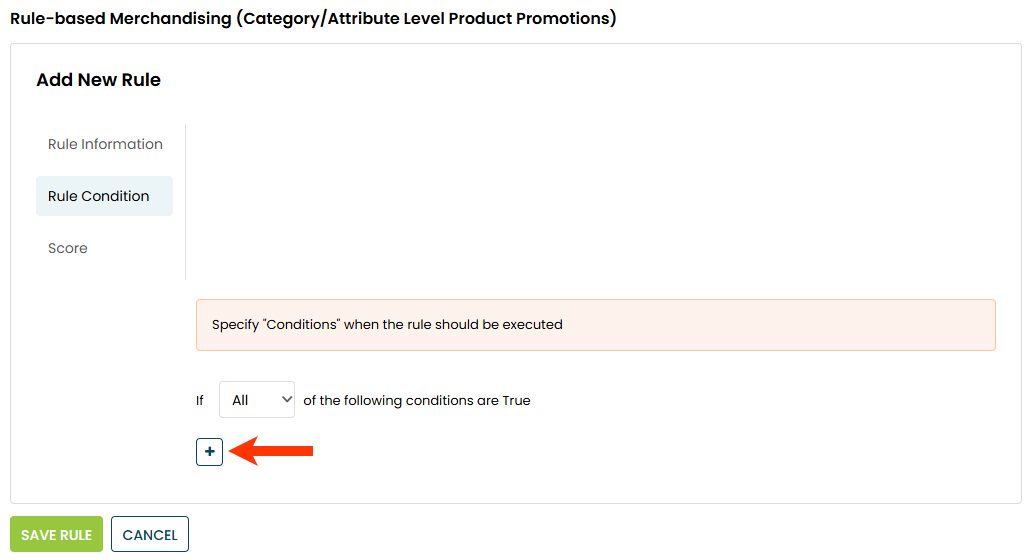
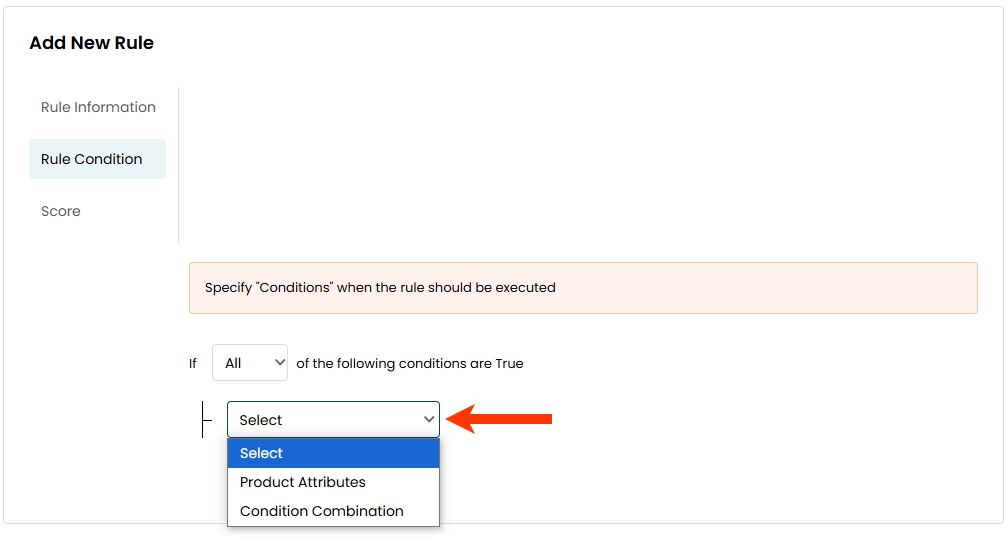
- Select the type of condition that you want to build.
- Configure the condition as explained in Rule Configuration Options. If you selected Condition Combination in step 6b, ensure that you set the type of logic you want applied to the combination of conditions.
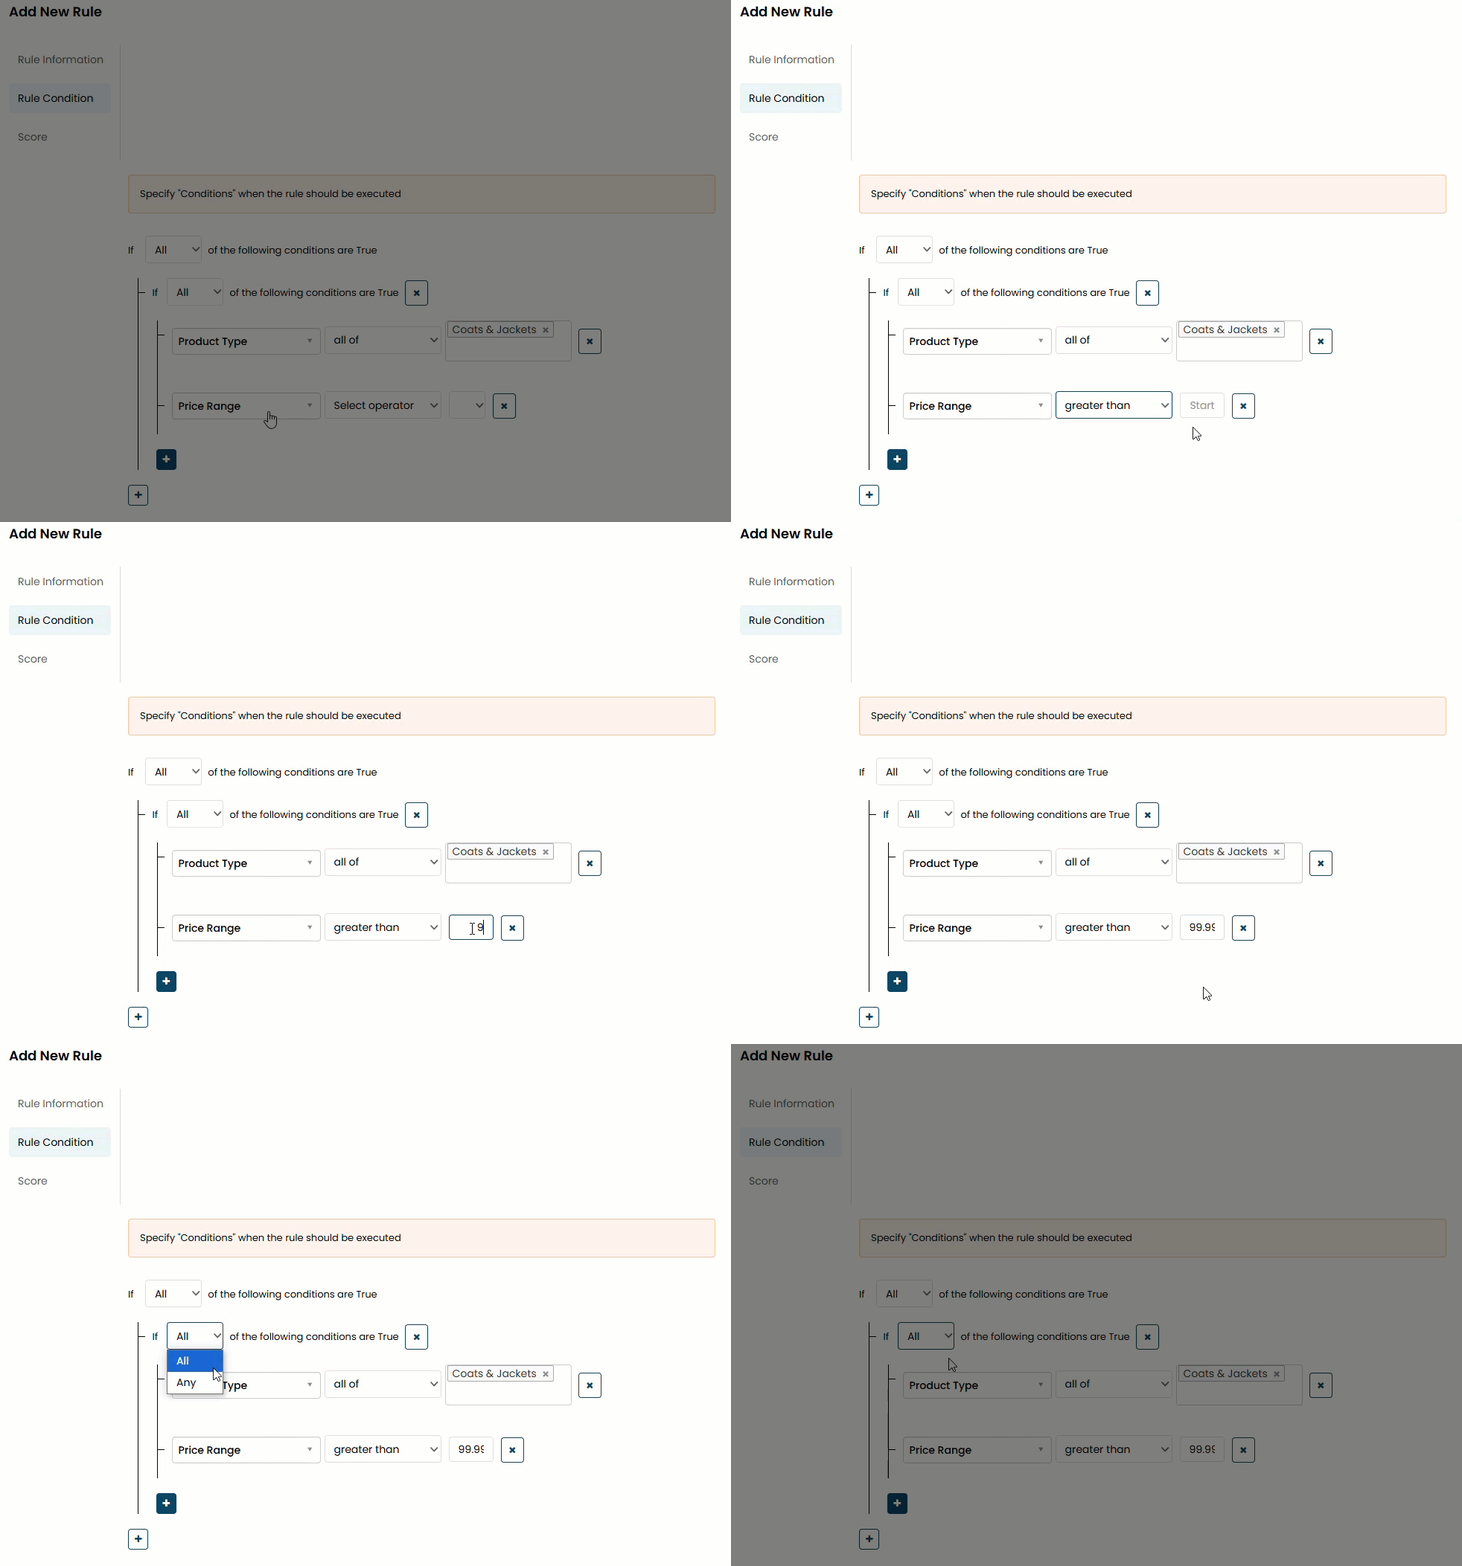
- Repeat steps 6a through 6c if you want to create additional attribute-based conditions.
- Select the type of logic you want applied to the attribute-based condition(s).
- Click the plus sign (+).
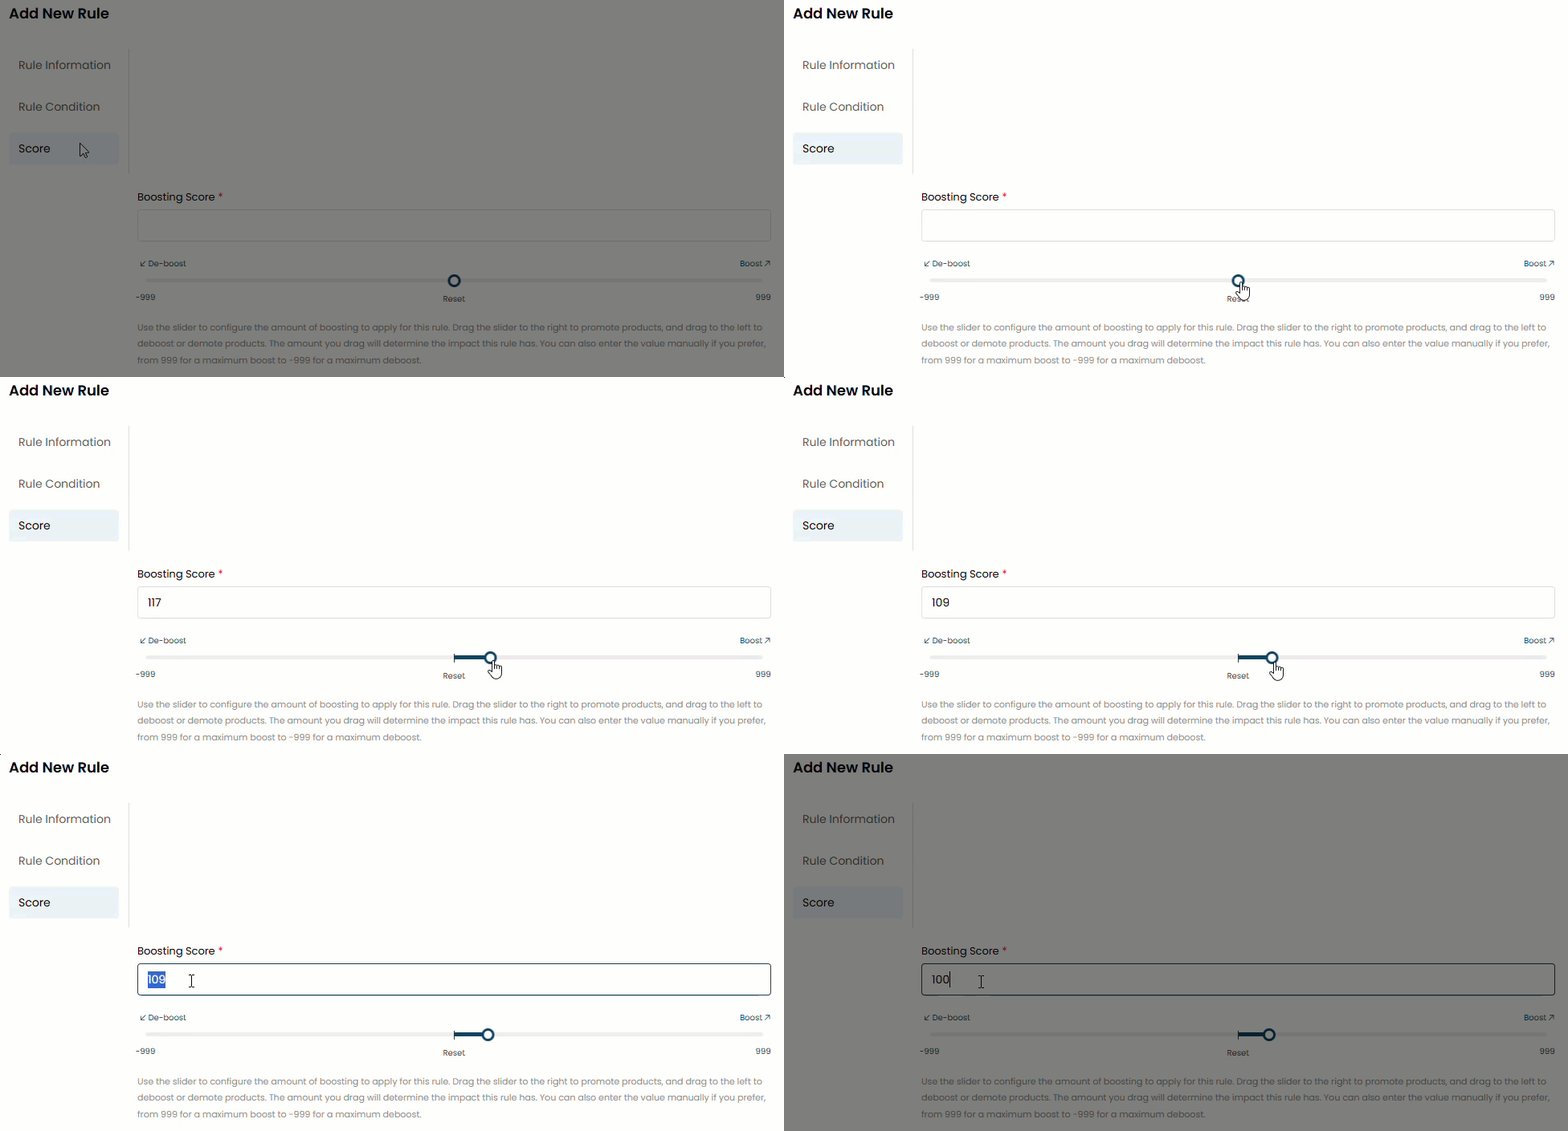
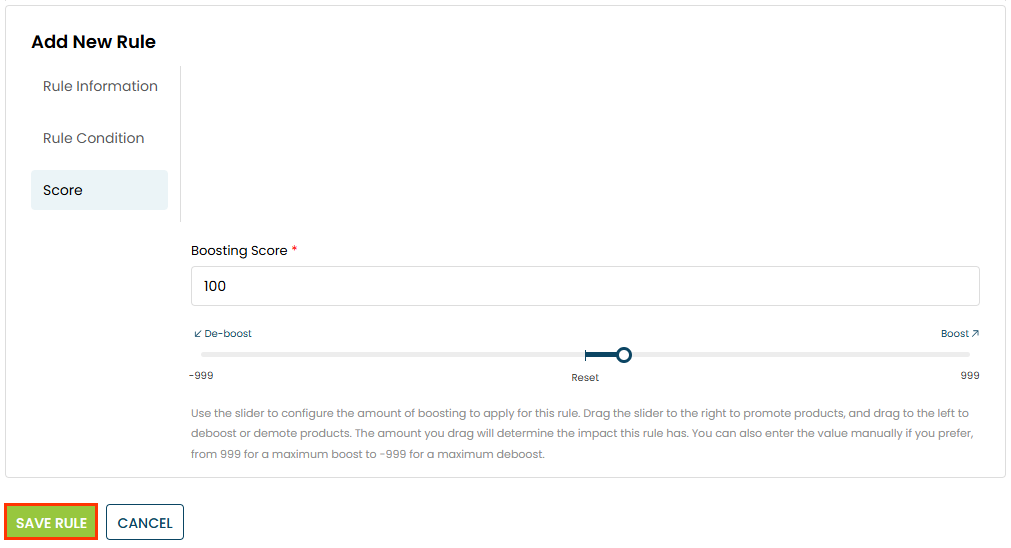
- Click Score and then use the slider or type a numeral into Boosting Score to set how much you want to boost or bury any products that meet the rule's condition(s).
- Click SAVE RULE.
You must wait up to 20 minutes before you can see the impact of the new RMS rule on search results in the store.
In the Action column of the table on the Rule-based Merchandising tab are icons that you can click to edit a rule, to delete a rule, or to see what products are impacted by a rule.
![]()
If you click the icon to view the products impacted by a rule, the modal that appears not only displays the total products impacted but also a table of each product that includes a thumbnail image and the name of the product as it appears in the product catalog.
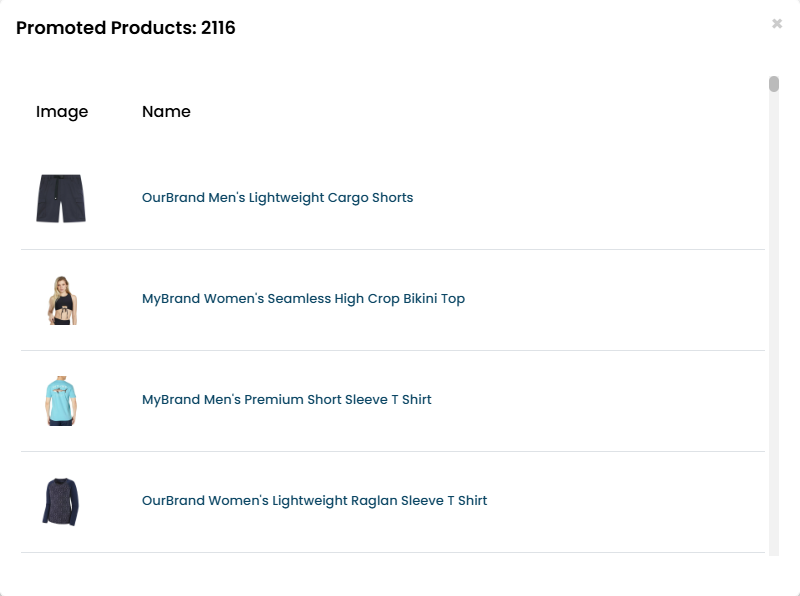
Click the product's name to load its product detail page on your site in a new browser window or tab.