You can add variants to a Web experience and define the percentage of site traffic to participate in each variant within the WHAT settings.
To add a variant to an experience, first place your mouse pointer on the plus sign (+) below the WHAT settings. Click ADD VARIANT when it appears, and then select the type of variant that you want to add.
- For Automated Personalization experiences, Dynamic Testing experiences, and Standard Test experiences, you can add a blank variant or a variant with actions from another variant in the experience.
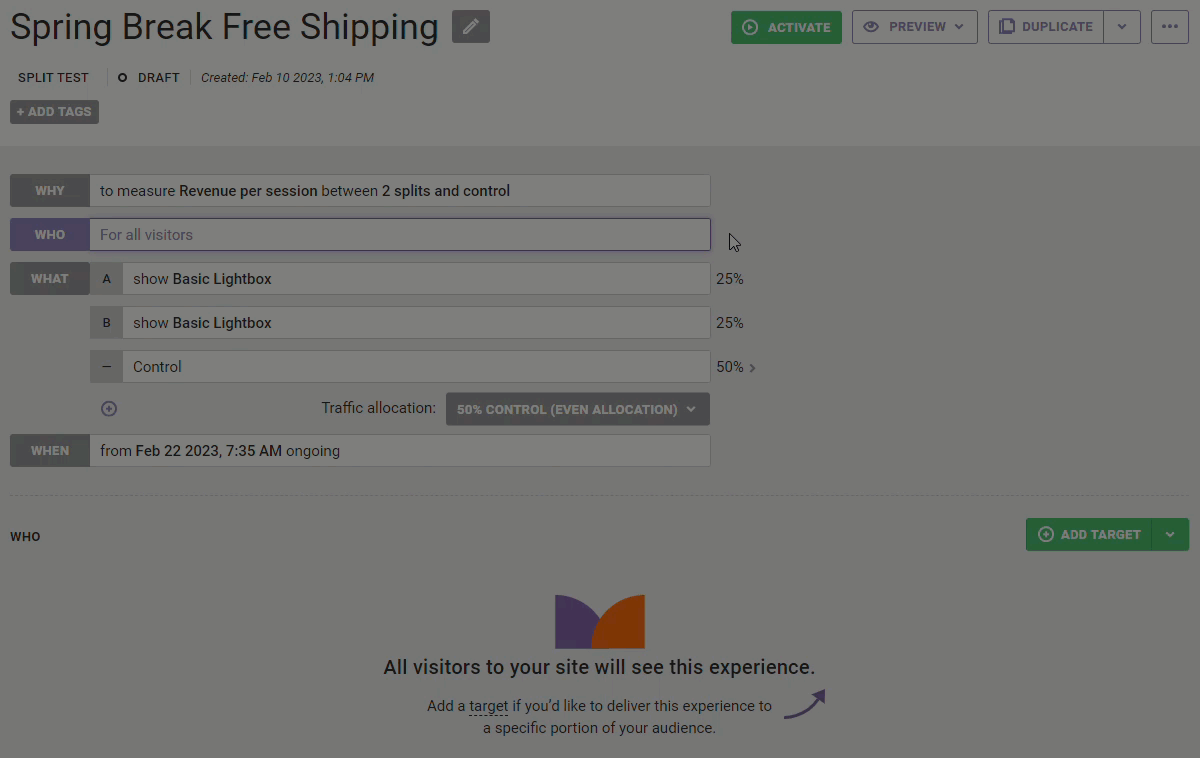
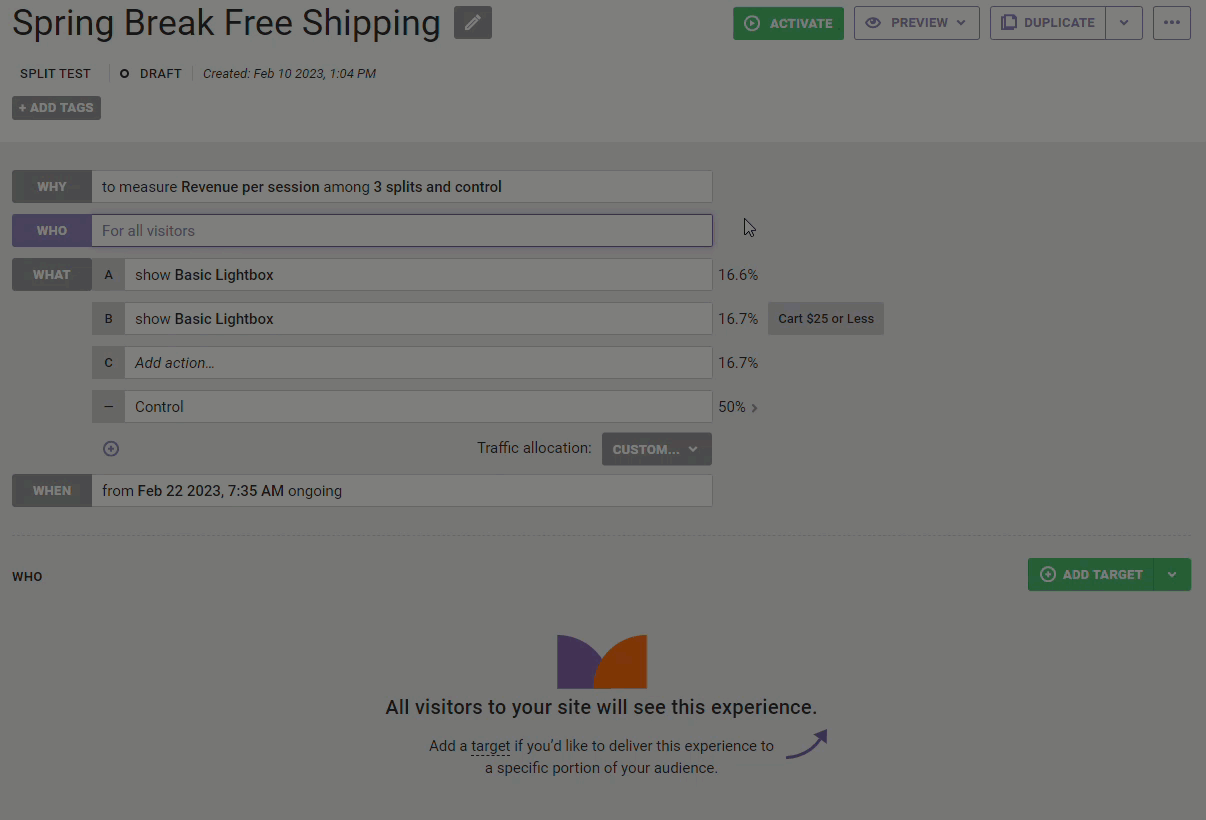
- For 100% Experiences, you can add a blank variant, a variant with actions from another variant in the experience, or a control.
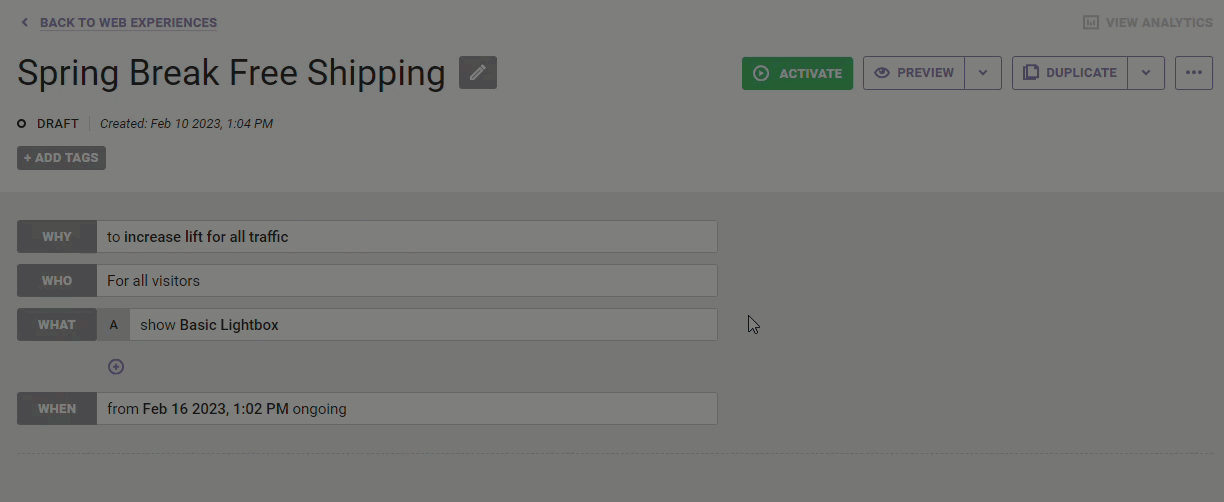
By default each variant is assigned a letter: Variant A, Variant B, Variant C, etc. To append the name of a variant to better identify it, first click it in the WHAT settings, then click the pencil icon next to its name in the action configuration panel, type the name into the field, and then click the green checkmark to save the change.
To configure an action for a blank variant or to modify the existing action from another variant within the experience, click that variant in the WHAT settings, and then either click ADD ACTION or click the existing action name to edit it.
Allocating Traffic
If you add variants to a 100% Experience or a Standard Test experience, you can adjust the traffic allocation to those variants by selecting an option from Traffic allocation. The default traffic allocation is even.
Traffic Allocation Considerations
You can adjust traffic allocation for three experience configurations.
A vs. Control
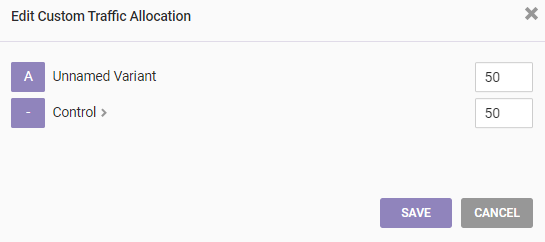
If you add only a control, then you can select Custom from Traffic allocation and then configure the allocation in the Edit Custom Traffic Allocation modal.
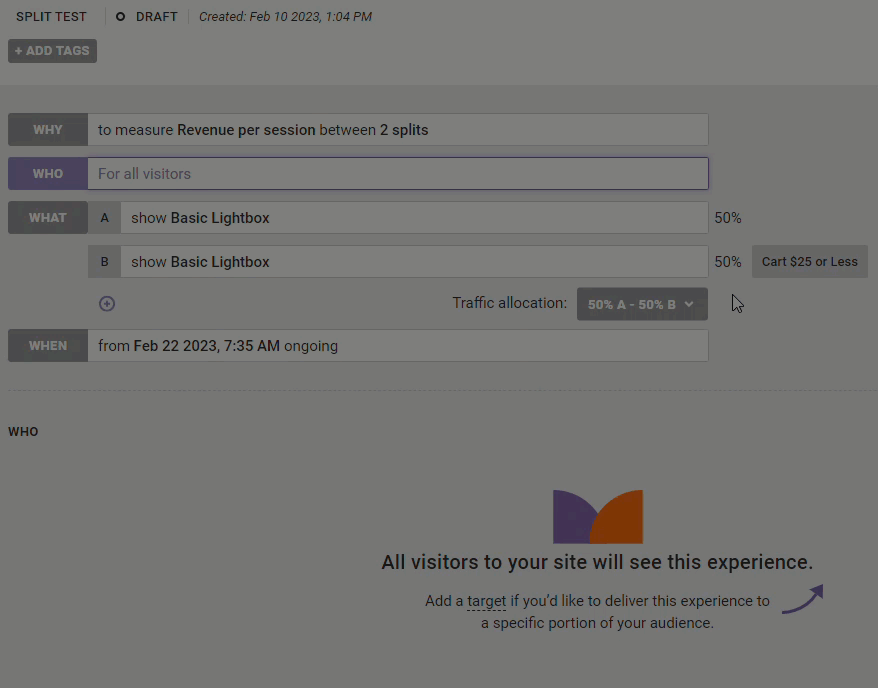
A vs. B
If you add only a second variant, variant B, then Traffic allocation contains a number of uneven variant allocation options as well as the Custom option.
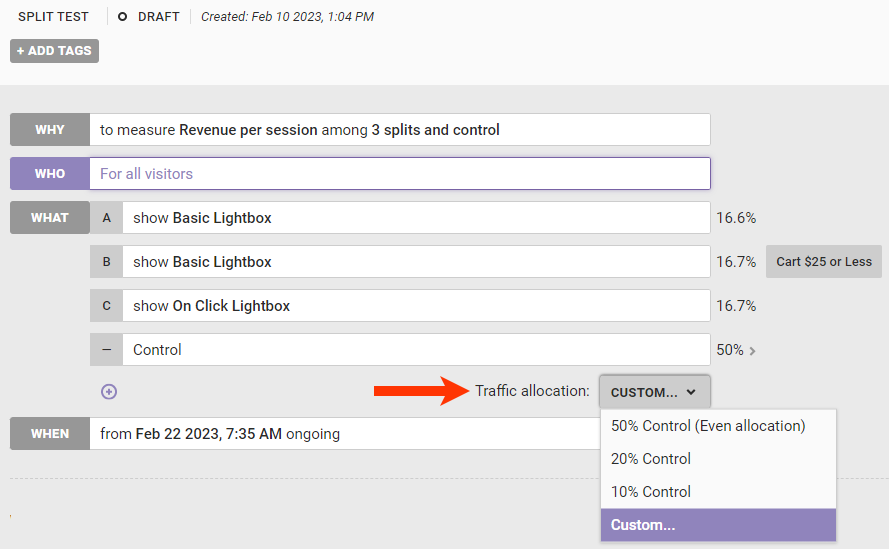
A/B vs. Control or A/B/n vs. Control
Once you add two or more variants with a control to an experience, Traffic allocation contains a different set of options. Instead of selecting the percentage of traffic for each variant, you select how much of the experience's traffic goes to the control.
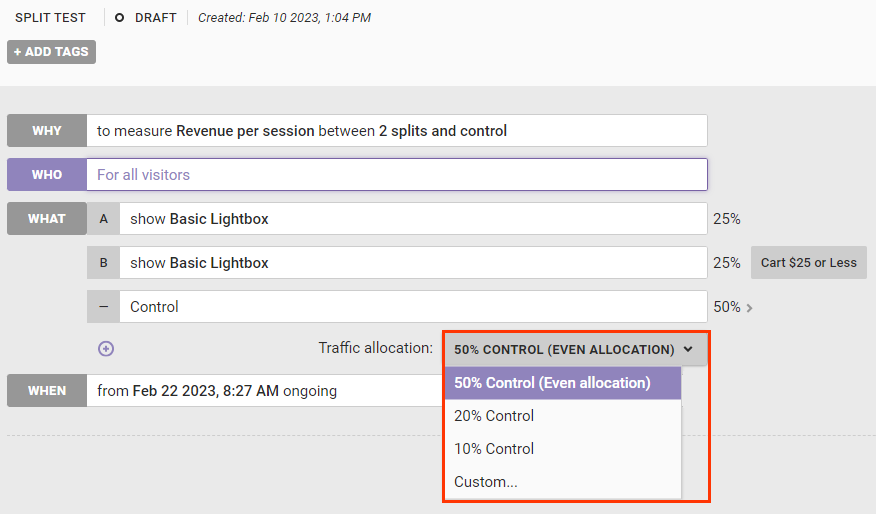
The control group consists of separate control groups for each variant. As a result, the control group traffic selection is evenly divided across variants. The traffic not allocated to the control is divided equally across all variants.
In the case of an A/B/n test without a control, the traffic distribution remains even and Traffic allocation is disabled. This guarantees that each variant receives enough traffic to achieve a statistically relevant result in the least amount of time.
When you create an experience with multiple variants, keep in mind that the size of those variants influences the sample size for the experiment and control groups. A small control group affects how long an experience takes to reach significance. For this reason, if an experience is not a test, you may not need to use a control group.
You should consider the following factors before adjusting the traffic percentages for variants in an experience:
- How much traffic will this experience see? If the page(s) you want to test only receives a small amount of traffic, a 50% control group is much more likely to yield actionable data.
- Is this experiment risky? If the experiment offers the potential for negative consequences, you may want to opt for a 60% or 70% control group.
- Do you want insight into site visitor behavior, or do you want to optimize your site? If you want insight, a control group closer to 50% may be helpful. However, if you want to optimize site content for the majority of your site visitors, a smaller control group may be best.
Exporting and Importing Variant Actions
You can export an action used in a variant and import it to a new experience.
To export a variant action, first click the additional options menu (...), select Export Actions, and then select the variant you want to export.

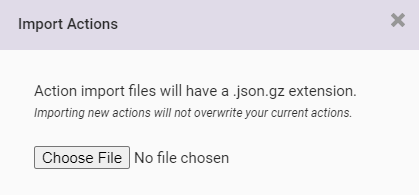
The variant JSON downloads as a GZ file.
You can add the exported variant action and settings to a variant in a different experience. With the recipient experience open on the Experience Editor page, click the additional options menu (...), select Import Actions, and then select the variant into which you want to import the action.
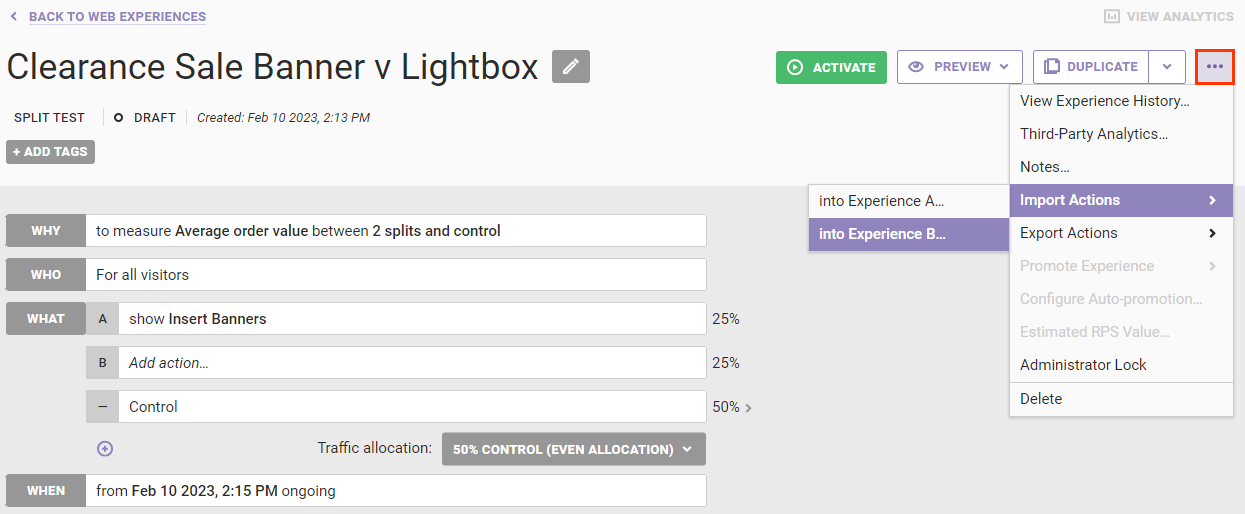
Next, click Choose File in the Import Actions modal, and then navigate to and select the GZ file.