A Customer Attributes dataset contains data you've collected about customers. You can use this type of dataset and its data to better target customers and personalize their experiences on your site.
Follow these steps to create a Customer Attributes dataset.
- Click Datasets in the left-hand navigation, and then click CREATE DATASET.

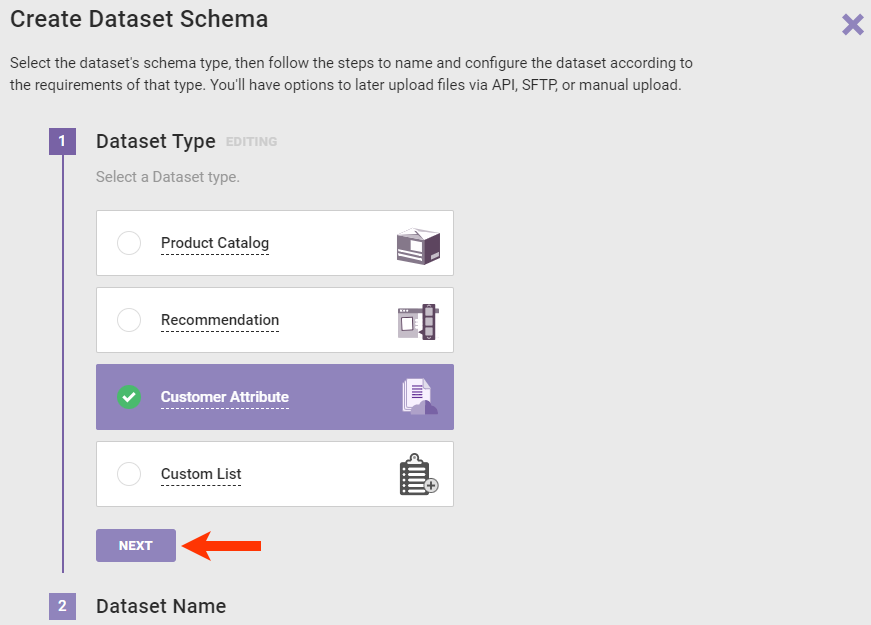
- Select Customer Attributes and then click NEXT.
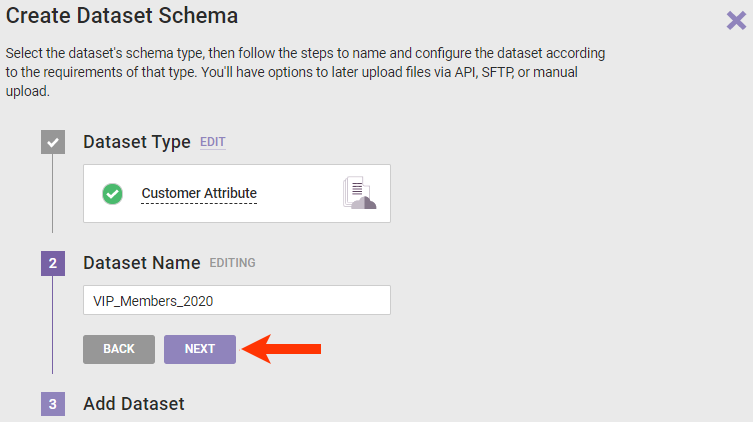
- Name the dataset you're creating, and then click NEXT.
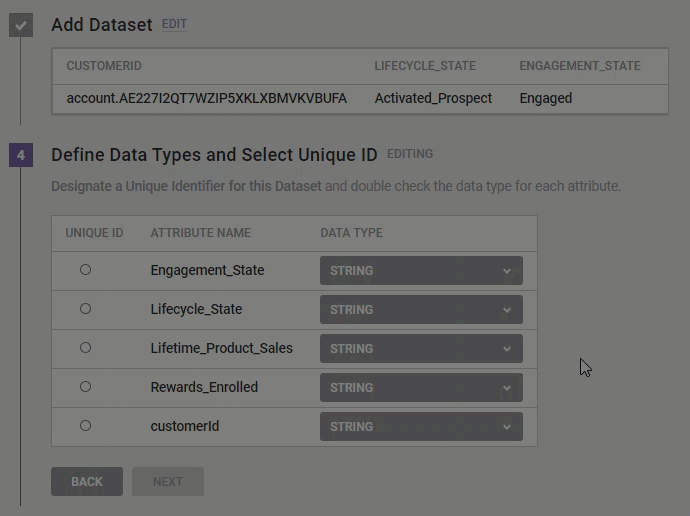
- Drag and drop the file you want to upload into the Create Dataset Schema wizard, and then review the schema generated to ensure all the column headers are present and correct. Select My file looks good, and then click NEXT.

- Confirm that the data type selected for each attribute is correct, then select an attribute to be the dataset's Unique ID, and then click NEXT.
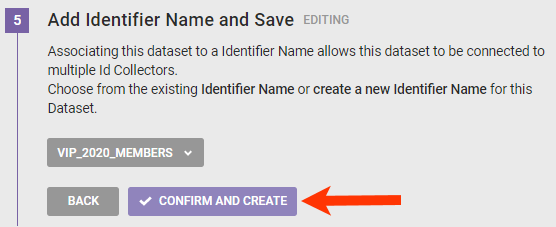
- Select or create an Identifier Name so that you can connect the dataset to one or more ID Collectors, and then click SAVE.
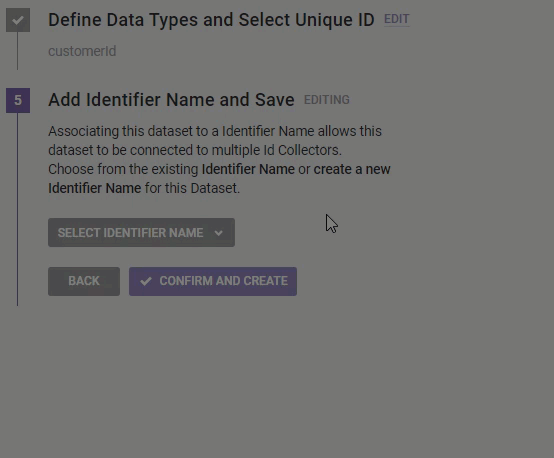
- Click CONFIRM AND CREATE.
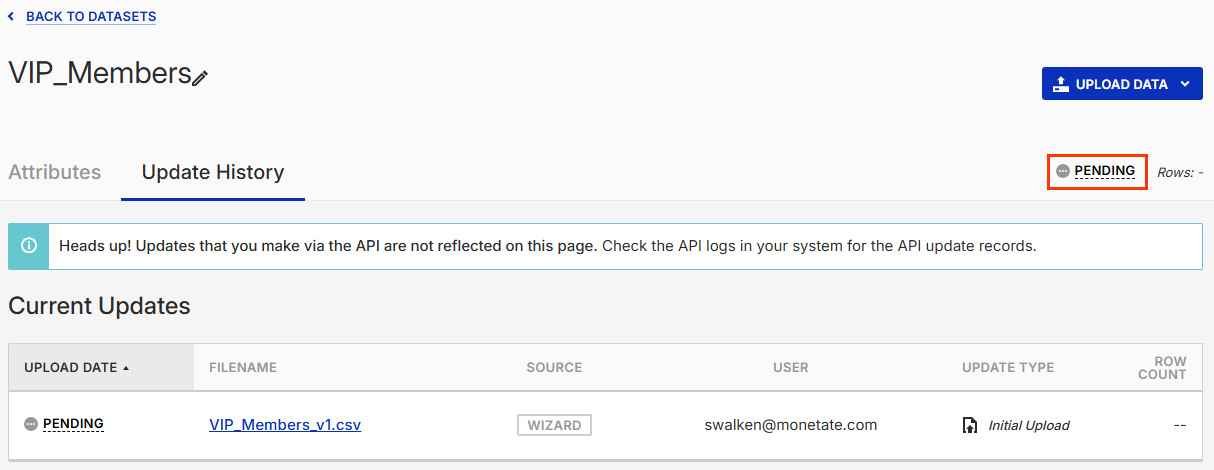
Once Monetate finishes creating the schema, the Update History tab of the details page for the newly created Customer Attributes dataset loads. The status is PENDING until the platform successfully completes processing the file or encounters an error.
Refer to Customer Attributes Dataset Details Page for more information about the Update History tab as well as the Attributes tab.