Follow these steps to set up an integration with Google Analytics.
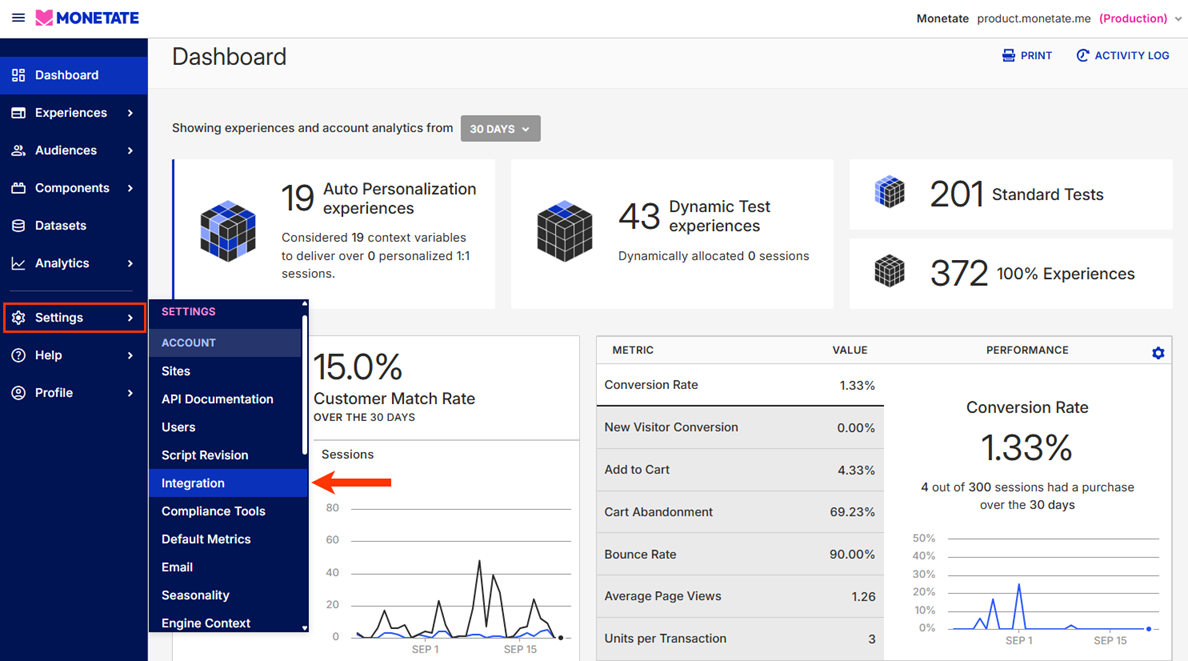
- Click the settings icon in the top navigation bar and then select Integration.
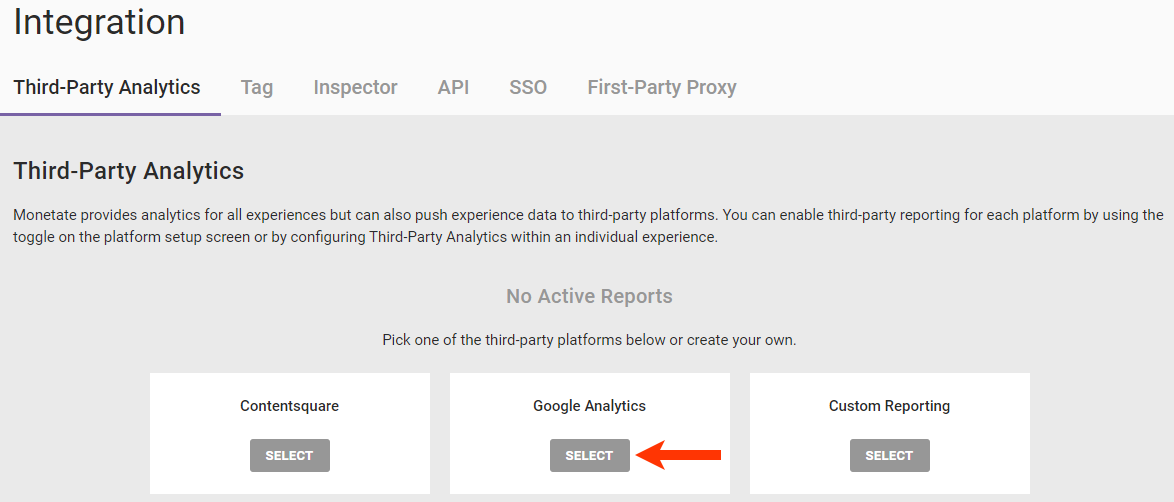
- On the Third-Party Analytics tab, take one of the following actions:
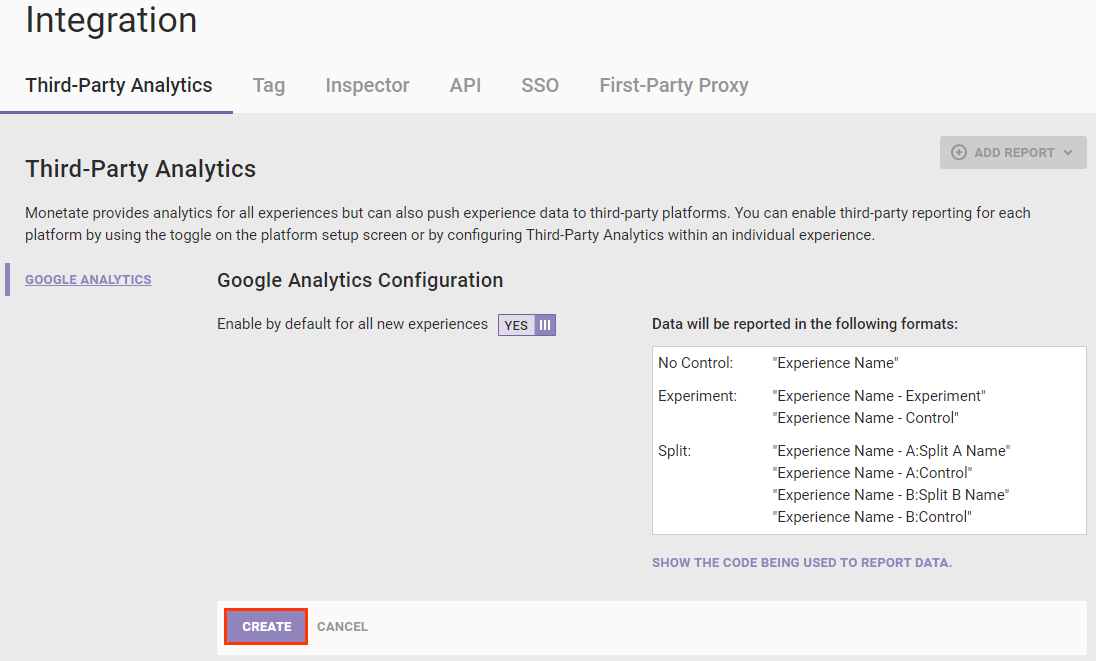
- If the account doesn't have any third-party analytics custom reports, then click SELECT for Google Analytics.
- If the account already has a third-party analytics report, then click ADD REPORT and select Google Analytics.

- If the account doesn't have any third-party analytics custom reports, then click SELECT for Google Analytics.
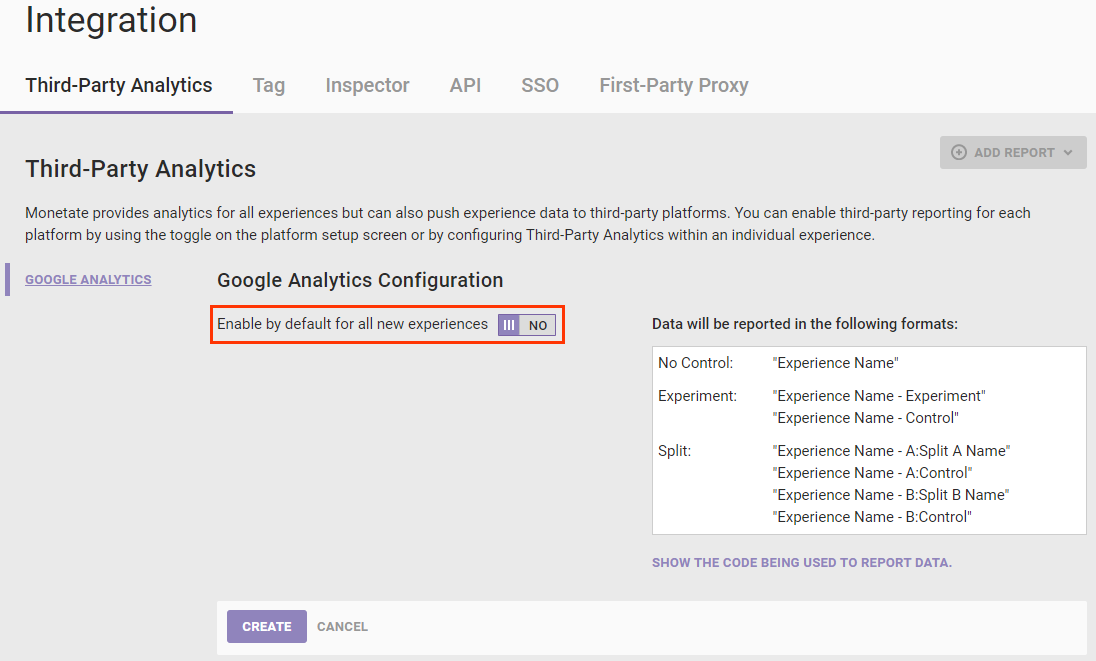
- Optionally, set Enable by default for all new experiences to YES if you want Monetate to push experience data for all new experiences to Google Analytics.
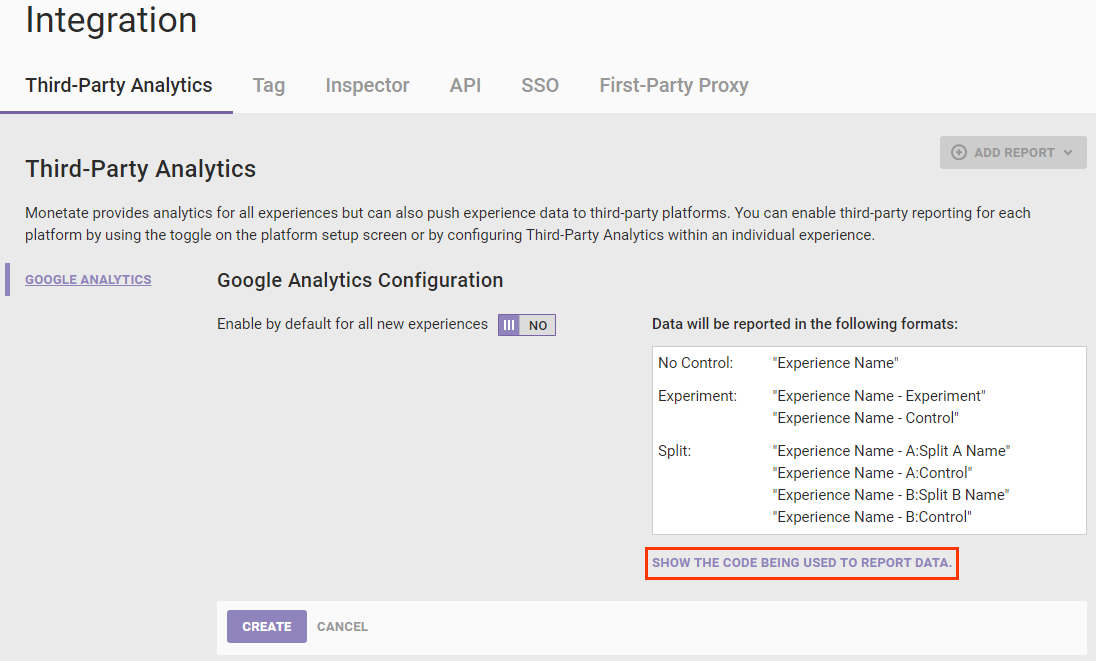
- Optionally, preview the code pushed to Google Analytics by clicking SHOW THE CODE BEING USED TO REPORT DATA.
- Click CREATE.
Monetate pushes experience data to Google Analytics after the initial page load and then every 5 minutes thereafter. Refer to Google's Realtime report documentation to learn more about viewing Monetate experience data in your Google Analytics setup.
Testing the New Report
You can ensure the new report works from the report configuration page.
Follow these steps to test the new report.
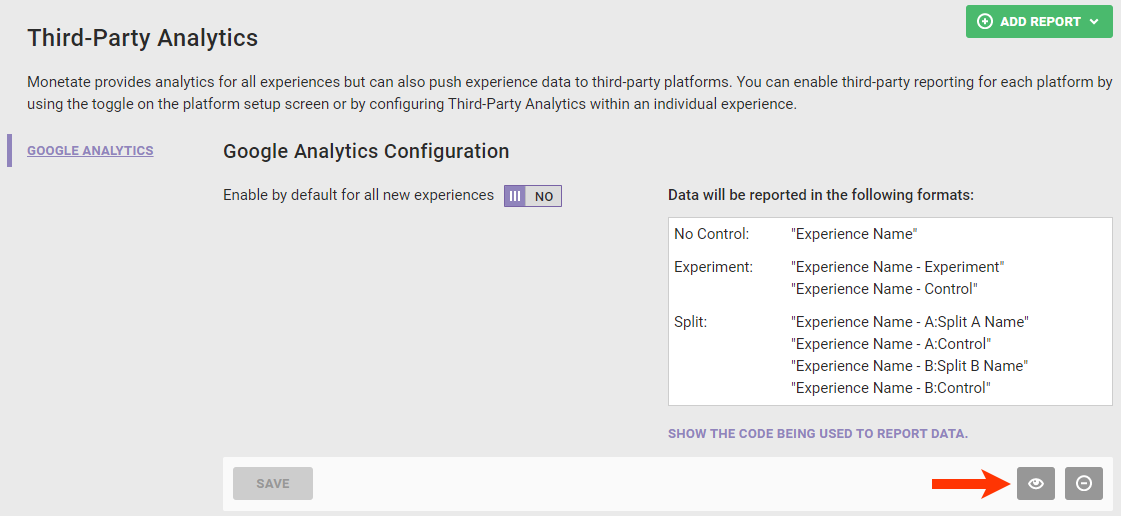
- Click the preview icon on the Google Analytics configuration page.
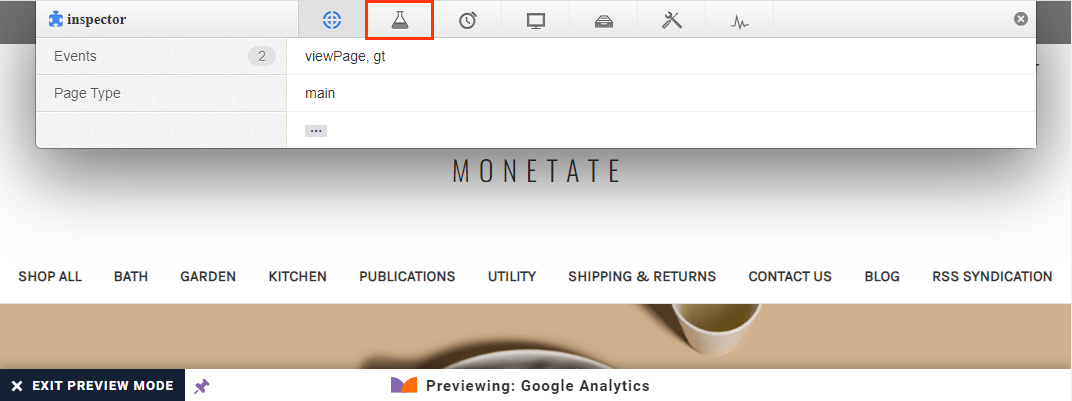
- While viewing the new browser tab or window in which your site loaded in Preview Mode, launch Monetate Inspector and then click the Components tab.
- Ensure that reporting labels are submitted. The reporting labels appear in the
sr2orSubmit Reporting Eventsrow of the Actions table.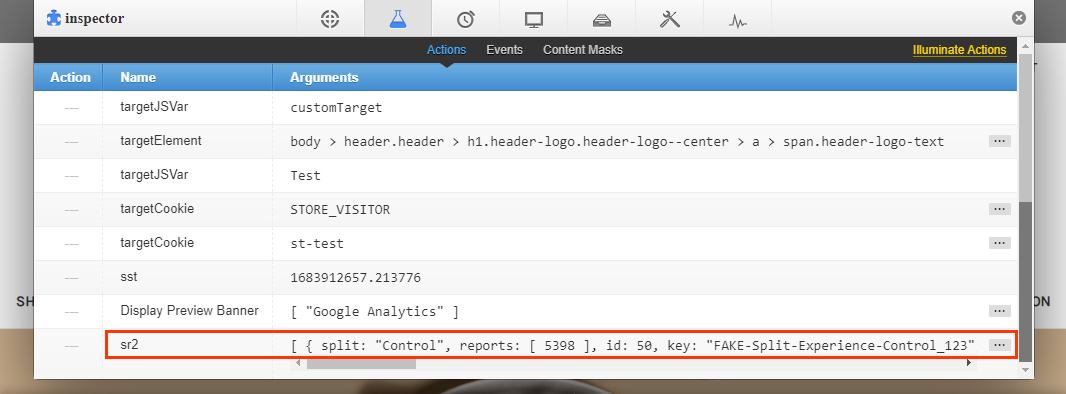
After you test the report, you can set Enable by default for all new experiences to YES if you opted not to do so when you first created the report.
If you opt to set Enable by default for all new experiences to YES, you must also add the new report to each active Web experience that you want reported to your Google Analytics setup. See Enabling Google Analytics at the Experience Level for more information.
Enabling Google Analytics at the Experience Level
Follow these steps to enable Google Analytics reporting for an individual active Web experience.
- Navigate to the experience that you want reported to Google Analytics, and then open it in Experience Editor.
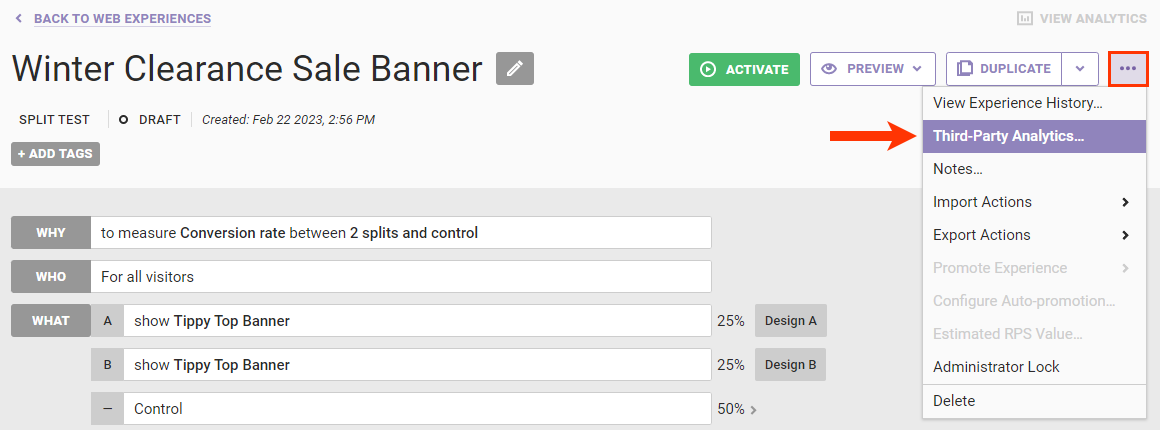
- Click the additional options menu (...) on the Experience Editor page, and then click Third-Party Analytics.
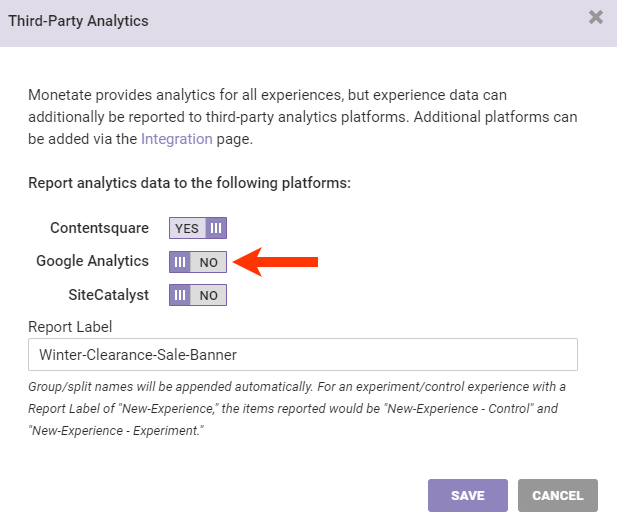
- Toggle Google Analytics to YES.
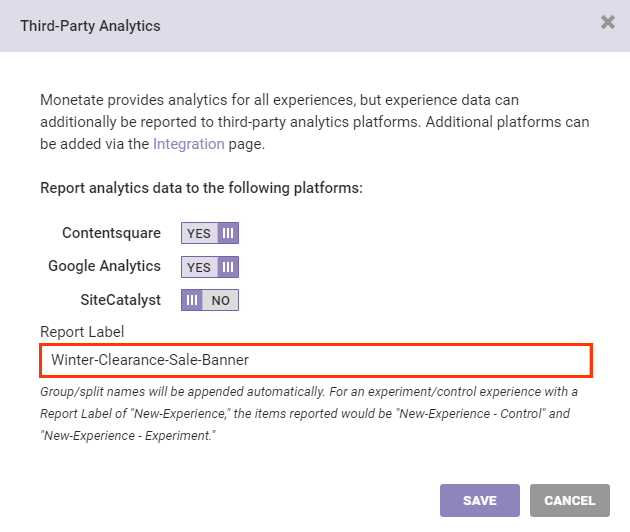
- If you want to see a specific string for this experience in all third-party analytics platforms enabled for it, enter it into Report Label.
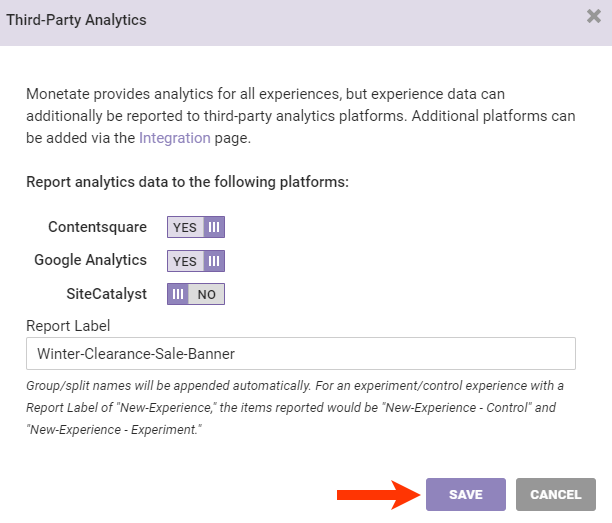
- Click SAVE.
You can view a table of experiences that Monetate is reporting to Google Analytics on the Google Analytics Configuration screen of the Third-Party Analytics tab of the Integration page of the Monetate platform settings.
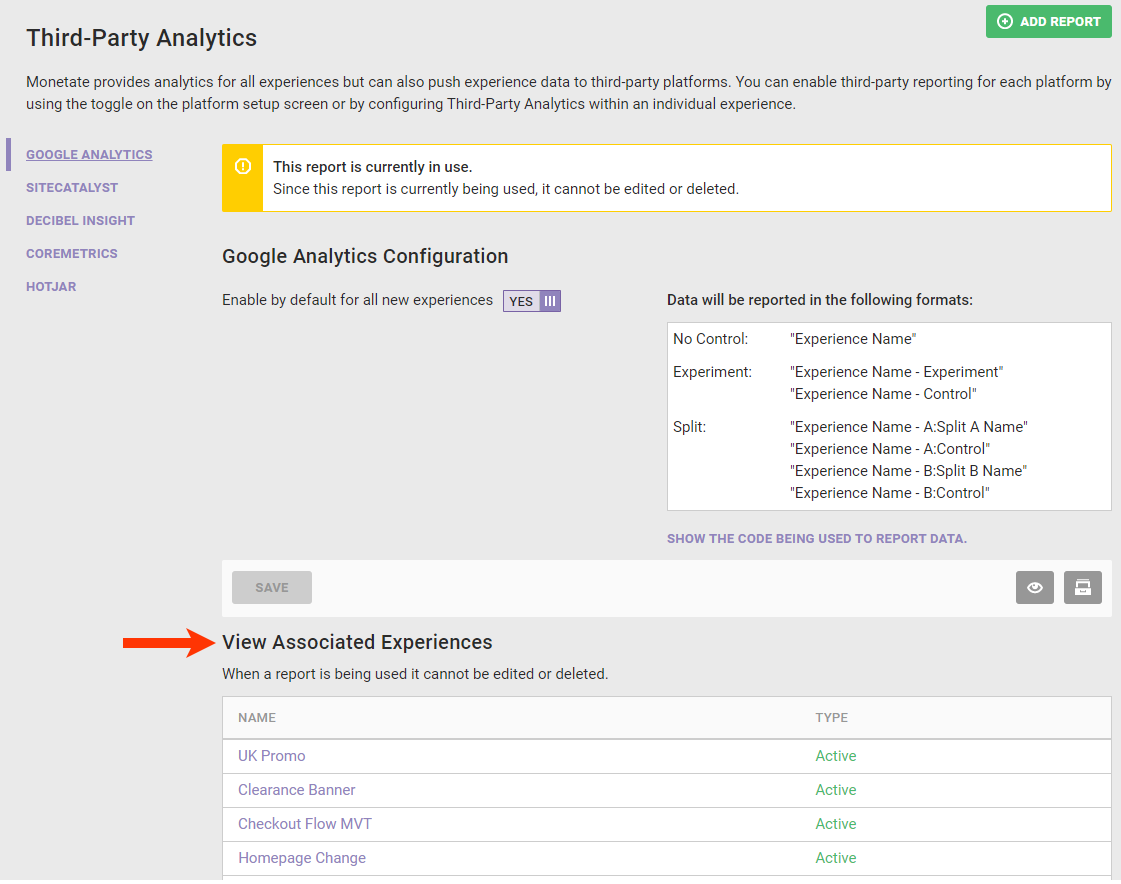
To disable Google Analytics reporting for a single experience, click its name in this table to open it in Experience Editor, then click the additional options menu (...), click Third-Party Analytics, and then toggle Google Analytics to NO in the Third-Party Analytics modal.