The Locations Manager tool of Content Manager allows you to upload a list of locations to use in Web experiences.
You can use the locations list with two WHO targets: Distance to location and Distance to many locations. The Distance to location option allows you to target site visitors who are within a specified distance of a single location. The Distance to many locations option allows you to target site visitors who are within a specified distance of one of many locations. You can adjust both to target people who are within or not within a specified distance of one location (for Distance to location) or many locations (for Distance to many locations).
File Requirements
The locations list that you upload must be a CSV file that uses UTF-8 character encoding and without the byte order mark (BOM).
The file must have a header row that contains all required attributes, also called columns or fields. You can include permitted optional attributes so long as all the required attributes are present. Although the file can contain additional attributes that are neither required nor permitted, the platform ignores them during the upload process.
Required Attributes
This table contains all the attributes that must appear in a locations list file. Each must appear exactly as shown.
| Attribute | Description |
|---|---|
internal_id |
The unique identifier for this particular location, which can be any combination of letters and numbers
NOTE: If you change the existing internal ID for a location in an update, the platform treats the new ID as a new location. |
name |
The business or business location name |
address1 |
The first line of the location's physical street address |
city |
The city where the location is |
region |
The location's state or province, either its postal abbreviation or full name |
postal_code |
The location's ZIP code or postal code, with no minimum or maximum character count |
country |
The location's country |
Optional Attributes
This table contains attributes that you can include along with the required ones in a locations list.
| Attribute | Description |
|---|---|
address2 |
The second line of the location's physical street address, if necessary |
phone |
The telephone number for the location |
latitude |
The location's north-south geographic coordinate |
longitude |
The location's east-west geographic coordinate |
email |
The designated email address for the location |
description |
A few words about the location, such as Inside Mall of America |
img_src |
The source code for an image file associated with the location, such as img src="store76.png" |
url1 |
The primary URL associated with the location |
url2 |
A secondary URL associated with the location |
tags |
Any tags associated with the location, each separated by a vertical pipe character (|), such as Bloomington retail outlet | Mall of America | Distribution Center |
If you include the latitude or longitude attributes in a file but the fields are empty for any row, then Monetate uses Google to fetch them when processing the file. If Google cannot find the coordinates, then a message appears on the Locations tab notifying you of the temporary error finding the coordinates. See 'Temporary error geocoding' Message in the troubleshooting section of this documentation for more information.
Uploading a Locations List
Follow these steps to upload a locations list to the Monetate platform.
- Click COMPONENTS in the top navigation bar, and then select Content.
- Click the Locations tab and then click UPLOAD CSV FILE.
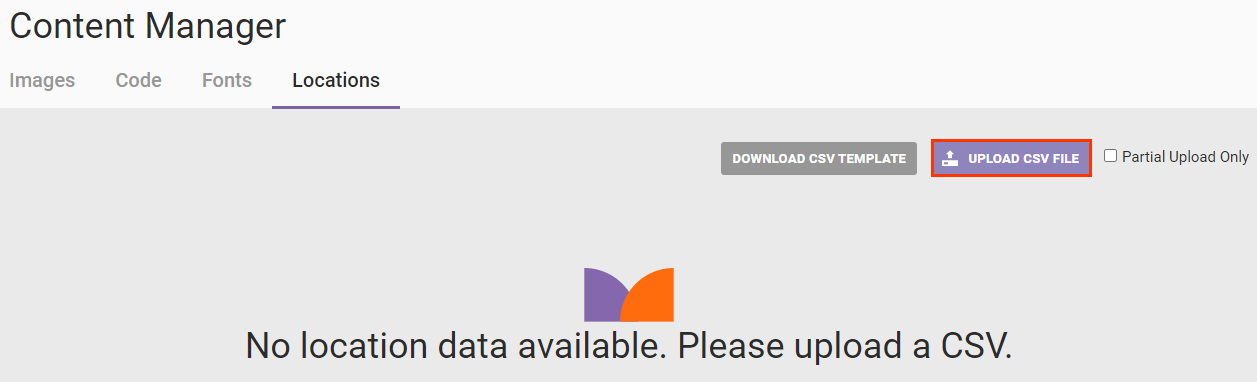
- Follow the prompts to navigate to the location of the CSV file, select it, and then upload it to the platform.
Once the file upload and processing are complete, a message stating as much appears above the table.

If you included the optional longitude and latitude attributes but did not include the coordinates for every location in the file, then processing may take a little longer and the message above the table indicates as much. A message also appears in the COORDINATES field for each location for which Google is still collecting the coordinates.
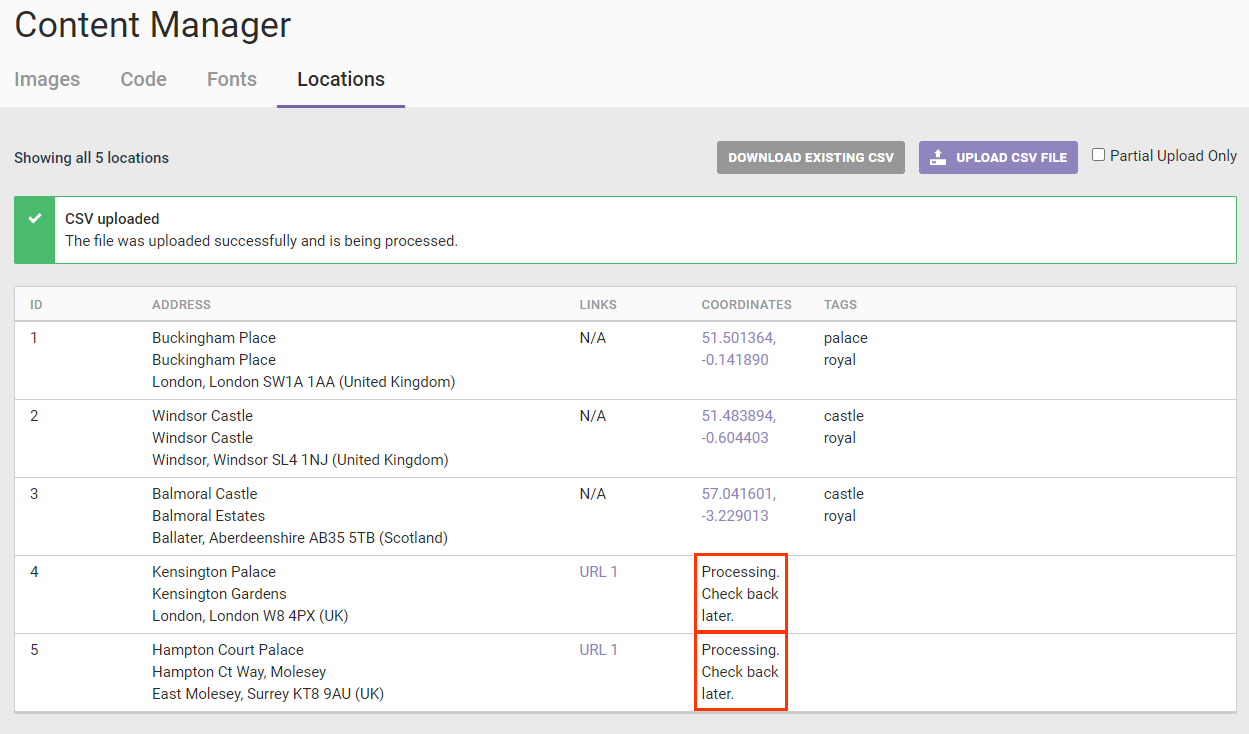
If ultimately Google cannot determine the coordinates, then a message about the geocoding failure and the number of locations without coordinates appears above the table. See 'Temporary error geocoding' Message in the troubleshooting section of this documentation for more information.
Troubleshooting Uploads
Here are some common causes of upload error messages:
- The filename contains one or more spaces or special characters. Remove them.
- The content of one or more fields contains a comma but is not enclosed in double quotation marks. You must put a set of double quotation marks (") at the beginning of and at the end of the content of a field if that content includes a comma (for example,
"Bldg 2, Ste 29"in theaddress2field for a location) so that the comma is not mistaken as separating two values. For example, the stringSPJ Publishers,428 Main Stcontains the values for thenameandaddress1fields, each value separated by a comma in this comma-separated values (CSV) file. - The content of one or more fields contains special characters. Remove them.
- The file is not in the CSV format, doesn't have UTF-8 character encoding, or includes the byte order mark (BOM). Open the file in a spreadsheet application to ensure it is in the CSV format with UTF-8 character encoding and without the BOM.
'Header is missing required fields' Error
The message shown in this screenshot appears if the file you uploaded didn't contain all seven of the required attributes in the header row or if any required or optional attribute in the header row contains a typo.
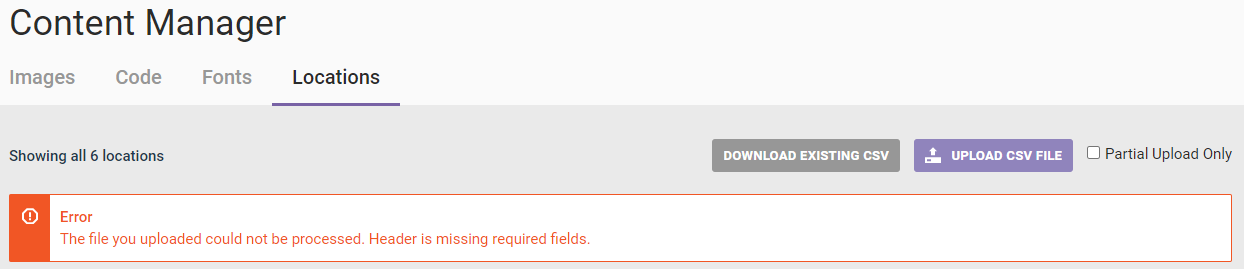
Resolve the issue by correcting the header row, adding the required attributes as necessary, and then uploading the revised file.
'Temporary error geocoding' Message
The message shown in this screenshot appears along with the successful upload message because even though the CSV file uploaded successfully, Google couldn't obtain the longitude and latitude coordinates for any location that was missing that data in the file only when the file includes the latitude and longitude optional headers.
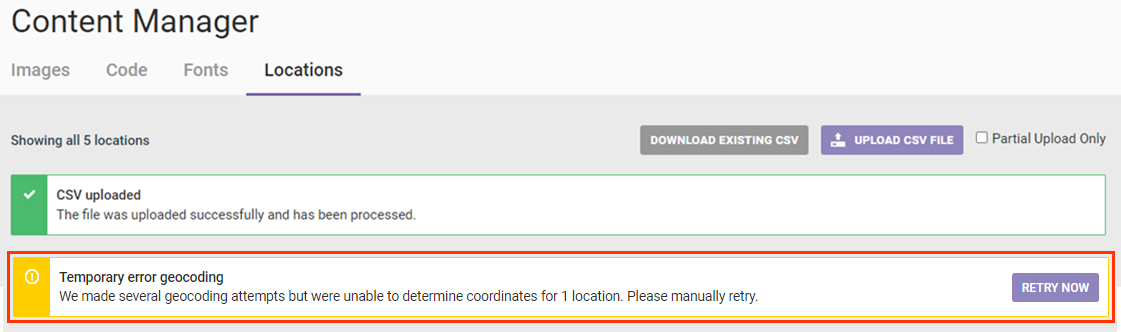
Follow these steps to correct this error.
- Click DOWNLOAD EXISTING CSV.

- Open the file in a spreadsheet application, find the row for the location missing the coordinates, and then verify that all parts of its address are correct. Repeat this step for each location missing coordinates as necessary.
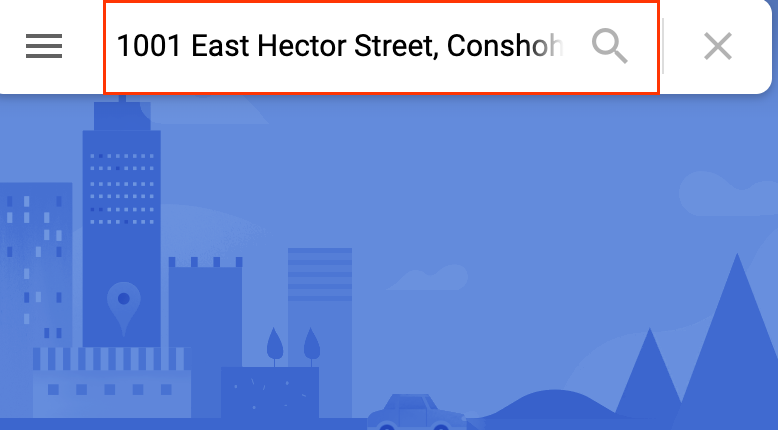
- Load Google Maps in a new browser window or tab.
- Copy and paste the location's address into the search box, and then click the magnifying glass icon.
- Right-click the pin icon marking the location on the map, and then click the coordinates that appears at the top of the contextual menu to copy them to the clipboard.
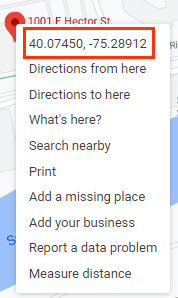
- Paste the first number of the pair into the location's
latitudecell in the locations list spreadsheet, and then paste the second number into thelongitudecell. Save the changes to the CSV file. - As necessary, repeat steps 4 through 6 for each location missing its coordinates, and then close the file.
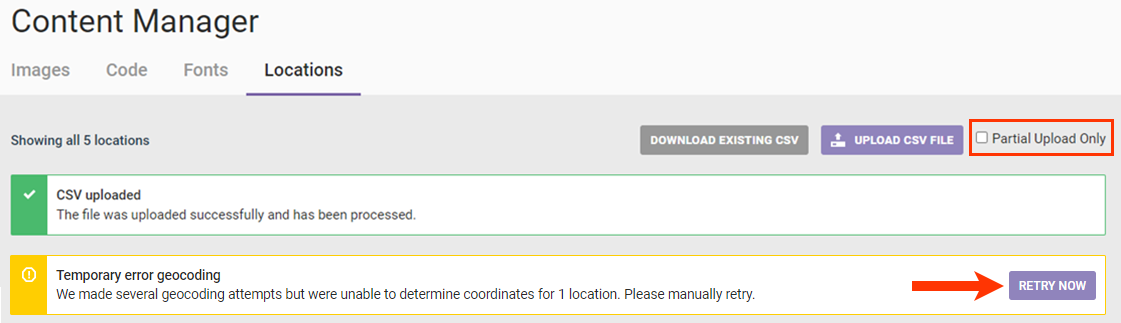
- On the Locations tab of Content Manager, select Partial Upload Only, and then click RETRY NOW to upload the revised file.
So long as you made no mistakes when copying and pasting the latitude and longitude coordinates from Google Maps into their respective fields in the CSV file, the platform will update the table with the additional coordinates information and display the successful upload message.
Unexpected Results When Updating the List
You may update the locations list for these reasons:
- Add locations
- Remove locations
- Add tags
- Remove tags
- Update a location's information
When you upload a revised CSV file, the platform compares the values for each location as defined by the value of internal_id in that file to the existing values for each existing location and then updates the list accordingly:
- If the values for a location in the file match the values for a location in the platform, then no changes are made.
- If any value for a location in the file differs from the value in the platform, then the value in the file overwrites the value in the platform.
- If the file does not include a location that is in the platform, then that location is removed from the platform.
- If the file includes a location that is not in the platform, then that location is added to the platform.
To better ensure the update you aim to perform ends with the results you expect, download the most recent file uploaded to the platform and revise it rather than revising a file you have stored elsewhere. This method can at least ensure you're working with the same data the platform contains for the locations in the list.
Unexpected Impact to Experiences When Updating the List
Updating the location list can impact active experiences because the data changes can expand or contract the targeted audience that can subsequently, depending on the circumstances, benefit your company or skew the experience results.
Perhaps the update added the retail tag to more locations. Meanwhile, an ongoing experience uses the WHO target Distance to many locations configured to show a different landing page to those site visitors within 25 miles of any location tagged retail.
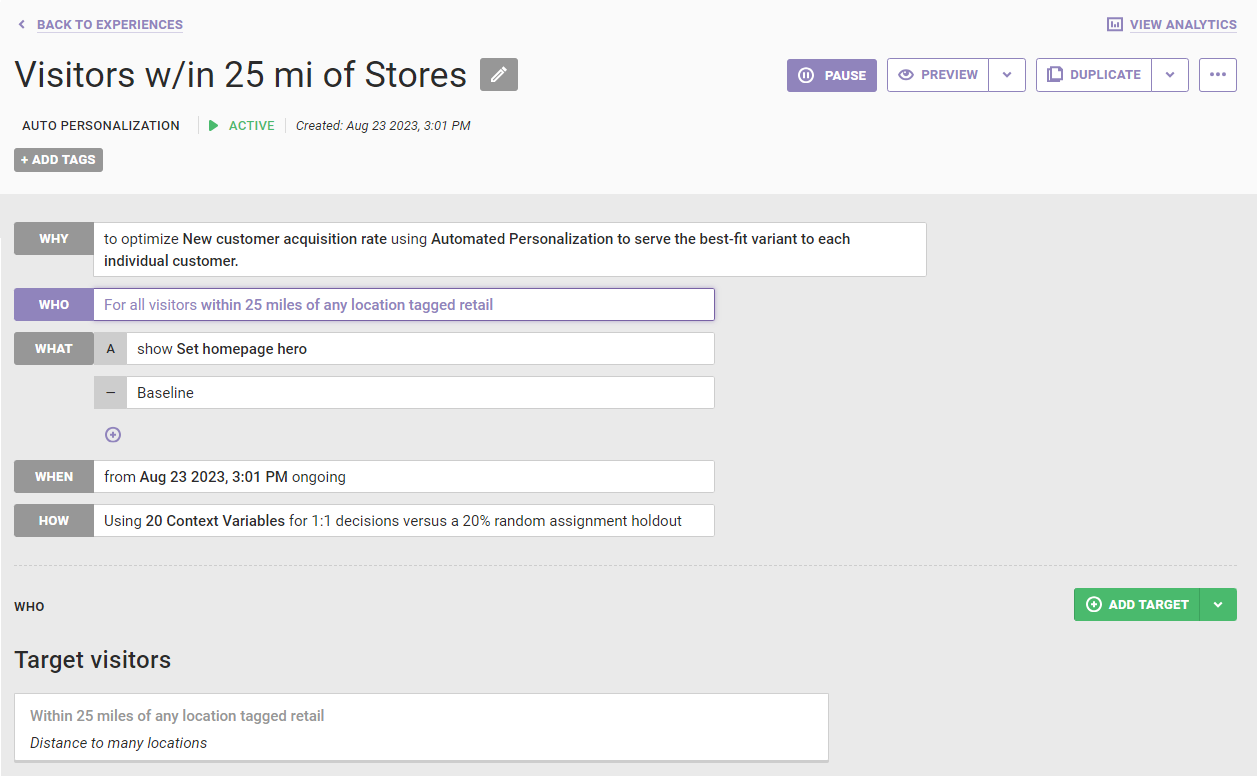
When more list locations gained the retail tag, the active experience could consequently target more site visitors who are within 25 miles of the larger pool of locations with the retail tag.
Consider another example. You need to update the latitude and longitude for your company's lone retail location in San Francisco because it moved to a larger space 10 blocks away. However, an active experience just so happens to target customers based on their distance from the San Francisco store.
In this type of situation, you can update the location list with the new address and geographic coordinates for the San Francisco store while the experience is running. Next, pause the experience, duplicate it, and then activate the duplicated experience. If you do not start a new experience, the original experience continues, still using the outdated latitude and longitude coordinates.