Follow these steps to create a customer dataset.
- Click Datasets in the left-hand navigation, and then select Customer Data.
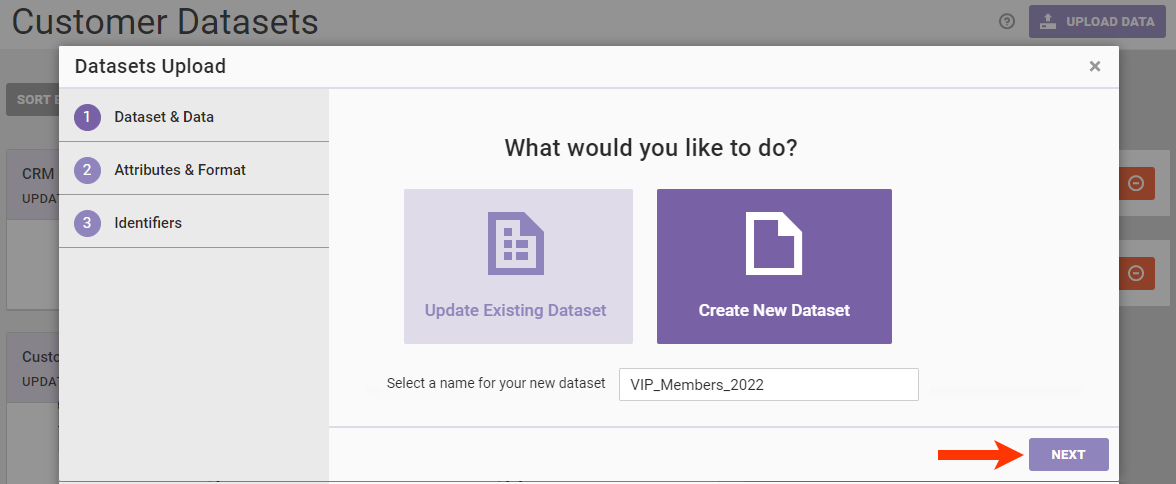
- Click UPLOAD DATA.

- Click Create New Dataset, give the new dataset a name, and then click NEXT.
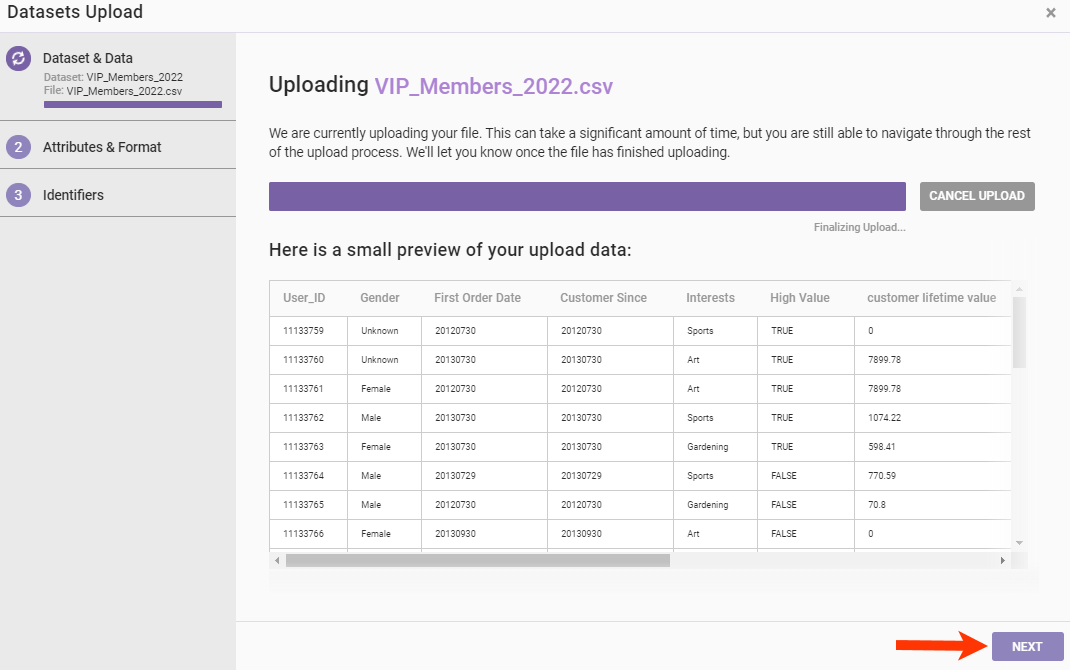
- Drag and drop into the Datasets Upload wizard the file you want to upload, and then review the schema generated to ensure all the column headers are present and correct. Click NEXT if the schema preview is correct, or click CANCEL UPLOAD to exit the wizard if you find errors.
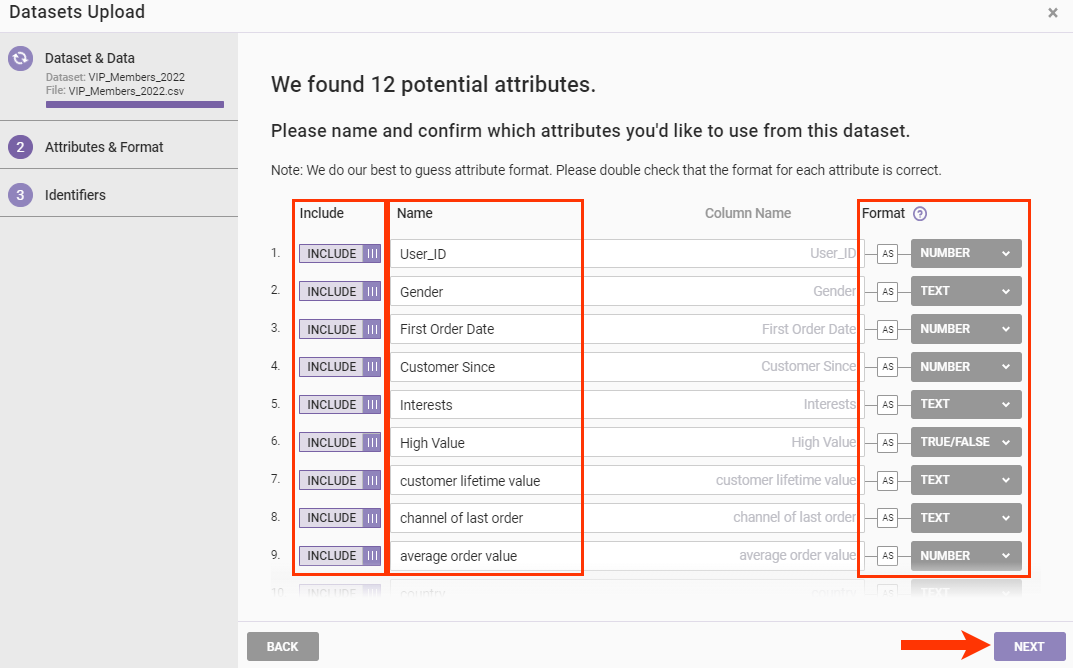
- Confirm that the information for each attribute is correct, and then click NEXT. You can optionally take these actions:
- Edit the attribute's name that appears on the new dataset's details page if you don't want it to match its field name as it appears in the column header of the CSV file.
- Toggle INCLUDE to EXCLUDE if you don't want an attribute to be part of the dataset.
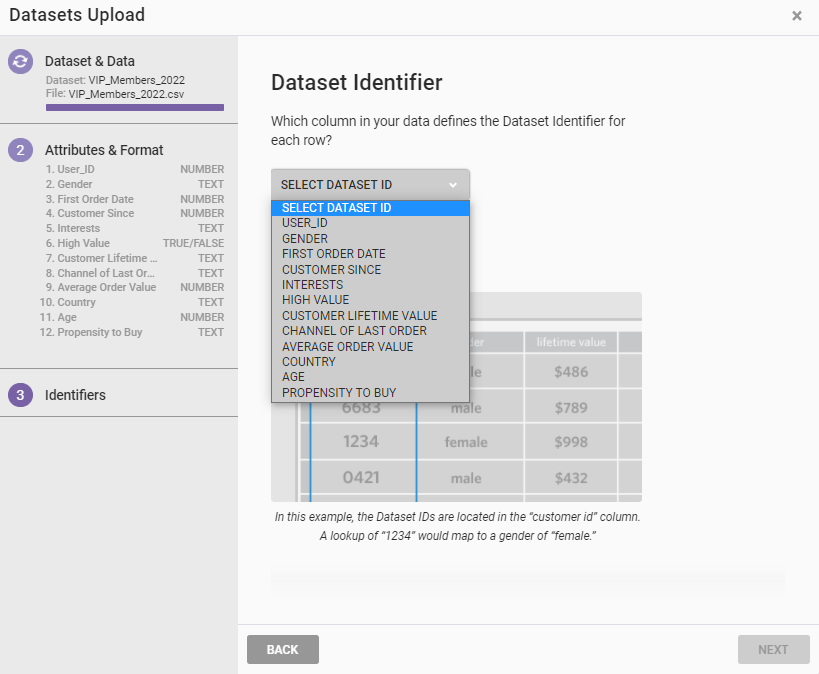
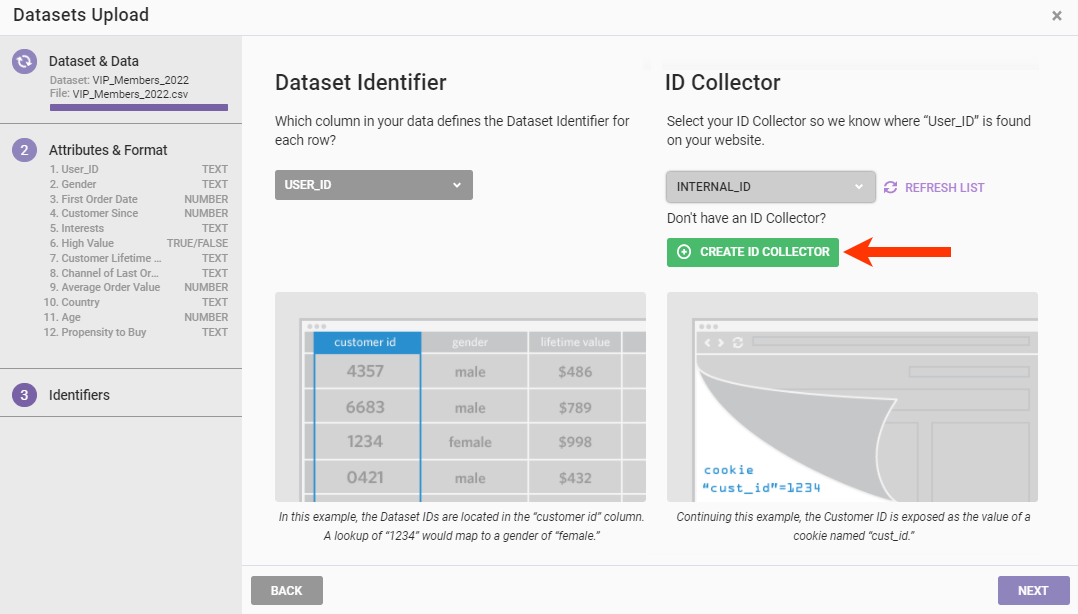
- Choose from Dataset Identifier the attribute that captures the customer ID or other unique ID used to identify visitors.
- Select the ID Collector that stores a visitor's customer ID and then click NEXT. If the ID Collector isn't listed, click CREATE ID COLLECTOR to create it, and then follow the steps in Setting Up an ID Collector in this documentation.

- Confirm all the information on the summary screen is correct, and then click FINISH.
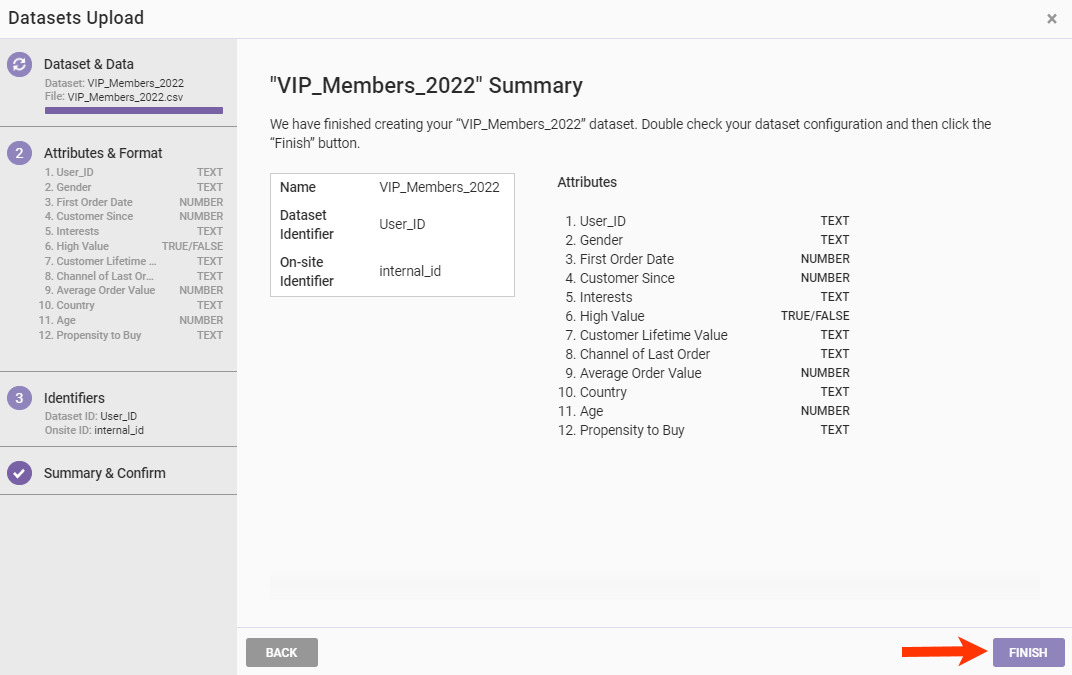
After the file upload is complete, you can find an entry for the new dataset on the Customer Datasets list page, from which you can access its details page.
Refer to Customer Dataset Details Page for more information.
Setting Up an ID Collector
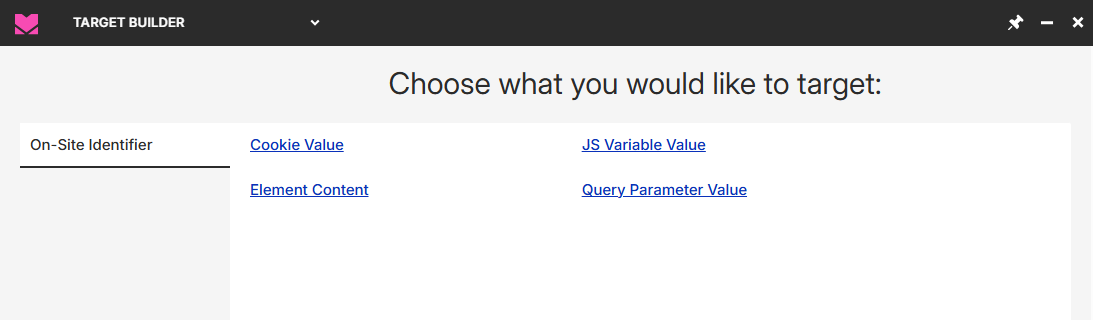
The ID Collector allows Monetate to remember your customers for future targeting and segmentation. Follow these steps to create one using Target Builder.
- Click CREATE ID COLLECTOR.
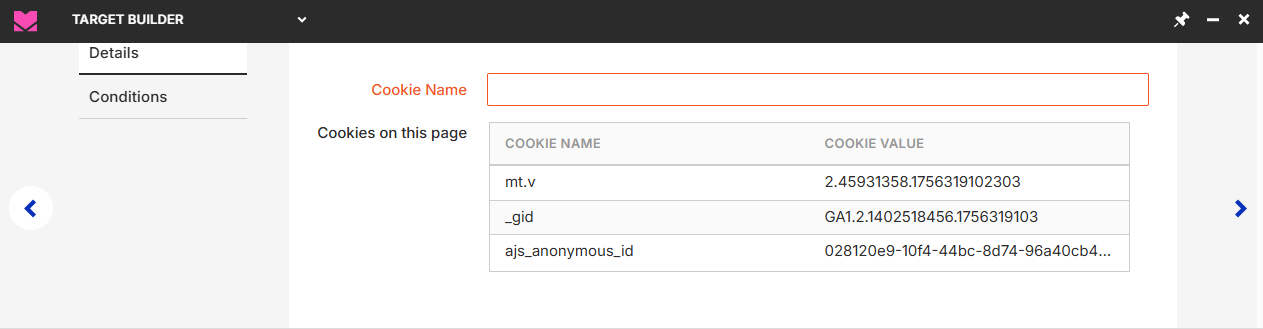
- Click the target type you want to use for the collector. You can create it based on a cookie value, the content of an HTML element, the value of a JavaScript variable, or a query parameter value.
- Select the element or input the cookie name, JavaScript variable name, or the query parameter name, depending on the target type. When you're finished, click the forward arrow.
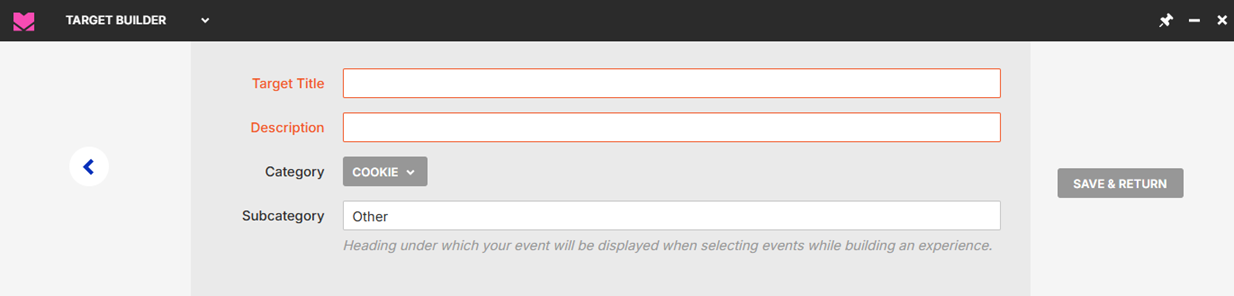
- Name the ID Collector target, and then enter a description. Click SAVE & RETURN to return to the Datasets Upload wizard.
You can now select in the wizard the ID Collector that you just built so that you can then continue creating the dataset.