The Automated Personalization algorithm shows the right content to each customer on your site. It's most effective when you have the time to allow the Automated Personalization experience to complete a state of learning.
Exploration and Exploitation
The Automated Personalization experience is an online learning solution that begins with no assumptions about behavior on your site. It leverages observations to learn what experiences are best for each individual based on each person's unique context.
The Automated Personalization algorithm balances two concepts: exploration and exploitation. This means Monetate serves variants early in the experience across all individuals with different context variables. The result is that the Personalization Engine collects observational data about how visitors with different context behave against each of the variants in this experience. The collection phase is called exploration. If there are observations that statistically demonstrate better performance, the algorithm begins to exploit this learning. The Automated Personalization algorithm always balances and intermixes exploration (learning) and exploitation (performing or targeting).
Creating an Automated Personalization Experience
Follow these steps to create an Automated Personalization experience.
- Click EXPERIENCES in the top navigation bar and then click Web.

- Click CREATE EXPERIENCE.

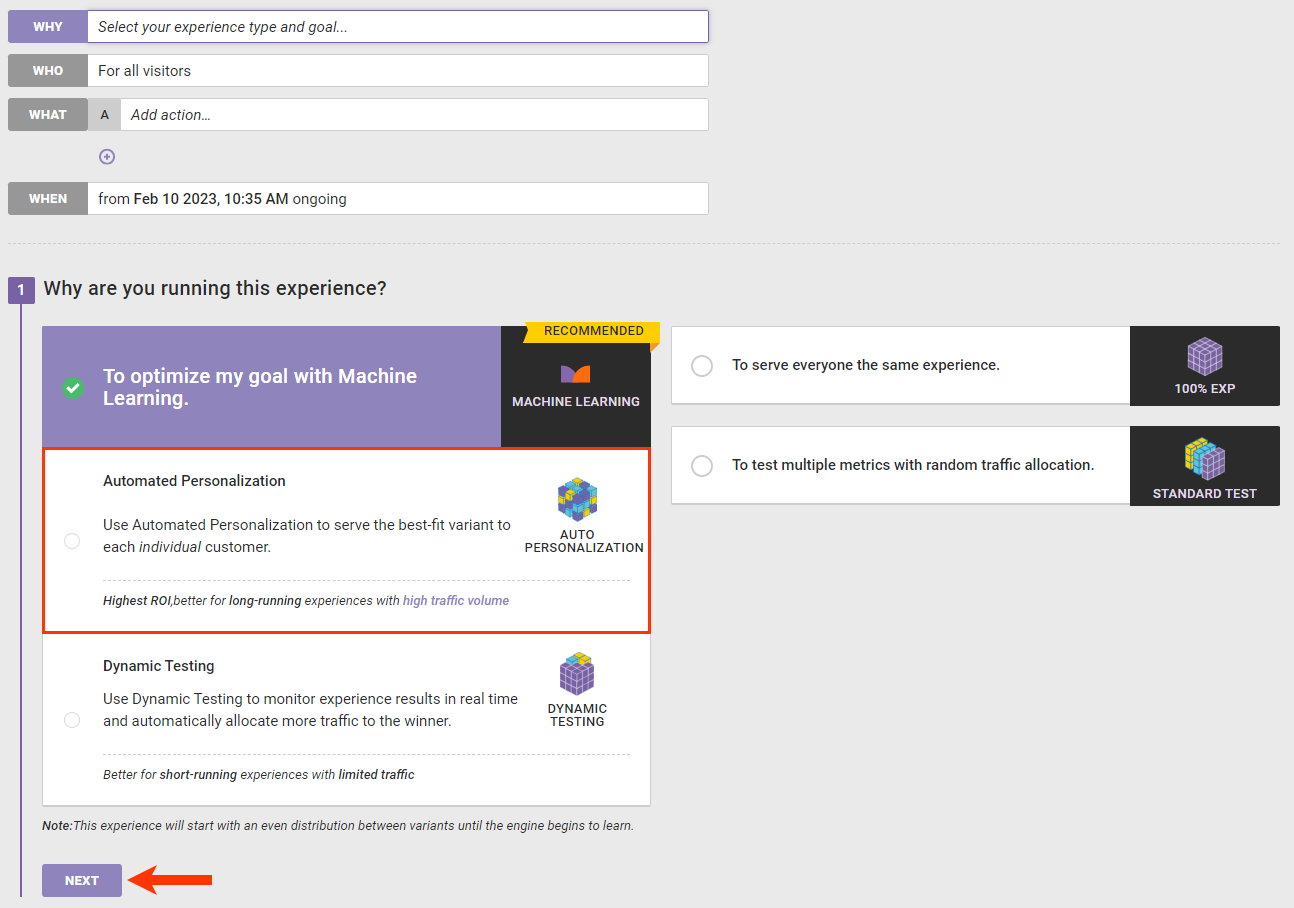
- Configure the WHY settings.
- Click WHY, select Automated Personalization, and then click NEXT.
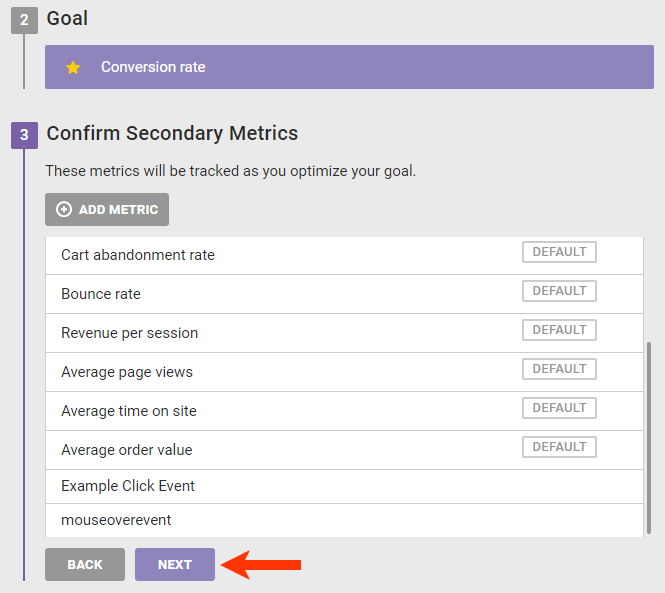
- Select the goal metric you want to optimize with this experience, and then click NEXT.

- Select any secondary metrics that you want to track with the Automated Personalization experience, and then click NEXT.
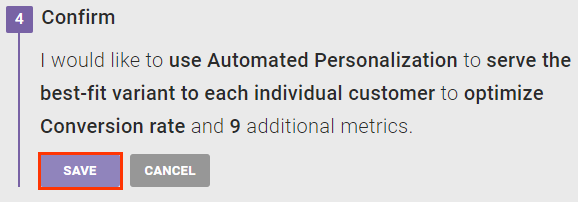
- Verify that you have configured the WHY settings properly, and then click SAVE.
- Click WHY, select Automated Personalization, and then click NEXT.
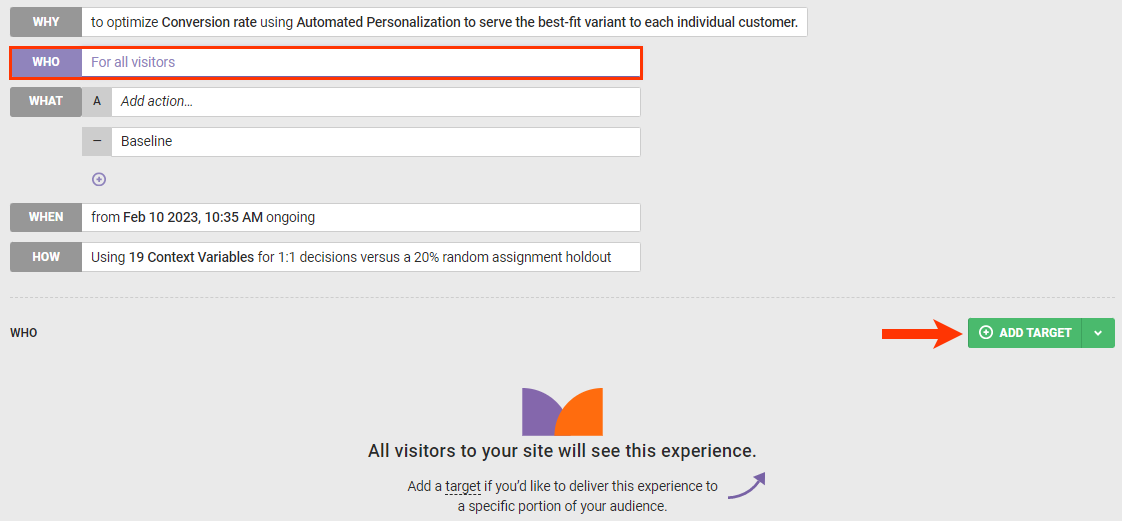
- Configure the WHO settings as necessary if you need to narrow the target audience for the experience. See Configure the WHO of a Web Experience for the steps.
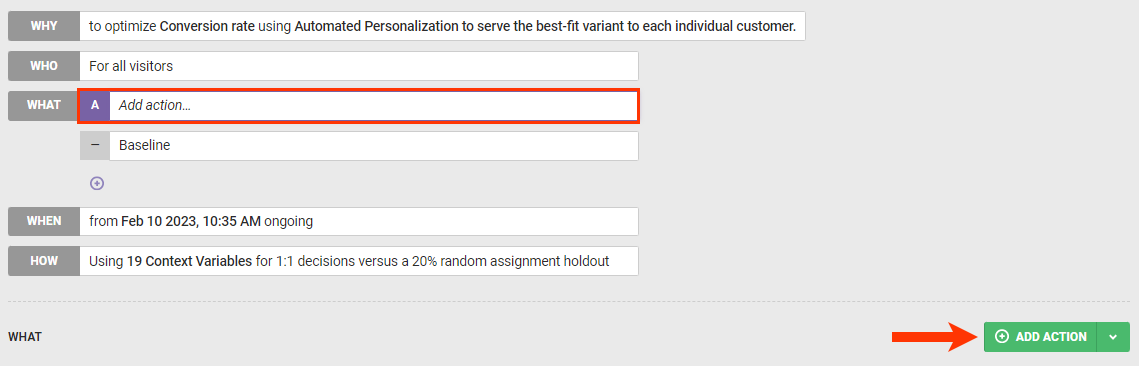
- Configure at least one action for the WHAT settings. See the Building Actions category of the knowledge base to learn more about action options.
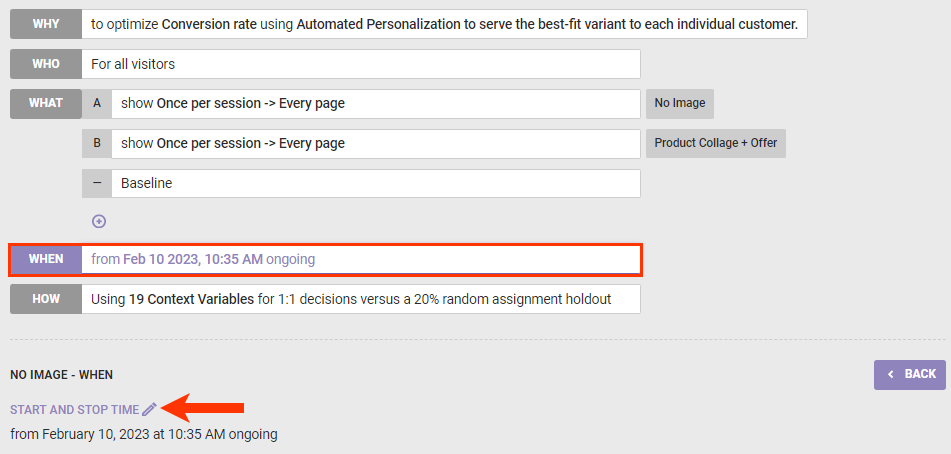
- Configure the WHEN settings as necessary to define when and for how long the experience should run. See Configure the WHEN of a Web Experience for the steps.
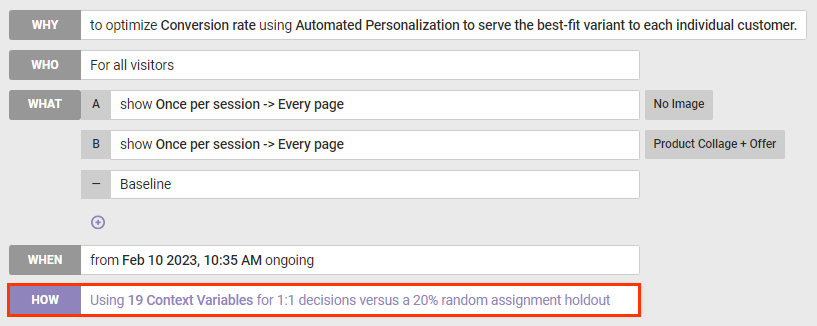
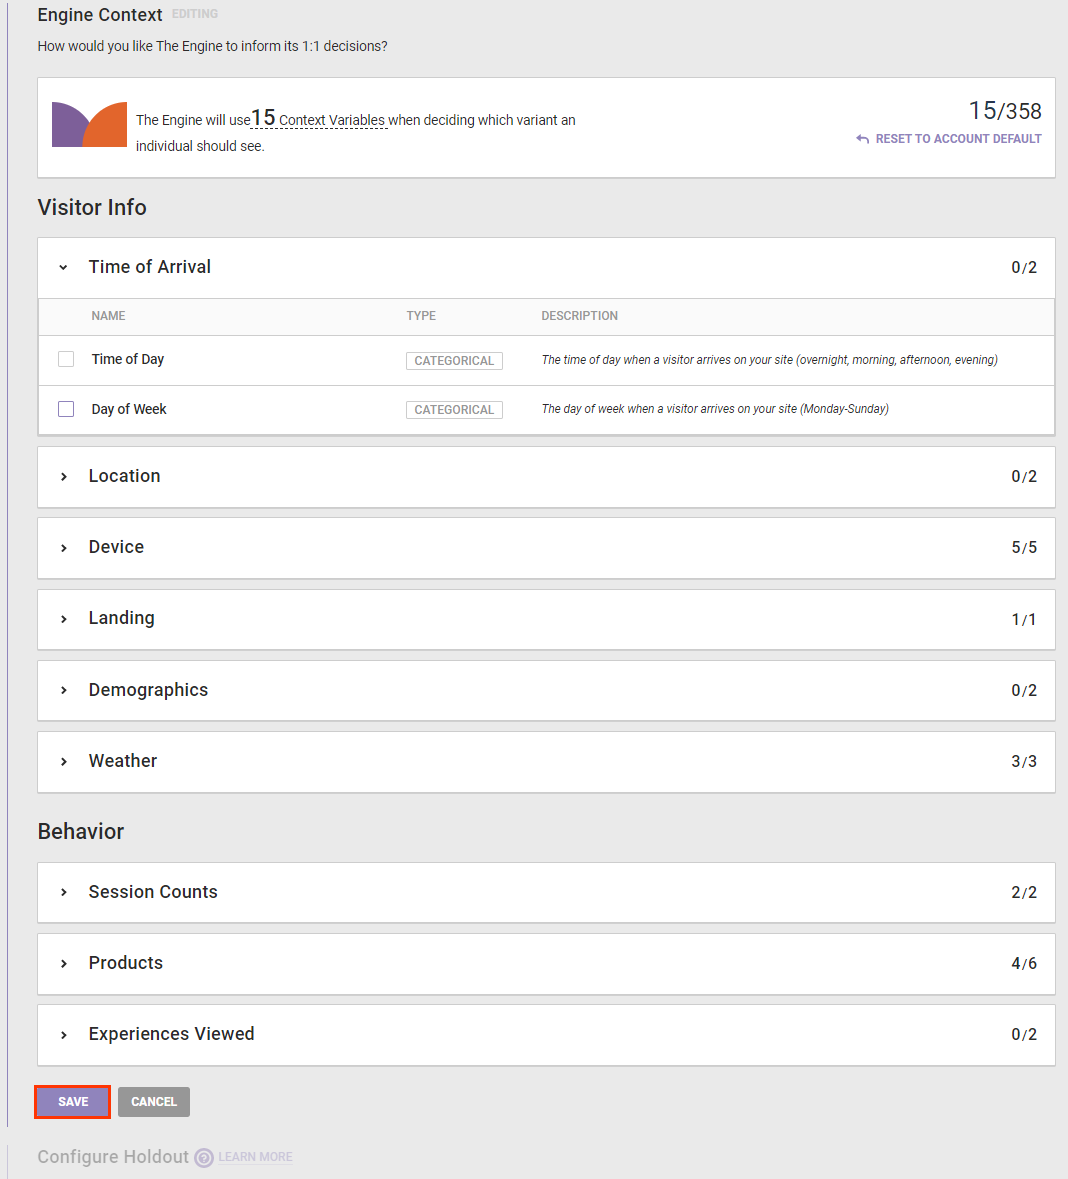
- Configure the HOW settings as necessary if you need to customize the context variables and traffic assignment percentages.
- Click HOW.
- Click EDIT for the Engine Context section.
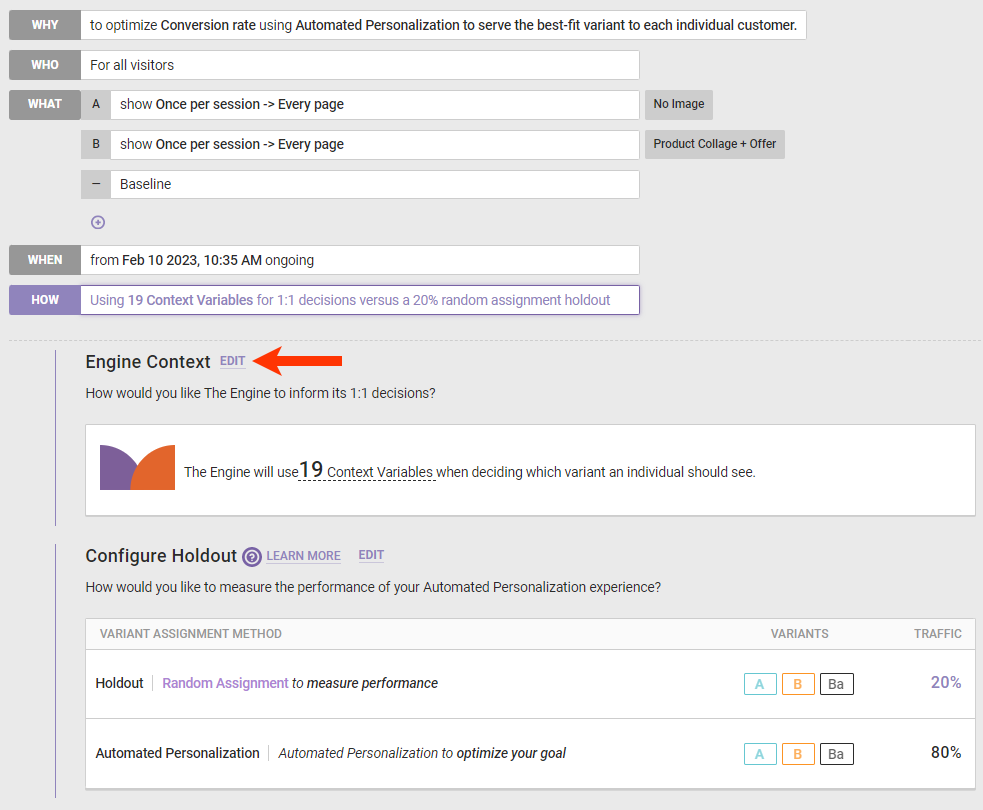
- Expand the context category that you want to edit, and then click to select or deselect the context variable(s) you want to add or remove from the experience. See Configure Engine Context for more information about these variables.
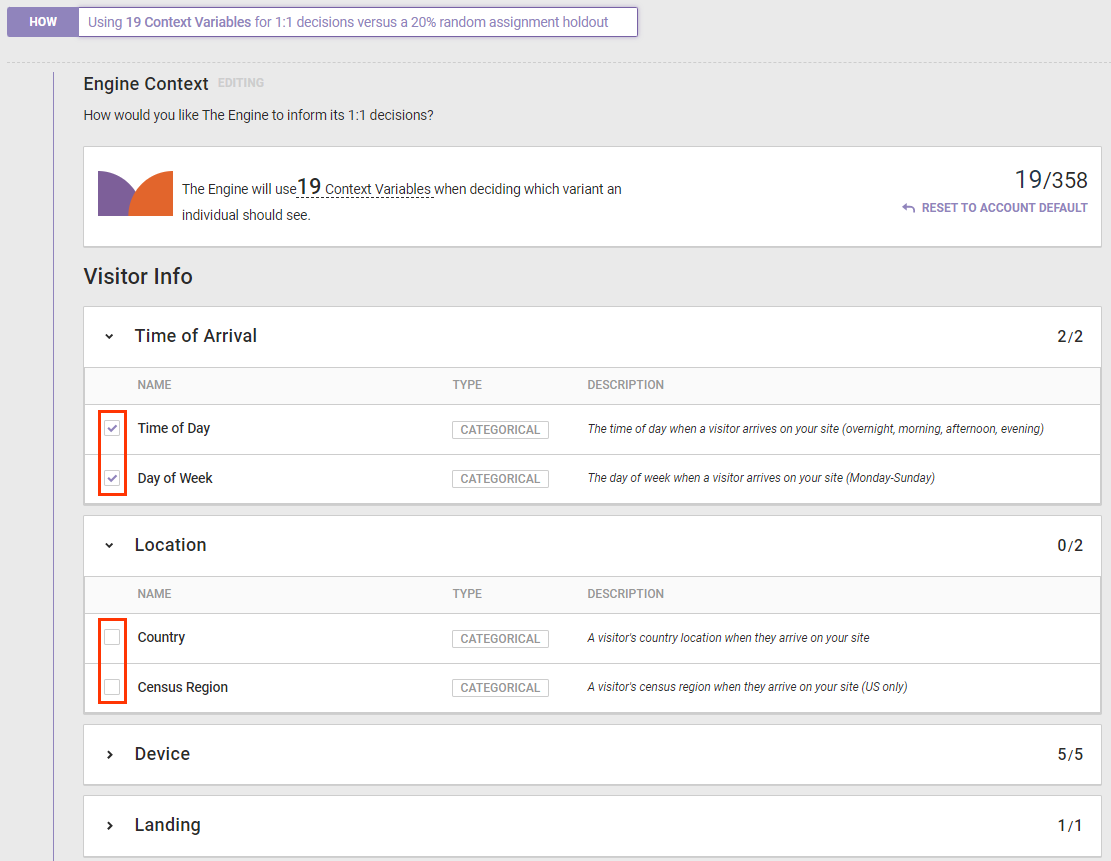
- Click SAVE.
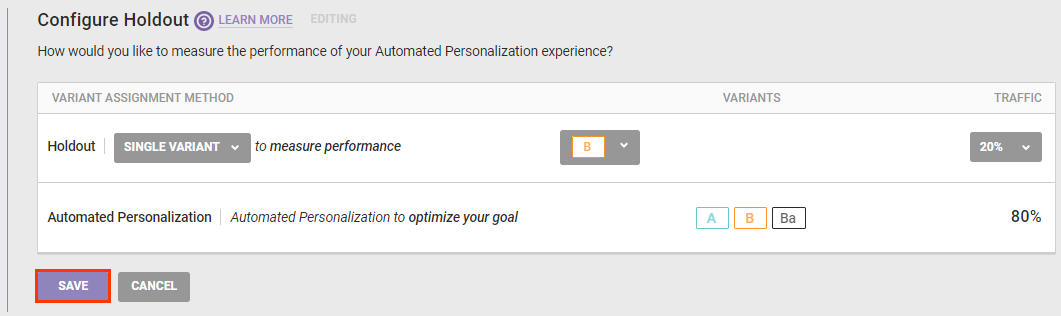
- Click EDIT for the Configure Holdout section.

- Optionally, change the holdout type. Click Random Assignment, select Single Variant Holdout, then select which variant should be assigned the holdout traffic, and then select what percentage of the traffic you want assigned to the holdout.
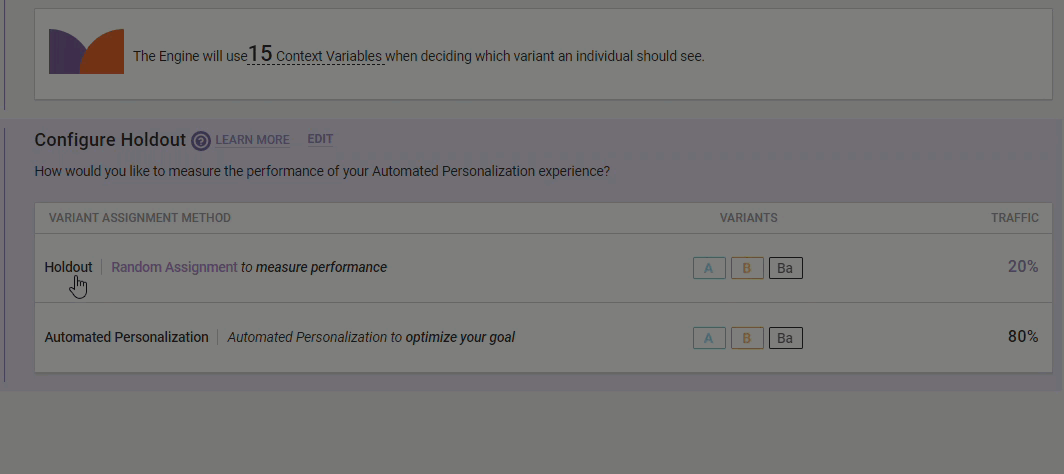
- Click SAVE.
- Click HOW.
- Click PREVIEW and then select the option that corresponds to the variant you want to preview and if you want to preview it alone or with all other active experiences. See Activate an Experience for Preview and Testing for more information.

- Click ACTIVATE to deploy the experience to your site as determined by the WHEN configuration.

Refer to Experience Priority and Enable Auto-Promotion for Experiences for more information about how experiences are prioritized.