You may find it necessary to update a Customer Attributes dataset, perhaps with more customers with actionable data or with new information about the customers already captured in the dataset.
The type of update you need to perform determines the method(s) available for accomplishing the task.
Updating or Adding Rows
Perhaps you need to update the values that appear in the recently_viewed_products attribute in a dataset for customer IDs (cust_id) 111 and 115. Therefore, you need to update the rows for those two customer IDs, which you can accomplish through a partial update.

Maybe instead of updating attribute values, you need to add data for customers with the IDs 116, 117, and 118. Each customer ID represents a new row, which you can upload to the dataset through a partial update.

If you need to add or replace rows of customer information within a dataset, you can perform a partial update through the Data API, via SFTP, or using the Upload Data wizard in the platform.
For more information about using the Data API for an update, refer to Update a Customer Attributes Dataset via the Data API. See Update a Customer Attributes Dataset via SFTP for more information about using an account's specific SFTP setup to send an update.
When using the Upload Data wizard to add or update rows in a product catalog dataset, you can either drag and drop a file directly into the wizard, or you can input a URL to a dataset file that you store on Amazon S3. Regardless of which of these two upload options you select, the file that you use must be in the CSV or TSV format.
Uploading a File Directly
Follow these steps to add rows to or update existing rows in a Customer Attributes dataset by uploading a file directly to the Monetate platform.
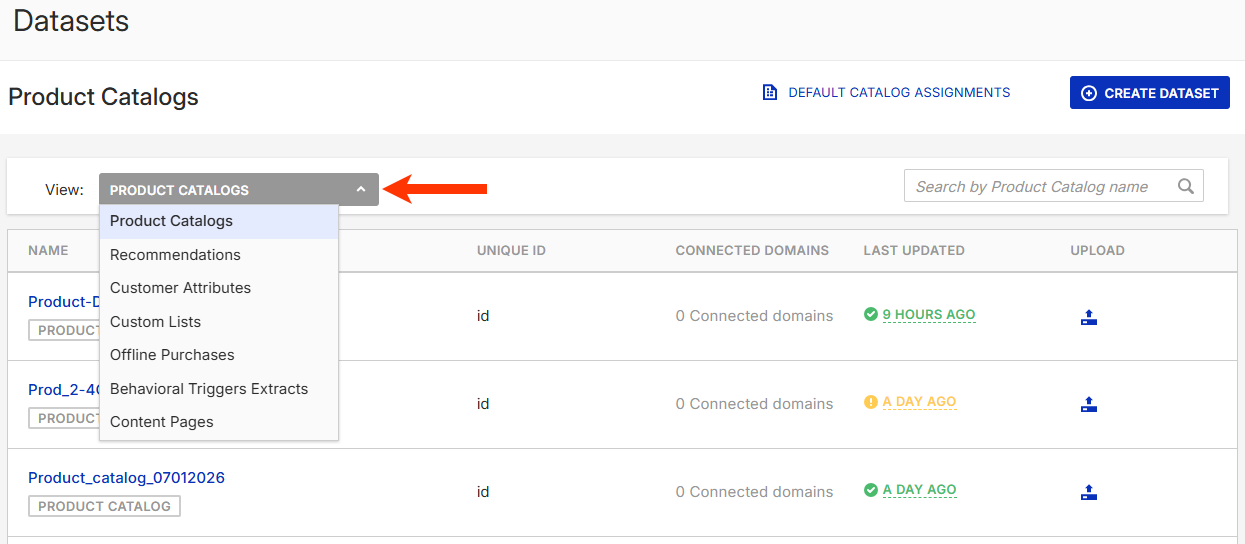
- Click Datasets in the left-hand navigation, and then select Customer Attributes from View on the Datasets list page.
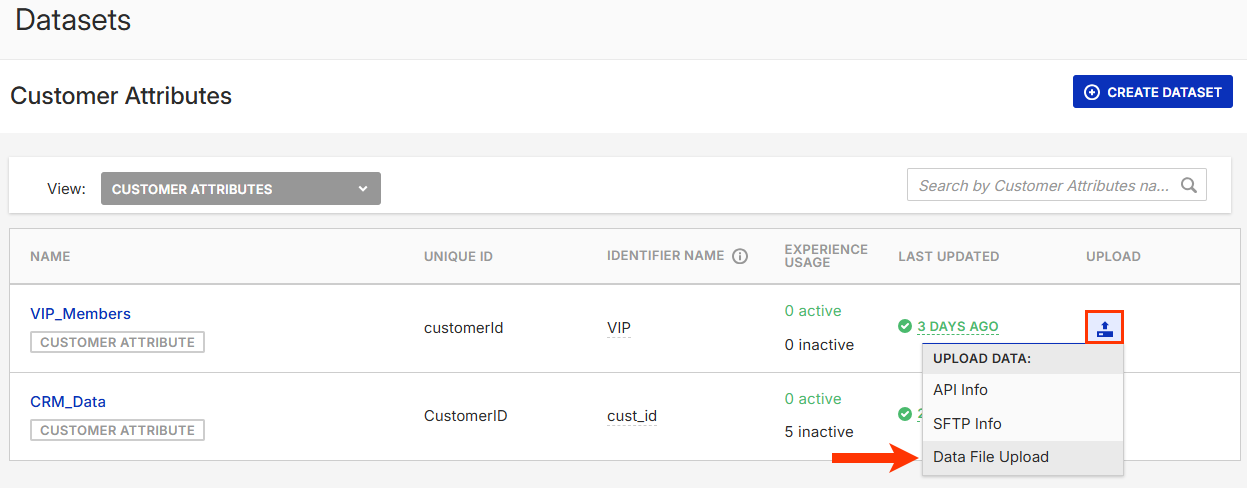
- Find the Customer Attributes dataset that you want to update, click the upload icon for its entry, and then select Data File Upload.
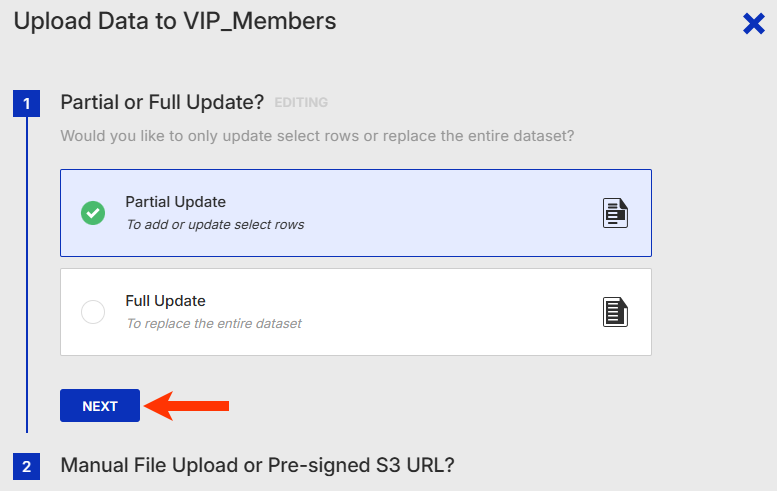
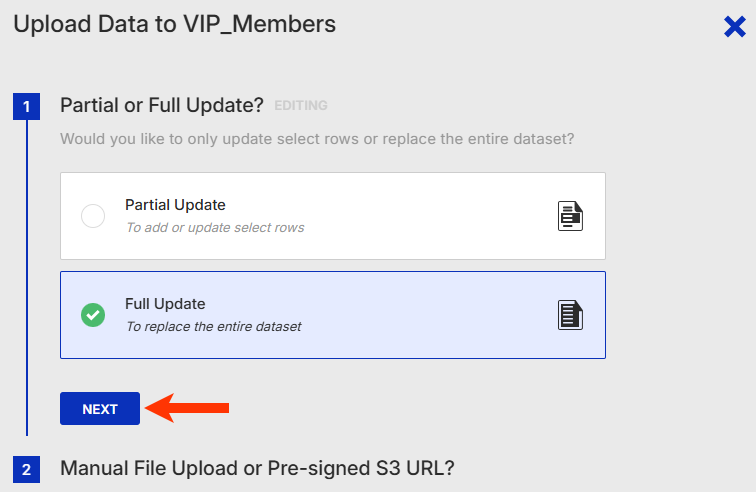
- Select Partial Update and then click NEXT.
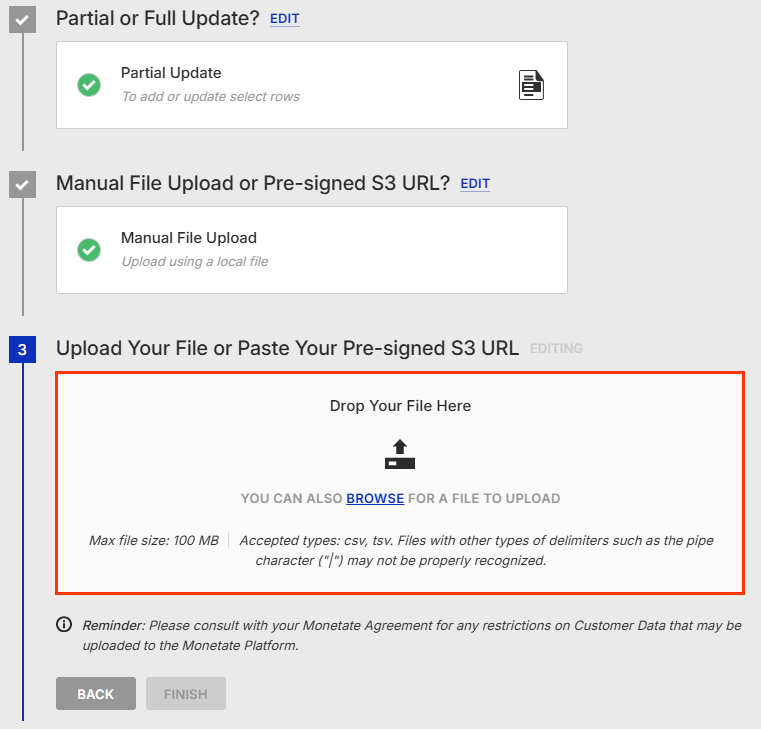
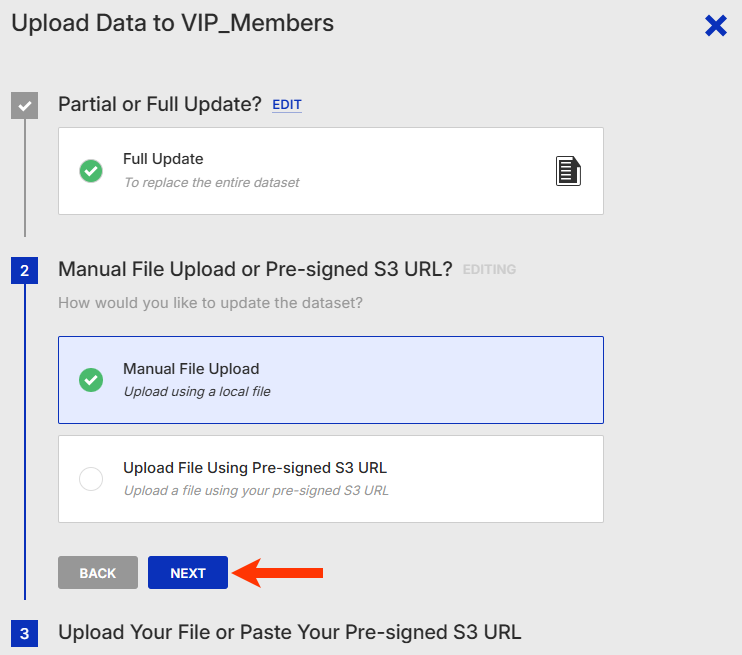
- Select Manual File Upload and then click NEXT.

- Drag and drop the file into the wizard.
Monetate ingests the file and closes the Upload Data wizard. When the dataset's Update History tab loads, a message briefly appears that informs you that the file was successfully uploaded. Additionally, PENDING appears where the timeframe of the last update normally appears.
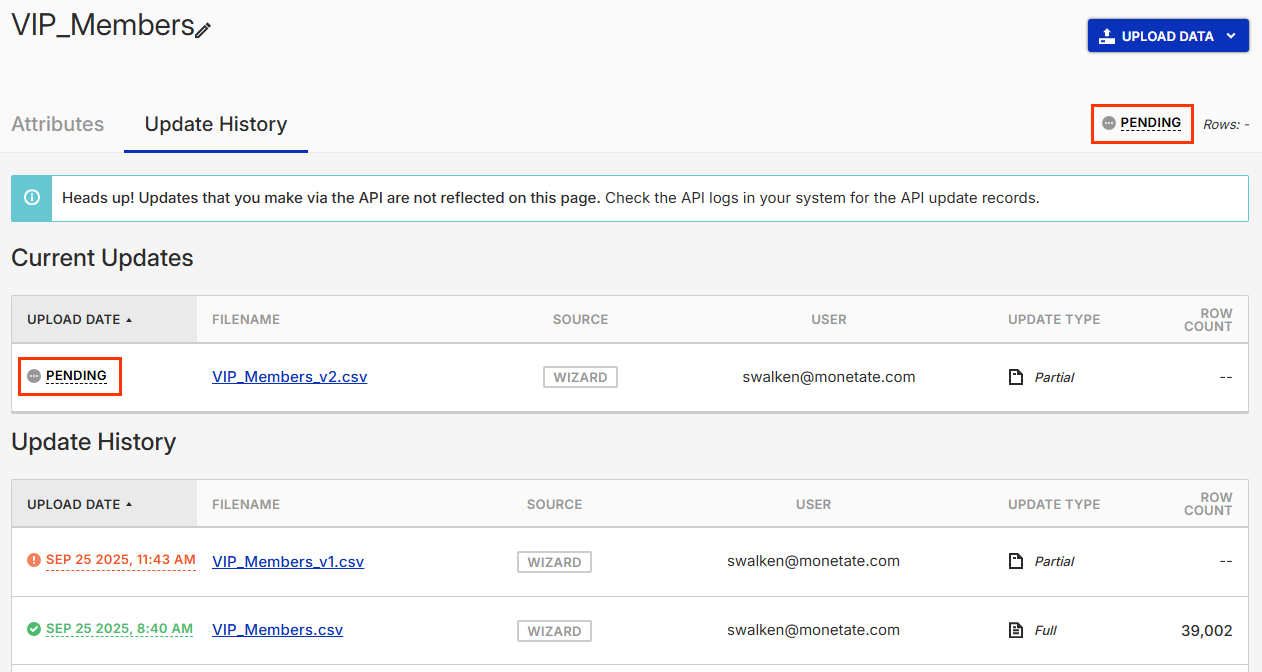
If the file failed to upload or the platform encountered other errors, you see messages indicating the problem. See Failed Updates in this documentation for more information.
Uploading a File Using an Amazon S3 URL
Follow these steps to add rows to or update existing rows in a product catalog by uploading a dataset file using an Amazon S3 pre-signed URL.
- Generate the pre-signed URL for the file you want to upload.
- Click Datasets in the left-hand navigation, and then select Customer Attributes from View on the Datasets list page.
- Find the Customer Attributes dataset that you want to update, click the upload icon for its entry, and then select Data File Upload.
- Select Partial Update and then click NEXT.
- Select Upload File Using Pre-signed S3 URL, and then click NEXT.

- Paste the Amazon S3 URL into the field, and then click FINISH.

The Upload Data wizard closes and Monetate ingests the file. When the dataset's details page loads, a message briefly appears that informs you that the file was successfully uploaded from the Amazon S3 URL. Additionally, PENDING appears where the timeframe of the last update normally appears.

If the file failed to upload or the platform encountered other errors, you see messages indicating the problem. See Failed Updates in this documentation for more information.
Updating Attributes
Perhaps the dataset update you need to perform entails adding information about whether or not each customer made a purchase in the last month. That information is captured in the purchased_in_last_month attribute, which currently the dataset doesn't include.

Whether you need to add one or multiple attributes to a Customer Attributes dataset, you have two options to accomplish this task:
- Send a full file update using the Data API
- Use the Add Attribute modal accessible from the dataset's details page
Using the Add Attribute Modal
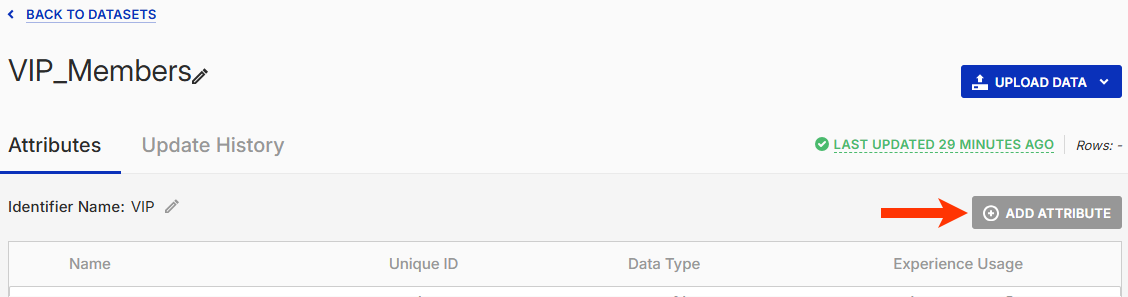
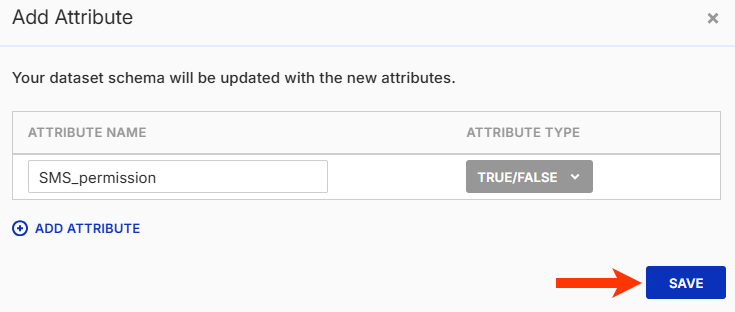
Follow these steps to add an attribute to a Customer Attributes dataset's schema.
- Navigate to the dataset's details page.
- Click ADD ATTRIBUTE on the Attributes tab.
- Type the new attribute's name into ATTRIBUTE NAME.
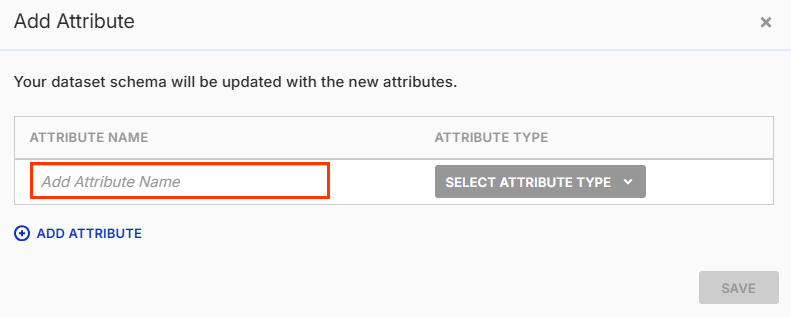
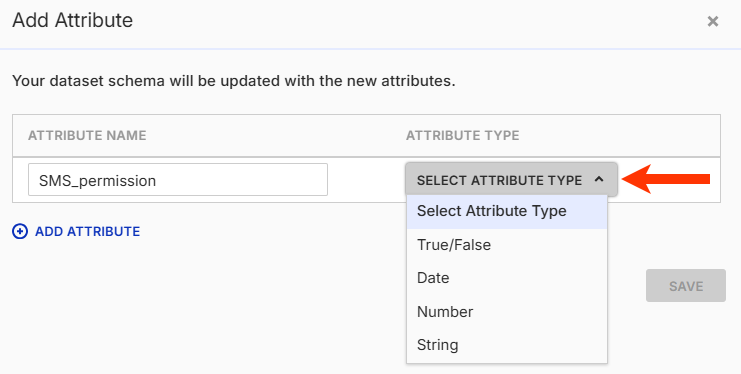
- Select the new attribute's data type from ATTRIBUTE TYPE.
- If necessary, click ADD ATTRIBUTE to generate another set of fields for another attribute, and then repeat steps 3 and 4 for the additional new attribute.
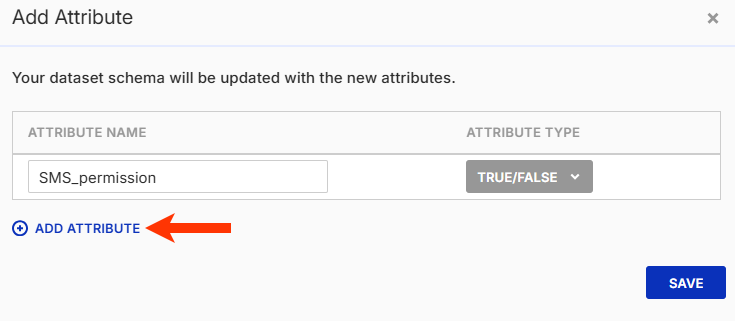
- Click SAVE.
The new attributes appear at the bottom of the table. There is no indication the new attributes have no data associated with them.
Because the new attributes now exist within the dataset schema in the platform, you must perform a partial update with a file that contains values for them. Refer to Updating or Adding Rows in this documentation for more information about partial updates.
Removing Attributes
If you need to remove attributes from a Customer Attributes dataset, then you can upload a full file update using the Upload Data wizard within the platform.
Even though removing attributes from a dataset rebuilds the dataset schema, you must ensure the full update still matches the order of attributes in the existing schema. Furthermore, you cannot revise the data type for any existing attributes
When using the Upload Data wizard to remove attributes, you can either drag and drop a file directly into the wizard, or you can input a URL to a dataset file that you store on Amazon S3. Regardless of which of these two upload options you select, the file that you use must be in the CSV or TSV format.
Uploading a File Directly
Follow these steps to remove one or more attributes by uploading a dataset file directly to the Monetate platform.
- Click Datasets in the left-hand navigation, and then select Customer Attributes from View on the Datasets list page.
- Find the Customer Attributes dataset that you want to update, click the upload icon for its entry, and then select Data File Upload.
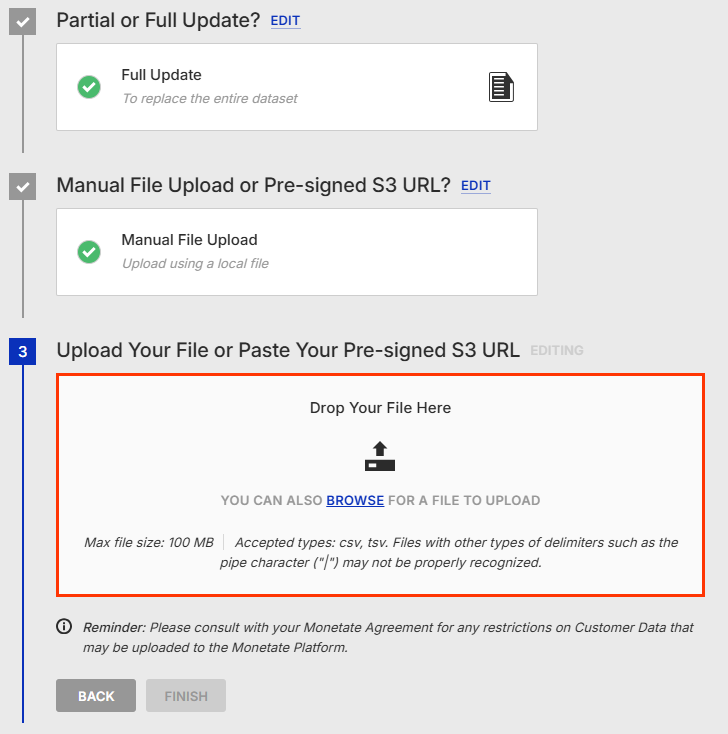
- Select Full Update and then click NEXT.
- Select Manual File Upload, and then click NEXT.
- Drag and drop the file into the wizard.
Monetate ingests the file and closes the Upload Data wizard. When the dataset's details page loads, a message briefly appears that informs you that the file was successfully uploaded. Additionally, PENDING appears where the timeframe of the last update normally appears since the update is in progress.

If the file failed to upload or the platform encountered other errors, you see messages indicating the problem. See Failed Updates in this documentation for more information.
Uploading a File Using an Amazon S3 URL
Follow these steps to remove one or more attributes by uploading a dataset file using an Amazon S3 pre-signed URL.
- Generate the pre-signed URL for the file you want to upload.
- Click Datasets in the left-hand navigation, and then select Customer Attributes from View on the Datasets list page.
- Find the Customer Attributes dataset that you want to update, click the upload icon for its entry, and then select Data File Upload.
- Select Full Update and then click NEXT.
- Select Upload File Using Pre-signed S3 URL, and then click NEXT.
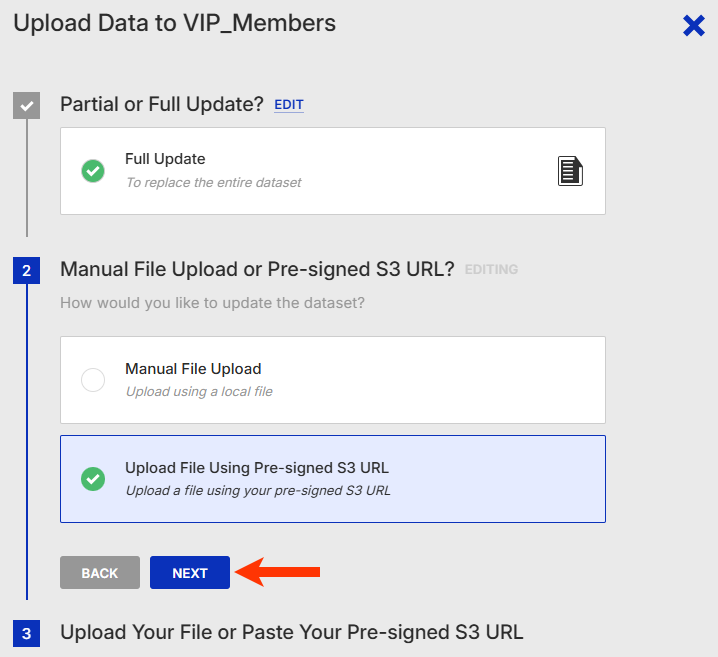
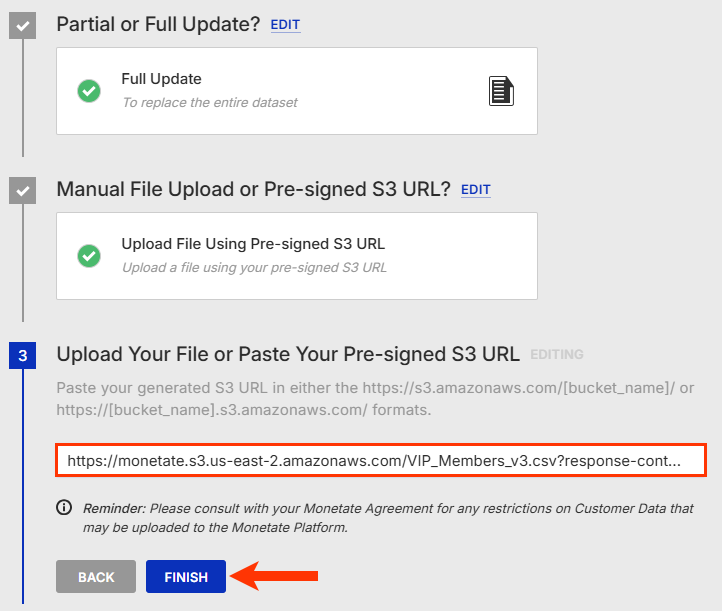
- Paste the Amazon S3 URL into the field, and then click FINISH.
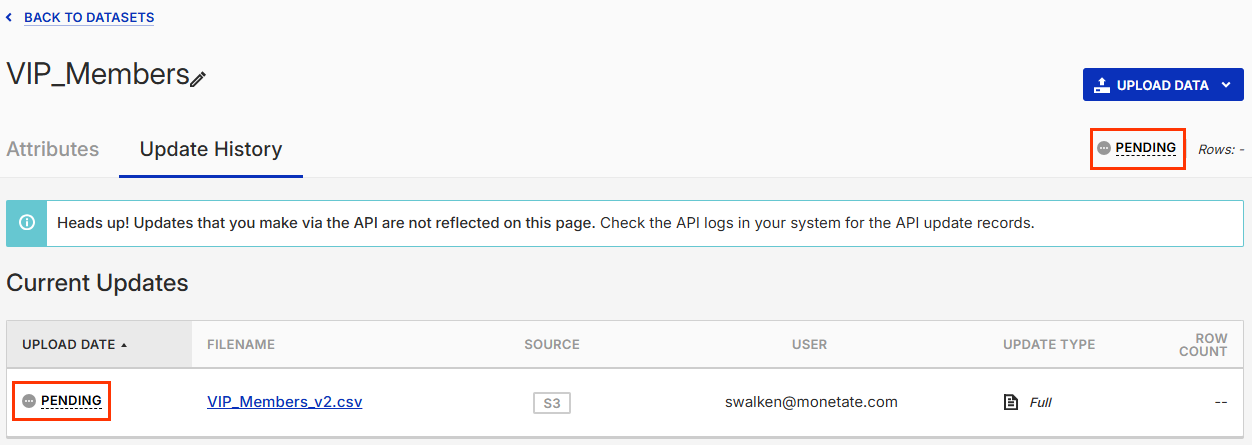
The Upload Data wizard closes and Monetate ingests the file. When the dataset's details page loads, a message briefly appears that informs you that the file was successfully uploaded from the Amazon S3 URL. Additionally, PENDING appears where the timeframe of the last update normally appears.
If the file failed to upload or the platform encountered other errors, you see messages indicating the problem. See Failed Updates in this documentation for more information.
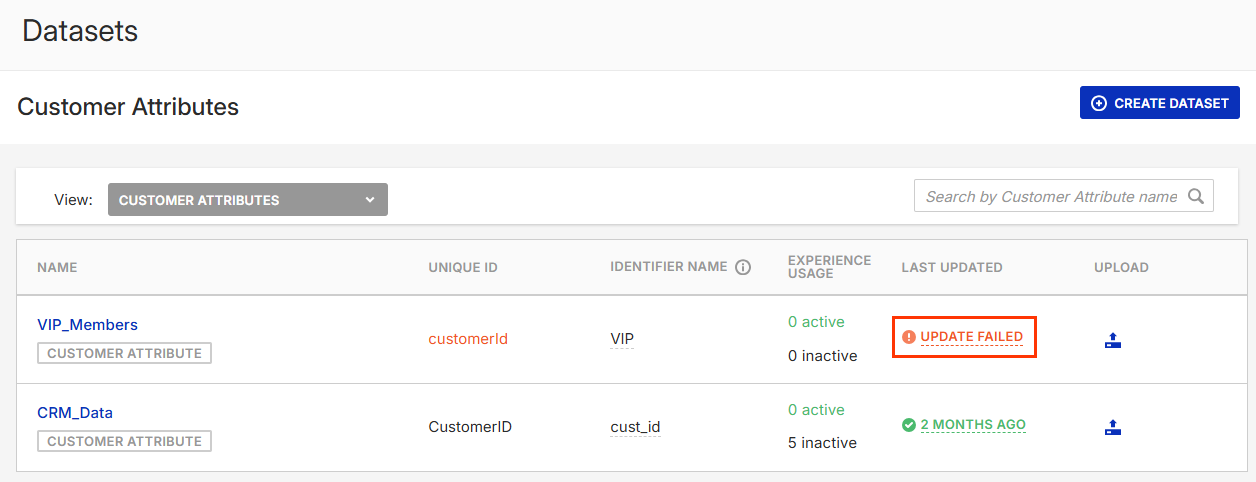
Failed Updates
If the platform encounters an error with the update, you see UPDATE FAILED in multiple places within the platform:
- In the LAST UPDATED column for the dataset's entry on the Customer Attributes view of the Datasets list page
- In place of the last update's timeframe on the dataset's details page, and the exact date and time of the failed update appears in red in the UPLOAD DATE column of the Update History table
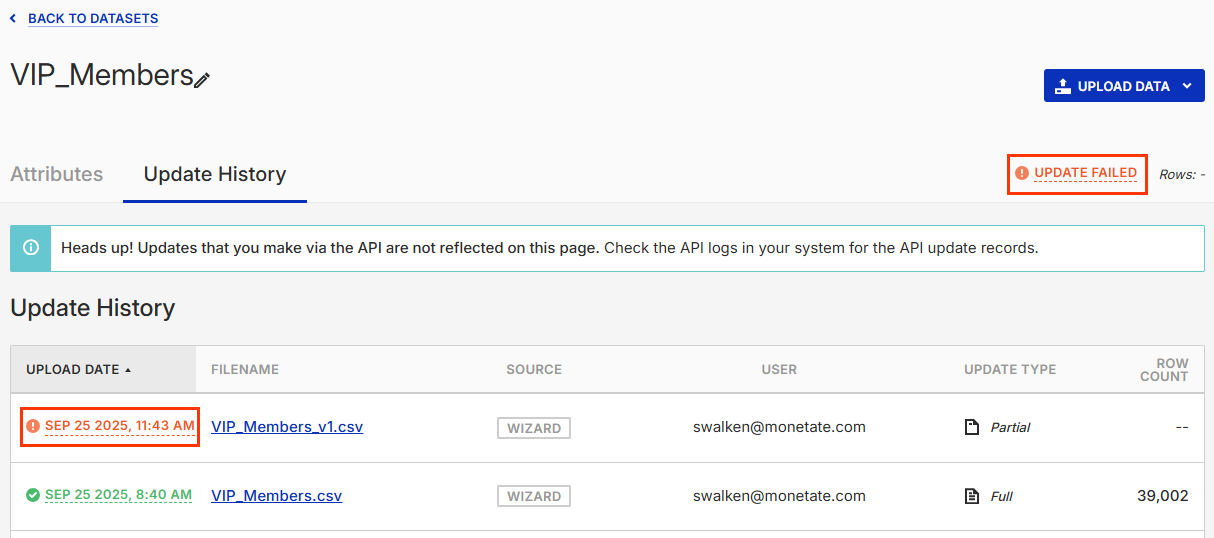
Click UPDATE FAILED to view the File Upload Error modal containing the reason(s) for the failure.
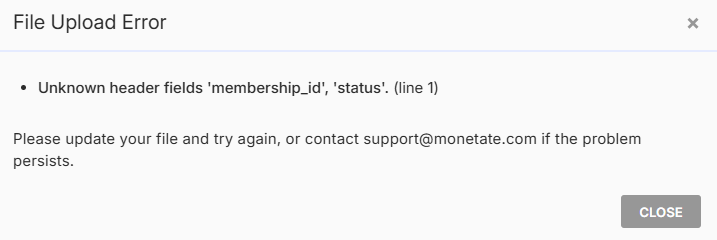
Refer to Customer Dataset Upload Requirements to ensure the update file conforms to the criteria for this type of dataset.