You can build a target in Target Builder to locate this site element and then deploy that custom target in a Web experience to trigger a variety of actions whenever the targeted site element is on a page of your site.
For example, lightboxes are useful for conveying important information to a customer in a way that forces them to interact with and pay attention to your content. The lightbox action in this example is paired with a custom WHO target so that the a customer only sees the lightbox when they land on a product detail page for an out-of-stock product.
Building the Custom 'Out of Stock' Target
Follow these steps to create the custom target in Target Builder.
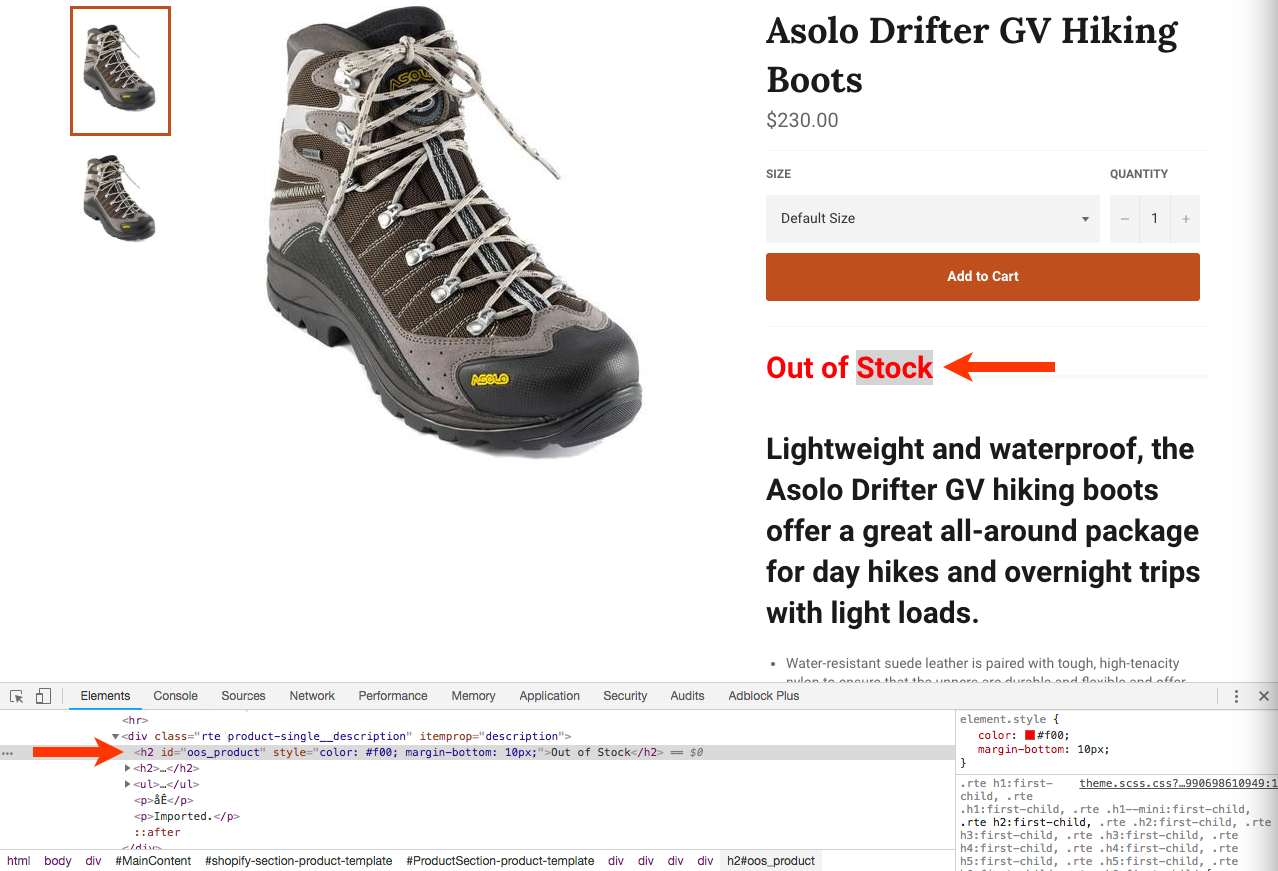
Out-of-stock items are noted on the use case site by the oos_product ID, which can be viewed using Google Chrome's Developer tools. Right-click the "Out of Stock" heading element, and then click Inspect.
- Navigate to a product detail page on your site for an out-of-stock product.
- Right-click the element on the page that contains the "Out of stock" message, and then select the option from the contextual menu to open your browser's Web developer tools. View the page's code to determine the site element that contains that message.
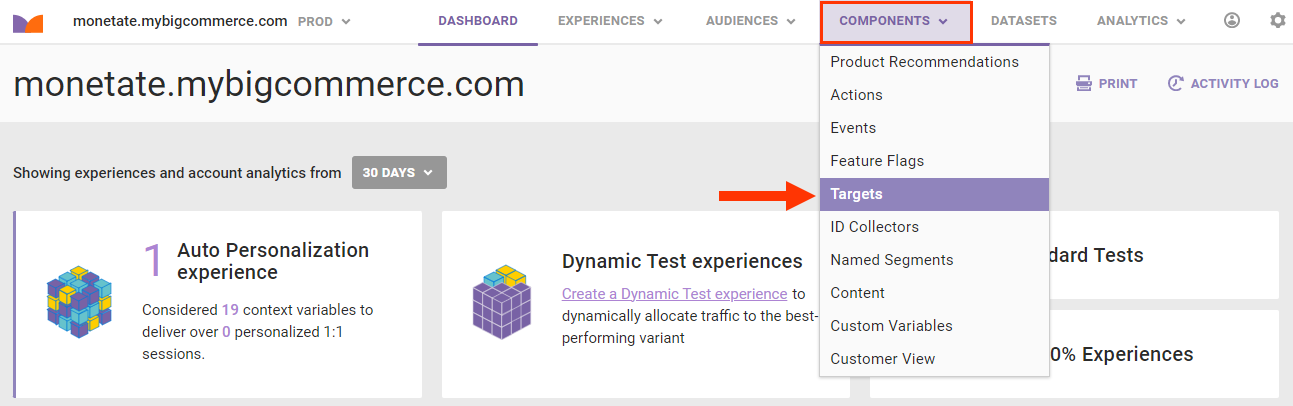
- In a new browser tab, launch the Monetate platform. Click COMPONENTS in the top navigation bar, and then select Targets.
- Click CREATE TARGET.

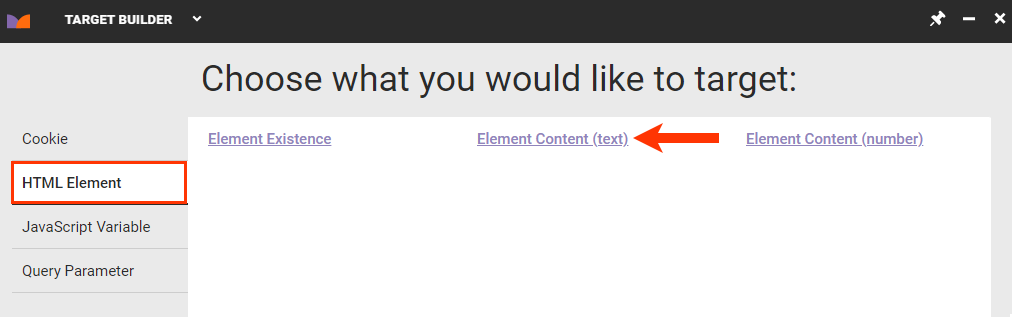
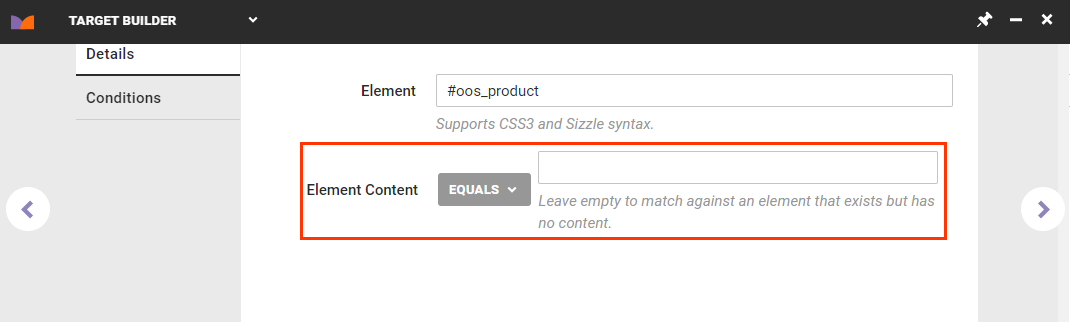
- Navigate to the page on your site that you viewed in step 1. In Target Builder, click the HTML Element tab and then click Element Content (text).
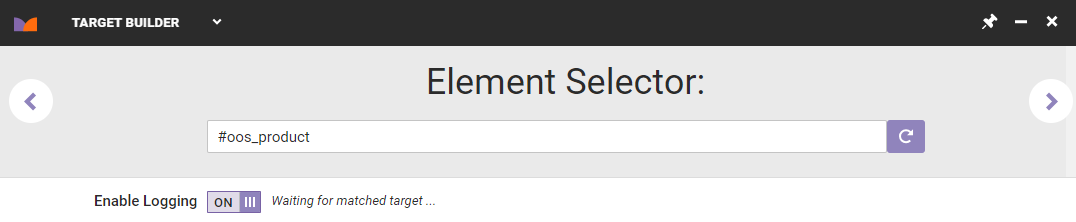
- Use the element selector to find the "Out of Stock" selector, and then click the forward arrow.
- On the Details tab, input as the Element Content value the text that must appear in the targeted element. Leave the Element Content operator set to EQUALS so that only pages on which the exact text is present are targeted.
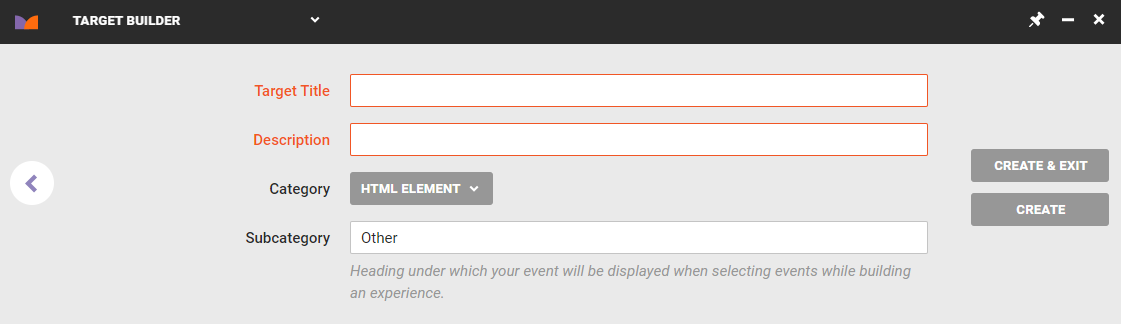
- Because this target should work on any page on your site, no conditions are necessary. Click the forward arrow.
- Give the target a title, a description, and a subcategory, and then click CREATE & EXIT.
The custom target is now ready to be used in a Web experience.
Creating the Experience
Follow these steps to add a custom target to a Web experience.
- Create a new Web experience.
- Configure the WHY settings.
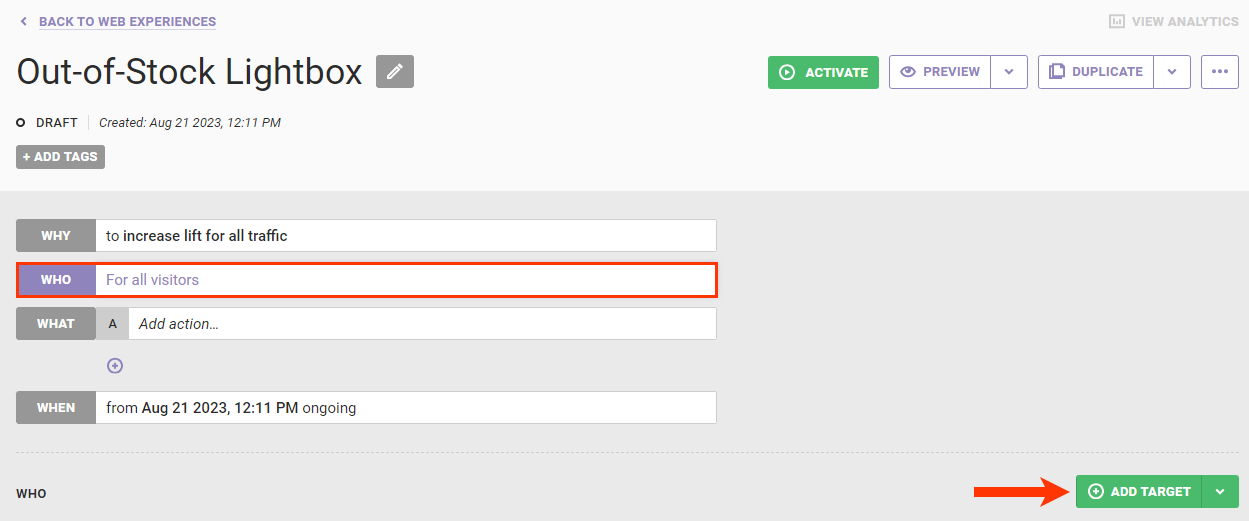
- Click WHO and then click ADD TARGET.
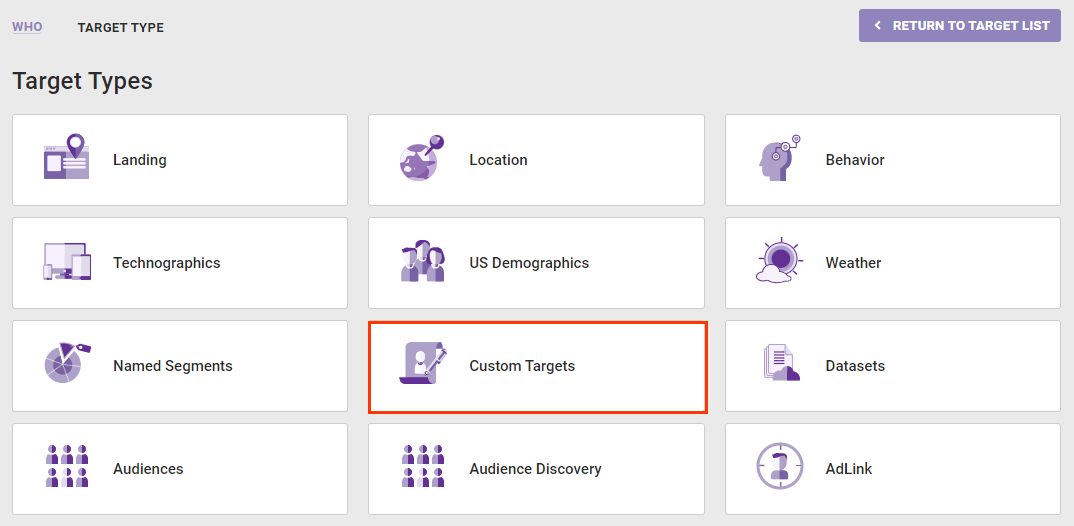
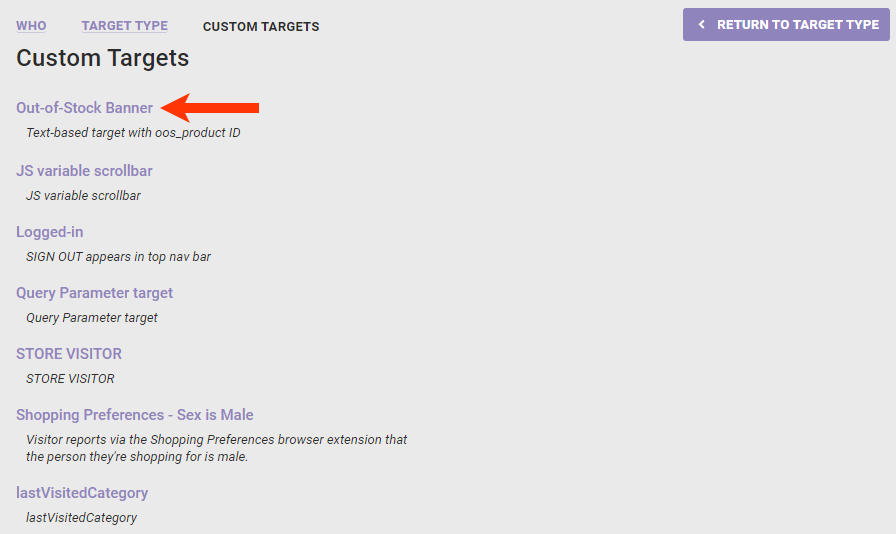
- Click Custom Targets.
- Click the custom target that you created in the previous section.
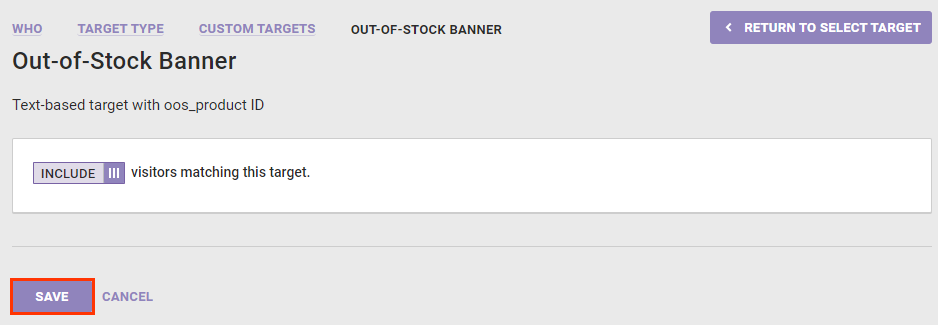
- Leave the toggle set to INCLUDE. Click SAVE.
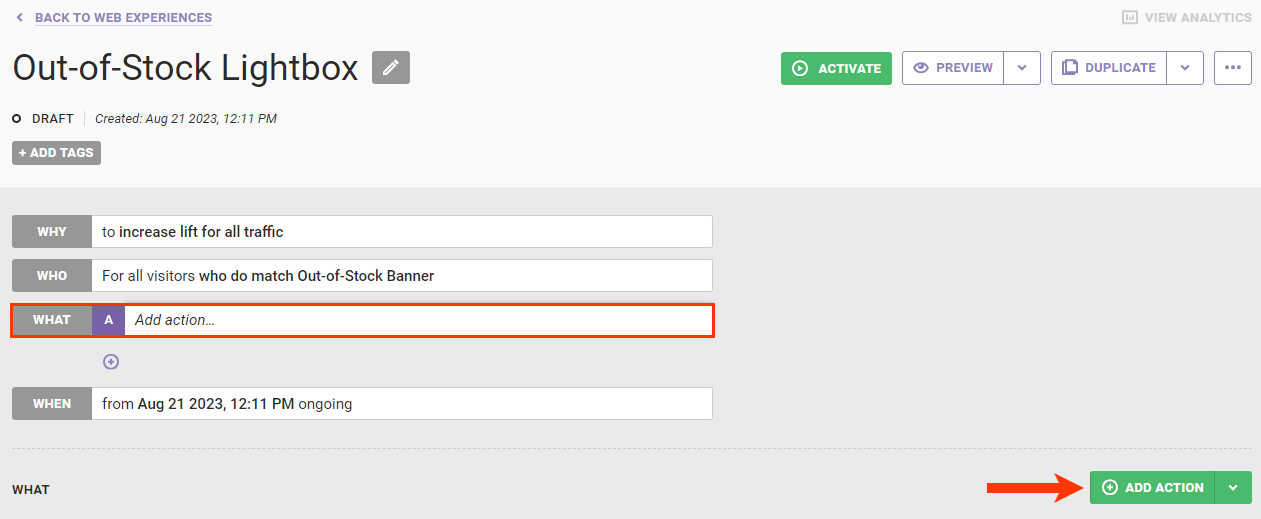
- Configure the WHAT settings.
- Click WHAT and then click ADD ACTION.
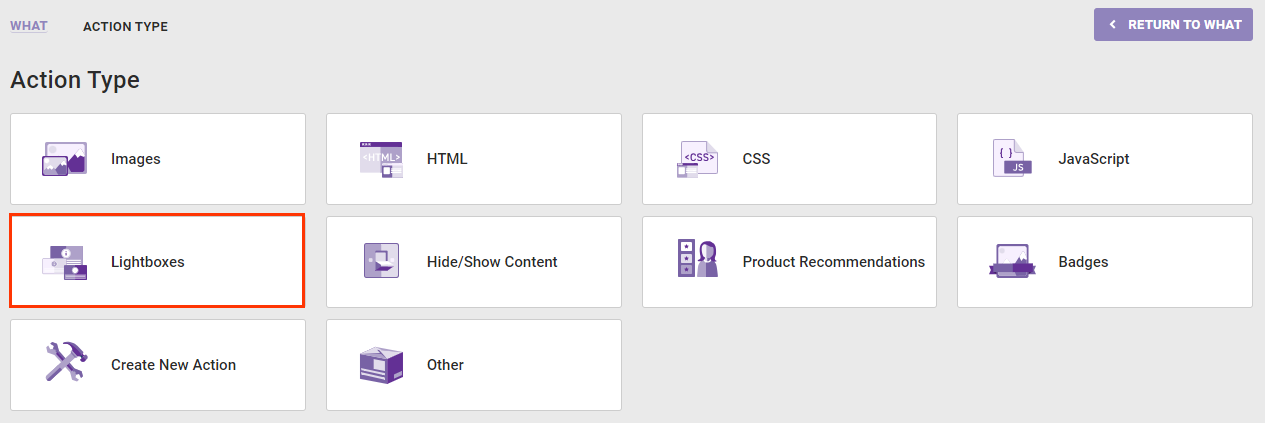
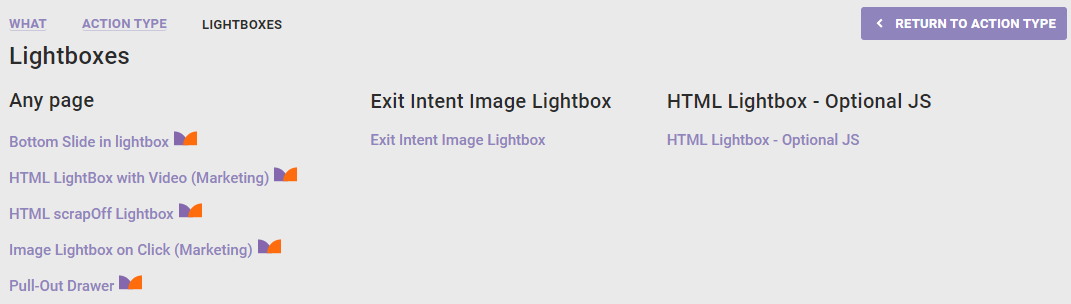
- Click Lightboxes.
- Click the action template that you want to use.
- Configure the lightbox template as necessary. See Lightbox Actions for guidance on the required and optional settings for different types of lightbox actions.
- Click WHAT and then click ADD ACTION.
- As necessary, configure the WHEN settings.
- Preview the experience. See Activate an Experience for Preview and Testing and Preview Mode Limitations to determine if the custom target you selected in step X limits your ability to use the PREVIEW button.