Action conditions specify the prerequisites for actions to fire. You can use them as a further level of granularity to determine the audience for an experience. Just as WHO targets define who is eligible for an experience, action conditions define whether qualified visitors can see the action. The combination of WHO targets and action conditions determine which visitors ultimately end up in an experience's analytics. However, unlike WHO targets, which affect the entire experience, action conditions only apply to individual actions that you add to the WHAT settings of an experience.
Because they act as prerequisites, action conditions in some ways assist with targeting in experiences. When you test variations of a change to your site, you must ensure only those visitors exposed to these changes are included in the analytics. If the analytics include a visitor who didn't see the change, the experience results can be diluted. Action conditions help prevent this scenario from happening and ensure the action doesn't fire on a part of the site that can't accept it.
General Guidance
A rule of thumb for action conditions is that unless you want the action to be visible on every page of your site, you should use action conditions. Here are a few examples of ways to use them:
- To specify that the action fires only on the index page so that a new lightbox or email sign-up displays to visitors only on this page type and nowhere else
- To specify that an image advertising free shipping only appears on the cart page and only when the cart value is greater than or equal to $100
- To restrict an action to specific pages for analytics purposes
You can also use regular expressions for URL-based action conditions. See Using Regular Expressions in Monetate for more information.
Action Condition Types
Action conditions fall into two categories: built-in conditions applied in Action Builder and optional conditions applied to an action that you configure in the WHAT settings in Experience Editor. If the action has no built-in conditions, then you must determine whether you want the action to run site-wide or add additional action conditions. If an action has been configured with both types of conditions, then a visitor must satisfy them all to qualify for the action.
Adding Action Conditions
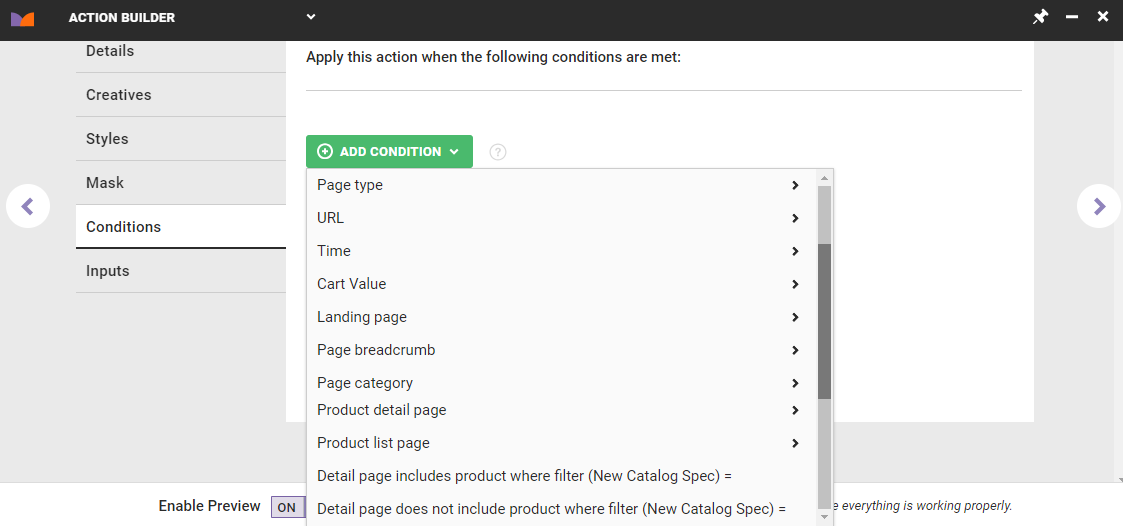
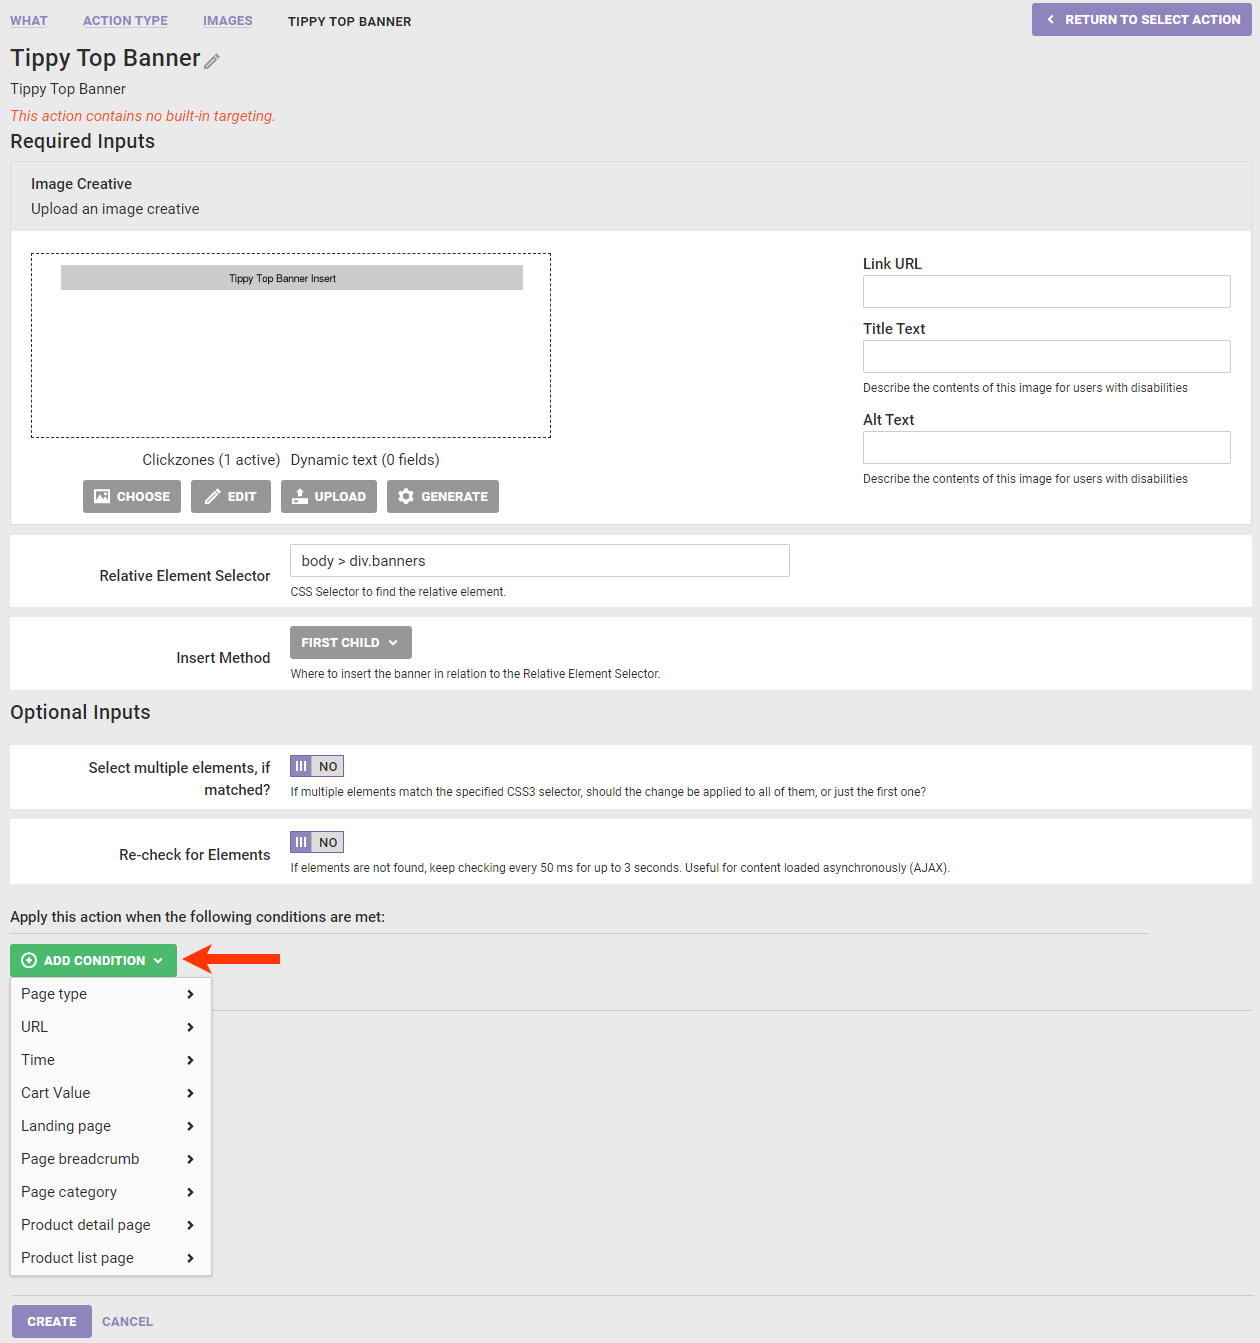
Built-in action conditions you apply via the Conditions tab in Action Builder.
If your goal is to have just a few reusable actions, you should avoid applying action conditions in Action Builder. Applying them in the builder can limit an action's utility in a variety of situations.
Instead, add action conditions in the individual action that you configure for the WHAT settings of an experience. These conditions only impact the experience.
How Action Conditions Work Together
Both types of action conditions can use AND/OR logic when you create two or more of them. The action shown here is configured with conditions so that it only fires on the cart page and the cart value is less than $100.
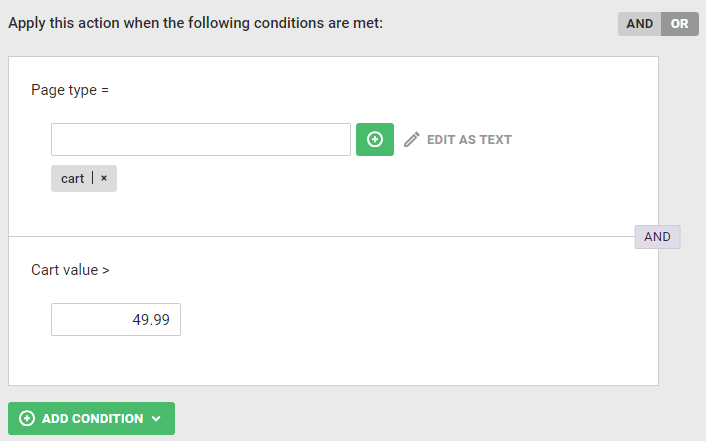
Click the toggle above the action conditions to change the logic from AND to OR.
Available Action Conditions
The action conditions available in the action templates you can select when configuring the WHAT settings of an experience depend both on your contract with Monetate and on the method calls used to pass data from your site to Monetate. For more information about passing data to Monetate, refer to Method Calls and Monetate Features Unlocked for Monetate tag–based integrations or to Target, Event, & Condition Mapping for Engine API integrations, both in the Monetate Developer Hub.
Without Data Tracking
If you haven't added JavaScript API method calls to your site, then you can use the following action conditions.
| Condition | Definition |
|---|---|
| URL | Specifies on which page the action initiates as determined by a URL indicator |
| Time | Specifies between what dates and times the action fires |
| Landing page | Indicates whether the action fires on the landing page or on every page except the landing page |
With Data Tracking
If you have added the relevant JavaScript API method calls to your site, you can use these action conditions.
| Condition | Definition |
|---|---|
| Page type | Determines on which page type, as defined by the setPageType data you pass to Monetate, the action fires |
| URL | Determines on which page the action fires as based on a URL indicator |
| Time | Determines between what dates and times the action fires |
| Cart value | Determines if the action fires before or after the visitor has a certain value in the cart |
| Landing page | Determines if an action fires based on the visitor's landing page or on every page except the landing page |
| Page breadcrumb | Determines if the action fires if a specified condition for the page's breadcrumb trail is met |
| Page category | Determines if the action fires on a particular page based on its category |
| Product detail page | Determines if the action fires on the product detail page based on the presence or absence of a certain product ID (PID), SKU, brand, PID in a custom list, product type, or product catalog attribute |
| Product list page | Determines if the action fires on the index page based on the presence or absence of certain PID, SKU, brand, PID in custom list, or product type |
| Custom variable | Determines if the action fires if the value of the configured custom variable is or is not present |
To use the SKU-based options in the Product detail page and the Product list page action condition categories, you must ensure that your JavaScript API implementation passes SKUs to Monetate through the addProductDetails method. You must also contact your dedicated Customer Success Manager to request that your account be configured to use these SKU-based options.
To use the PID-based options in the Product detail page and the Product list page action condition categories, you must ensure that your implementation pass PIDs to Monetate through the addProductDetails method.
See Method Calls and Monetate Features Unlocked, Step 4: Capture Product Details, and addProductDetails in the Monetate Developer Hub for more information about passing PID and SKU information through the API.
Using a Custom Variable
Just as you can with a WHO Landing target and a recommendations filter, you can configure an action condition that uses a custom variable and its value in Web and Omnichannel experiences to determine the conditions for when an action fires.
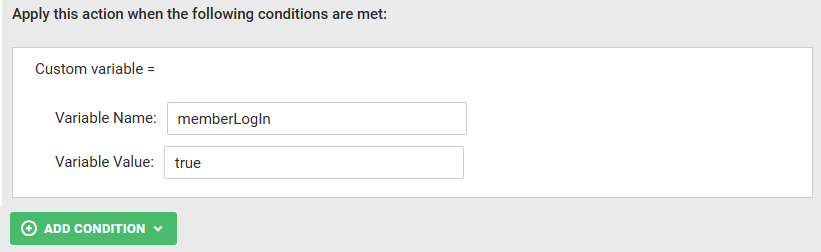
When you configure this type of action condition, you must use a custom variable that your site passes to Monetate either using the setCustomVariables method call in the Monetate JavaScript API implementation or using monetate:context:CustomVariables in the Engine API implementation.