Monetate provides two Dynamic Bundles action templates:
- The basic Dynamic Bundles action template allows you to include the product on which the bundle is based as the first product in the results slider when used with a bundle in which Prepend context item in recommendation is set to YES.
- The Dynamic Bundles with Context Item action template includes CSS and JavaScript so that you can the product on which the bundle is based is styled different from the recommended products when used with a bundle in which Prepend context item in recommendation is set to YES.
Unless you select a bundle in which Prepend context item in recommendation is set to YES, the product on which the bundle is based does not appear with the recommended products regardless of which action template you use.
Follow these steps to build a Web experience with a Dynamic Bundles action.
- Create a new Web experience, and then configure the WHY and WHO settings.
- Click WHAT and then click ADD ACTION.
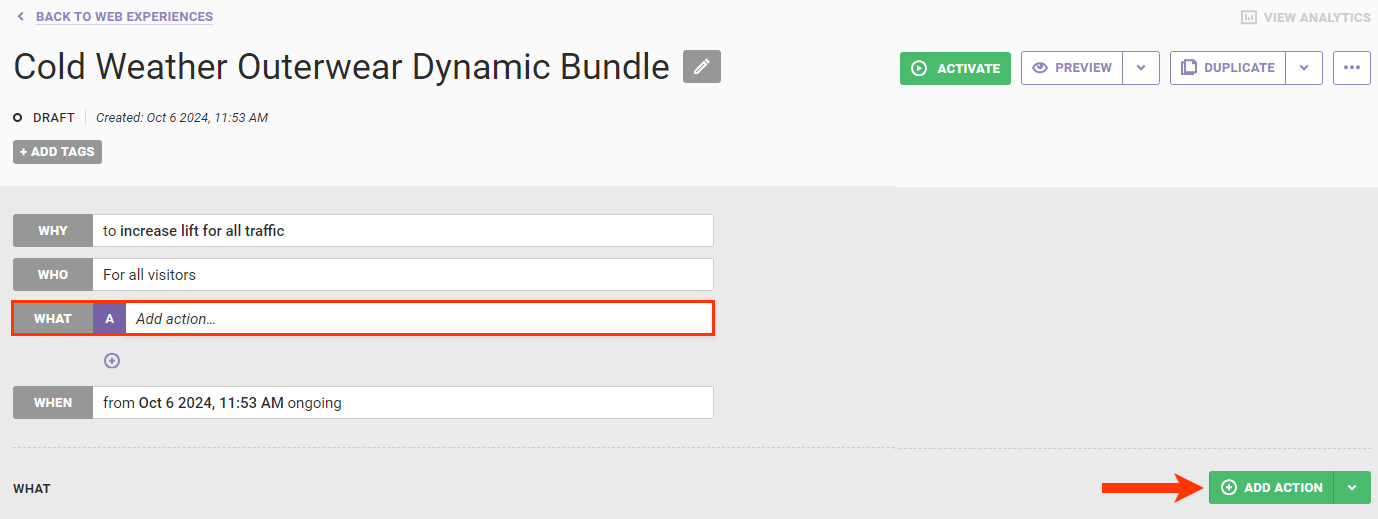
- Click Product Recommendations.
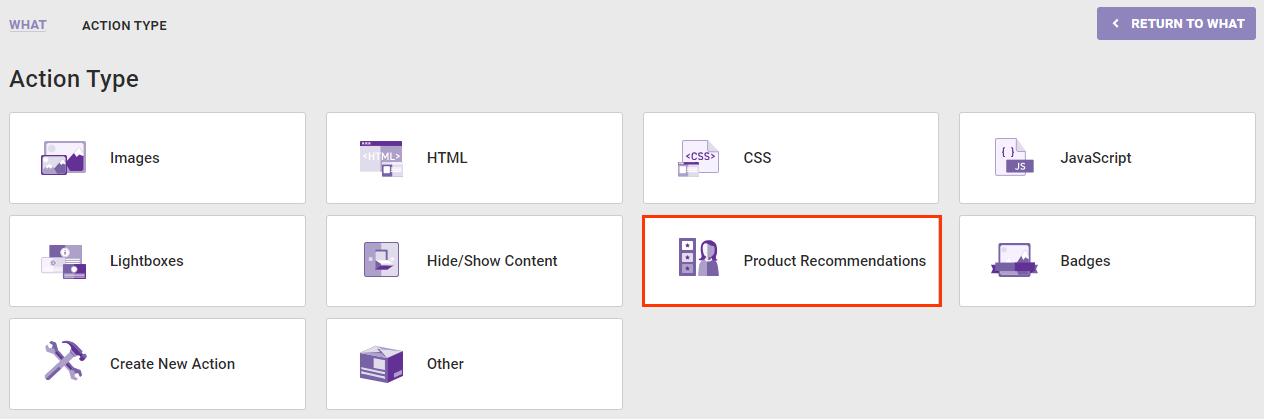
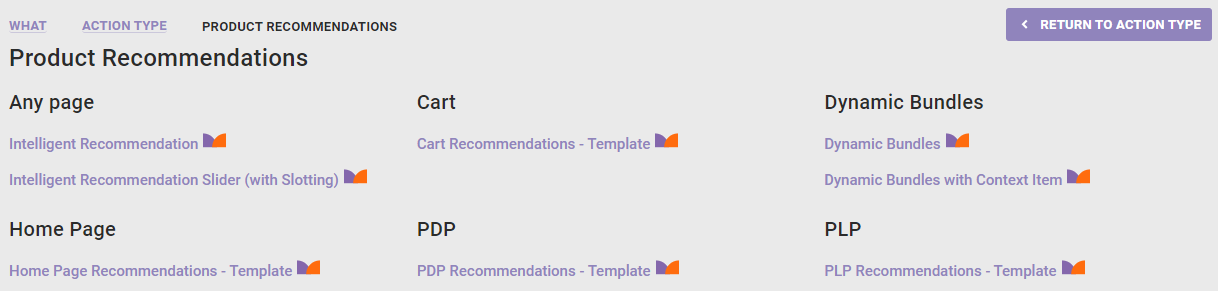
- Select the Dynamic Bundles action template that you want to use.
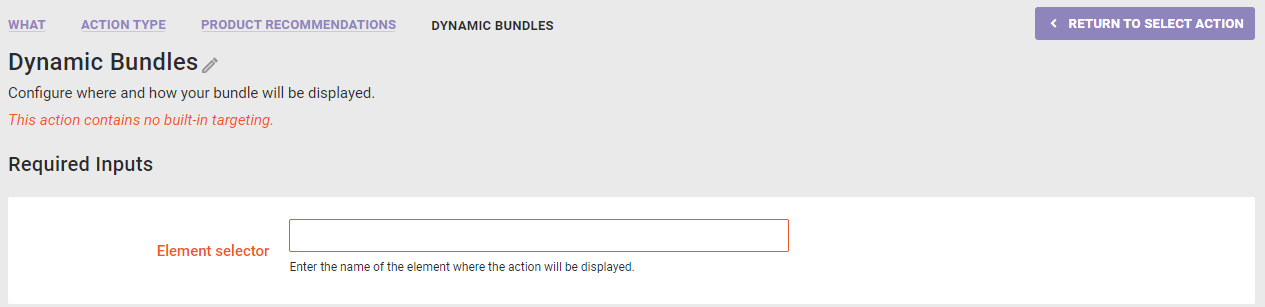
- Complete the required settings.
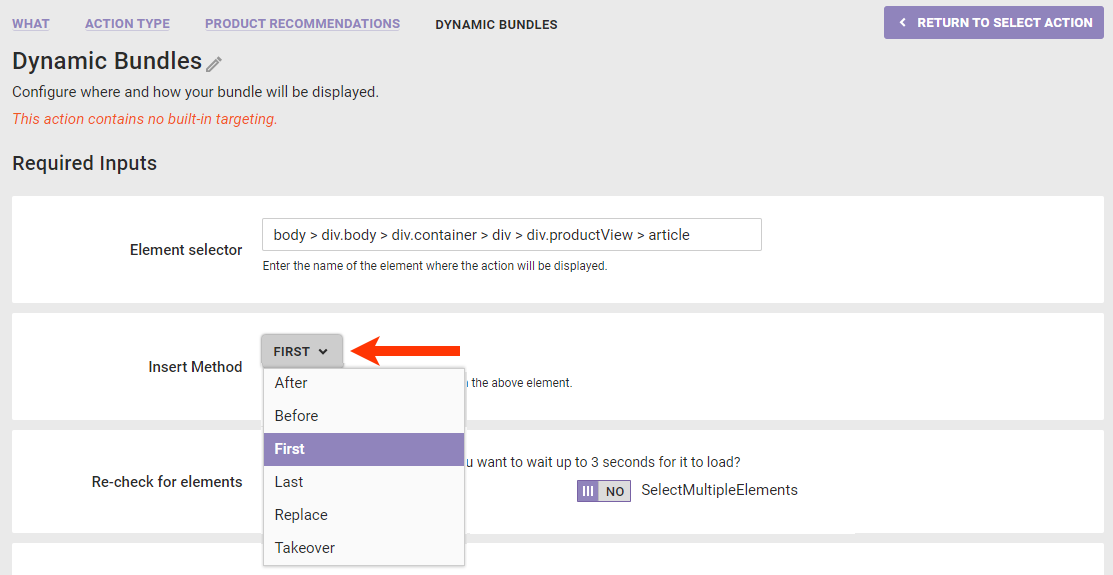
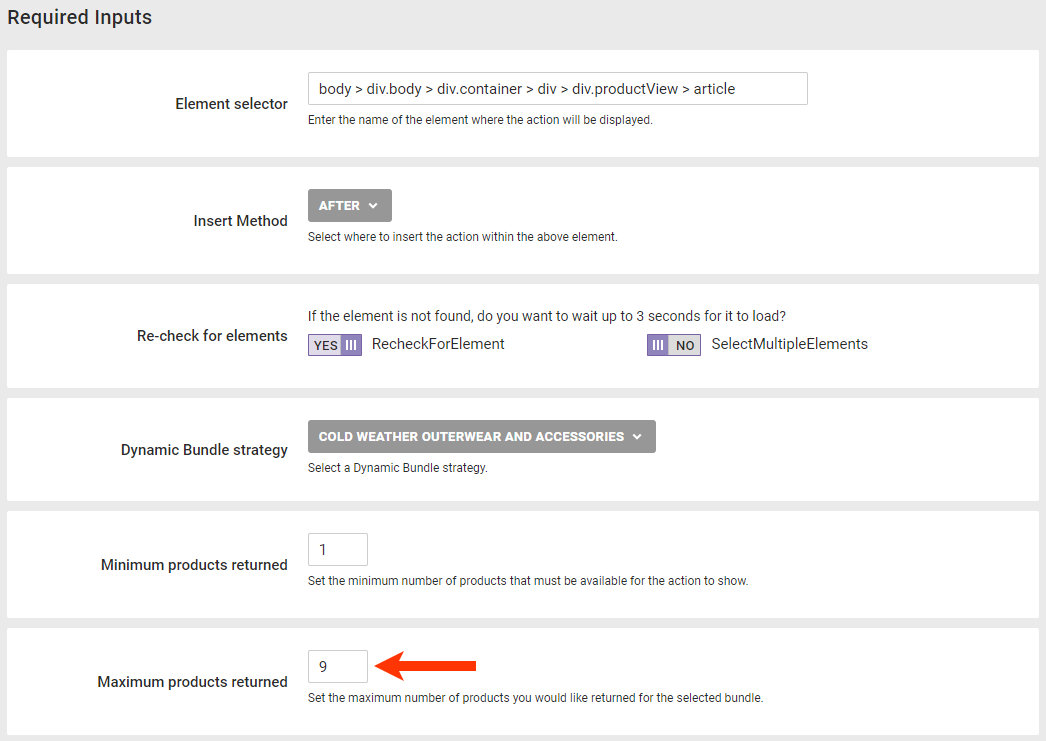
- Input the element selector identifying where on a product detail page you want the Dynamic Bundles slider to appear.
- Select an option from Insert Method to determine where the action should be inserted relative to the selected node you input in the previous step.
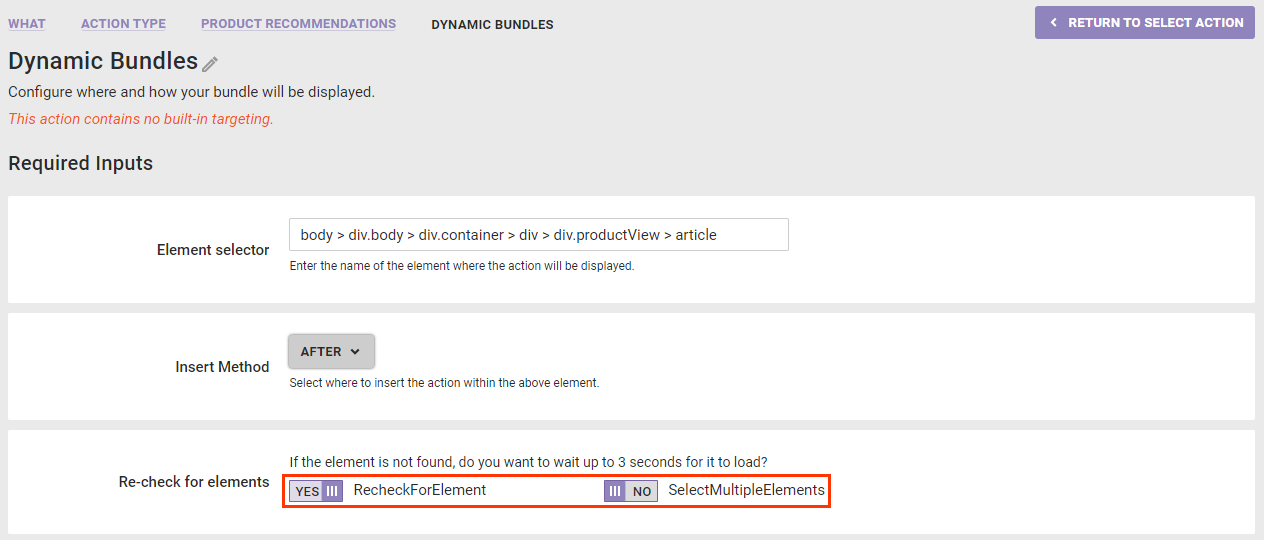
- Toggle RecheckForElement to NO if you do not want Monetate to recheck for the selected node for up to 3 seconds if it doesn't find it immediately. Toggle SelectMultipleElements to YES if you want the platform to display the recommendations at every occurrence of the selected node on the page if it finds multiple occurrences.
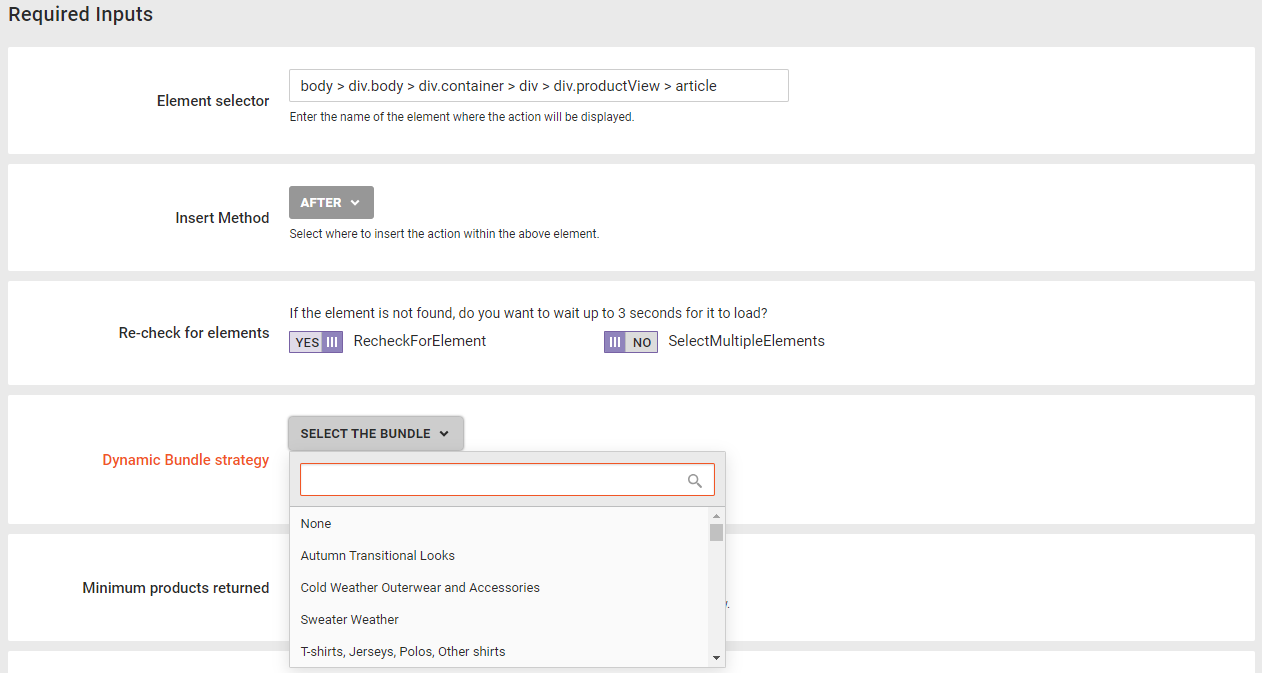
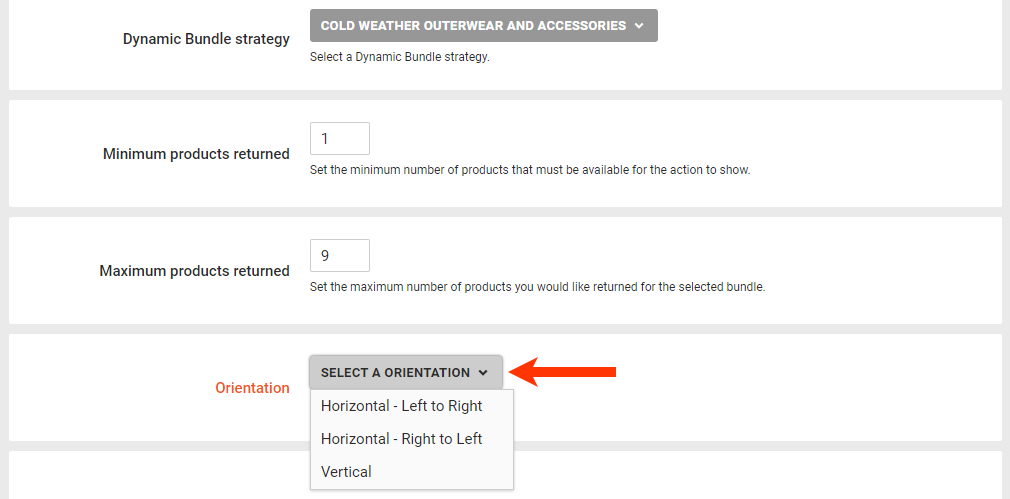
- Select the bundle that you want to use. Scroll through the list of bundles in the selector, or use the search bar to find one by name.
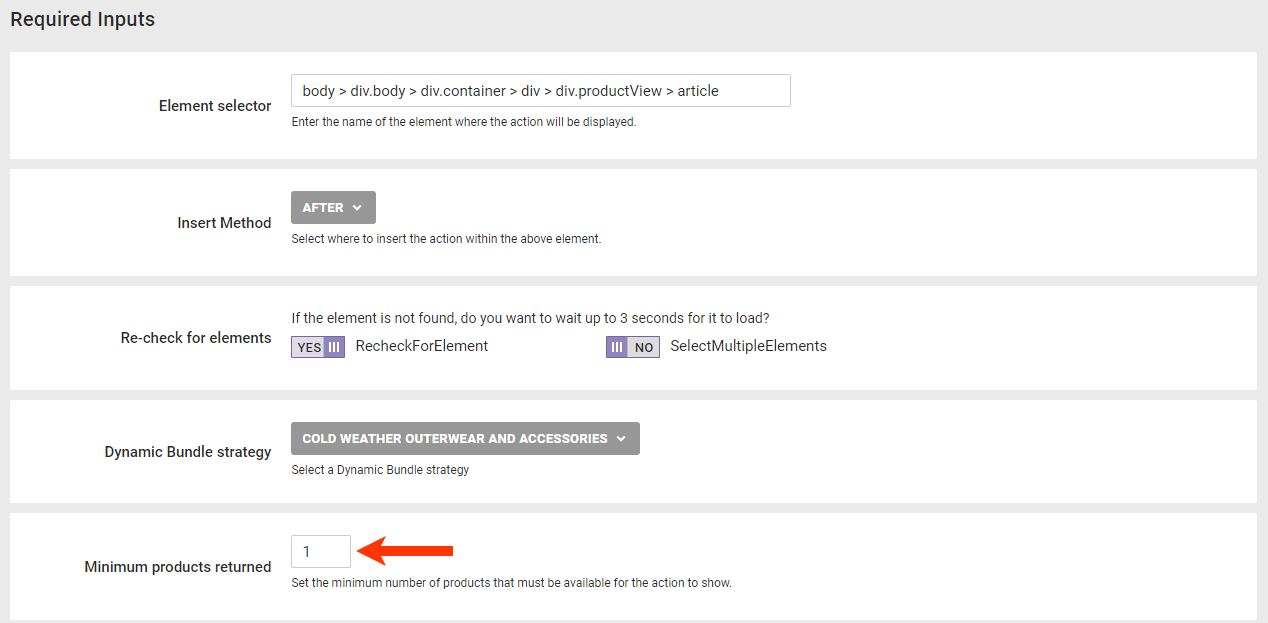
- Input the minimum number of products that must be available to trigger the action.
- Input the maximum number of products that you want to appear in the slider.
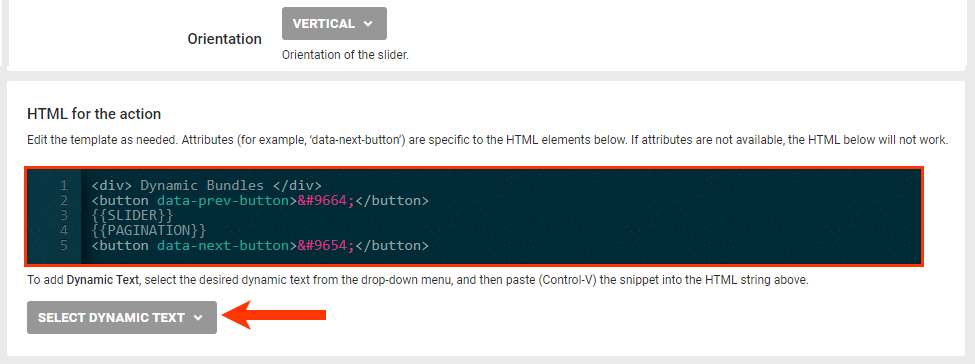
- Select from Orientation the movement of product images in the slider.
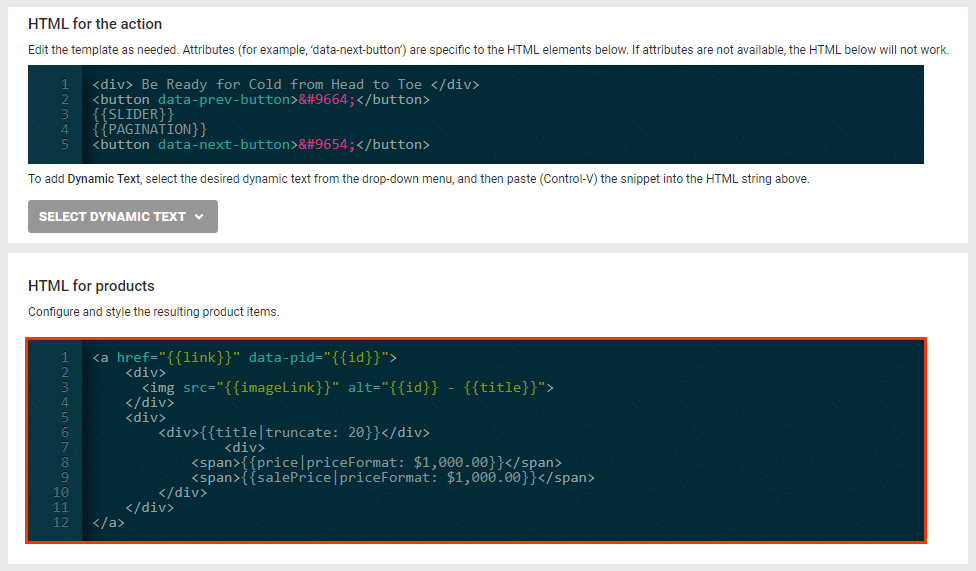
- As necessary, modify the code in HTML for the action that builds the slider structure.
- To add slide navigation buttons, use the attributes
data-prev-buttonanddata-next-button. If you include optional arrow images, then you must include elements with the attributedata-prev-buttonanddata-next-buttonfor them to appear. - To add location-related dynamic text, select an option from SELECT DYNAMIC TEXT, and then paste the code snippet into the code editor.
- To add slide navigation buttons, use the attributes
- As necessary, modify the code in HTML for products that builds the product slides. See Modifying the Slide Product Template in Configure a Recommendations Action for more information.
- Optionally, revise the CSS that is appended to the DOM in a
<style>or<link>element, or click CHOOSE SAVED CSS or UPLOAD CSS to insert code into the editor. If you're using the Dynamic Bundles with Context Item action template, see Styling the Context Item for more information.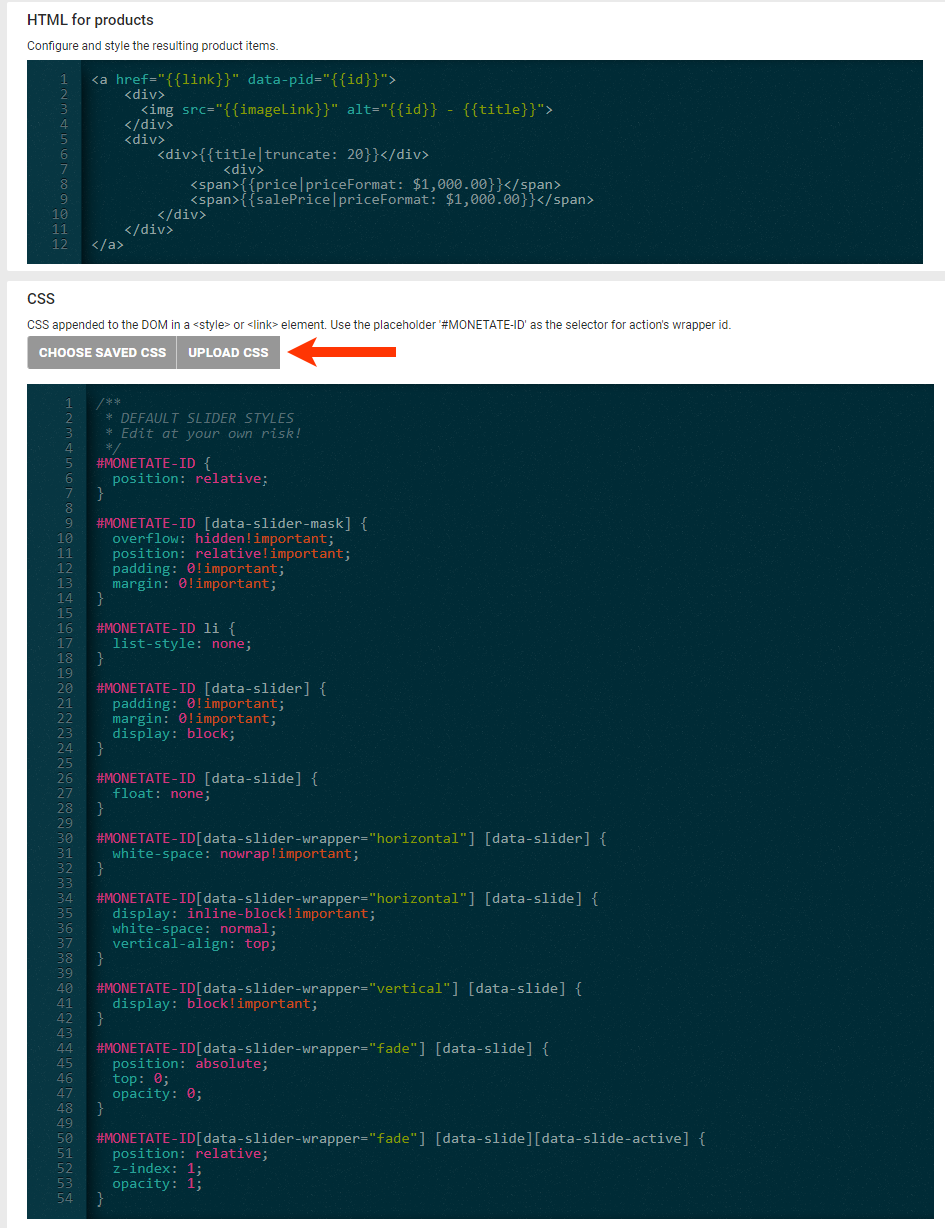
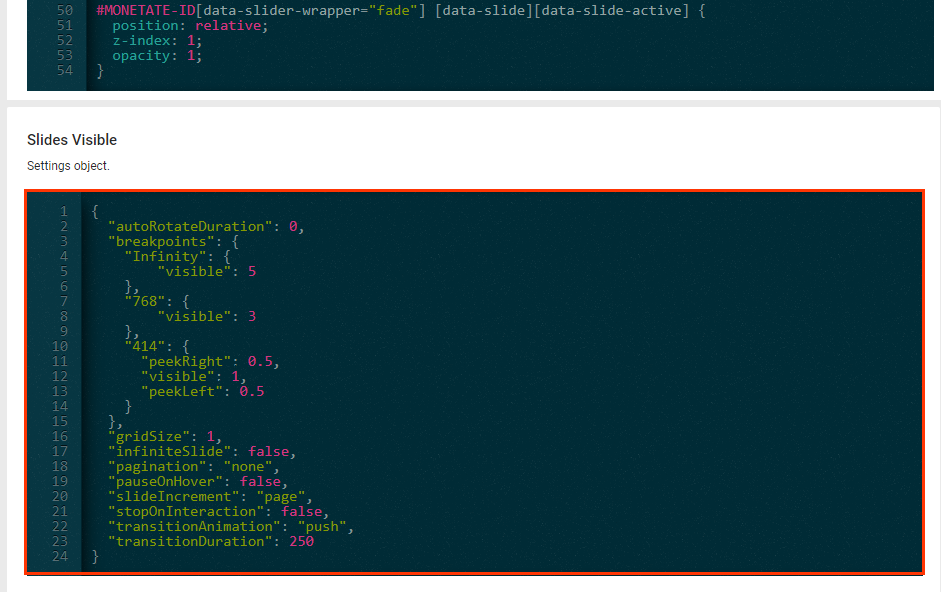
- As necessary, modify the code in Slides Visible to change the slide visibility options. See Modifying the Visible Slides Template in Configure a Recommendations Action for more information.
- Input the element selector identifying where on a product detail page you want the Dynamic Bundles slider to appear.
- Optionally, add image files to be used for the slider navigation buttons by clicking CHOOSE EXISTING, GENERATE IMAGE, or UPLOAD for Previous Button Image and Next Button Image, respectively.

- Optionally, configure the action with JavaScript.

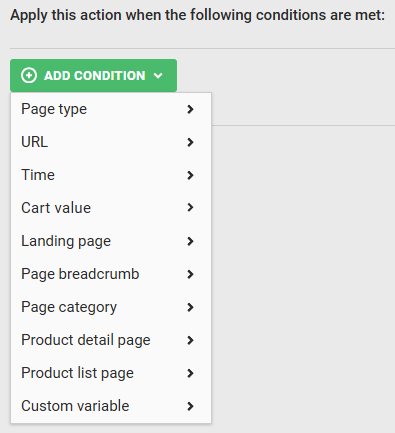
- Optionally, add one or more action conditions. Click ADD CONDITION and then navigate the categories and options to set any conditions that must be met for the action to fire. See Action Conditions for more information.
- Click CREATE.
Finish building the experience by configuring the WHEN settings. Ensure that you preview the experience before activating it. See Activate an Experience for Preview and Testing for more information.
Styling the Context Item
The Dynamic Bundles with Context Item action template natively includes both CSS and JavaScript necessary for the product on which the bundle is based to appear along with the recommended products but be styled differently.
HTML for Products
The HTML code that configures and styles the recommended products in the bundle varies slightly from the HTML code used in the basic Dynamic Bundles action.
<a href="{{link}}" data-pid="{{id}}">
  <div>
    <img src="{{imageLink}}" alt="{{id}} - {{title}}">
  </div>
  <div>
    <div class="product-title">{{title}}</div>
    <div>
      <span>{{price|priceFormat: $1,000.00}}</span>
      <span>{{salePrice|priceFormat: $1,000.00}}</span>
    </div>
  </div>
</a>
CSS for the Context Item
The following code snippet contains the default CSS that controls the appearance of the product on which the bundle is based.
#MONETATE-ID .context-item-main {
  display: flex;
  /*height : 600px;*/
  justify-content: center;
}
#MONETATE-ID .context-item {
  border: 1px solid #979797;
  flex: 1;
  padding: 25px;
  position: relative;
}
#MONETATE-ID .context-item .mt-merch-item img {
  width: 100% !important;
  height: 100%;
}
#MONETATE-ID .context-item a {
  text-decoration: none;
}
#MONETATE-ID .context-item a div {
  margin: auto;
}
#MONETATE-ID .context-item a .product-title {
  margin-top: 15px;
  margin-bottom: 10px;
}
#MONETATE-ID .mt-hover-wrapper {
  display: none;
}
#MONETATE-ID a .product-title {
  white-space: normal;
  word-break: break-word;
  margin-bottom: 17px;
}

@media (min-width: 768px) and (max-width: 1024px) {
  #MONETATE-ID {
    text-align: center;
    font-size: 12px;
    flex-direction: column;
    max-height: 100%;
    max-width: max-content;
    margin: 5%;
  }
  #MONETATE-ID .context-item-main {
    flex-direction: column;
    height: auto;
  }
  #MONETATE-ID .context-item {
    max-height: max-content;
  }
  #MONETATE-ID .context-item a div {
    width: 100%;
  }
  #MONETATE-ID [data-slide] {
    flex-basis: 33.33% !important;
  }
  #MONETATE-ID [data-slide] img {
    height: auto;
    width: 100% !important;
    margin-bottom: 15px;
  }
  #MONETATE-ID [data-slider-mask] {
    margin-top: 0px;
  }
  #MONETATE-ID [data-slide]:not(:first-child) {
    border-top: none;
    /* Remove top border for elements that are not the first child */
  }
  #MONETATE-ID [data-slide]:nth-child(3n+2) {
    border-left: 1px solid #979797;
  }
}

@media (max-width: 768px) {
  #MONETATE-ID {
    text-align: center;
    font-size: 12px;
    flex-direction: column;
    max-height: 100%;
    max-width: max-content;
    margin: 5%;
  }
  #MONETATE-ID .context-item-main {
    flex-direction: column;
    height: auto
  }
  #MONETATE-ID .context-item {
    width: 100%;
    max-height: max-content;
  }
  #MONETATE-ID .context-item a div {
    width: 100%;
  }
  #MONETATE-ID .context-item a .product-title,
  #MONETATE-ID .context-item a div span {
    margin-left: auto;
  }
  #MONETATE-ID [data-slide] {
    flex-basis: 33.33% !important;
  }
  #MONETATE-ID [data-slide]>div {
    padding: 10px
  }
  #MONETATE-ID a .product-title {
    overflow: hidden;
    text-overflow: ellipsis;
    margin-bottom: 20px
  }
  #MONETATE-ID [data-slide] img {
    height: auto;
    width: 100% !important;
    margin-bottom: 15px;
  }
  #MONETATE-ID [data-slider-mask] {
    margin-top: 0px;
  }
  #MONETATE-ID a div+div {
    font-size: 12px;
  }
  #MONETATE-ID [data-slide]:not(:first-child) {
    border-top: none;
    /* Remove top border for elements that are not the first child */
  }
  #MONETATE-ID [data-slide]:nth-child(3n+2) {
    border-left: 1px solid #979797;
  }
}
JavaScript
The following code snippet contains the JavaScript required for the product on which the bundle is based to appear along with the recommended products.
var slides = document.querySelectorAll(".mt-merch-item");
if (slides.length > 1) {
  var firstSlide = slides[0];
  var contextItemDiv = document.querySelector(".context-item");
  contextItemDiv.appendChild(firstSlide.cloneNode(true));
} else {
  var ctx = document.querySelector('.ctl-wrapper');
  ctx.style.display = "none";
}