A custom list dataset contains up to 5,000 curated product IDs (PIDs) that you can use as part of the following settings and options:
- An action condition
- A WHO Behavior target in an experience
- A recommendation filter in a recommendation strategy or Dynamic Bundle
- A Boost and Bury filter in a recommendation strategy or Dynamic Bundle
This type of dataset allows you to target customers who have browsing or purchase behaviors related to the PIDs in the custom list.
Follow these steps to create a custom list dataset in the platform.
- Click Datasets in the left-hand navigation, and then, if necessary, select Product Data.
- Click CREATE DATASET.

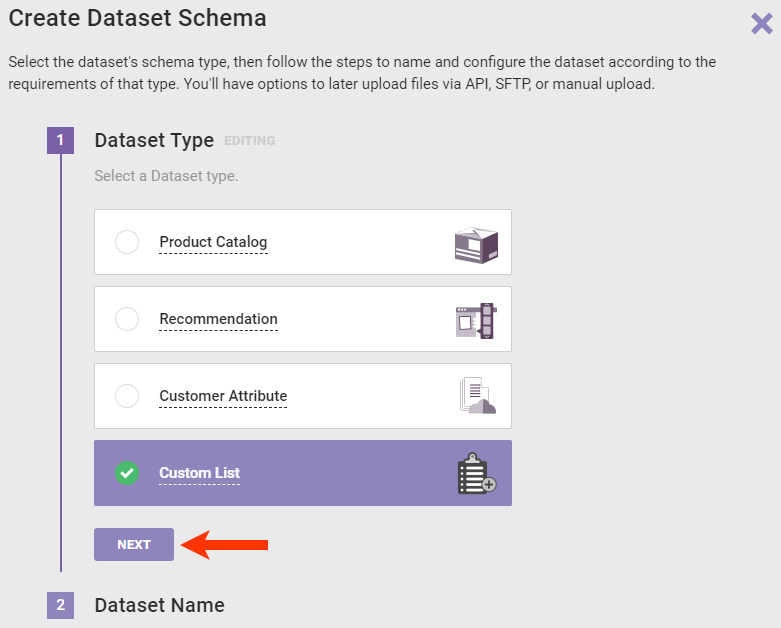
- Select Custom List in the Create Dataset Schema wizard, and then click NEXT.
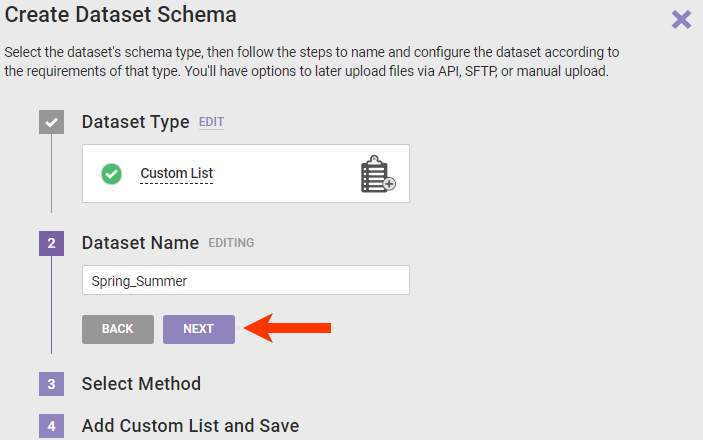
- Name the dataset and then click NEXT.
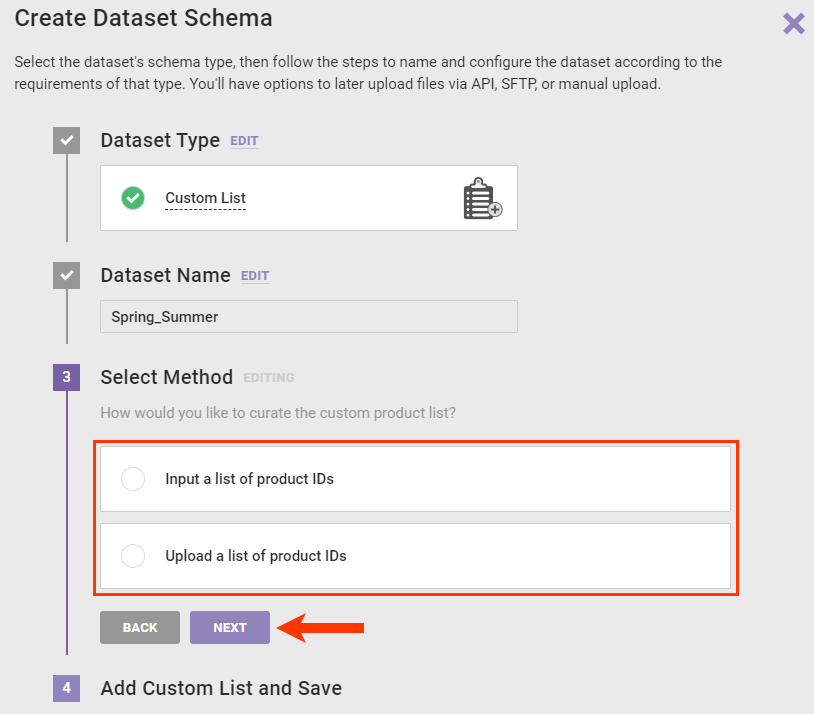
- Select a method to add the PIDs to the dataset, and then click NEXT.
- Input the PIDs using the method you selected in the previous step.
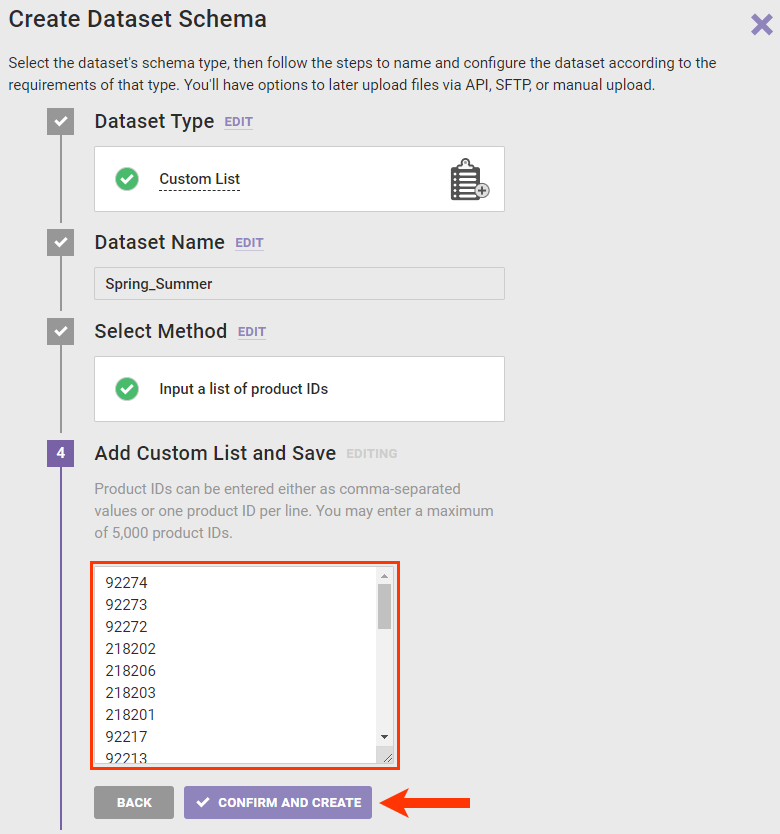
- If you selected Input a list of product IDs, then copy and paste into the text field the PIDs as comma-separated values or as a list with one PID per line, and then click CONFIRM AND CREATE.
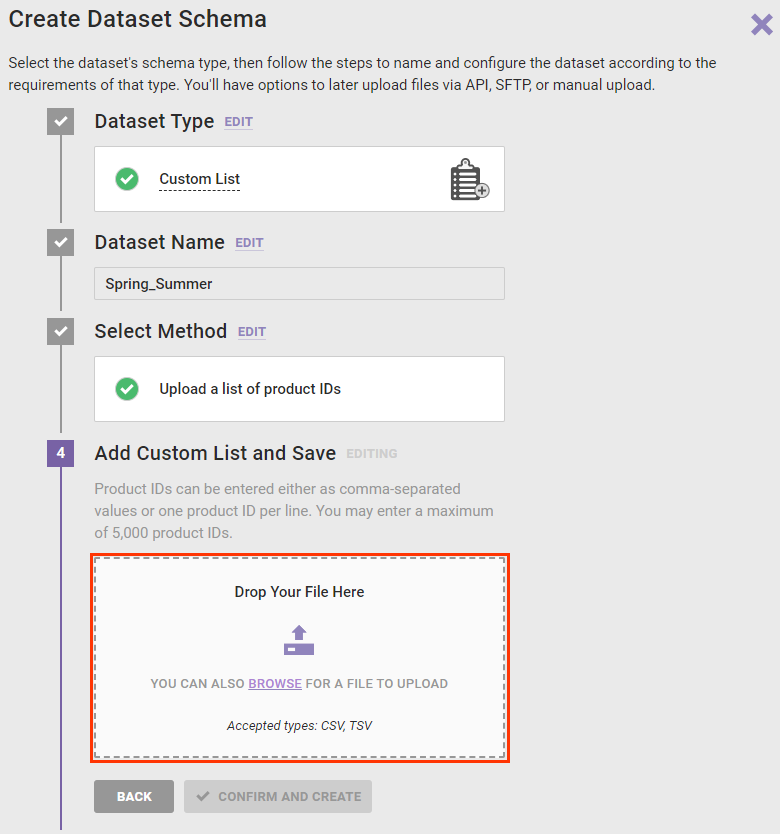
- If you selected Upload a list of product IDs, then drag and drop the file containing the PIDs, and then click CONFIRM AND CREATE once the wizard has verified the file.
- If you selected Input a list of product IDs, then copy and paste into the text field the PIDs as comma-separated values or as a list with one PID per line, and then click CONFIRM AND CREATE.
After you click CONFIRM AND CREATE, Monetate ingests the product IDs and closes the wizard. It automatically assigns the new dataset a unique ID that you cannot edit.
Downloading Files
You can download a previously uploaded CSV or TSV file from a custom list's Update History tab. However, you cannot download a custom list that you previously created using the Input a list of product IDs method in the wizard or by updating the custom list using the field on the Update Custom List tab.
If a file is available for download, its filename appears in blue in the Update History table.
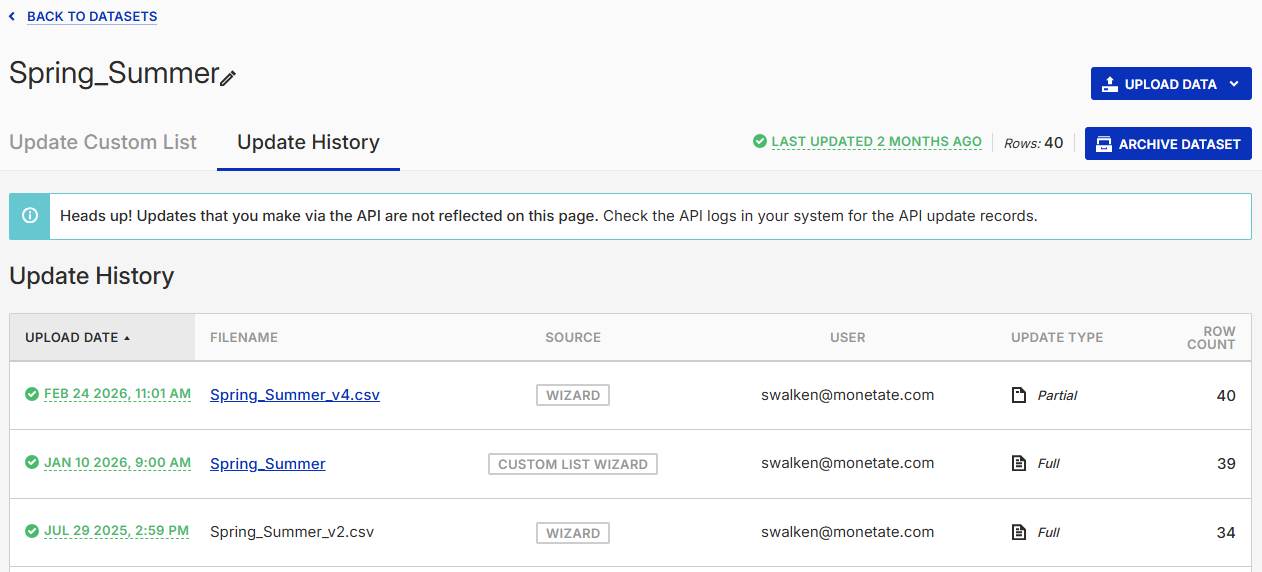
Click the filename and then save it to a location on your computer.