Use Audience Explorer to create audience segments, view analytics for a custom audience segment, and then use the audience segments as WHO targets in experiences.
Creating an Audience Segment
Follow these steps to create a custom audience segment in Audience Explorer.
- Click AUDIENCES in the top navigation bar, and then select Audience Explorer.

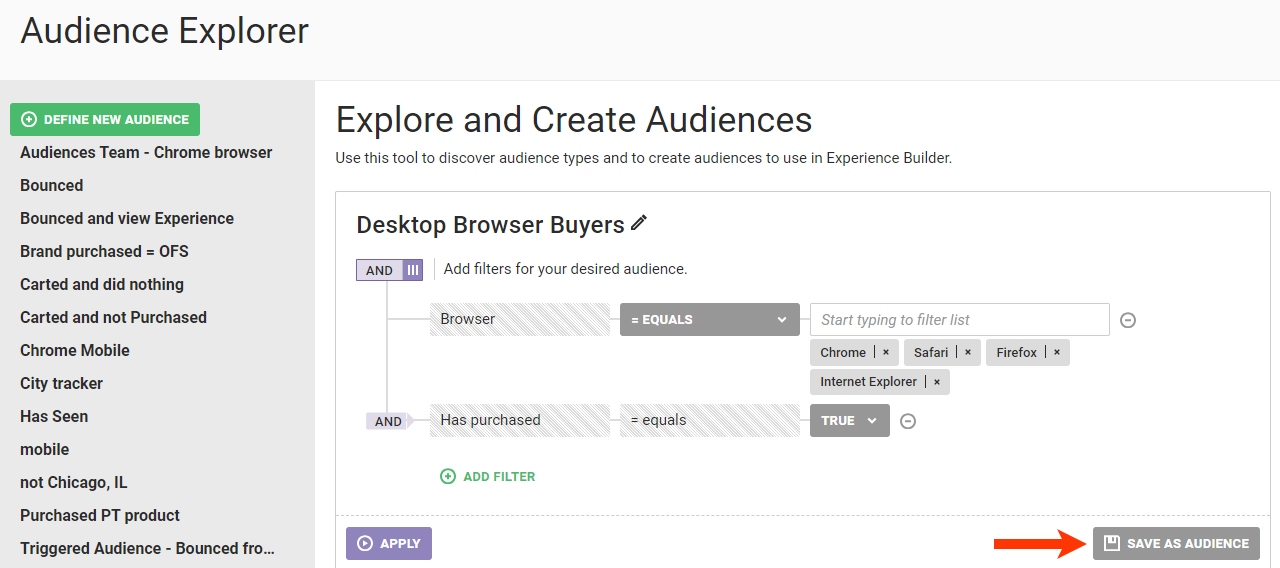
- Name the new audience segment.
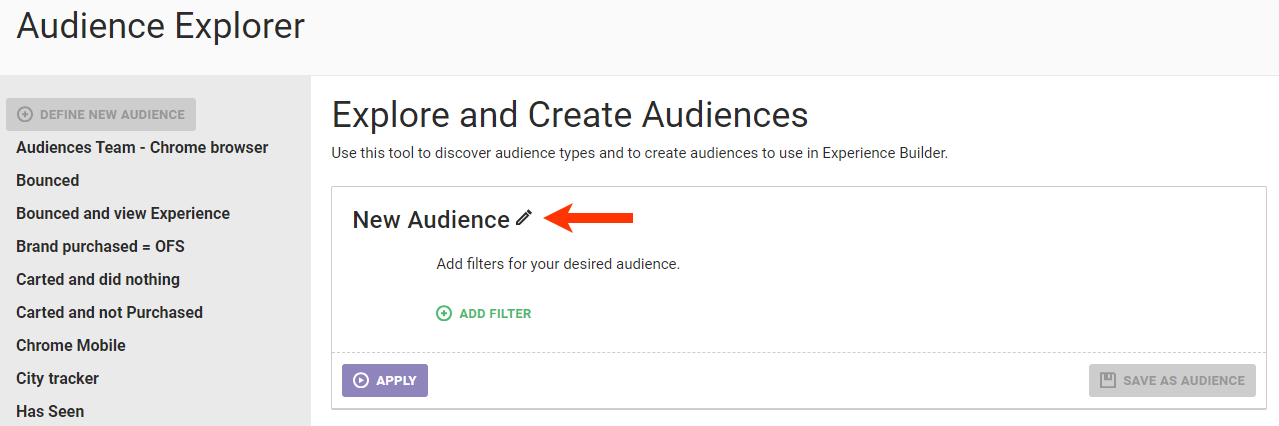
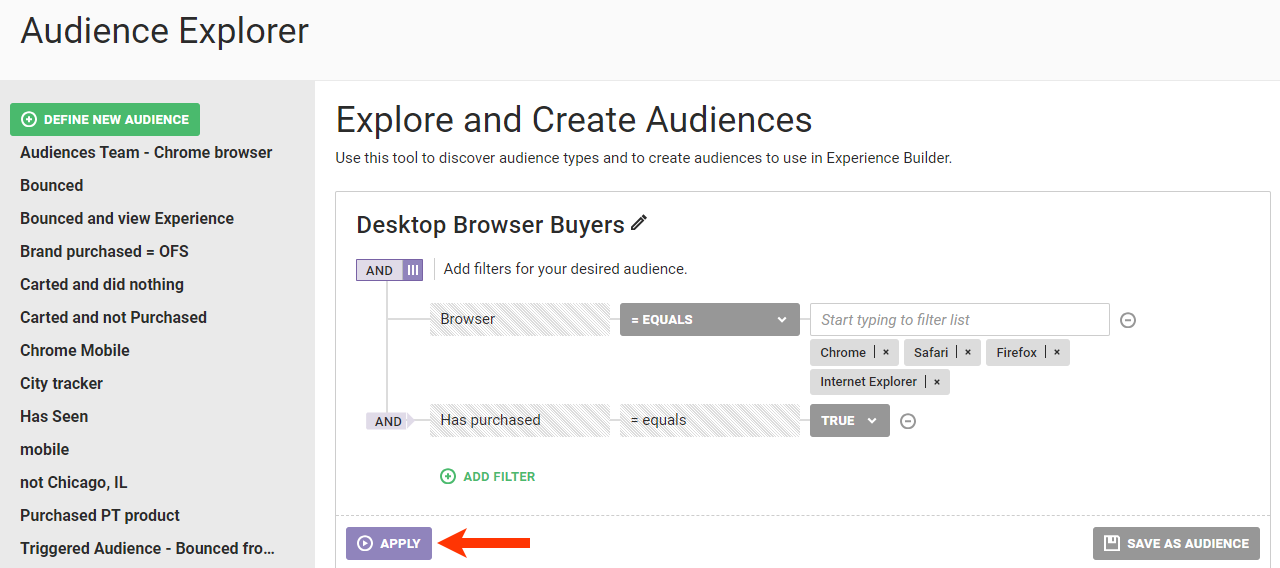
- Click ADD FILTER, select an attribute, and then complete the filter equation by selecting an operator and then inputting or selecting a value.
- Optionally, repeat the previous step to add additional filters. If necessary, click the logic connector from AND to OR.

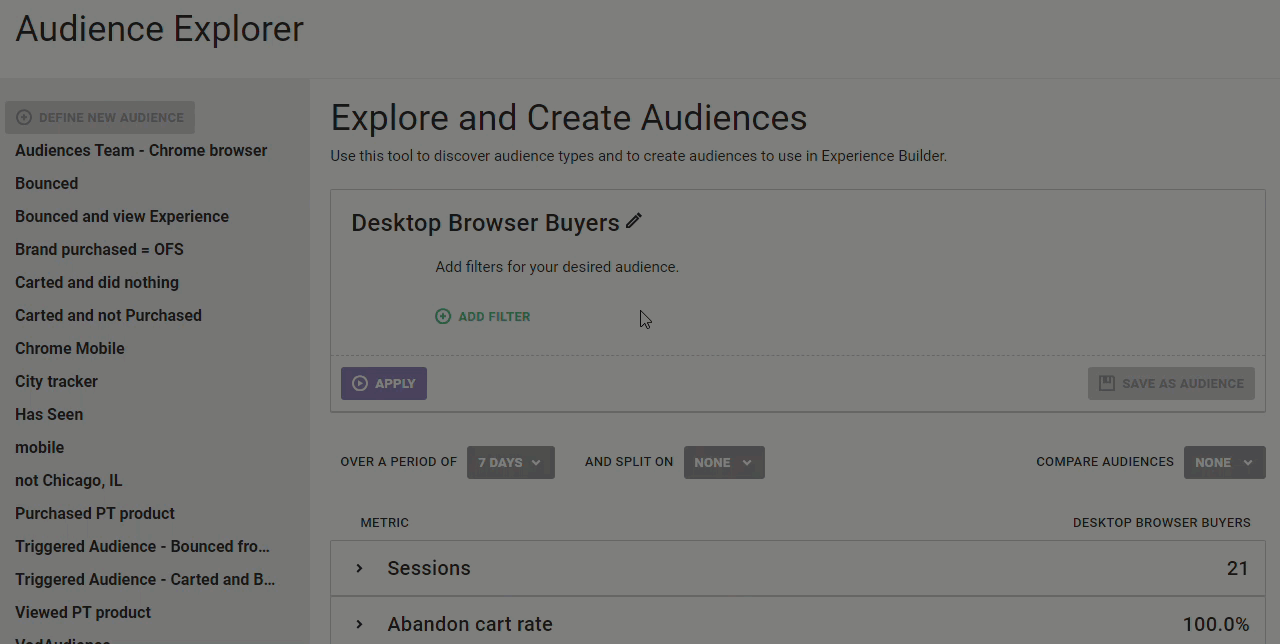
- Click APPLY to segment your site's traffic based on the filter(s) you created.
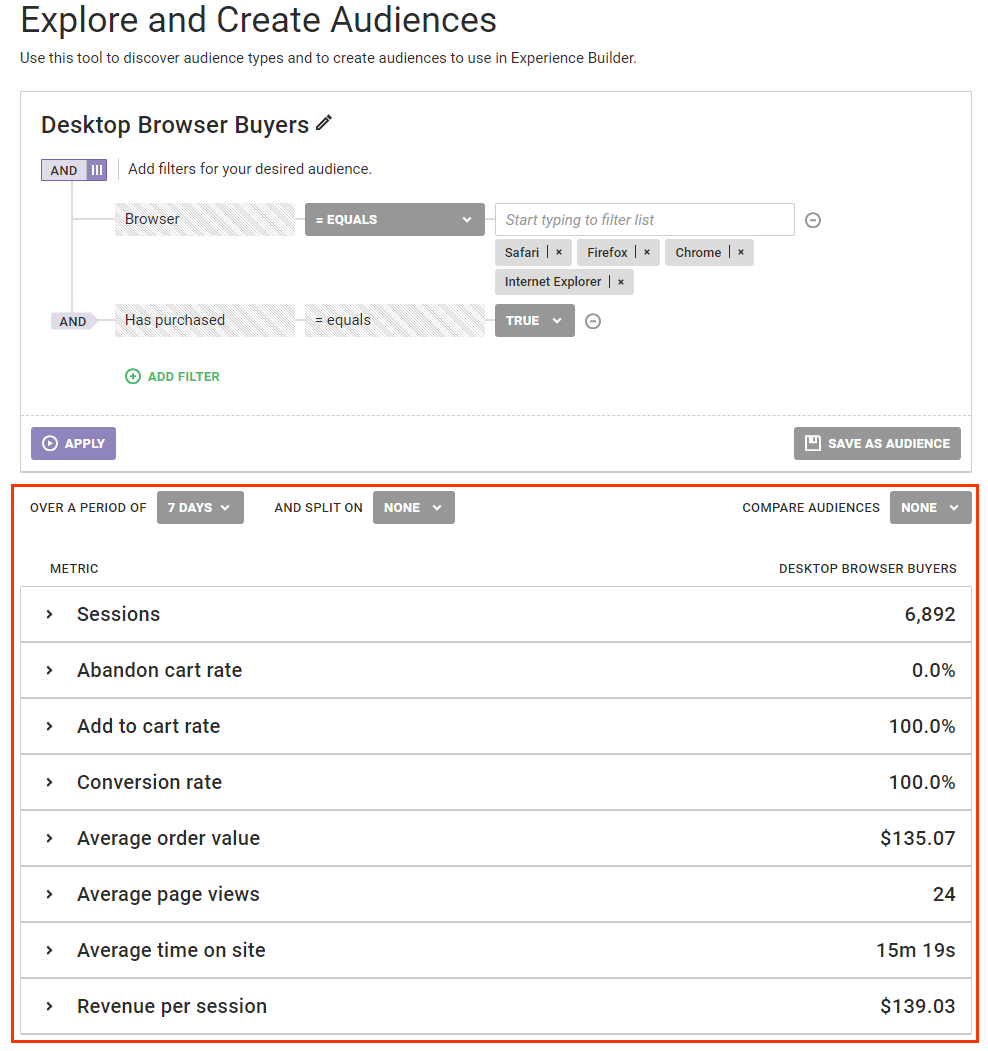
- Review the table of metrics for the new audience to determine if the filters are appropriate. You can change the settings above the table to better understand the audience you've defined.
- Select an option from OVER A PERIOD OF to change the range of historical data used to calculate the metrics in the table.
- Select an option from AND SPLIT ON to add a secondary dimension to the data. (For example, if you create a Browser = equals Chrome filter to define the audience, you can select Operating system from AND SPLIT ON to view the data for each metric in the table broken down based on the operating systems that visitors used in the sessions reported.)
- Select an option from COMPARE AUDIENCES to compare the new audience against an existing audience segment or all traffic for your site.
- Click the arrowhead to the left of a metric title in the table to preview a graph of the data. Click the Display Table icon to view that metric data as a table instead.
- Click SAVE AS AUDIENCE.
You can view the newly created audience segment as well as the existing ones by clicking it in the left-hand panel of the Audience Explorer page.
Using a Custom Audience Segment in an Experience
Follow these steps to use an audience segment in an experience.
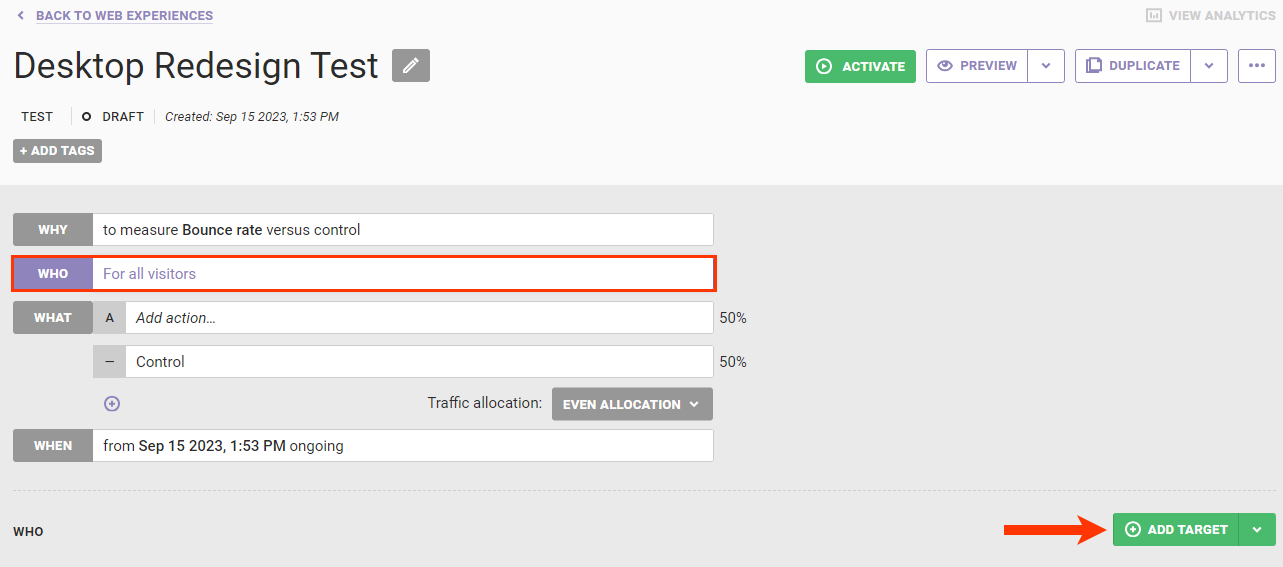
- Create a new Web experience and then configure the WHY settings.
- Click WHO and then click ADD TARGET.
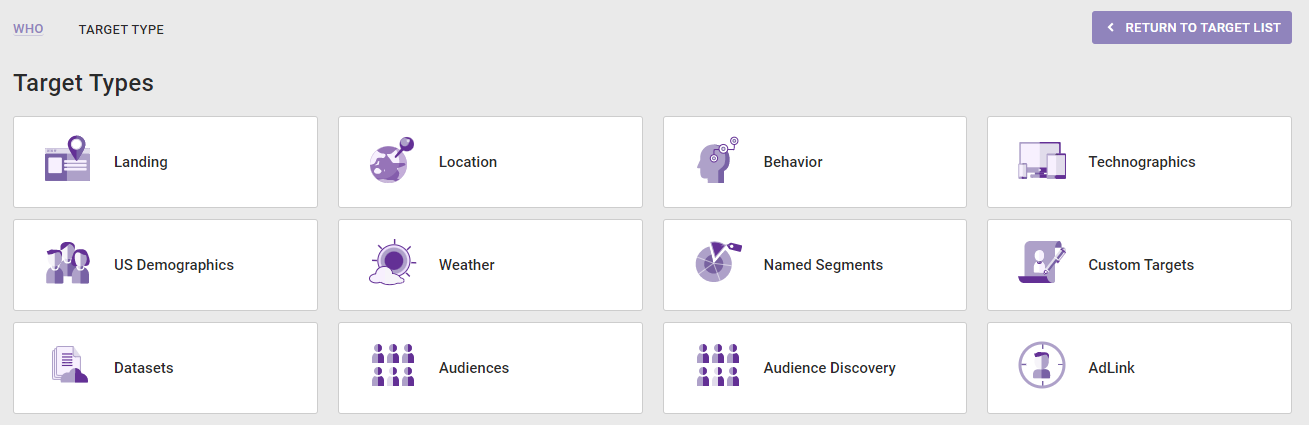
- Click Audiences.
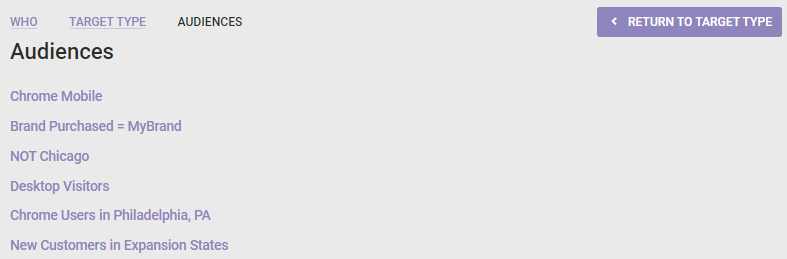
- Select the custom audience segment that you want to use.
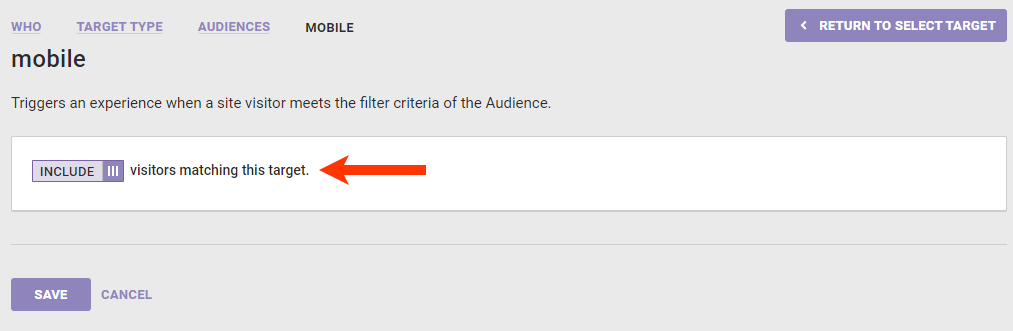
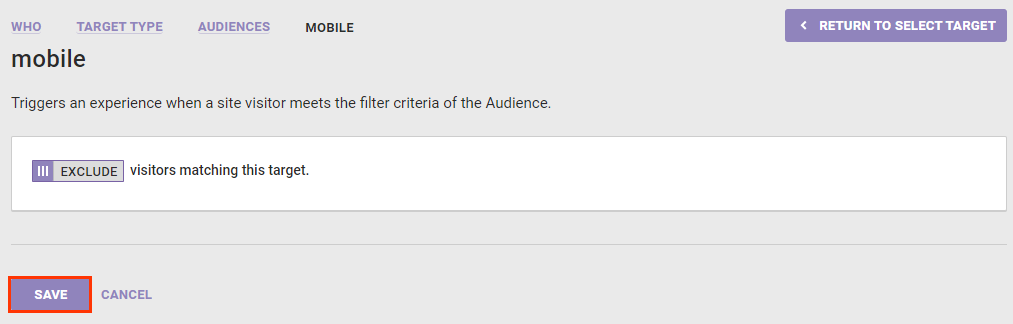
- Optionally, click to toggle INCLUDE to EXCLUDE if you want to exclude the audience segment from the experience.
- Click SAVE.
Finish configuring the experience as necessary, and then preview or activate it.