Follow the appropriate steps to create one of the nine custom reports about one or more experiences that are available in the Monetate platform.
Experience Performance Report or No Control Experience Performance Report
Follow these steps to create either an Experience Performance Report or a No Control Experience Performance Report.
- Click ANALYTICS in the top navigation bar and then select Custom Reports.

- Click CREATE REPORT.

- Give the report a name, and then select either Experience Performance Report or No Control Experience Performance Report from Report Type.

- As necessary, click to toggle between the default 5 DECIMAL PLACES and 3 DECIMAL PLACES.

- As necessary, adjust the dampening to scale purchases in the report that are above the selected threshold to a specific number of standard deviations (SD) above the mean.

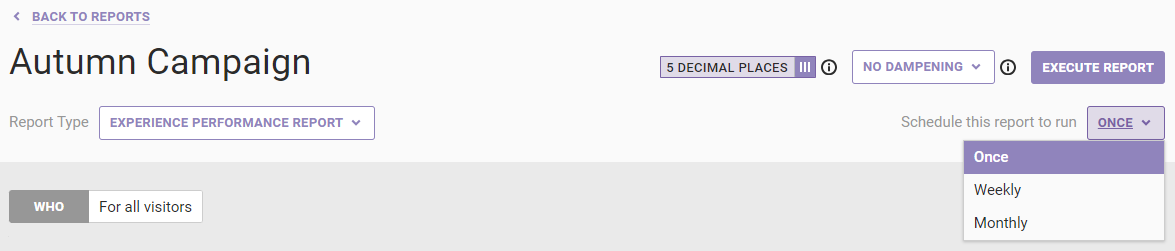
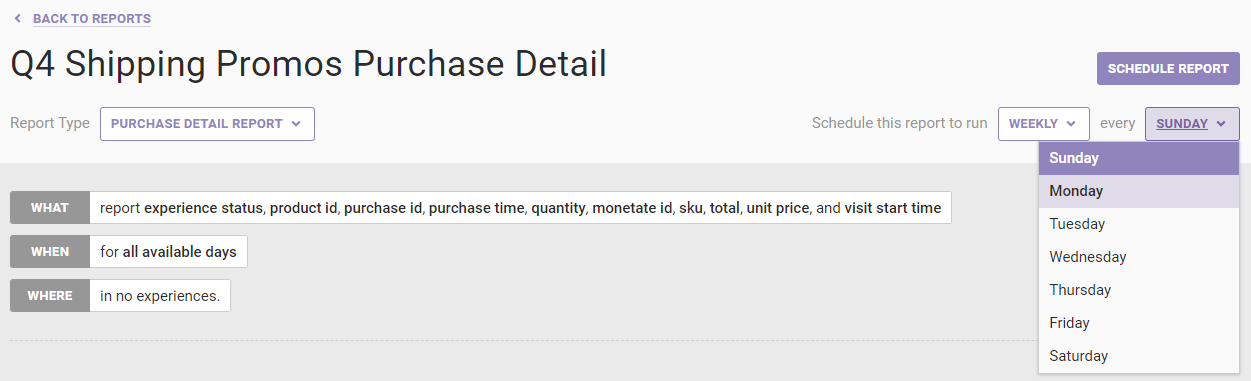
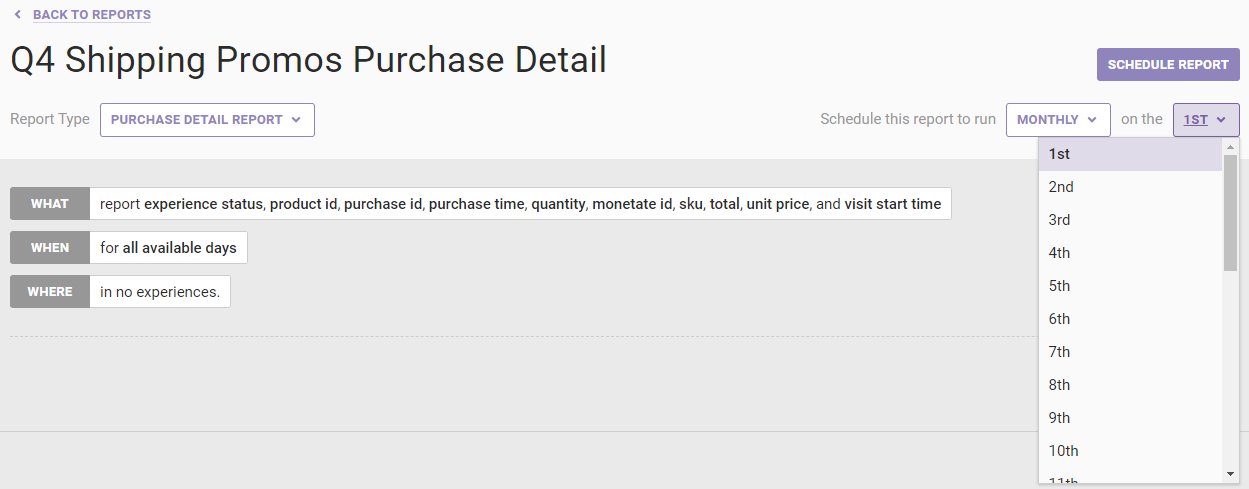
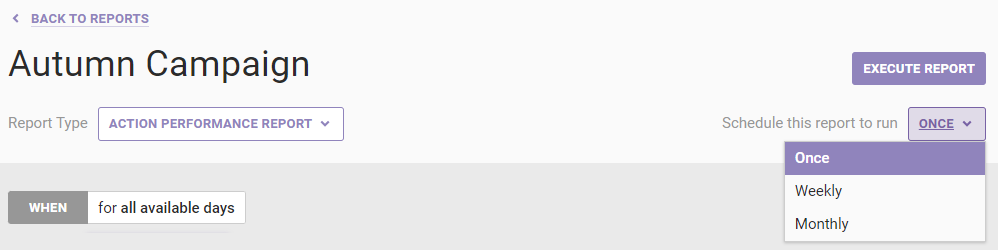
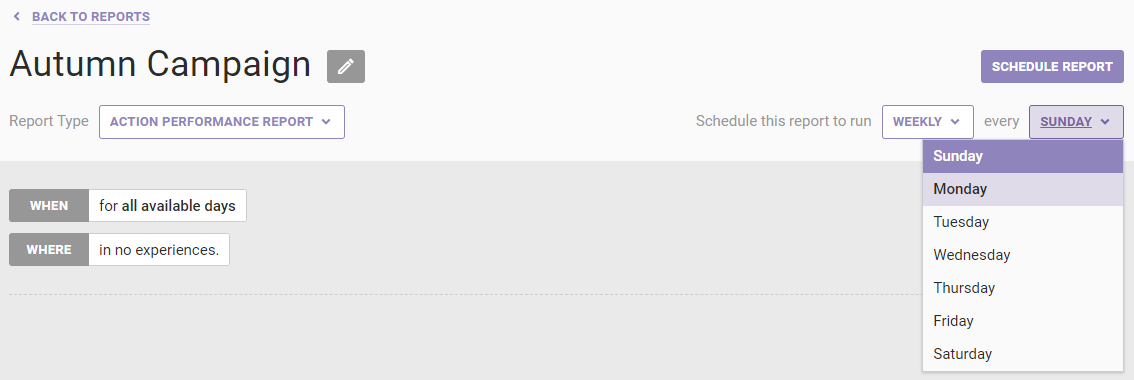
- Configure the report scheduling.
-
Select if you want to run the report once, weekly, or monthly.
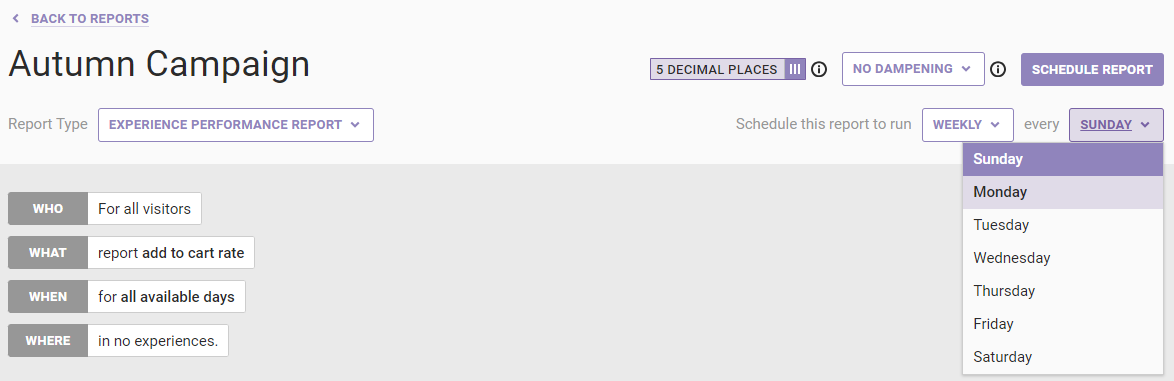
- If you selected Weekly in step 6a, then select on which day of the week you want the report generated.
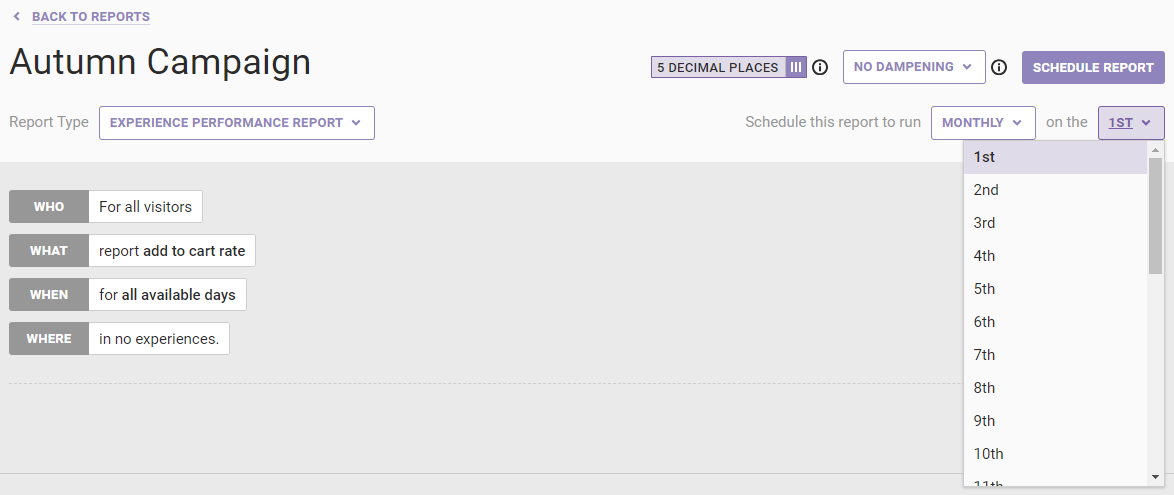
- If you selected Monthly in step 6a, then select a date on which you want the report generated each month. The latest date in a month that you can select is the 28th.
-
Select if you want to run the report once, weekly, or monthly.
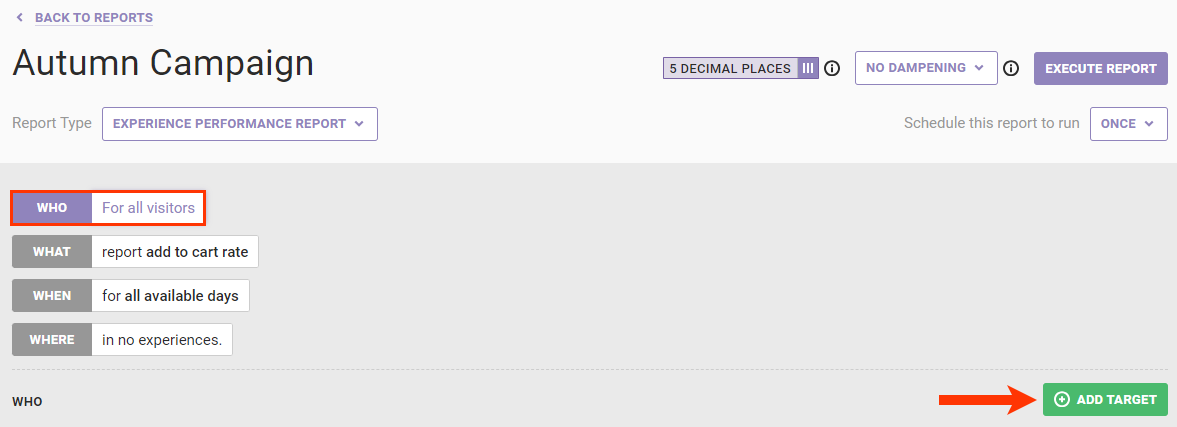
- Configure the WHO settings to refine the scope of the report.
- Click WHO and then click ADD TARGET.
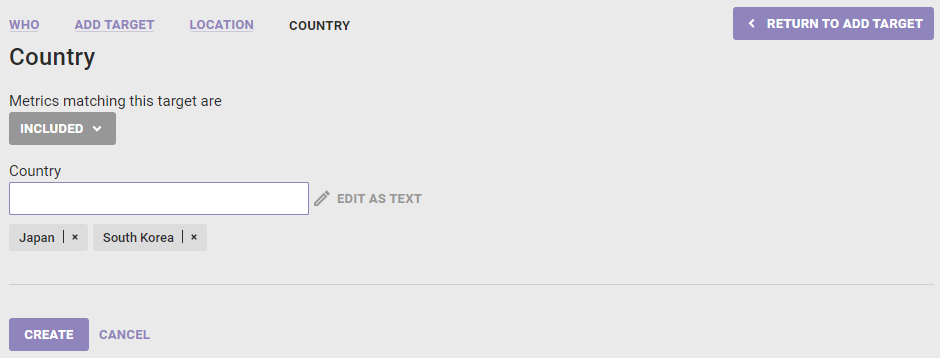
- Select the target type.

- Configure the target and then click CREATE.
- As applicable and necessary, select to include or exclude the target.
- As applicable and necessary, input or select the target's criteria.
- As necessary, repeat steps 7a through 7c to configure additional targets.
- Click WHO and then click ADD TARGET.
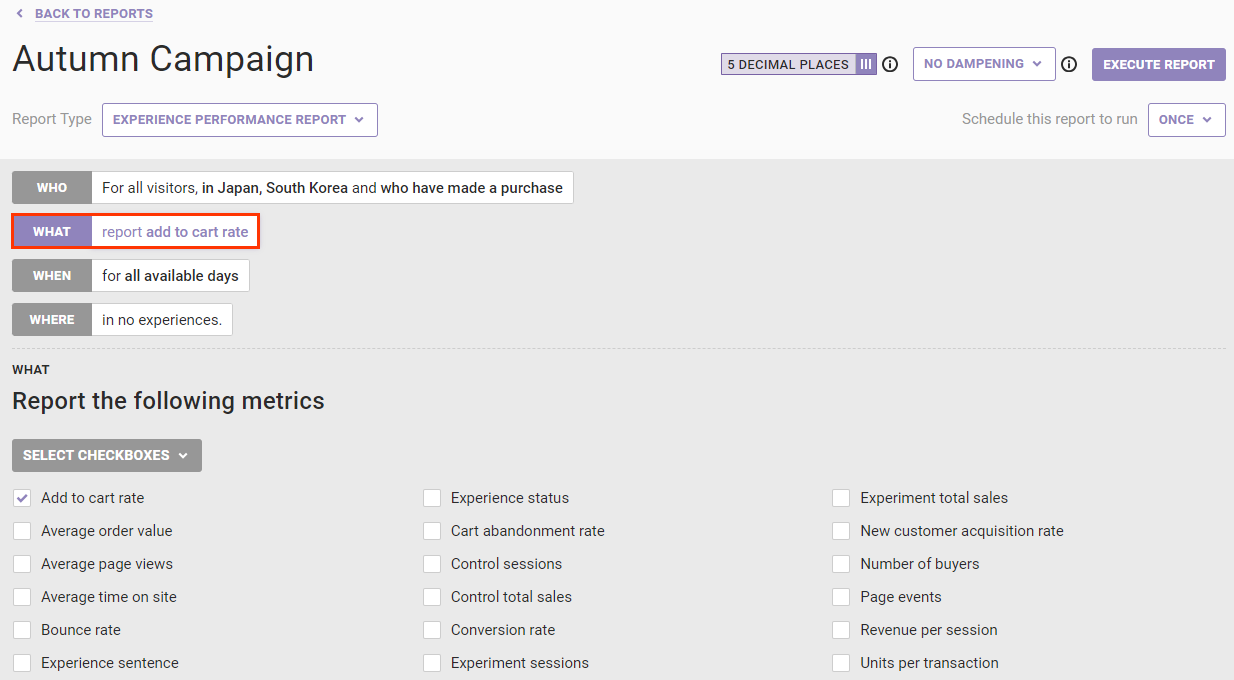
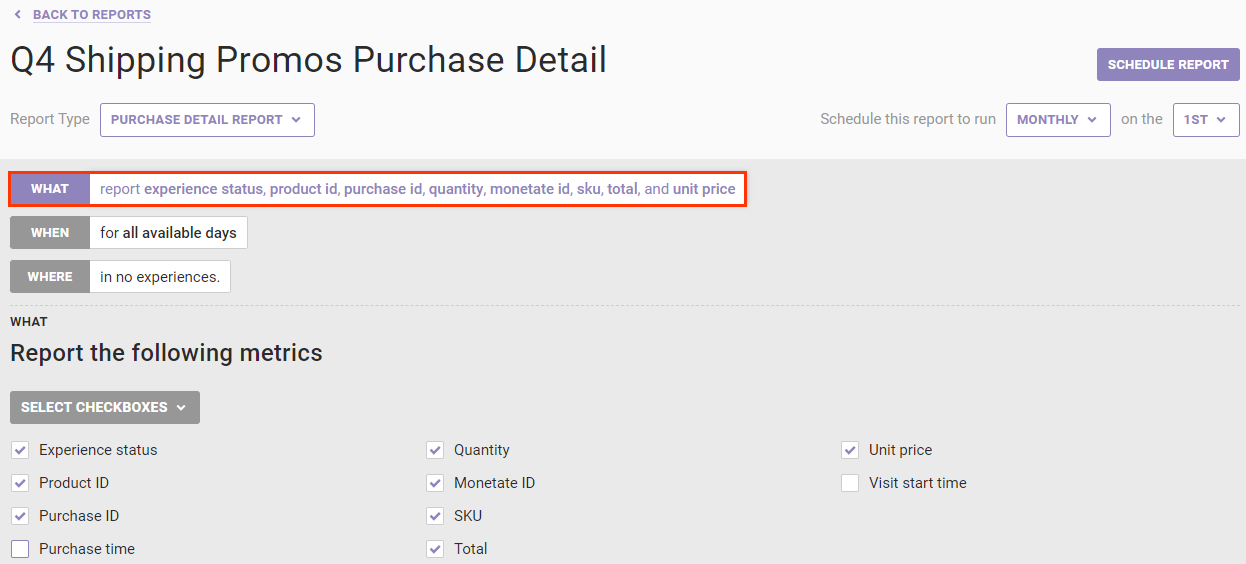
- Refine which metrics you want in the report. Click WHAT and then select the metrics you want to include. See Custom Reports Overview to review which metrics you can include in an Experience Performance Report and in a No Control Experience Performance Report.
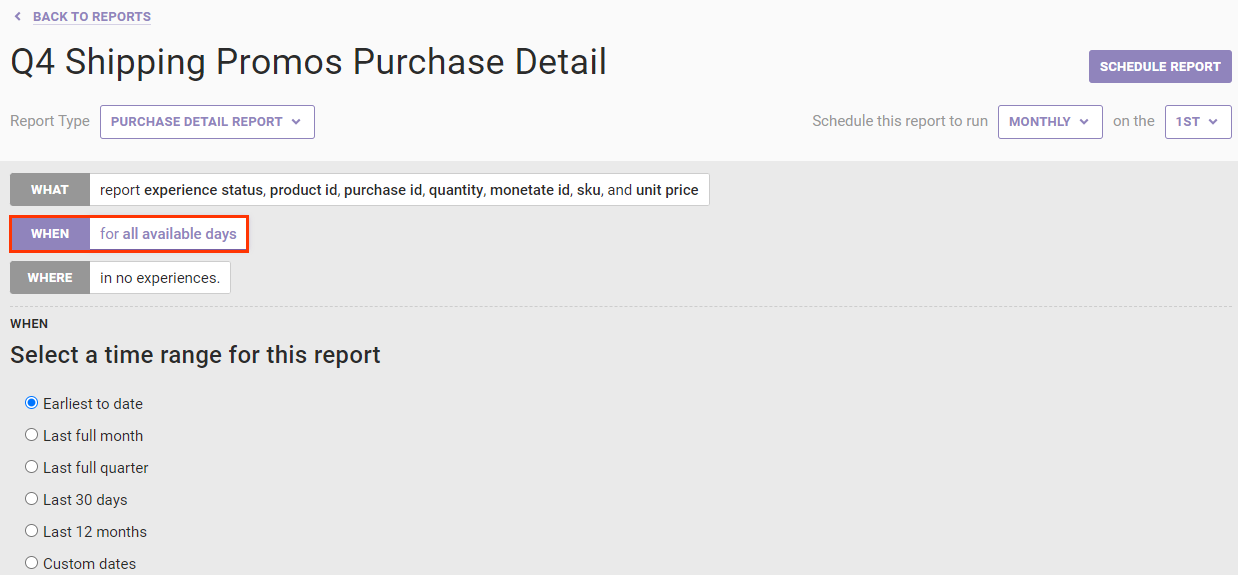
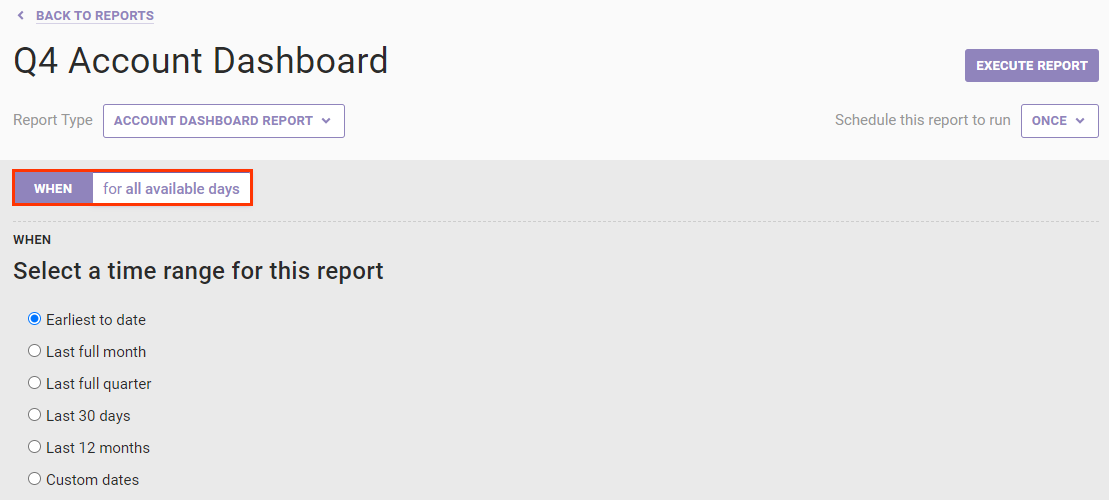
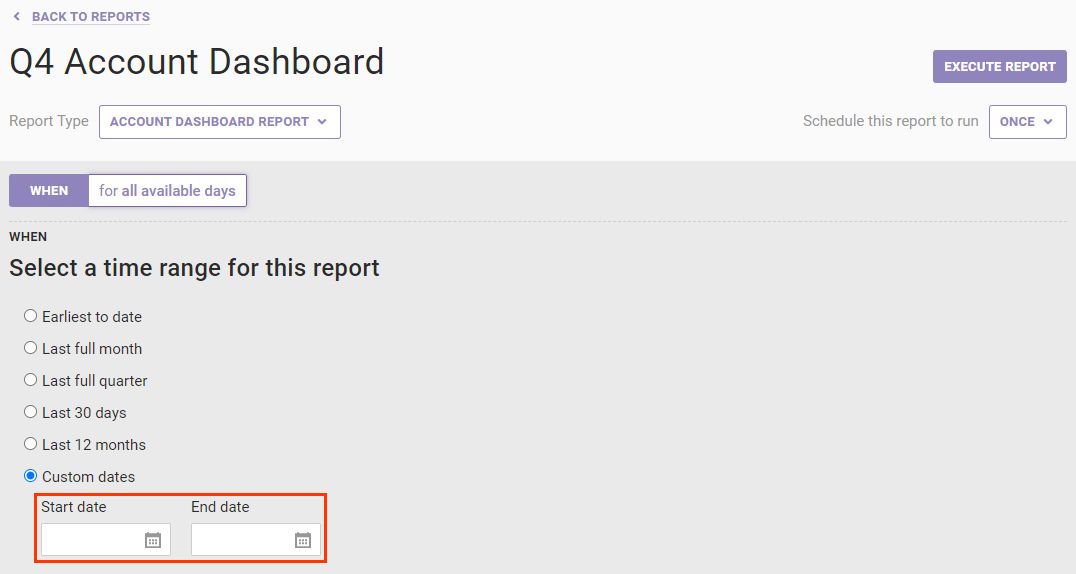
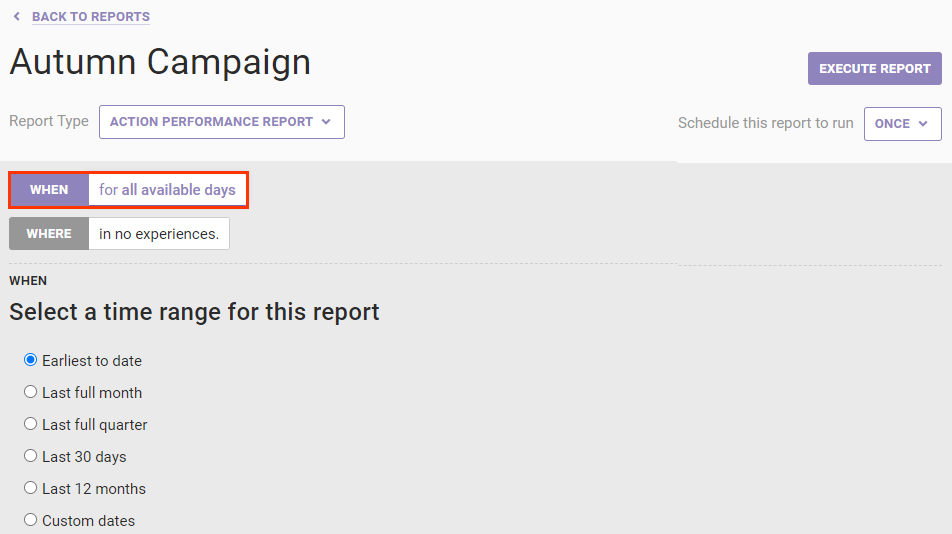
- Configure the time frame of the report.
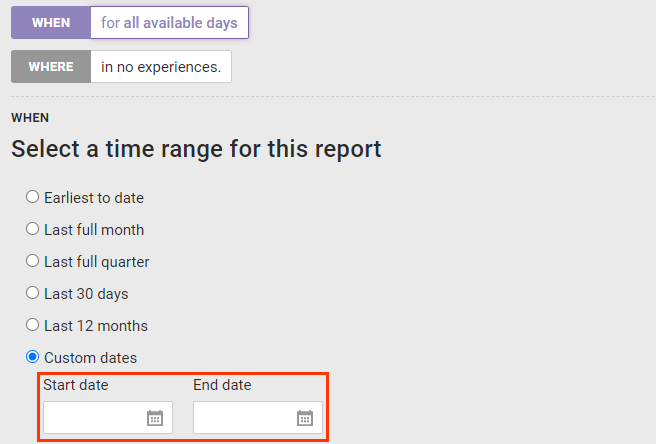
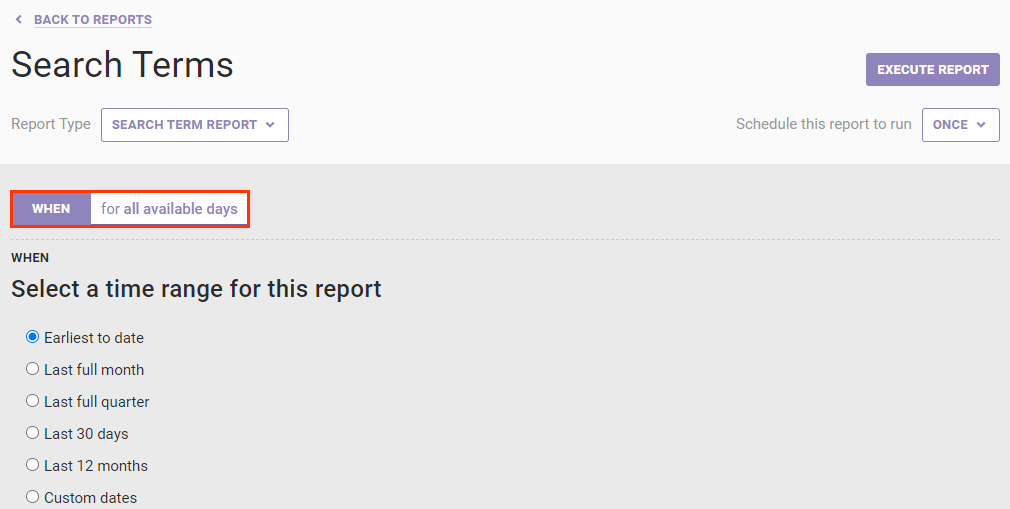
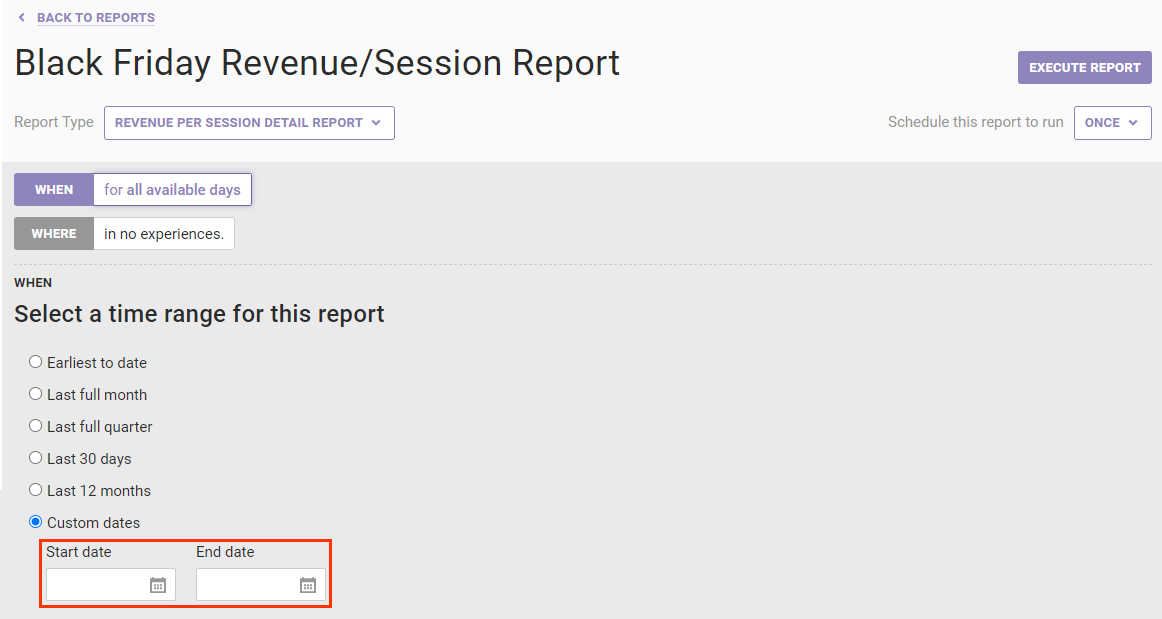
- Click WHEN and then select a time range option.

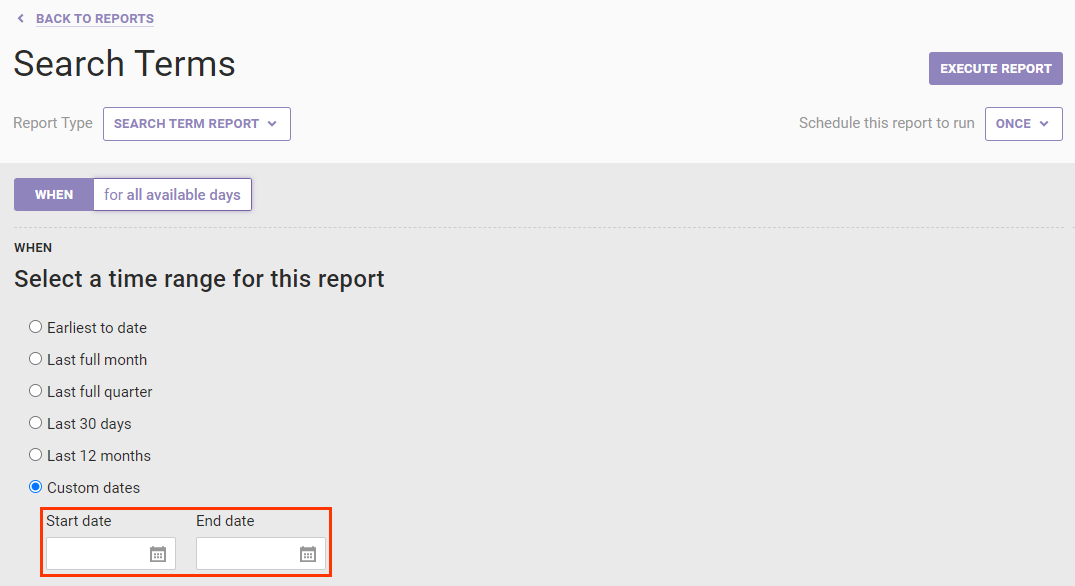
- If you selected Custom dates in the previous step, then input or select from the calendar a start date and an end date, respectively.
- Click WHEN and then select a time range option.
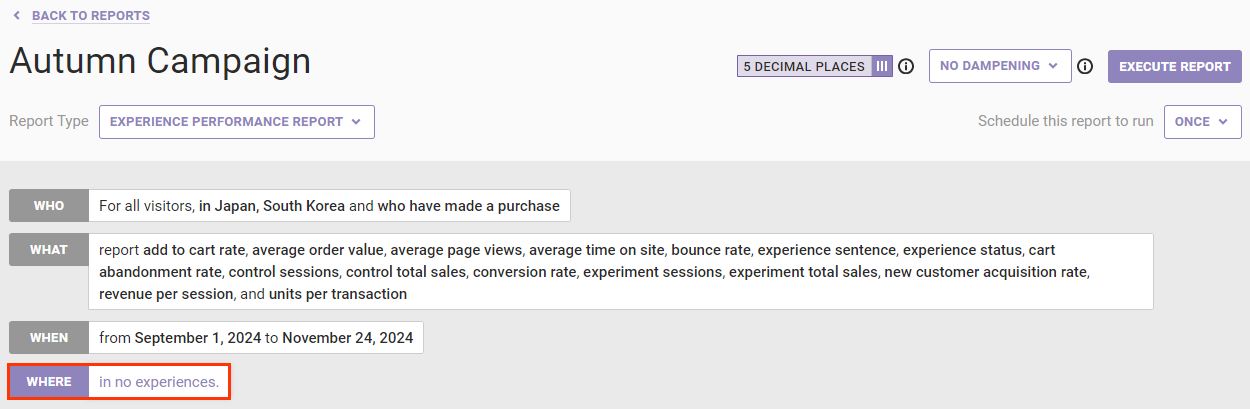
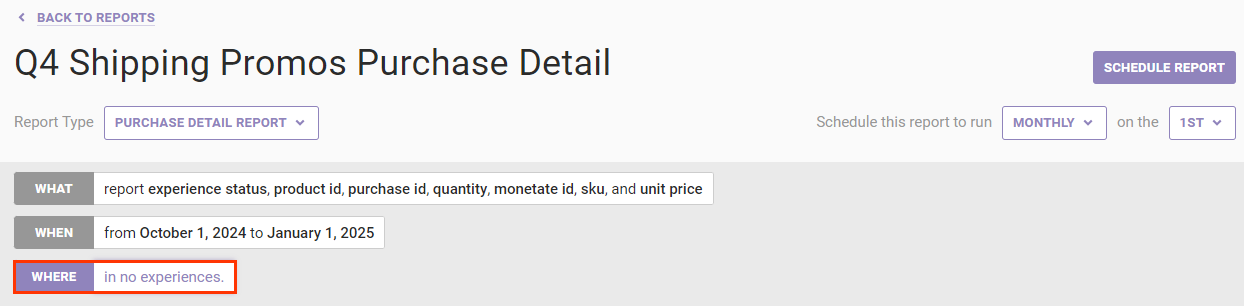
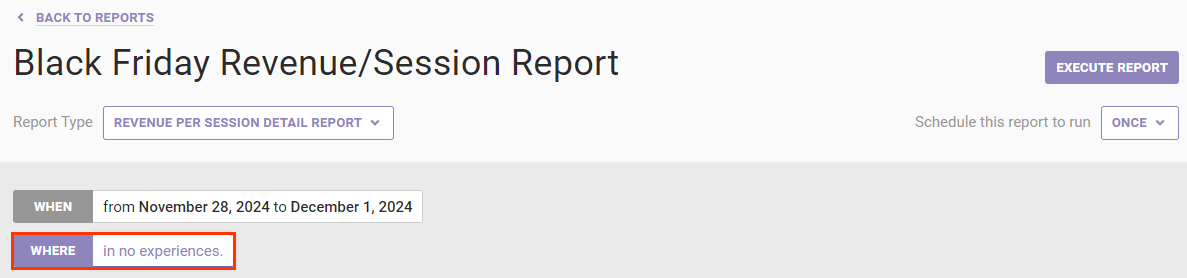
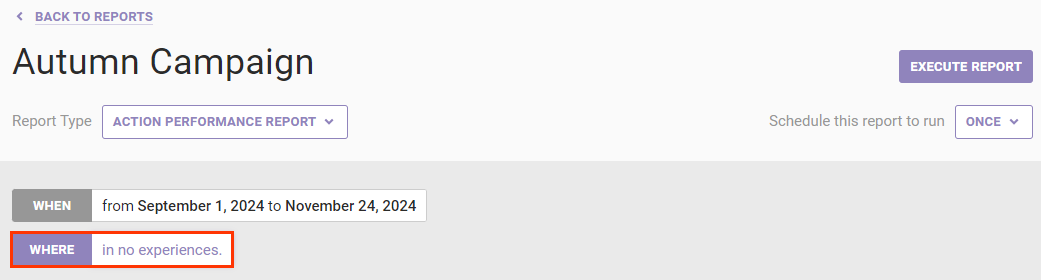
- Configure which experiences you want included in the report.
- Click WHERE.
-
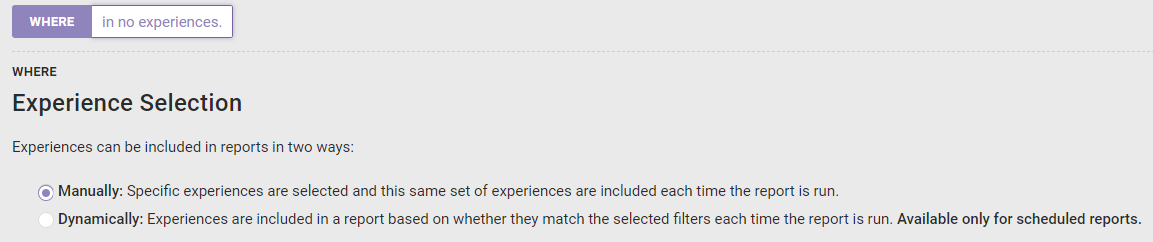
If you scheduled the report to run weekly or monthly in step 6a, then select how the experiences included in the report are determined:
- Manually — You select the specific experiences, which will always be included each time the report is generated
- Dynamically — Experiences that meet the criteria WHERE filtering criteria as well as any specific experiences you optionally add.
- If you selected Manually in the previous step or scheduled the report to run once in step 6a, then select from Available Experiences the specific experiences you want included in the report. Click to select the experience and then click MOVE TO SELECTED.
- If you selected Dynamically in step 10b, then add experience-filtering criteria as necessary. Type an experience name or experience tag into the Available Experiences search field, and then press Enter to add the tag or name to the WHERE settings.
- Click WHERE.
- Save the report.


You can access the report on the Custom Reports list page. See Viewing Reports for more information.
Purchase Audit Report
Follow these steps to create a Purchase Audit Report.
- Click ANALYTICS in the top navigation bar and then select Custom Reports.
- Click CREATE REPORT.
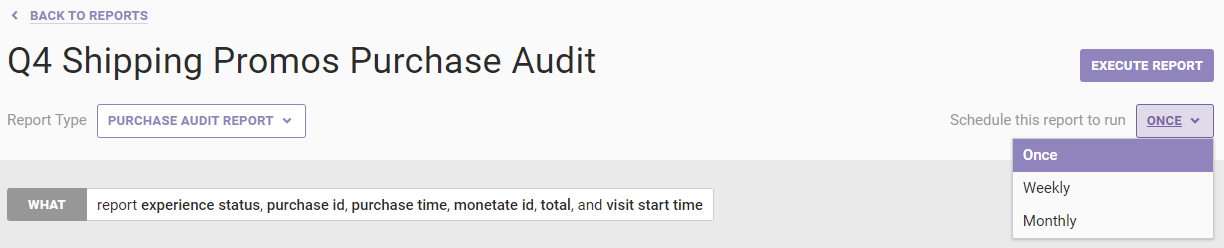
- Give the report a name, and then select Purchase Audit Report from Report Type.
- Configure the report scheduling.
-
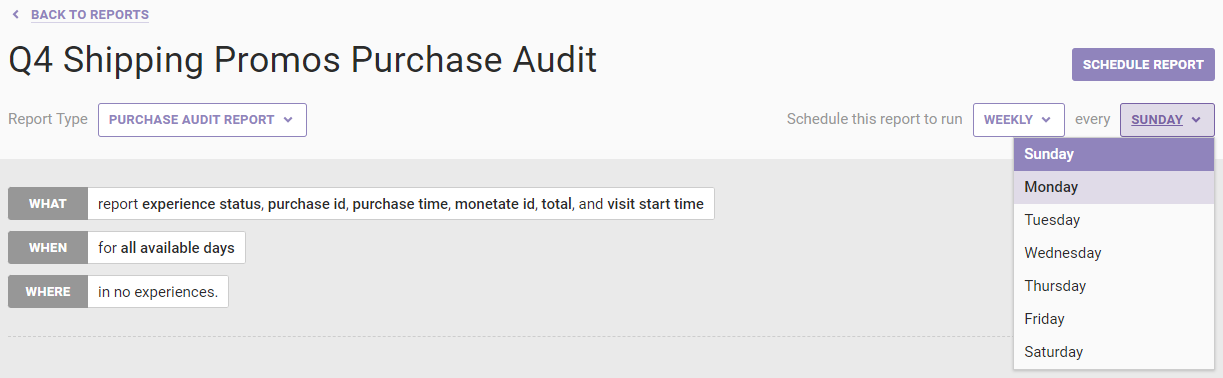
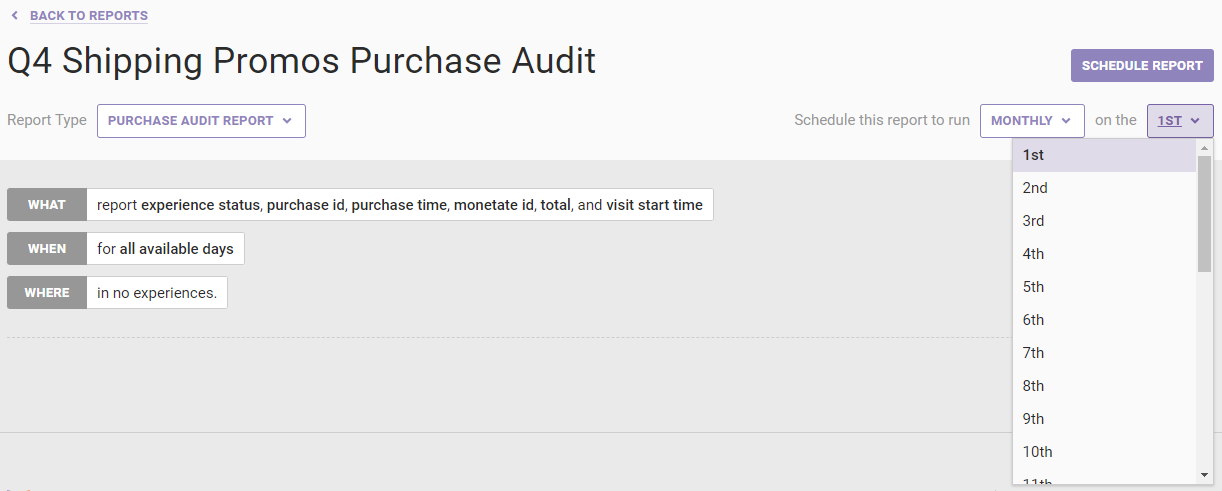
Select if you want to run the report once, weekly, or monthly.
- If you selected Weekly in step 4a, then select on which day of the week you want the report generated.
- If you selected Monthly in step 4a, then select a date on which you want the report generated each month. The latest date in a month that you can select is the 28th.
-
Select if you want to run the report once, weekly, or monthly.
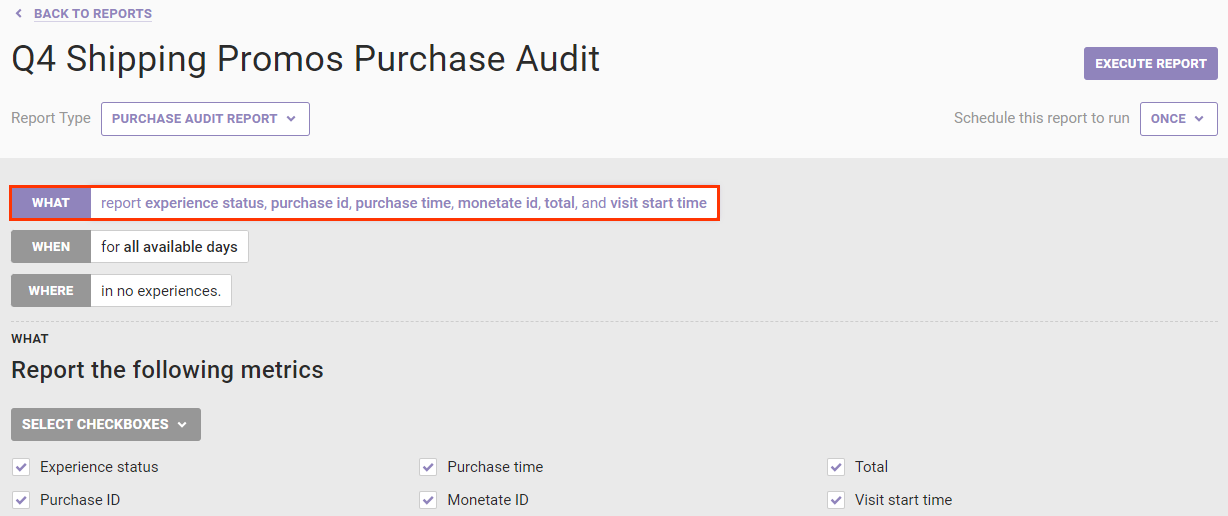
- Refine which metrics you want in the report. Click WHAT and then select the metrics you want to include.
- Configure the time frame of the report.
- Click WHEN and then select a time range option.

- If you selected Custom dates in the previous step, then input or select from the calendar a start date and an end date, respectively.
- Click WHEN and then select a time range option.
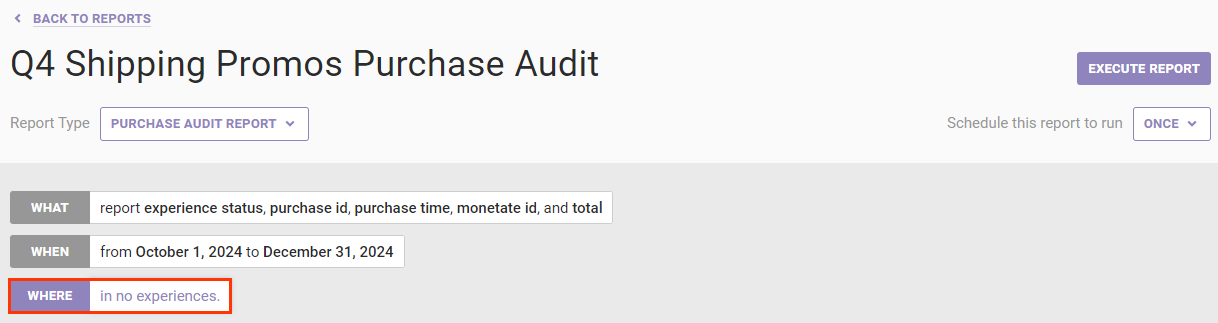
- Configure which experiences you want included in the report.
- Click WHERE.
- If you scheduled the report to run weekly or monthly in step 4a, then select how the experiences included in the report are determined:
- Manually — You select the specific experiences, which will always be included each time the report is generated
- Dynamically — Experiences that meet the criteria WHERE filtering criteria as well as any specific experiences you optionally add.
- If you selected Manually in the previous step or scheduled the report to run once in step 4a, then select from Available Experiences the specific experiences you want included in the report. Click to select the experience and then click MOVE TO SELECTED.
- If you selected Dynamically in step 7b, then add experience-filtering criteria as necessary. Type an experience name or experience tag into the Available Experiences search field, and then press Enter to add the tag or name to the WHERE settings.
- Click WHERE.
- Save the report.


You can access the report on the Custom Reports list page. See Viewing Reports for more information.
Purchase Detail Report
Follow these steps to create a Purchase Detail Report.
- Click ANALYTICS in the top navigation bar and then select Custom Reports.
- Click CREATE REPORT.
- Give the report a name, and then select Purchase Detail Report from Report Type.
- Configure the report scheduling.
-
Select if you want to run the report once, weekly, or monthly.

- If you selected Weekly in step 4a, then select on which day of the week you want the report generated.
- If you selected Monthly in step 4a, then select a date on which you want the report generated each month. The latest date in a month that you can select is the 28th.
-
Select if you want to run the report once, weekly, or monthly.
- Refine which metrics you want in the report. Click WHAT and then select the metrics you want to include.
- Configure the time frame of the report.
- Click WHEN and then select a time range option.
- If you selected Custom dates in the previous step, then input or select from the calendar a start date and an end date, respectively.
- Click WHEN and then select a time range option.
- Configure which experiences you want included in the report.
- Click WHERE.
- If you scheduled the report to run weekly or monthly in step 4a, then select how the experiences included in the report are determined:
- Manually — You select the specific experiences, which will always be included each time the report is generated
- Dynamically — Experiences that meet the criteria WHERE filtering criteria as well as any specific experiences you optionally add.
- If you selected Manually in the previous step or scheduled the report to run once in step 4a, then select from Available Experiences the specific experiences you want included in the report. Click to select the experience and then click MOVE TO SELECTED.
- If you selected Dynamically in step 7b, then add experience-filtering criteria as necessary. Type an experience name or experience tag into the Available Experiences search field, and then press Enter to add the tag or name to the WHERE settings.
- Click WHERE.
- Save the report.


You can access the report on the Custom Reports list page. See Viewing Reports for more information.
Search Term Report
Follow these steps to create a Search Term Report.
- Click ANALYTICS in the top navigation bar and then select Custom Reports.
- Click CREATE REPORT.
- Give the report a name, and then select Search Term Report from Report Type.
-
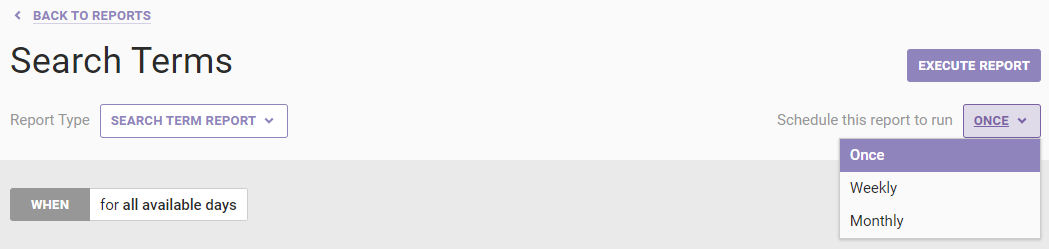
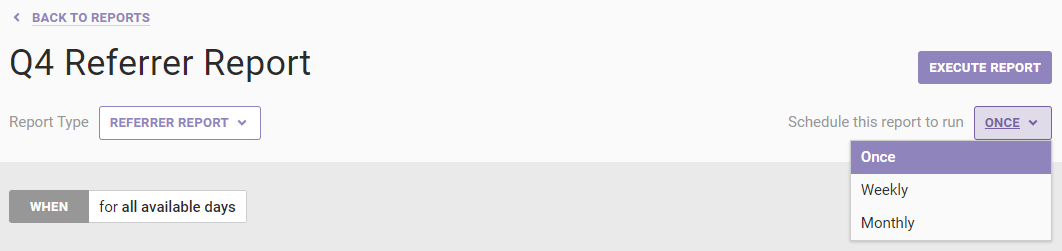
Configure the report scheduling.
- Select if you want to run the report once, weekly, or monthly.
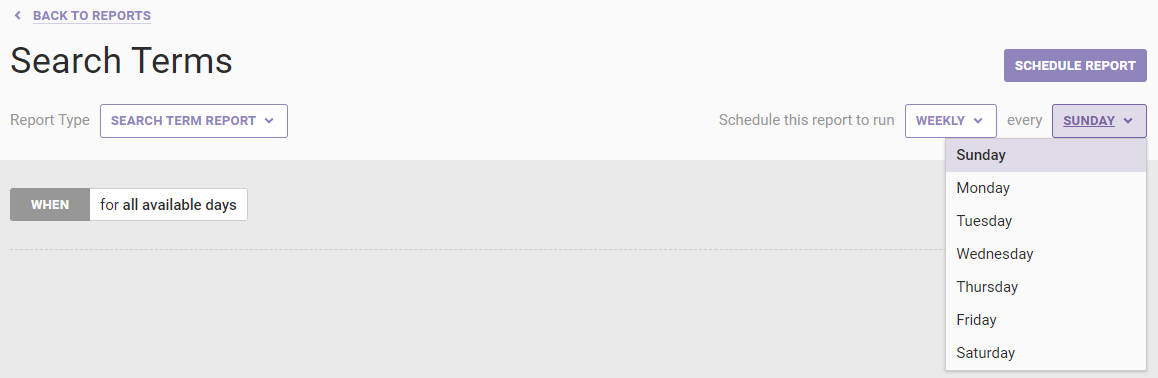
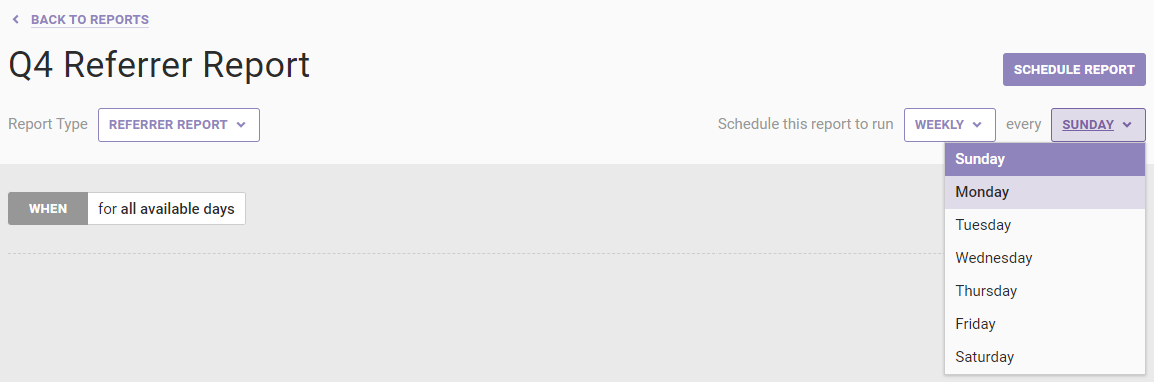
- If you selected Weekly in step 4a, then select on which day of the week you want the report generated.
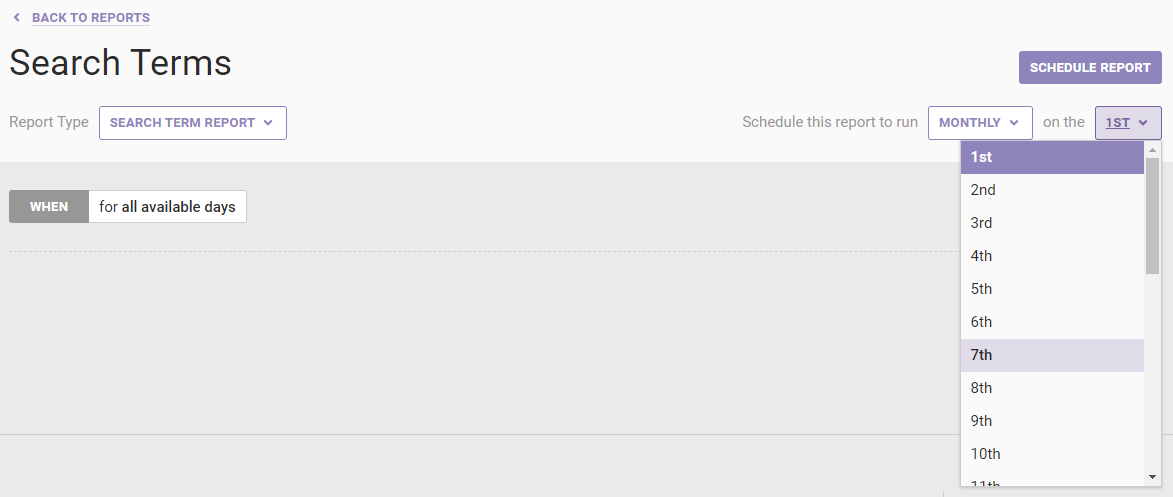
- If you selected Monthly in step 4a, then select a date on which you want the report generated each month. The latest date in a month that you can select is the 28th.
- Select if you want to run the report once, weekly, or monthly.
- Configure the time frame of the report.
- Click WHEN and then select a time range option.
- If you selected Custom dates in the previous step, then input or select from the calendar a start date and an end date, respectively.
- Click WHEN and then select a time range option.
- Save the report.


You can access the report on the Custom Reports list page. See Viewing Reports for more information.
Referrer Report
Follow these steps to create a Referrer Report.
- Click ANALYTICS in the top navigation bar and then select Custom Reports.
- Click CREATE REPORT.
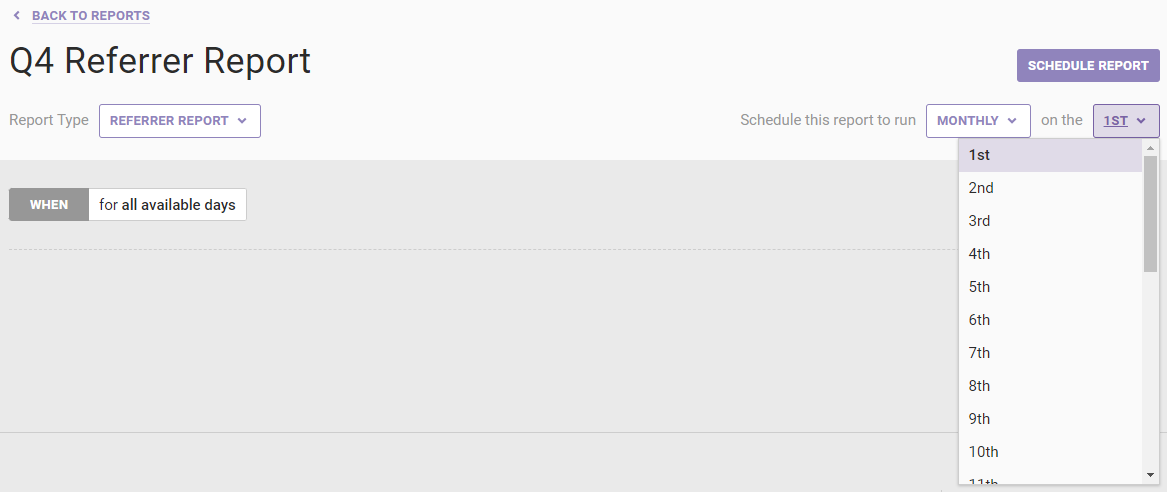
- Give the report a name, and then select Referrer Report from Report Type.
- Configure the report scheduling.
-
Select if you want to run the report once, weekly, or monthly.
- If you selected Weekly in step 4a, then select on which day of the week you want the report generated.
- If you selected Monthly in step 4a, then select a date on which you want the report generated each month. The latest date in a month that you can select is the 28th.
-
Select if you want to run the report once, weekly, or monthly.
- Configure the time frame of the report.
- Click WHEN and then select a time range option.

- If you selected Custom dates in the previous step, then input or select from the calendar a start date and an end date, respectively.

- Click WHEN and then select a time range option.
- Save the report.


You can access the report on the Custom Reports list page. See Viewing Reports for more information.
Account Dashboard Report
Follow these steps to create an Account Dashboard Report.
- Click ANALYTICS in the top navigation bar and then select Custom Reports.
- Click CREATE REPORT.
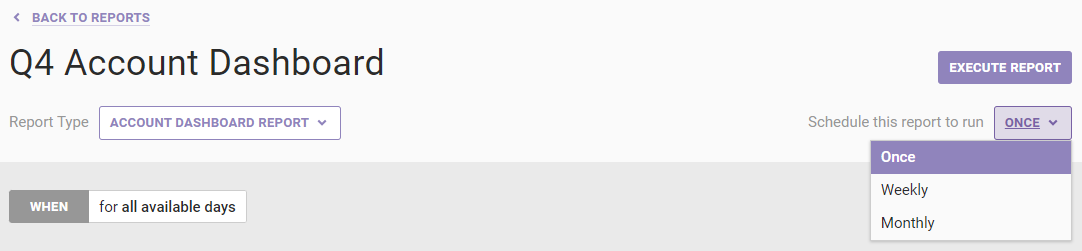
- Give the report a name, and then select Account Dashboard Report from Report Type.
- Configure the report scheduling.
-
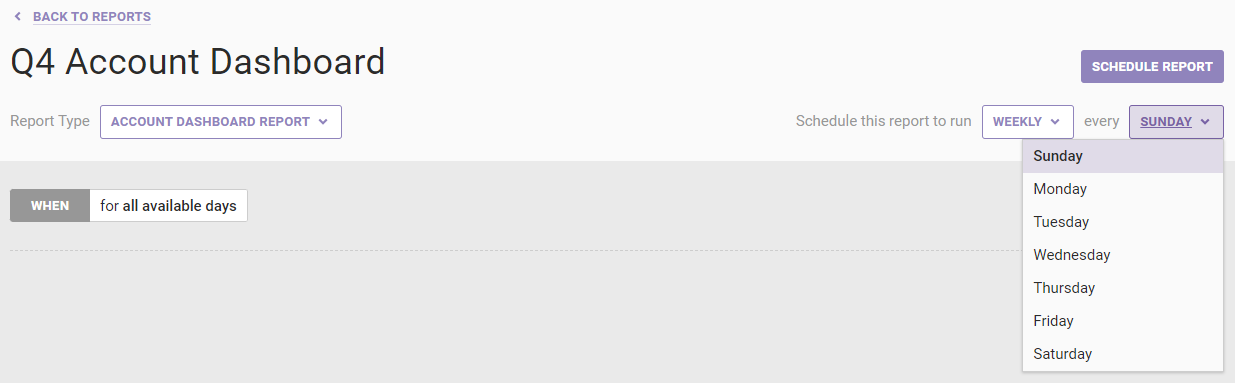
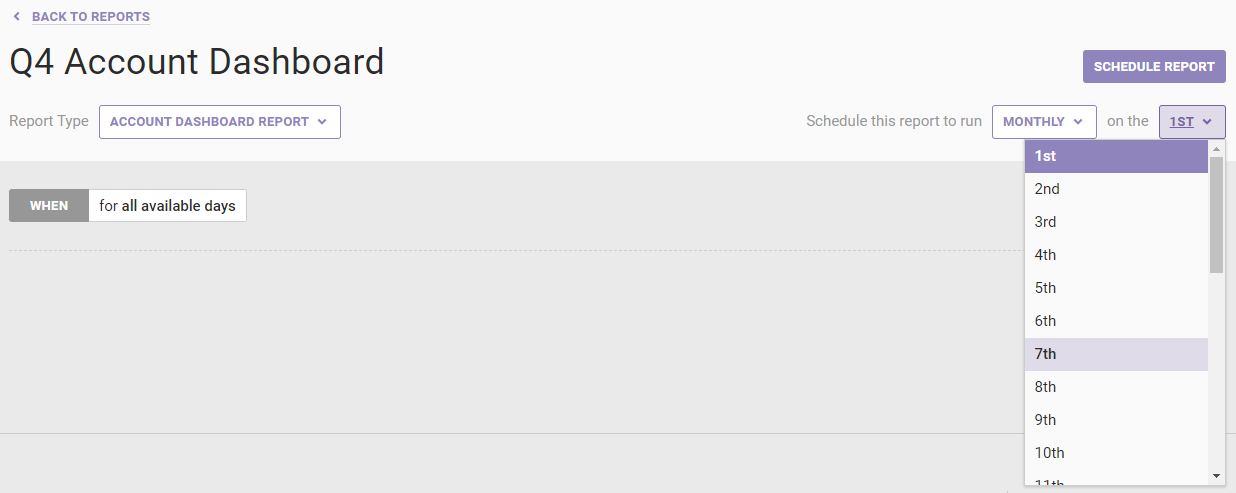
Select if you want to run the report once, weekly, or monthly.
- If you selected Weekly in step 4a, then select on which day of the week you want the report generated.
- If you selected Monthly in step 4a, then select a date on which you want the report generated each month. The latest date in a month that you can select is the 28th.
-
Select if you want to run the report once, weekly, or monthly.
- Configure the time frame of the report.
- Click WHEN and then select a time range option.
- If you selected Custom dates in the previous step, then input or select from the calendar a start date and an end date, respectively.
- Click WHEN and then select a time range option.
- Save the report.

You can access the report on the Custom Reports list page. See Viewing Reports for more information.
Revenue per Session Detail Report
Follow these steps to create a Revenue per Session Detail Report.
- Click ANALYTICS in the top navigation bar and then select Custom Reports.
- Click CREATE REPORT.
- Give the report a name, and then select Revenue per Session Detail Report from Report Type.
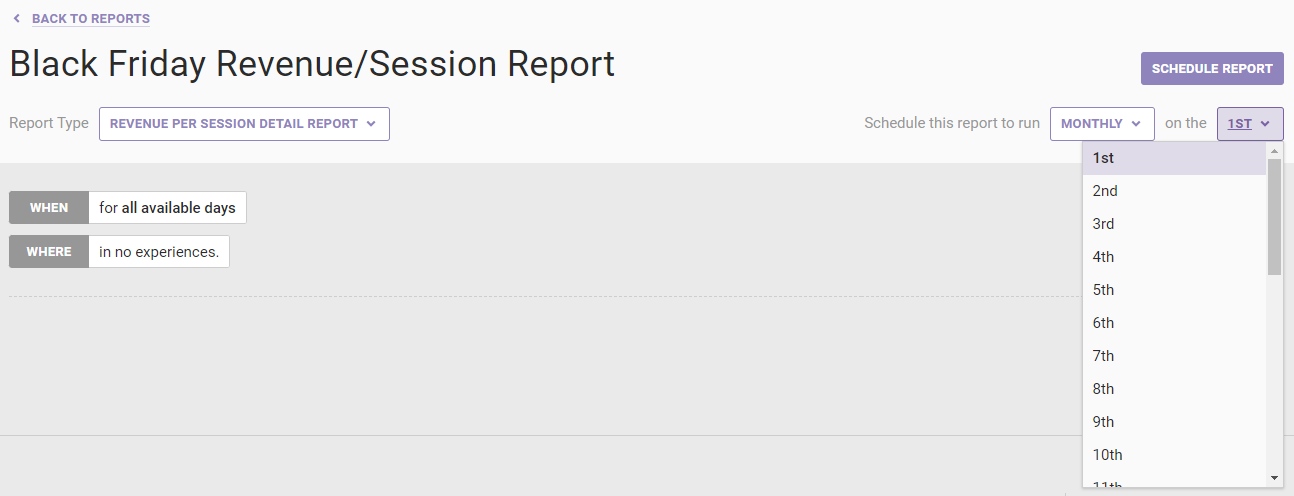
- Configure the report scheduling.
-
Select if you want to run the report once, weekly, or monthly.

- If you selected Weekly in step 4a, then select on which day of the week you want the report generated.

- If you selected Monthly in step 4a, then select a date on which you want the report generated each month. The latest date in a month that you can select is the 28th.
-
Select if you want to run the report once, weekly, or monthly.
- Configure the time frame of the report.
- Click WHEN and then select a time range option.
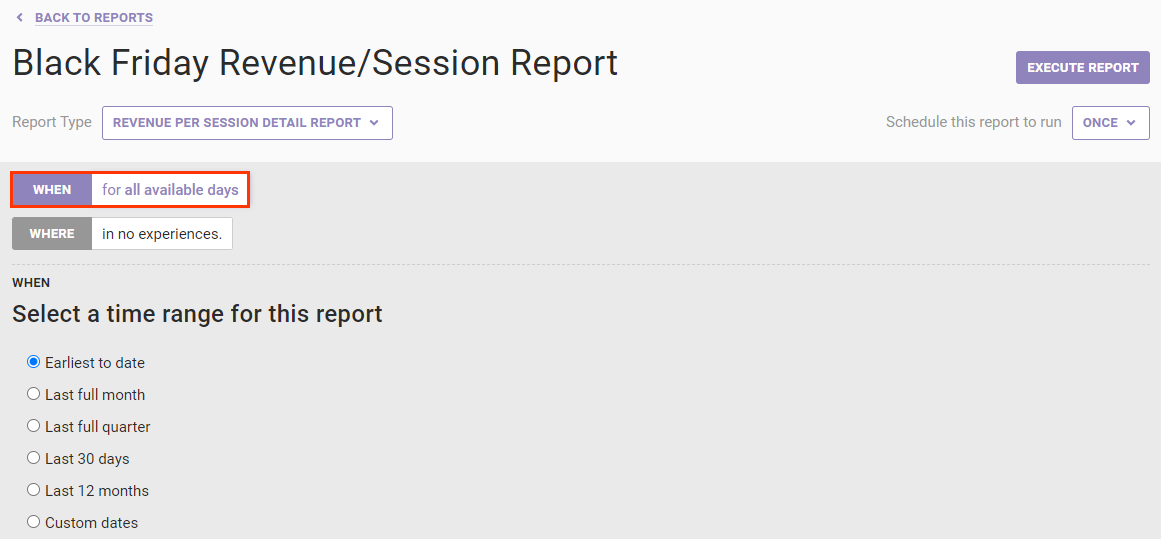
- If you selected Custom dates in the previous step, then input or select from the calendar a start date and an end date, respectively.
- Click WHEN and then select a time range option.
- Configure which experiences you want included in the report.
- Click WHERE.
- If you scheduled the report to run weekly or monthly in step 4a, then select how the experiences included in the report are determined:
- Manually — You select the specific experiences, which will always be included each time the report is generated
- Dynamically — Experiences that meet the criteria WHERE filtering criteria as well as any specific experiences you optionally add.
- If you selected Manually in the previous step or scheduled the report to run once in step 4a, then select from Available Experiences the specific experiences you want included in the report. Click to select the experience and then click MOVE TO SELECTED.

- If you selected Dynamically in step 6b, then add experience-filtering criteria as necessary. Type an experience name or experience tag into the Available Experiences search field, and then press Enter to add the tag or name to the WHERE settings.
- Click WHERE.
- Save the report.


You can access the report on the Custom Reports list page. See Viewing Reports for more information.
Action Performance Report
Follow these steps to create an Action Performance Report.
- Click ANALYTICS in the top navigation bar and then select Custom Reports.
- Click CREATE REPORT.
- Give the report a name, and then select Action Performance Report from Report Type.
- Configure the report scheduling.
-
Select if you want to run the report once, weekly, or monthly.
- If you selected Weekly in step 4a, then select on which day of the week you want the report generated.
- If you selected Monthly in step 4a, then select a date on which you want the report generated each month. The latest date in a month that you can select is the 28th.

-
Select if you want to run the report once, weekly, or monthly.
- Configure the time frame of the report.
- Click WHEN and then select a time range option.
- If you selected Custom dates in the previous step, then input or select from the calendar a start date and an end date, respectively.
- Click WHEN and then select a time range option.
- Configure which experiences you want included in the report.
- Click WHERE.
- If you scheduled the report to run weekly or monthly in step 4a, then select how the experiences included in the report are determined:
- Manually — You select the specific experiences, which will always be included each time the report is generated
- Dynamically — Experiences that meet the criteria WHERE filtering criteria as well as any specific experiences you optionally add.
- If you selected Manually in the previous step or scheduled the report to run once in step 4a, then select from Available Experiences the specific experiences you want included in the report. Click to select the experience and then click MOVE TO SELECTED.
- If you selected Dynamically in step 6b, then add experience-filtering criteria as necessary. Type an experience name or experience tag into the Available Experiences search field, and then press Enter to add the tag or name to the WHERE settings.
- Click WHERE.
- Save the report.


You can access the report on the Custom Reports list page. See Viewing Reports for more information.
WHO Targets
The following targets are available when you create an Experience Performance Report or a No Control Experience Performance Report.
Landing Targets
| Target | Description |
|---|---|
| Referrer | Include or exclude visitors who arrive on your site from another site
Note: This target only works for https:// to https:// navigation or http:// to http:// navigation since, as a security measure, you cannot go from a secured site to an unsecured site. |
| New Visitors | Include or exclude visitors who arrived on your site for the first time or for the first time since clearing their cache and removing any cookies set by Monetate |
| Landing URL | Include or exclude visitors who arrive on a page containing a certain URL string
Note: This target matches any part of the landing URL, including query parameters. |
Location Targets
| Target | Description |
|---|---|
| Country | Include or exclude visitors from a certain country or from one of multiple countries |
| Time Zone | Include or exclude visitors based on their time zone |
| City | Include or exclude visitors from a certain city or from one of multiple cities |
| Zip/Postal Code | Include or exclude visitors based on their US ZIP code or international postal code |
| Media Market | Include or exclude visitors based on their media market
Note: This target only uses US media markets. |
| US State | Include or exclude visitors based on their US state or one of the multiple states |
| IP Address | Include or exclude visitors with a certain IP address or one of the multiple IP addresses
Note: The IP address must be in the IPv4 format ( x.x.x.x). |
Behavior Targets
| Target | Description |
|---|---|
| Has Purchased Product | Include or exclude visitors who've purchased a product from a list of product IDs that you input within the report's timeframe |
| Has Purchased (Any Product) | Include or exclude visitors who've purchased any product within the report's timeframe |
| Has Viewed Product | Include or exclude visitors who've viewed a product from a list of product IDs that you input within the report's timeframe |
Technographics Targets
| Target | Description |
|---|---|
| Device | Include or exclude visitors based on the device they're using
Note: Device type is defined by the User-Agent string sent in the browser header. |
| Screen Width | Include or exclude visitors based on their device's screen width |
| Screen Resolution | Include or exclude visitors based on the resolution of their device's screen |
| Browser | Include or exclude visitors based on the browser they're using |
| Operating System | Include or exclude visitors based on the operating system they're using |
| Screen Height | Include or exclude visitors based on their device's screen height |