Before you write CSS in actions, you should understand how CSS hierarchy works and how Monetate can use CSS actions within this hierarchy.
Different levels of CSS include browser default CSS, external stylesheets, internal stylesheets, and inline styles. Styles cascade in the following order, where inline styles are most dominant.
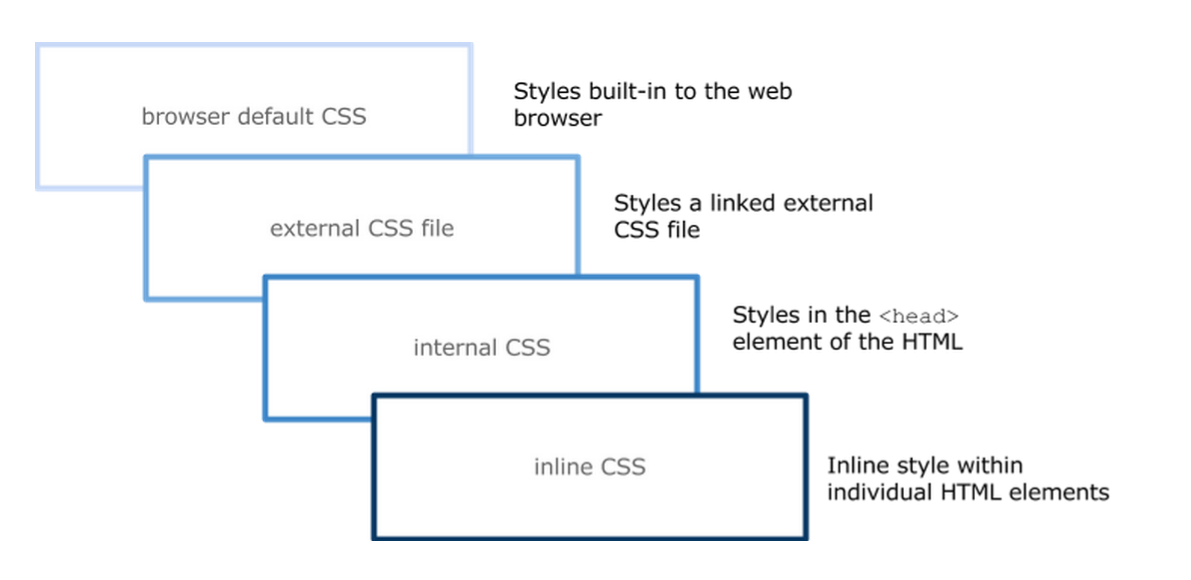
A CSS action's styles overwrite existing styling in any external or browser-based stylesheet on your site.
Basic CSS Properties in Actions
You should be familiar with two principle property types when you build or edit actions: display properties and position properties. The display and position properties that apply to actions are explained in greater detail below.
CSS Display Properties
CSS display properties determine how an element is displayed on your site.
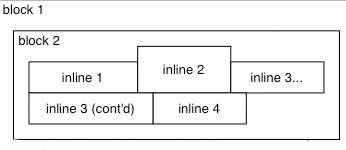
Block-Level Elements
Block-level elements occupy any available width, regardless of their content, and begin on a new line. They go all the way across the page. Block-level elements are generally used for larger pieces of content, such as headings and structural elements.
div {
display: block;
}
Inline-Level Elements
Inline-level elements occupy only the width their content requires and display on the same line, one after the other. You can remember where inline elements go by thinking about inline as being "in line with an element."
You can use inline-level element for smaller pieces of content, such as boldface or italicized text.
div {
display: inline;
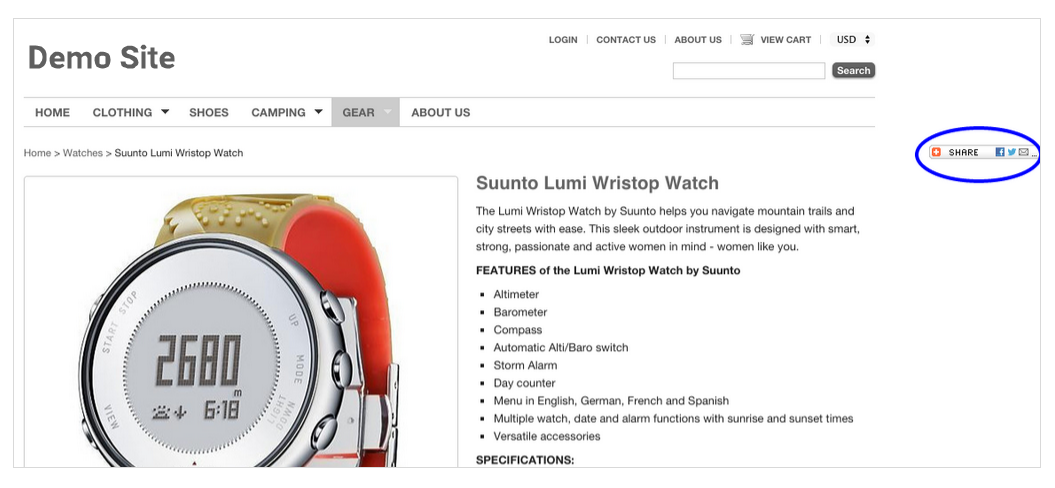
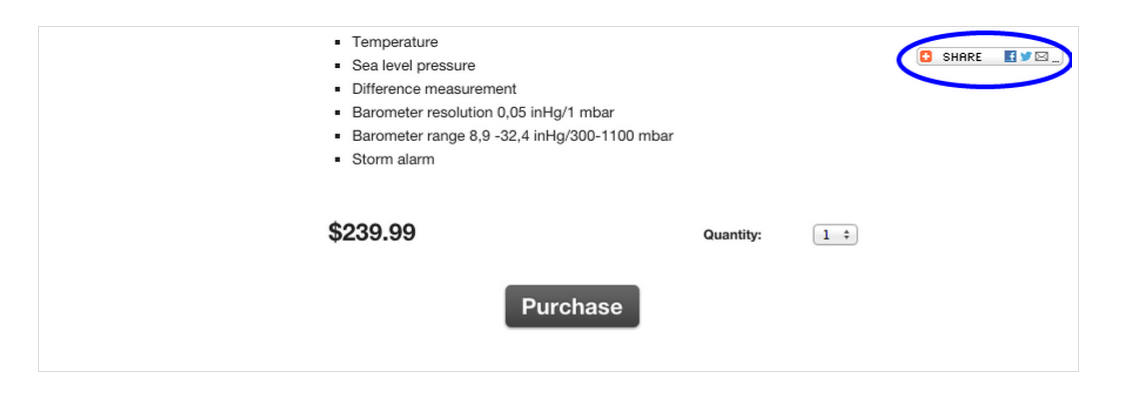
}Here is an example of a site with both block and inline elements on the page.
CSS Position Properties
The CSS position property determines how an element is positioned in relation to other elements on the page. The position of HTML elements is static by default. This means they are laid out in the current flow of the document.
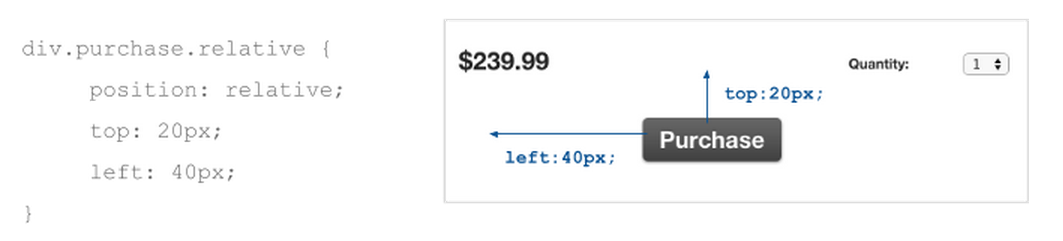
The position: relative; property accepts the box offset properties top, right, bottom, and left. These box offset properties allow you to precisely position the element, shifting it from its default position in any direction.
When you use the position: absolute; property, elements are removed from the normal flow of the HTML document. Upon removing the element from the normal flow, "absolute" elements are positioned in relation to their containing parent, which is relatively or absolutely positioned. If the parent element does not have a relative or absolute position, the child element is positioned in relation to the body of the page.
The position: fixed; property doesn't leave space for the element in the normal flow. Fixed positioning is similar to absolute positioning, except the element's containing block is the viewport.
This property is often used to create a floating element that stays in the same position regardless of scrolling.
Global CSS Styles
After a customer qualifies for an experience, they receive action content that consists of various changes, insertions, and the removal of content on the page. Most actions have an optional input to include "global" CSS styles. The optional input may appear both in Action Builder or in an action template when you're configuring the WHAT settings of a Web experience.
These global styles are included in a <style> element in the <head> of the HTML document. The style block looks something like this in the DOM:
<style id="monetatecss" type="text/css">
.cssSelector {
    margin-left:3px !important;
    padding-top:0 !important;
}
</style>
Retracks and Dynamic Content
Because the Monetate style block is included in the <head> of the page rather than in the body, it generally remains intact when dynamic content gets updated in the DOM. This is both an advantage and disadvantage. Global styles from any actions still render with dynamic page content, so a CSS Append action never requires a retrack. The disadvantage is the CSS styles still render on dynamic content, which may not be expected.
Compiled from Multiple Actions
The CSS styles from all actions the user has qualified for are compiled into a single <style> element and appended to the page. The CSS is compiled from first to last, following the order of experience and action priority. This means that a typo such as a missing } after a CSS statement can cause issues with unrelated actions.
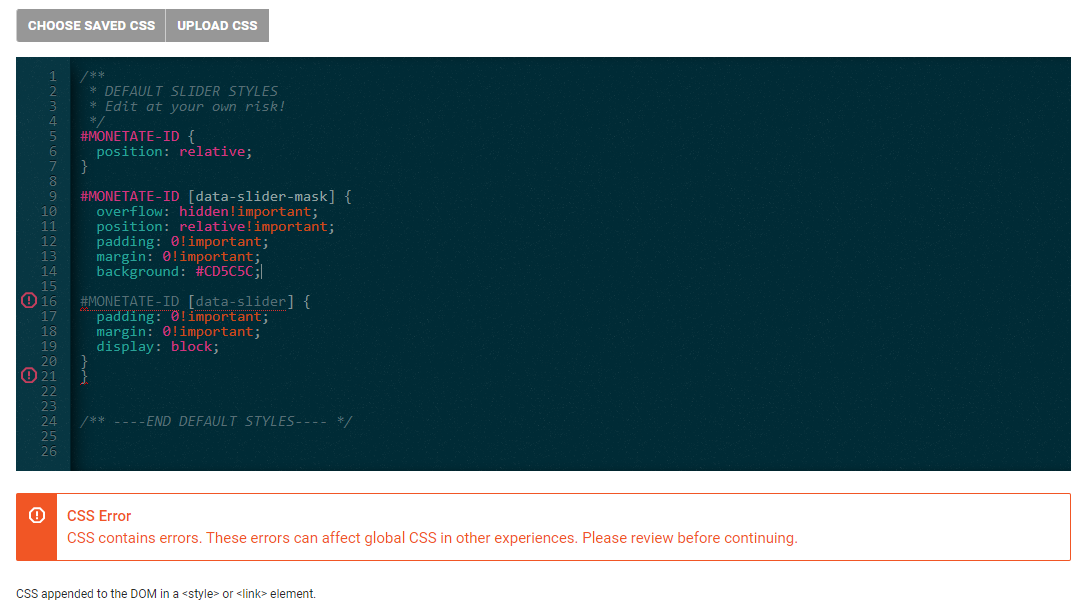
To combat this possible malfunction, the CSS code editor has a validation mechanism that alerts you when invalid CSS code is present.
Some older legacy actions that have a text-only action input may not have this CSS validation.
Additional Tips and Tricks
Overwriting Existing Styles
You can overwrite existing styles on your site in actions using specificity. Selector specificity is a process used to determine which rules take precedence in CSS when several rules are applied to the same element in the HTML. If two selectors apply to the same element, the one with higher specificity wins. For example, #my_id_selector styles can be overwritten by using a parent element ID or parent class:
#my_id_selector { color: #f00; }can be overwritten by
div.main #my_id_selector { color: #ccc; }or
body .main #my_id_selector { color: #ddd; }Another method to overwrite existing styles is using !important after a style property. This is useful for overwrite inline styles, so !important annotations are often used with inline styles. Consider this example:
<div class="my-class" style="border: 3px solid #000;">Monetate Rocks!</div>can be overwritten in the CSS by
.my-class { border: none!important; }Be careful not to overuse the !important property because too many properties with !important can cause conflicts between styles. Monetate recommends that you first use selector specificity for overwriting. That said, sometimes using !important is the best option available to ensure an action styles take precedence over any other styles.
A final method for overwriting styles is to recognize the order in which the rules are written. Whatever style appears last takes precedence.
In the following example, the header would appear blue.
#header { color: red; }
#header { color: blue; }
Don't Forget the Semicolon
Excluding a semicolon (;) after each line of an element's styles is a common mistake in CSS. Doing so breaks the style of the particular class and possibly any elements defined after it.
Note the lack of semicolons in this code block:
.class {
display: block
position: relative
width: 100%
}
Here's the same code block with correct semicolon placement:
.class {
display: block;
position: relative;
width: 100%;
}
Use Pseudo-Classes to Add Content
The CSS insert action and CSS Style field support pseudo-classes. This is particularly useful for inserting text within Monetate-generated content for which there is no other access to the HTML.
Here is an example of the :before and :after pseudo-classes. You use the following code:
.pseudo-sale-price:before {
content: "On Sale!";
color: #f00;
font-weight: bold;
with this HTML in place:
<span class="pseudo-sale-price">$99.99</span>You would see this on your site:
On Sale! $99.99
For more information on pseudo-classes, refer to W3Schools' CSS Pseudo-classes page.
Create a Reusable CSS Action
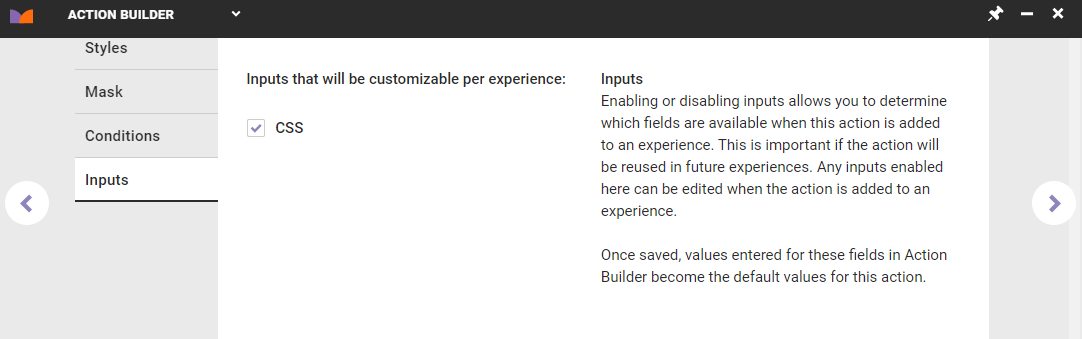
The CSS option on the Inputs tab of Action Builder lets you customize the look and feel of anything on your site. If you want to reuse a CSS action, click the CSS checkbox. Remember, this setting is only available when you create a new action. If you need to change the input after you've created an action, you must duplicate the action and make the change in the duplicate action.
You can use this single action multiple times. Simply customize it at the experience level to initiate the style changes you want to use for each experience. This means that you won't have to create another new CSS action again if you don't want to.
Keep in mind that the CSS action requires you to write complete CSS markup, including selectors.
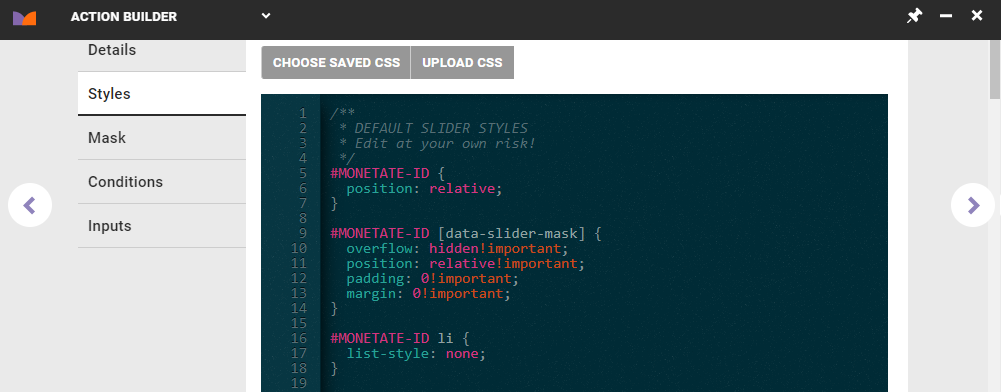
Edit CSS in Other Actions with the Styles Tab
The CSS code is applied via an internal stylesheet as the last element to the <head>.
Here is an example of the format you should use.