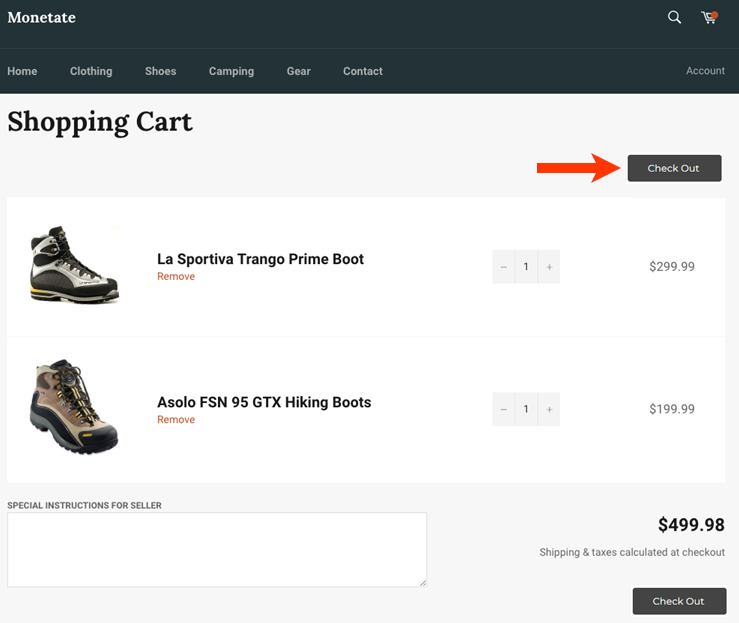
To increase chances of conversion on your site's cart page, you may want to increase the visibility of the checkout button by duplicating it elsewhere on the page. You can accomplish this goal by building a custom Duplicate Element action that also retains its bindings to the cart form submit.
This use case demonstrates exactly how to accomplish this goal with a custom action that duplicates the Check Out button below the site's "Shopping Cart" page heading.
Building the Duplicate Element Action
Follow these steps to build the custom Duplicate Element action.
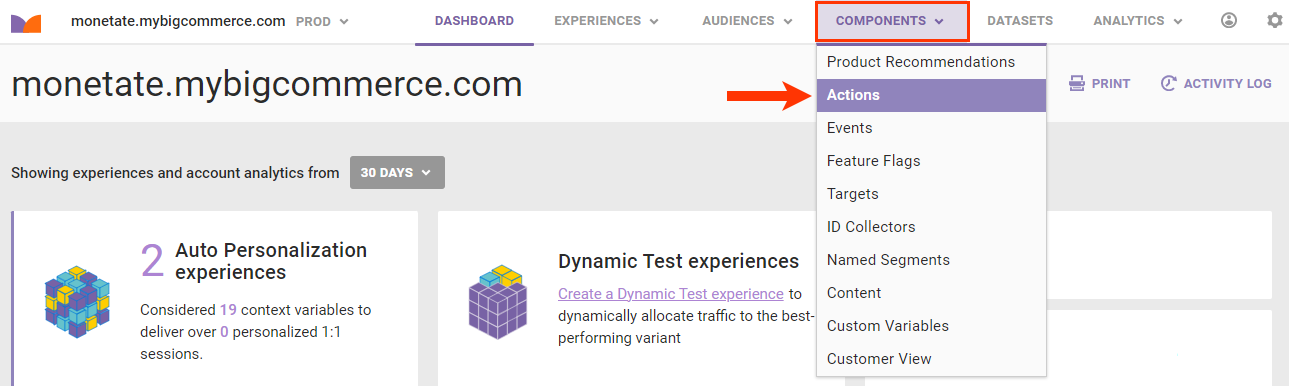
- Click COMPONENTS in the top navigation bar, and then select Actions.
- Click CREATE ACTION.

- After Action Builder loads on your site, add any product to the cart, and then navigate to the cart page.
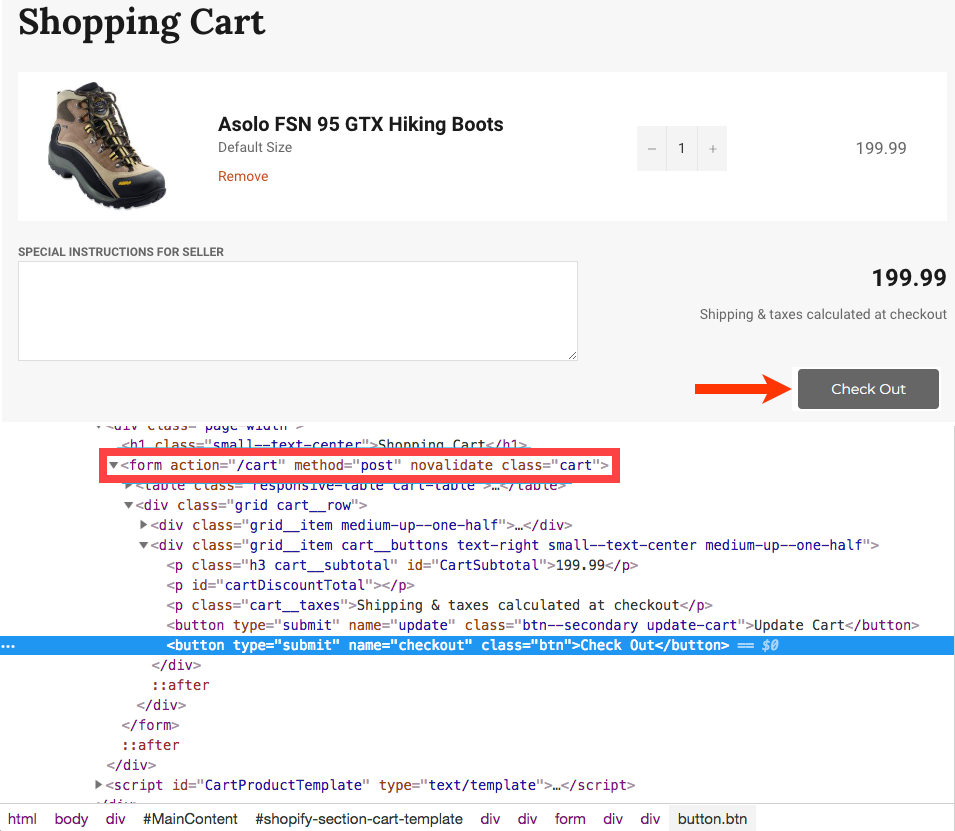
- Use your browser's developer tools to inspect the checkout button's code.
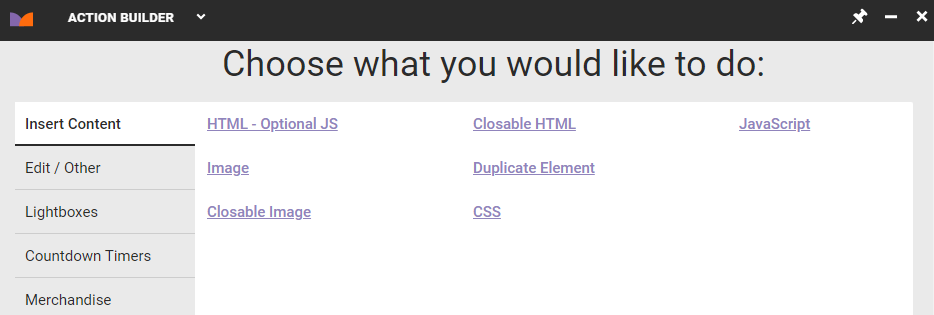
- Return to Action Builder to click Duplicate Element on the Insert Content tab.
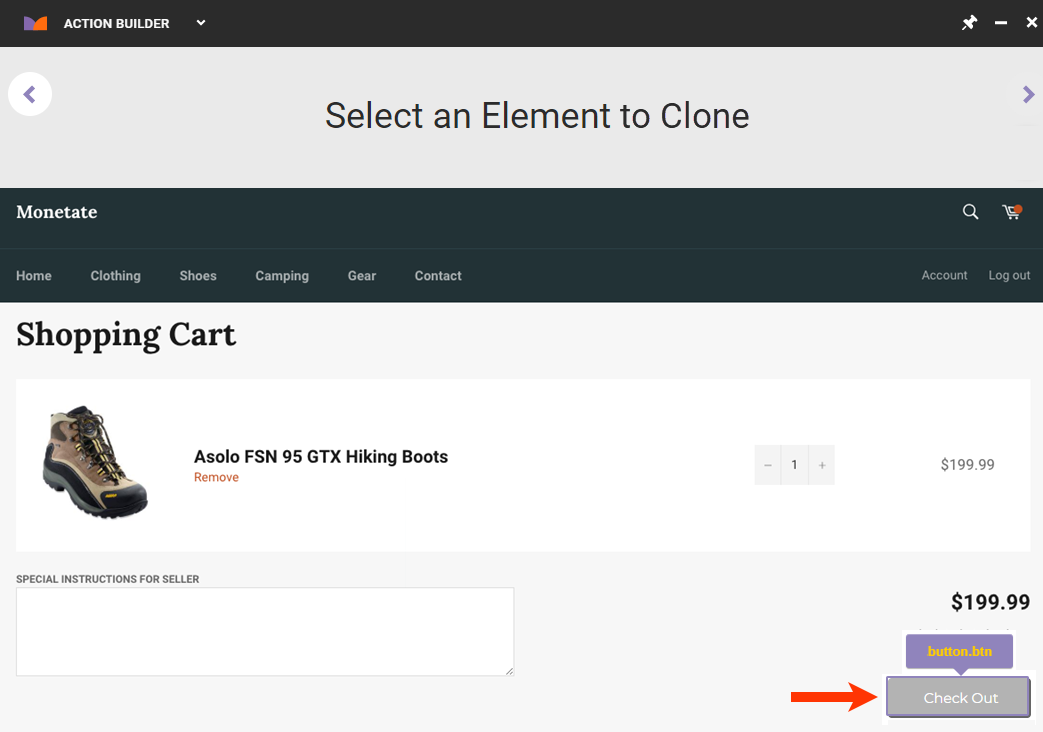
- Find the selector for the Check Out button, and then click the forward arrow.
- Identify where the cloned button should appear, understanding that you can refine the element selector on the Details tab to ensure it falls within the
formparent. Click the forward arrow.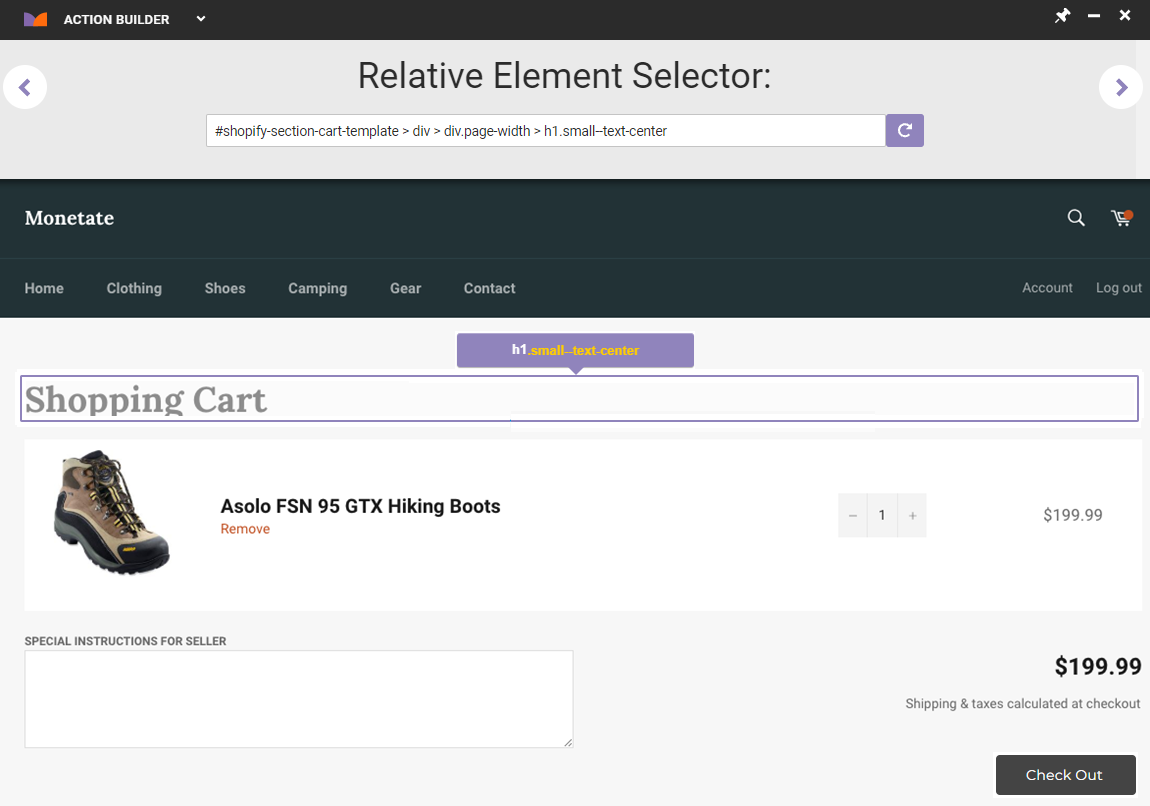
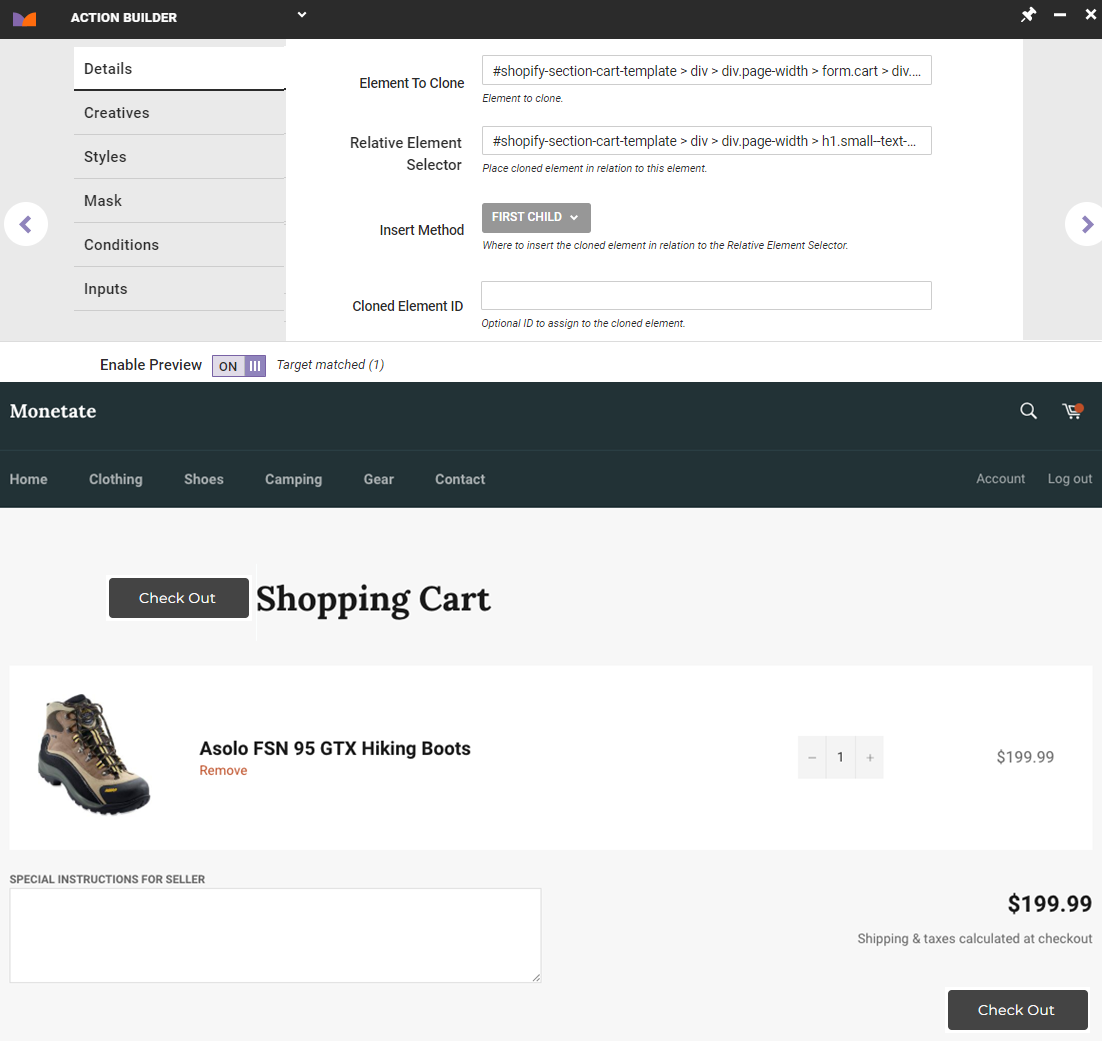
- Ensure Enable Preview is set to ON, and then confirm that the cloned element appears where you want it and works. If it does, move on to step 9. If the action preview doesn't work as intended, take the following actions.
- Launch your browser's developer tools to confirm the cloned element is where it needs to be within the page code to work. In this use case, Chrome DevTools reveals that the code for the cloned button is above the
<form>element when the cloned code needs to be within it.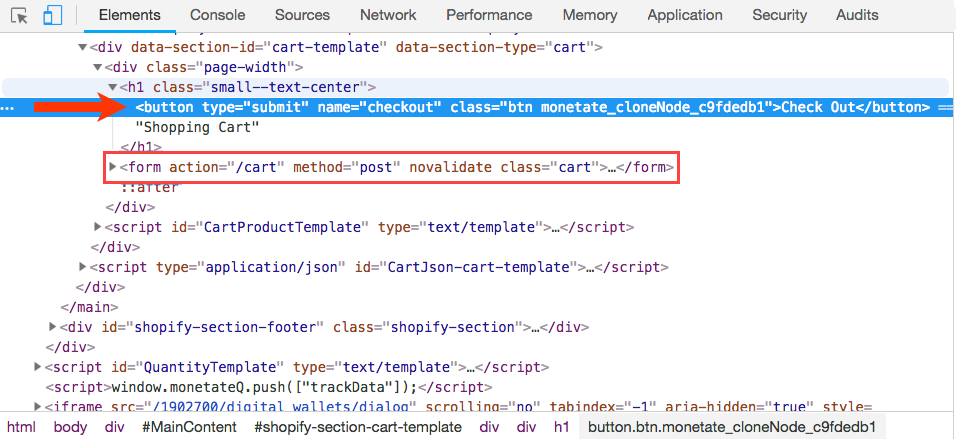
- Correct any coding errors that you find. In this use case, the selector for the
<form>element is the correct one to use in Relative Element Selector in Action Builder.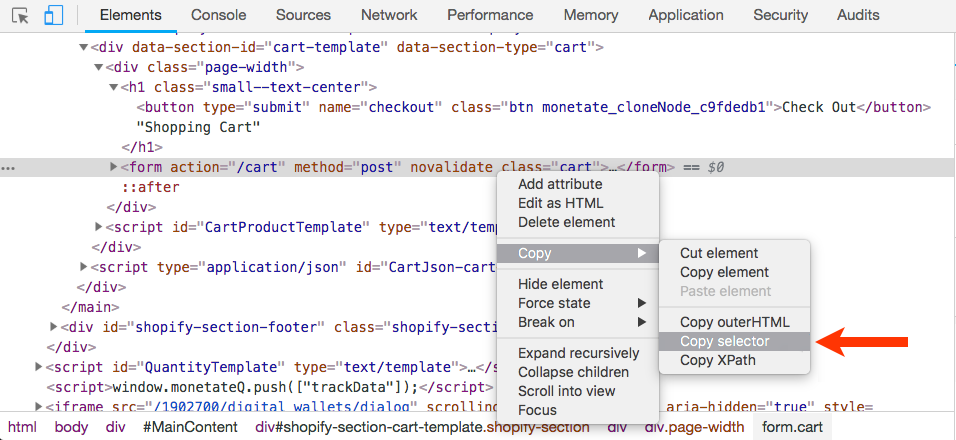
- Test the cloned button again by clicking it and confirming that the checkout page loads as expected.
- Launch your browser's developer tools to confirm the cloned element is where it needs to be within the page code to work. In this use case, Chrome DevTools reveals that the code for the cloned button is above the
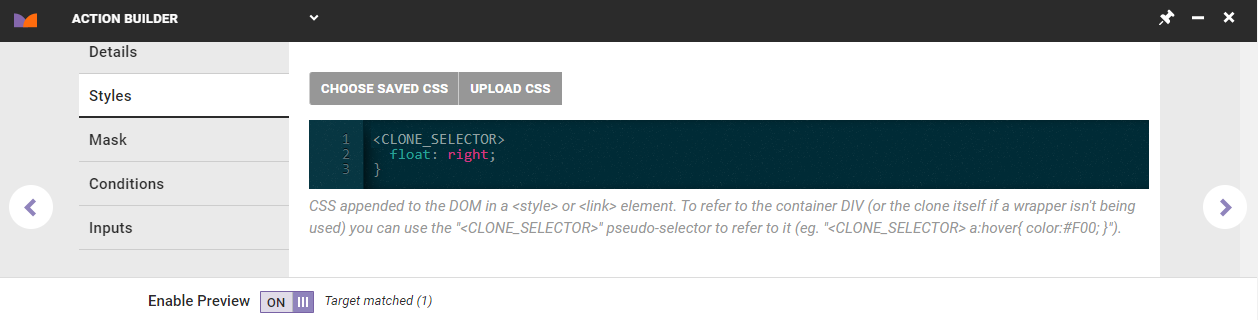
- If necessary, click the Styles tab to add any CSS to ensure that the cloned button matches the original one.
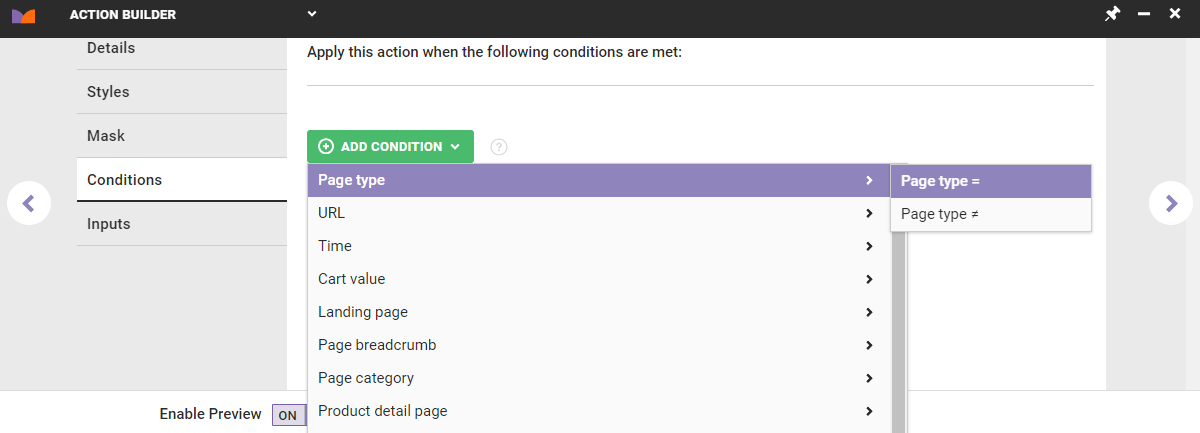
- Add an action condition to ensure the action only fires on the cart page. Click the Conditions tab, click ADD CONDITION, expand Page type, and then select Page type =. Input the value to identify the page type. Click the forward arrow.
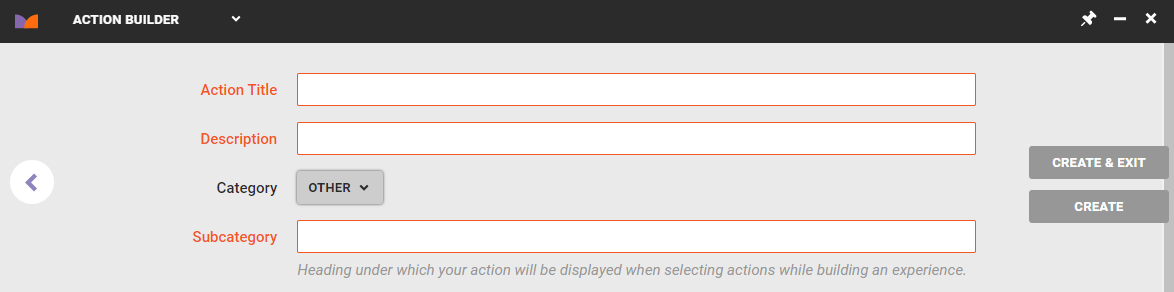
- Give the action a title, a description, and a subcategory, and then click CREATE & EXIT.
Now that you've created the Duplicate Element action, add it to a Web experience to deploy it on your site.
Creating the Experience
Follow these steps to create the experience that uses the custom Duplicate Element action.
- Click EXPERIENCES in the top navigation bar, and then select Web.

- Click CREATE EXPERIENCE.

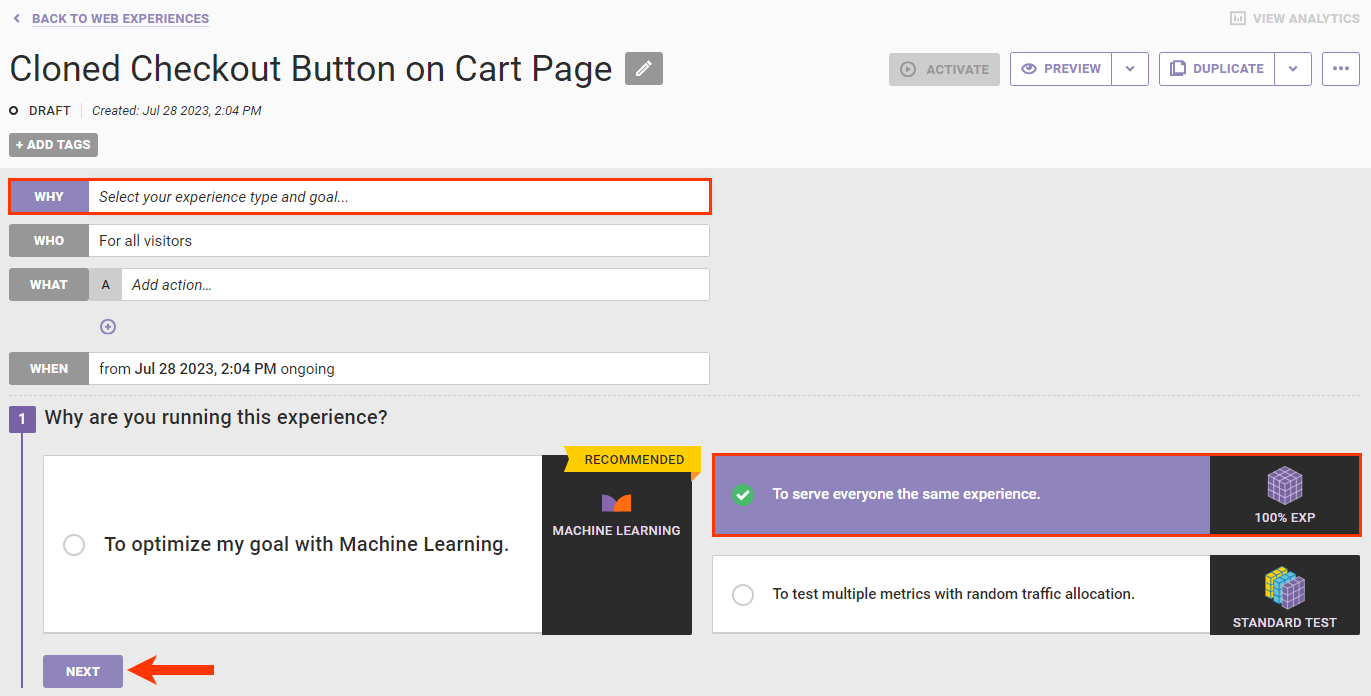
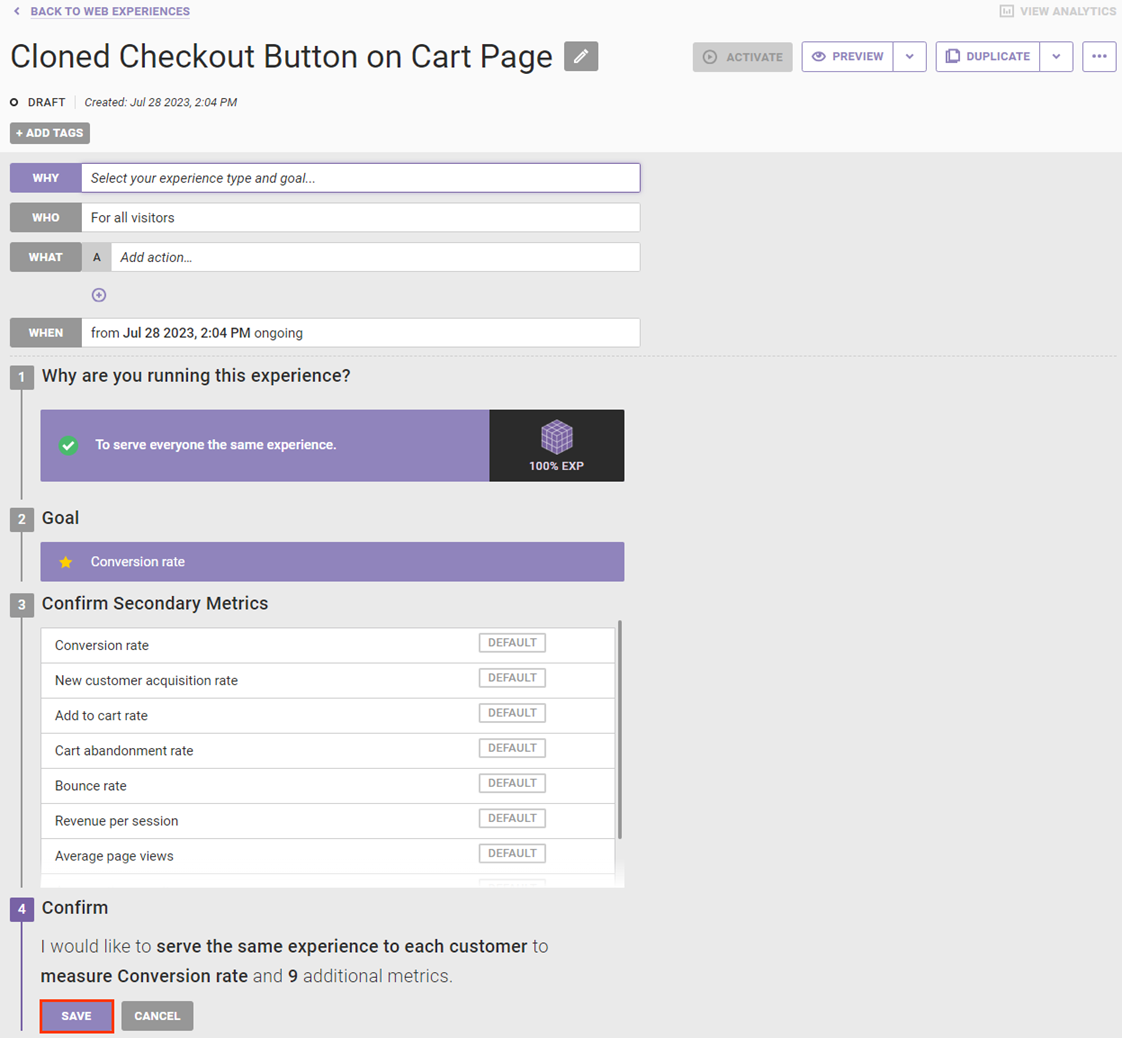
- Configure the WHY settings.
- Click WHY, select To serve everyone the same experience, and then click NEXT.
- Select a goal metric, adjust the secondary metrics as necessary, and then click SAVE.
- Click WHY, select To serve everyone the same experience, and then click NEXT.
- Configure the WHO settings as necessary. For this use case, the experience should target all site visitors, so there's no need to change the WHO settings.
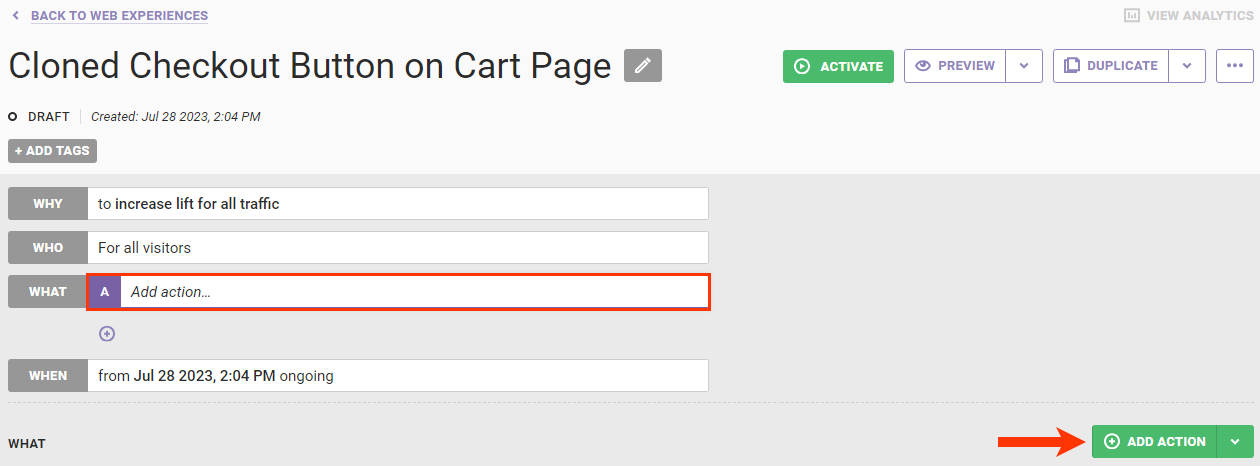
- Add the Duplicate Element action to the experience.
- Click WHAT and then click ADD ACTION.
- Click Other.
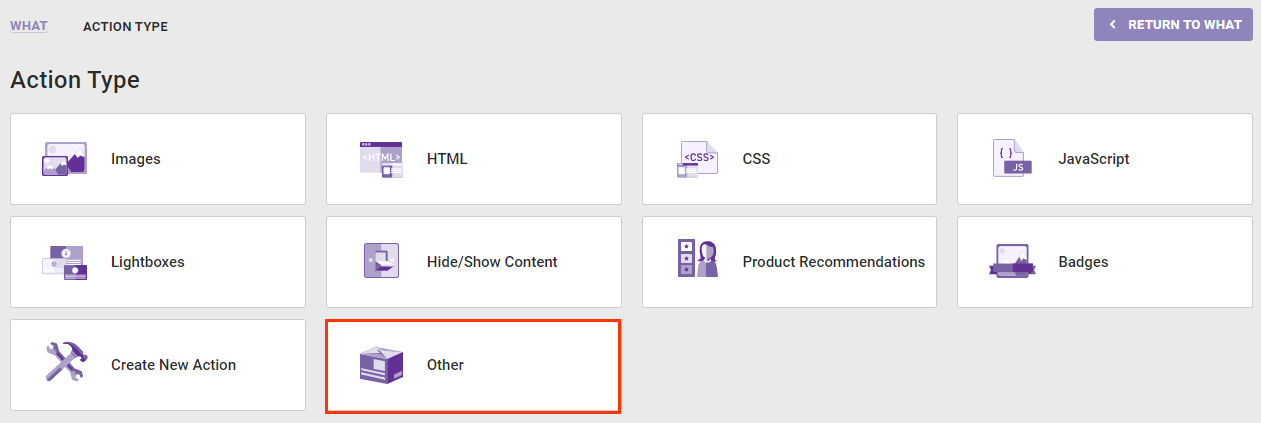
- Click the Duplicate Element action that you created for this experience.

- Because the action was so specifically configured in Action Builder, no experience-level changes are required. Click CREATE.

- Click WHAT and then click ADD ACTION.
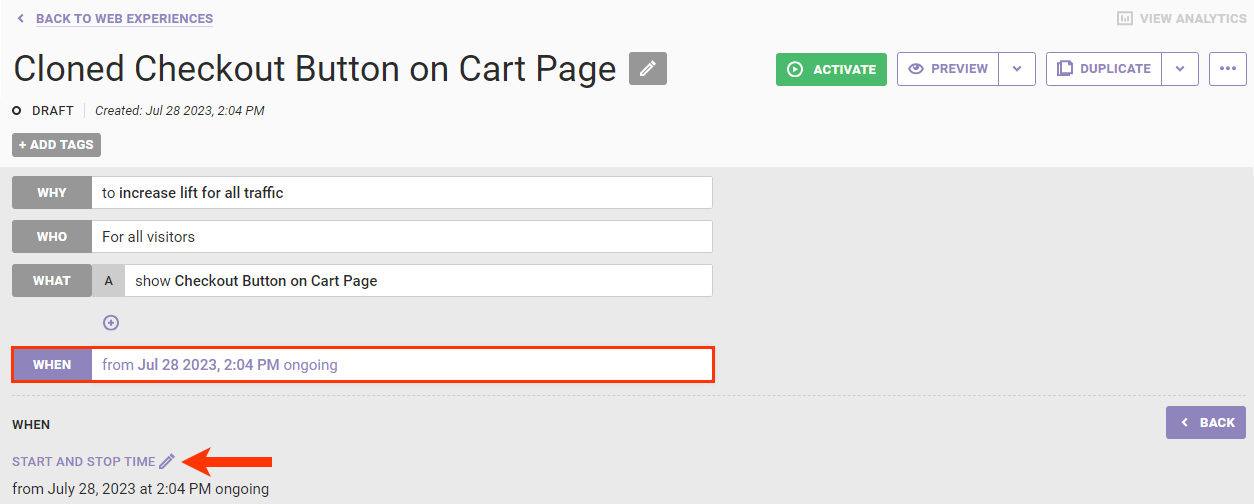
- Click WHEN and then click START AND STOP TIME to configure the experience timing as necessary.
Ensure you test the experience before activating it.
Testing the Experience
Before scheduling when the experience runs by configuring the WHEN settings, you should perform a quality assurance check to ensure the action works as expected.
- Click the arrow to the right of PREVIEW, and then select Preview this Experience Alone.

- Add a product to the cart on your site, navigate to the cart page, and then ensure that the cloned button appears as expected.
- Click the cloned button to verify that doing so loads the checkout page.
After you confirm that the action worked as expected, return to the Experience Editor page in the Monetate platform to click ACTIVATE.