When you use Google Tag Manager (GTM) to integrate your site with Google Analytics, you configure how it collects analytics data using its interface. Unfortunately for GTM users, Google Analytics 4's gtag.js script for sending analytics data from webpages to Google's analytics platform isn't an option for integrating with the latest version of the Google Analytics platform.
Furthermore, because it cannot modify a client's GTM configuration interface and because it cannot account for the differences amongst all GTM setups its clients might have, Monetate cannot provide a ready-made option in its own platform so that its clients using GTM can configure a Monetate–GA4 integration with just a few clicks.
However, you can still configure a Monetate–GA4 integration using a multi-step approach:
- Create and test a custom GA4 report in the Monetate platform that uses a code to push experience data to GTM's data layer.
- Configure GTM to extract experience data from the
campaignsvariable that Monetate writes to the pages of your site for traditional Monetate tag–based experiences. - Add the custom GA4 report to all active experiences in Monetate.
Prerequisites
You must have a GA4 property before you can create the custom report in Monetate. Refer to Google's Make the switch to Google Analytics 4 documentation to learn how to create the property.
While not mandatory to do so, you should consider configuring in GTM the Google Analytics: GA4 Configuration tag for your GA4 property before following the steps in Configuring Events and Triggers in Google Tag Manager. See Google's own documentation for setting up a Google Analytics 4 Configuration tag for the steps. If you opt not to configure this tag in GTM, then ensure you have your Google tag ID on hand. See Google's Find your Google tag ID for instructions.
Creating the Custom Report
Follow these steps to create a custom Google Analytics report that uses data layer polling in the Monetate platform.
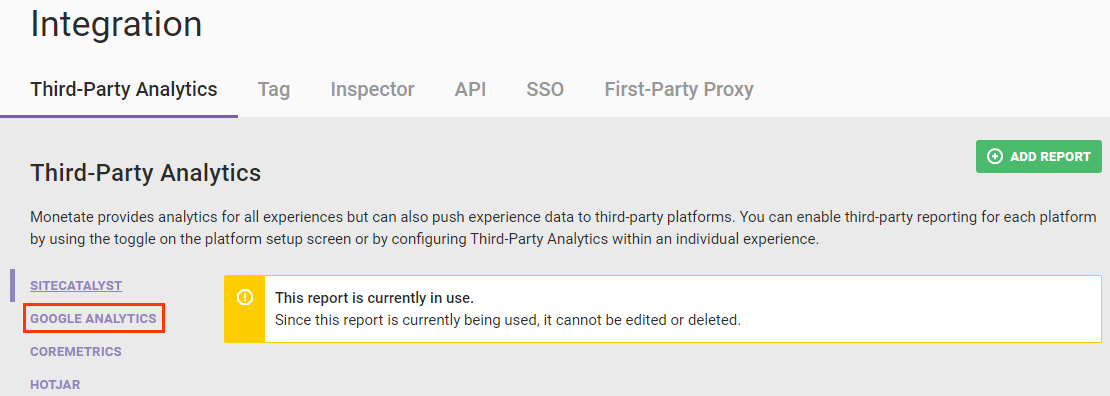
- Click the settings icon in the top navigation bar and then select Integration.
- On the Third-Party Analytics tab, take one of the following actions:
- If the account doesn't have any third-party analytics custom reports, then click SELECT for Custom Reporting.
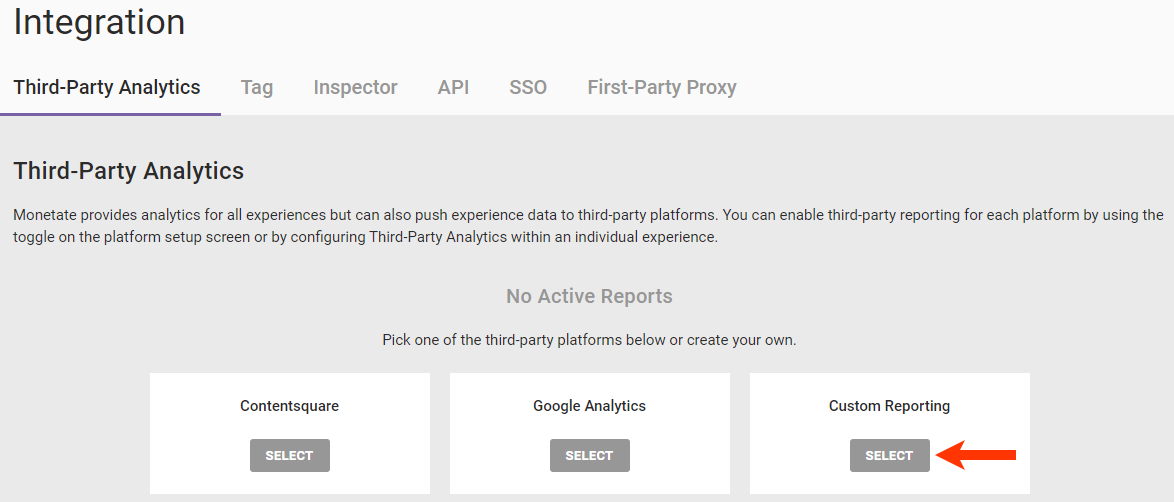
- If the account already has a third-party analytics report, then click ADD REPORT and then, if necessary, select Custom.
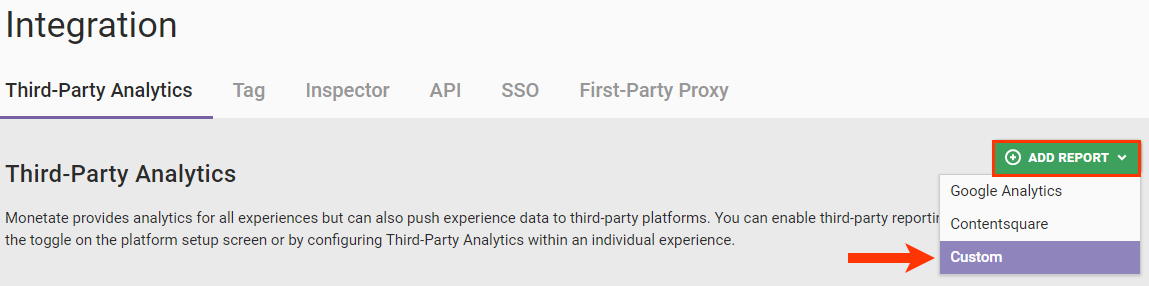
- If the account doesn't have any third-party analytics custom reports, then click SELECT for Custom Reporting.
- Give the report a name. If you have an existing Google Analytics integration, ensure the name differentiates it from the existing Google Analytics report.
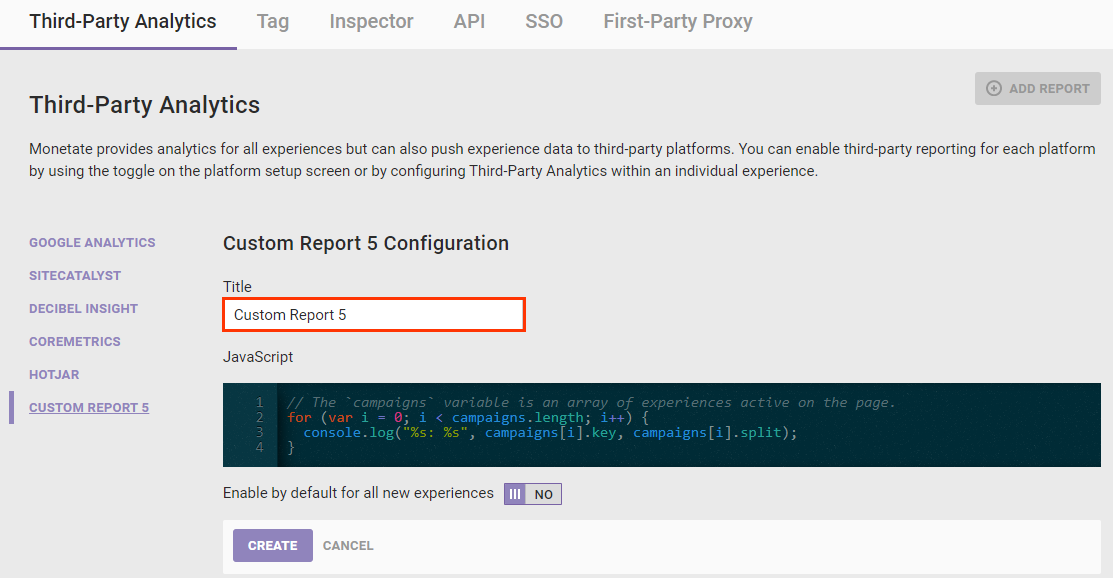
-
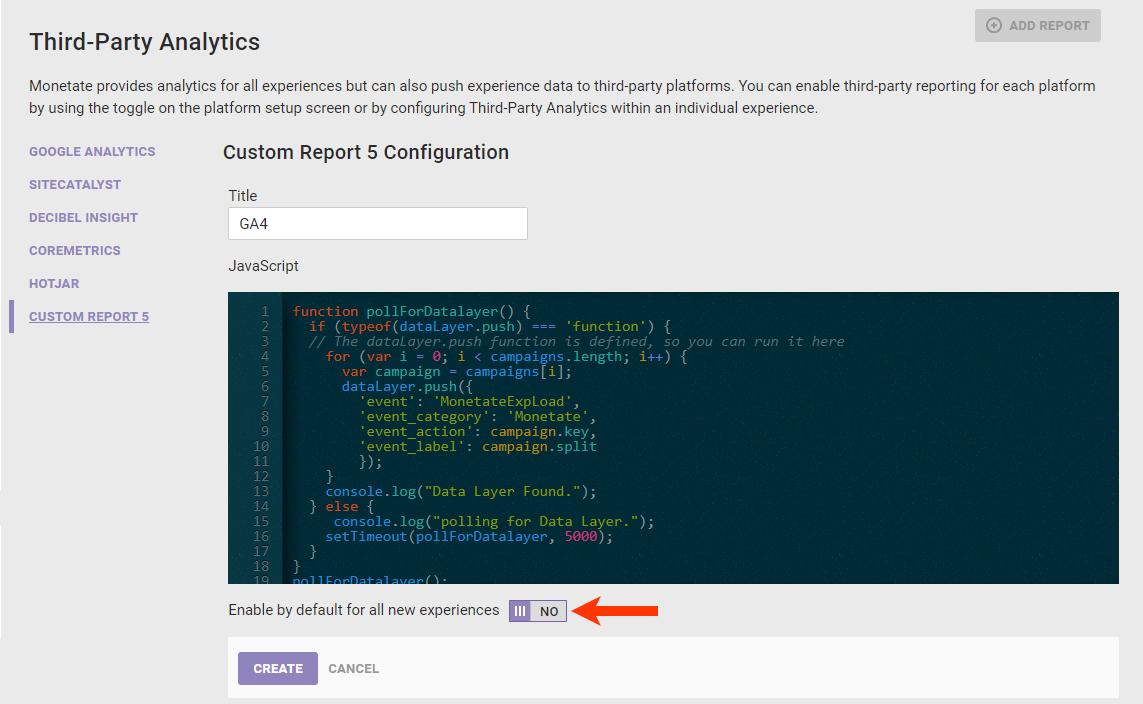
Copy this code sample and paste it into the code editor.
function pollForDatalayer() {
  if (typeof(dataLayer.push) === 'function') {
  // The dataLayer.push function is defined, so you can run it here
    for (var i = 0; i < campaigns.length; i++) {
      var campaign = campaigns[i];
      dataLayer.push({
        'event': 'MonetateExpLoad',
        'event_category': 'Monetate',
        'event_action': campaign.key,
        'event_label': campaign.split
        });
    }
    console.log("Data Layer Found.");
  } else {
     console.log("polling for Data Layer.");
    setTimeout(pollForDatalayer, 5000);
  }
}
pollForDatalayer();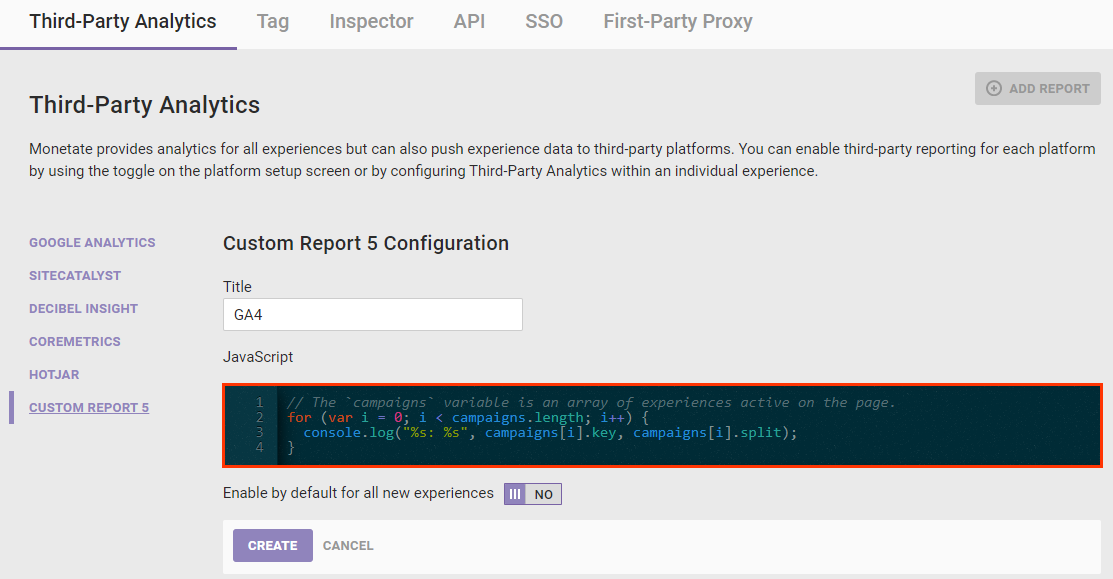
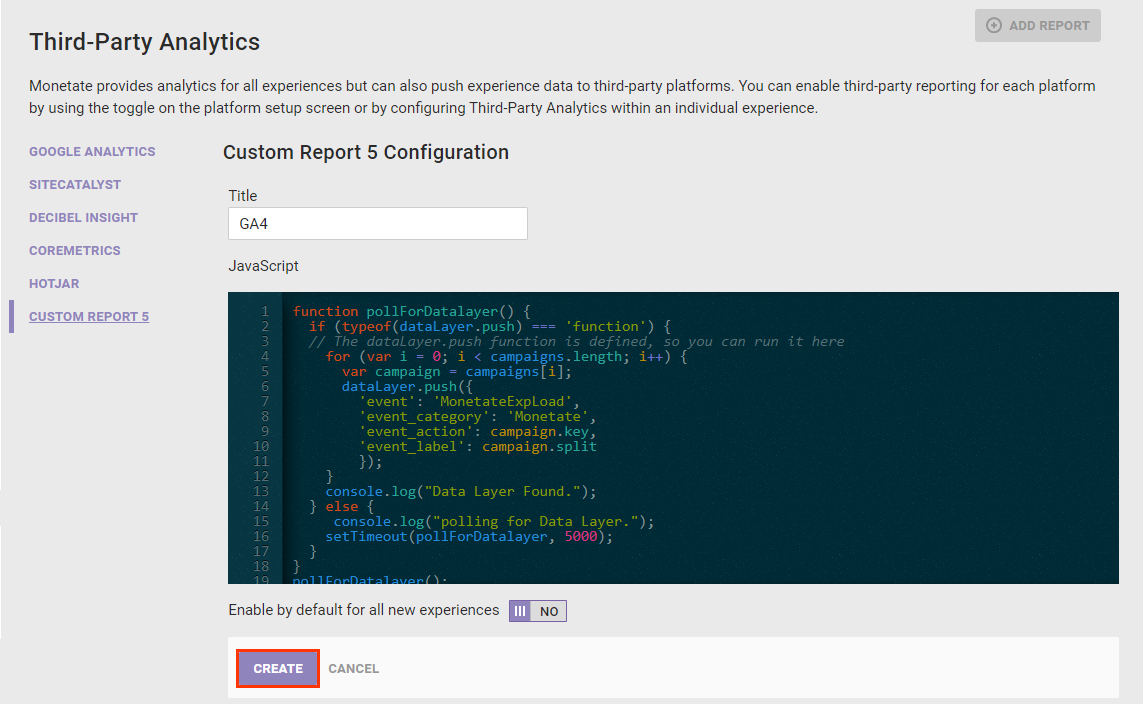
- Leave Enable by default for all new experiences set to NO.
- Click CREATE.
- Test the report.
- Open your site in a new browser tab or window, then open your browser's developer tools, and then switch to its console.
- Ensure the message in the first
console.log()method in the report's code (Data Layer Found.) is present in the console.
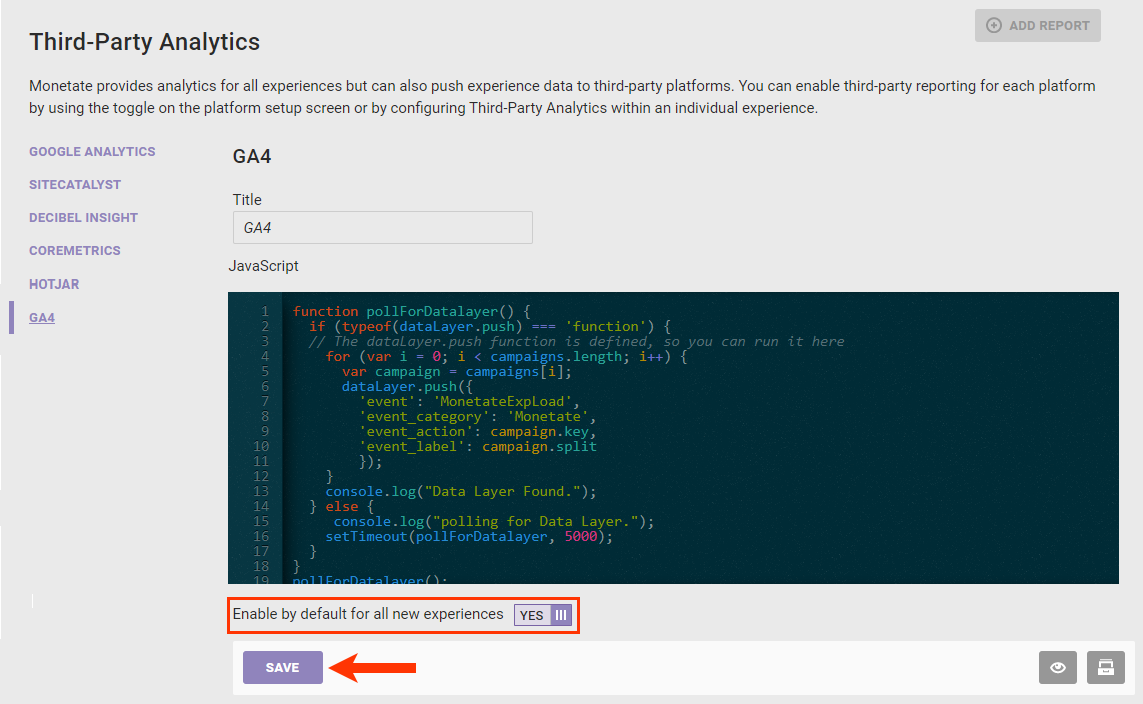
- In the Monetate platform, set Enable by default for all new experiences to YES, and then click SAVE.
If you previously configured a Google Analytics integration in the Monetate platform and have multiple legacy Google Analytics reports in one domain, ensure that you create and test a new GA4-compatible report for each of them.
Configuring Events and Triggers in Google Tag Manager
Follow these steps to create the events and triggers in GTM required to extract data from Monetate's campaigns variable.
- Launch GTM and then, if necessary, select the appropriate workspace.
- Create a new trigger based on a custom event.
- Click Triggers in the left-hand navigation.
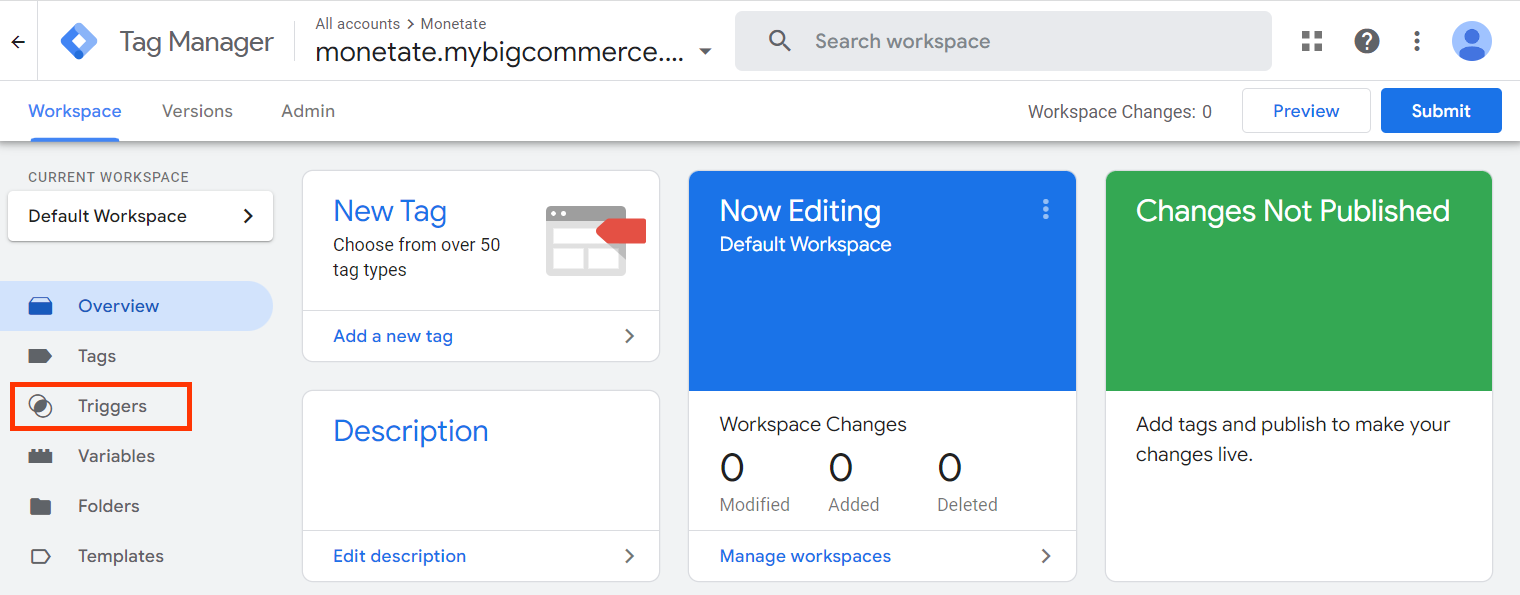
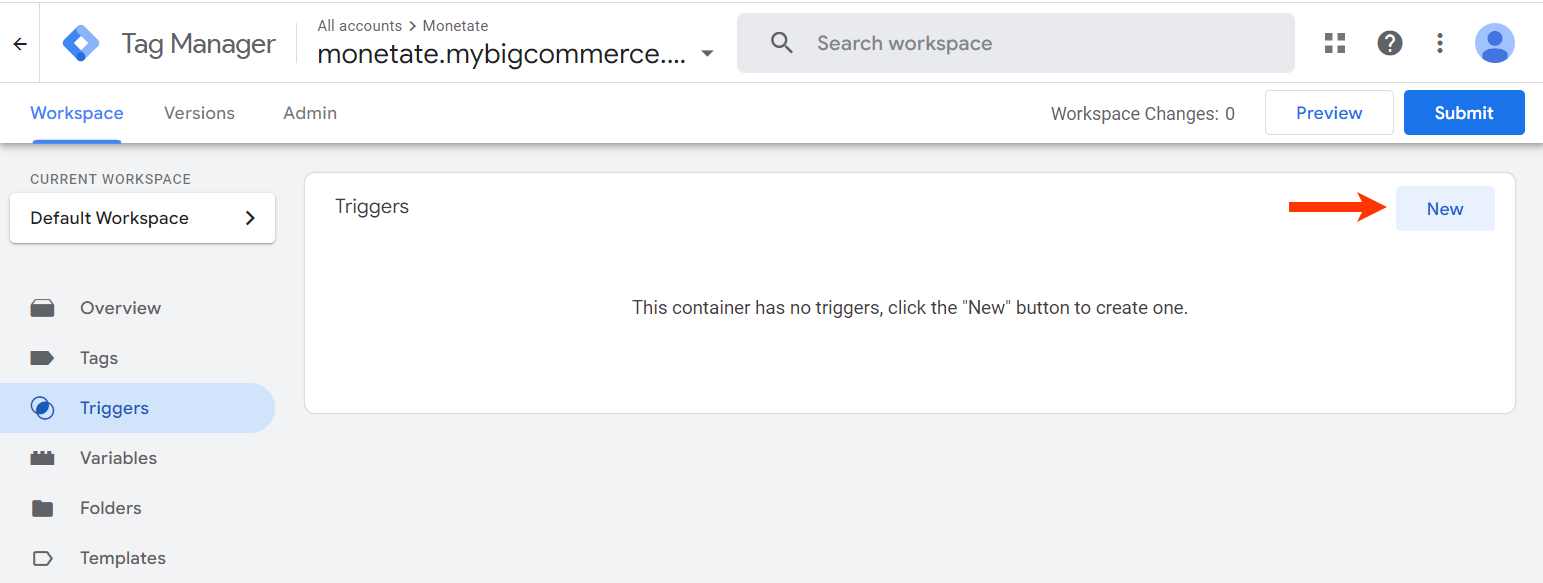
- Click New.
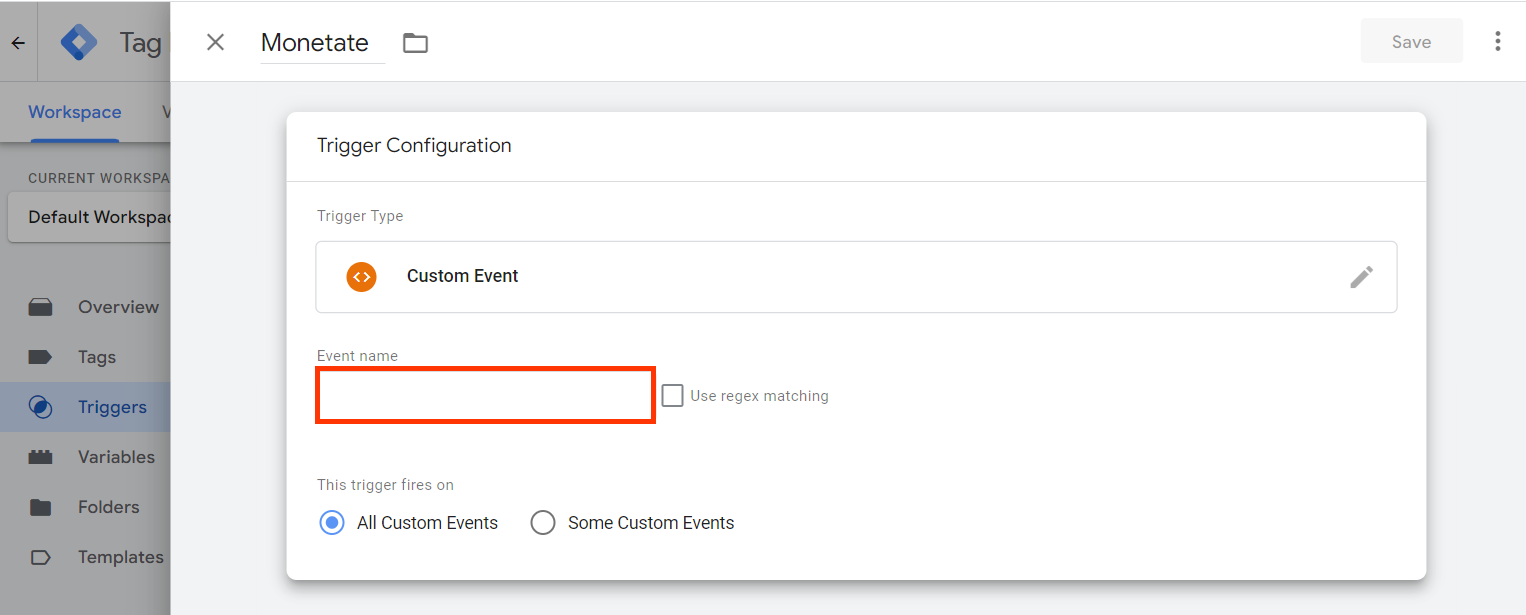
- Click
Untitled Triggerand then name the trigger.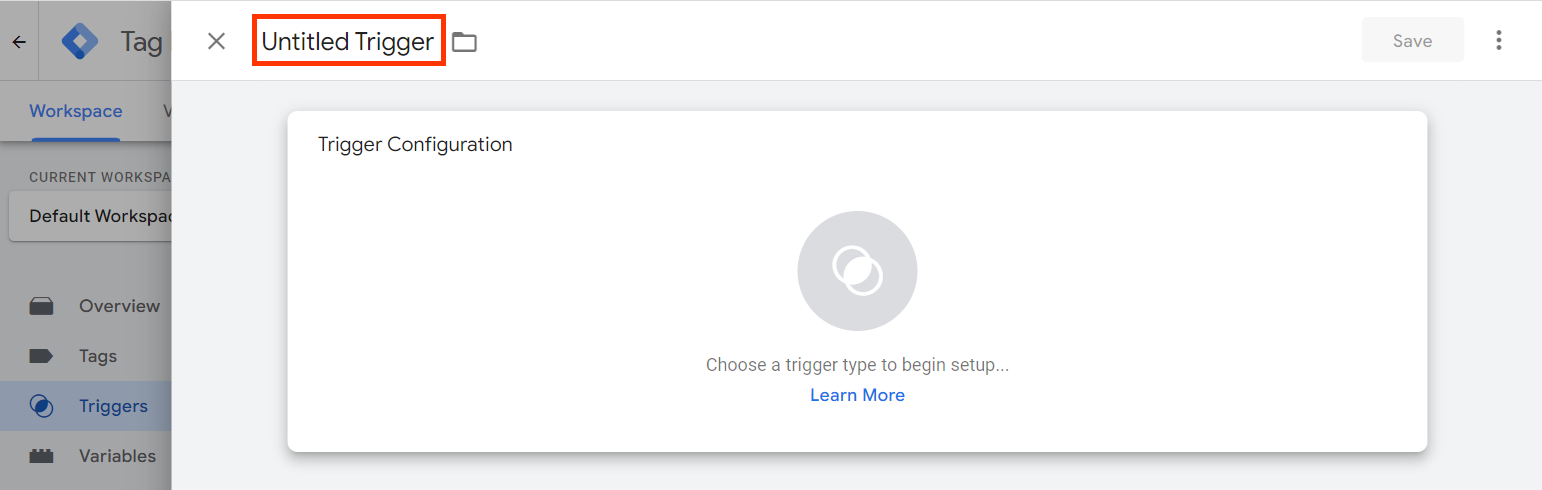
- Click the icon in the Trigger Configuration panel, and then select Custom Event from Choose trigger type.
-
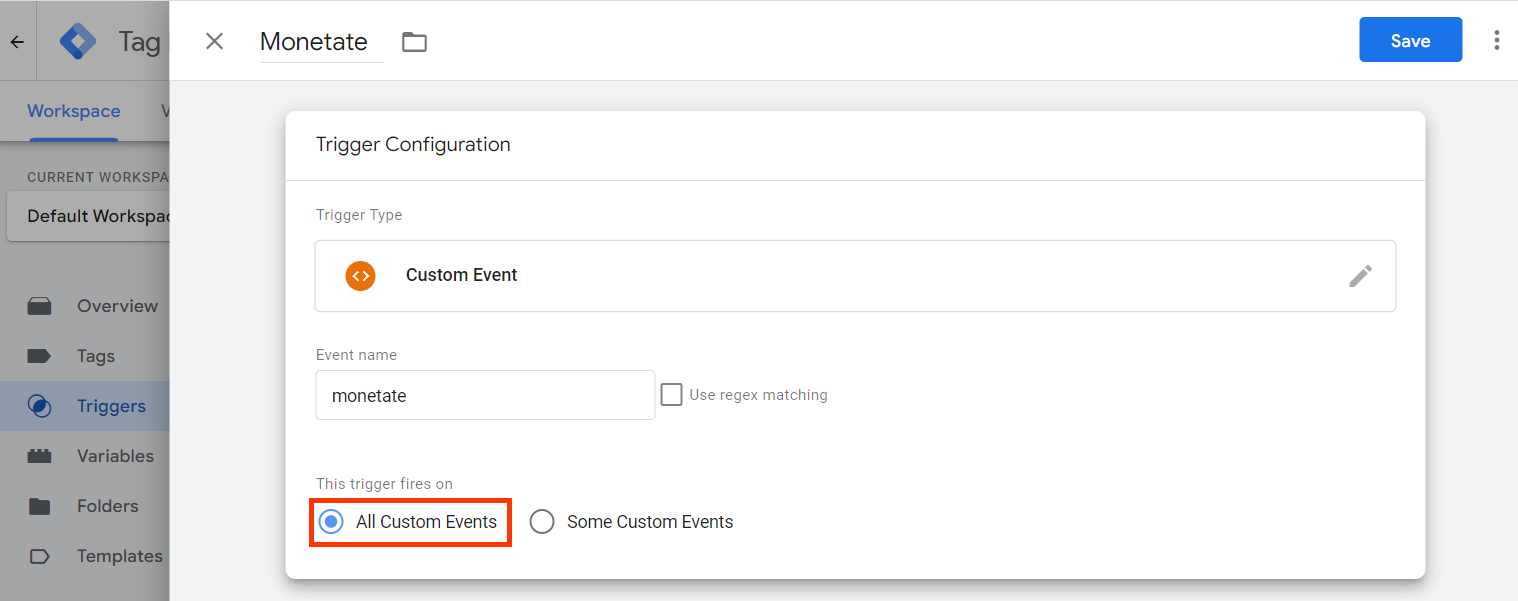
Give the event a name that matches the name you're sending in the custom report that you set up in Monetate.
- Leave All Custom Events selected for This trigger fires on if you're unsure of the rules to use.
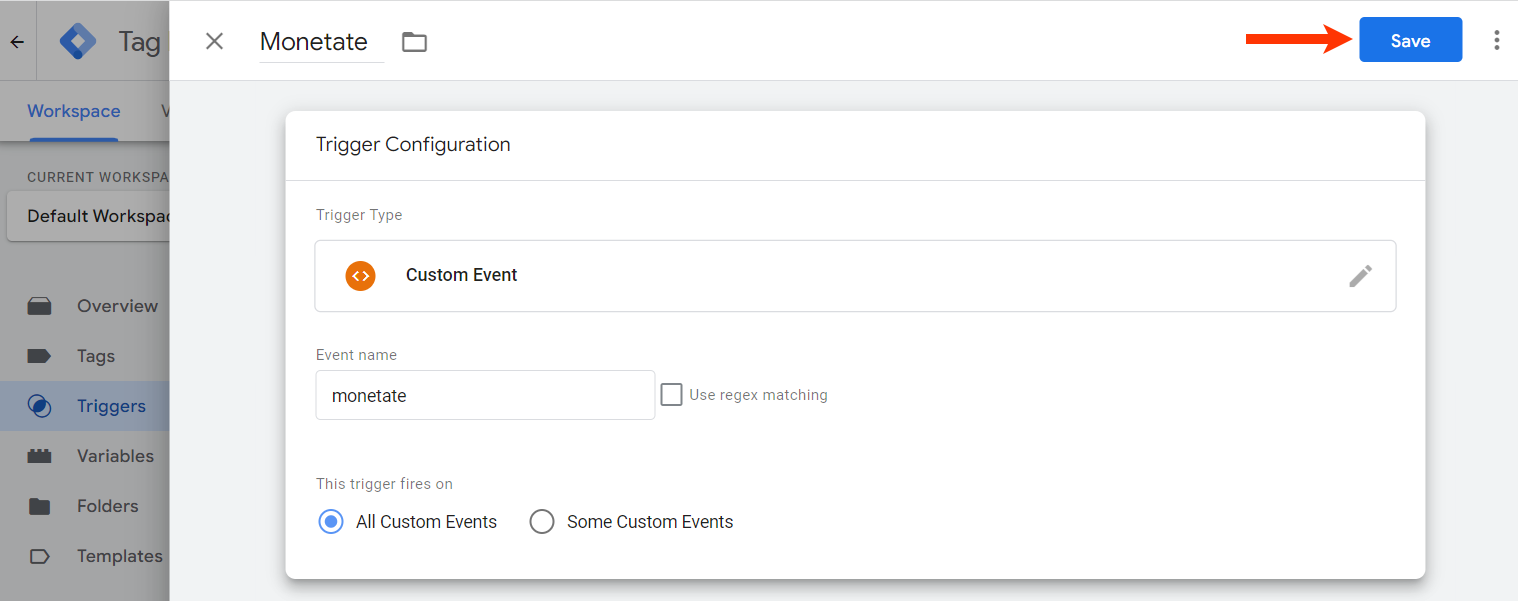
- Click Save.
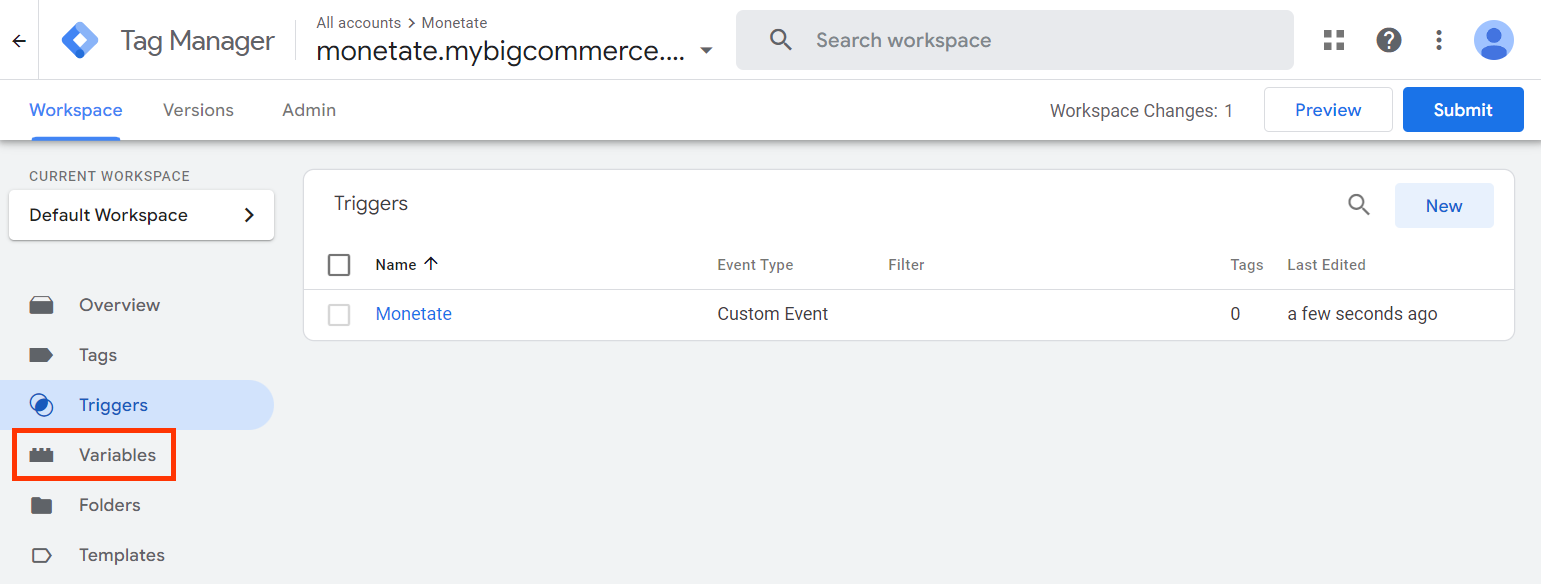
- Click Triggers in the left-hand navigation.
- Create the variable(s) that will pass to the data layer.
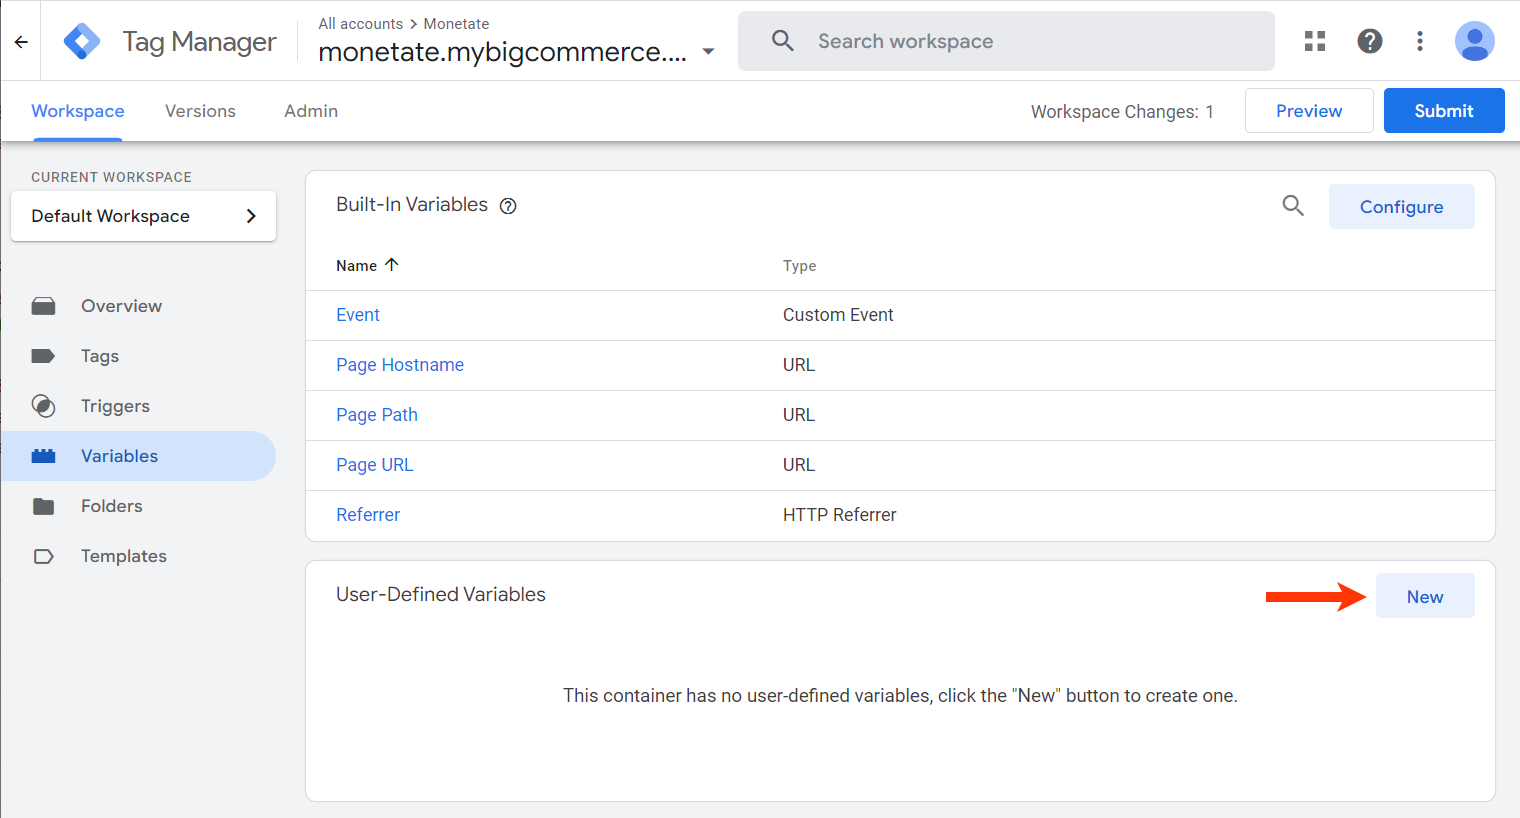
- Click Variables in the left-hand navigation.
- Click New.
- Click
Untitled Variableand name the variable.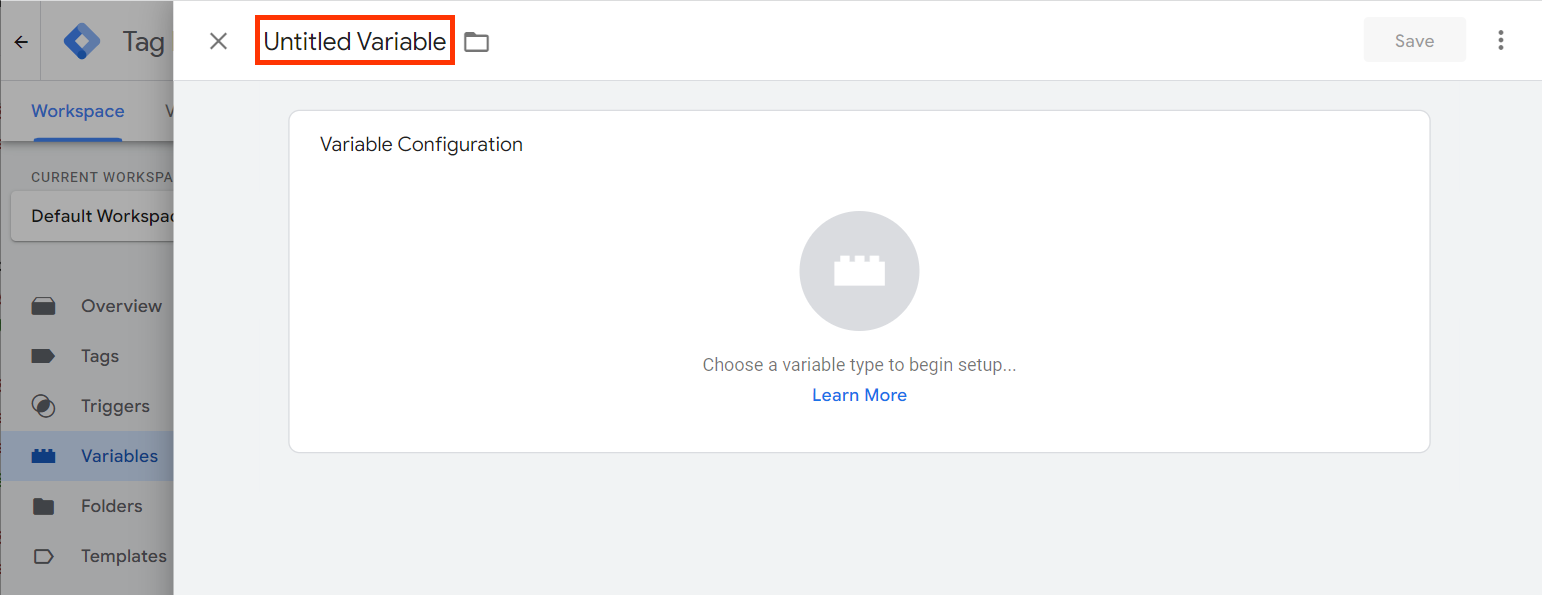
- Click the icon in the Variable Configuration panel, and then select Data Layer Variable from Choose variable type.

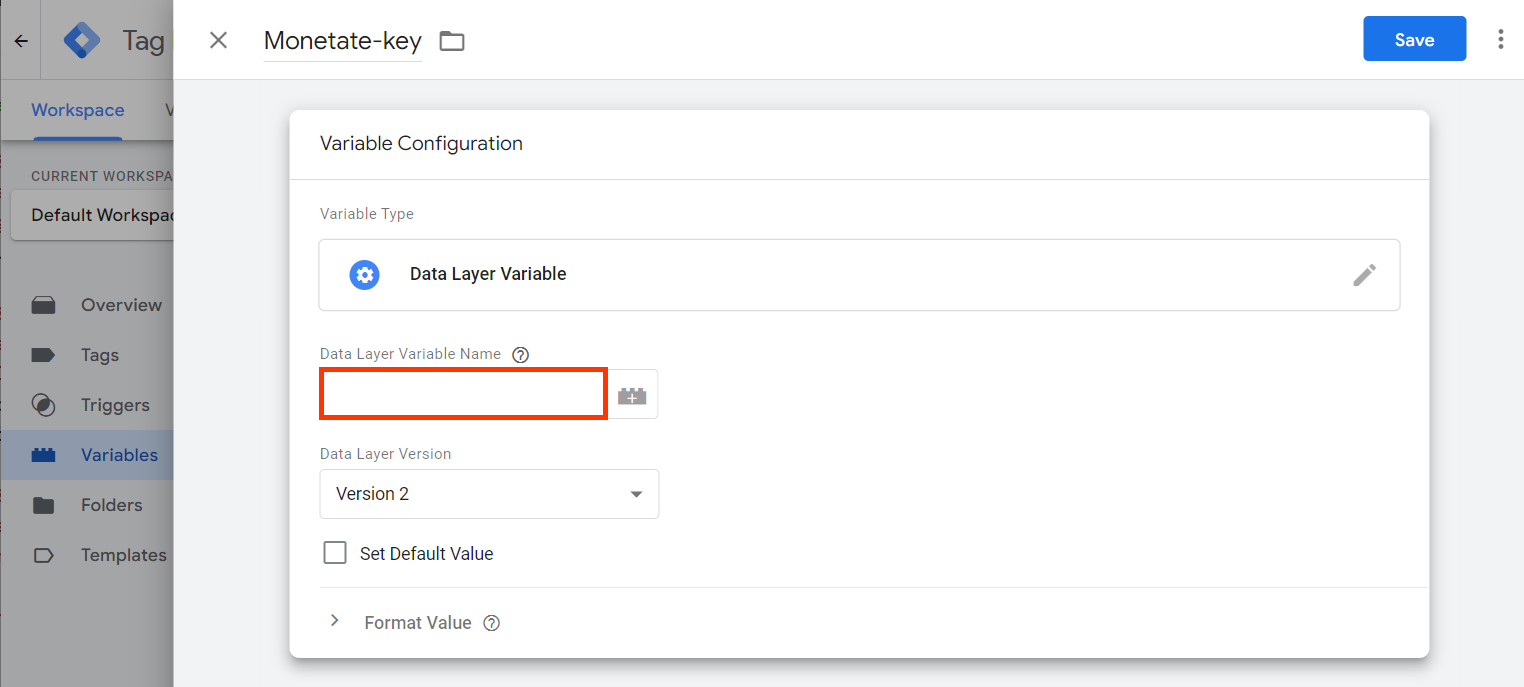
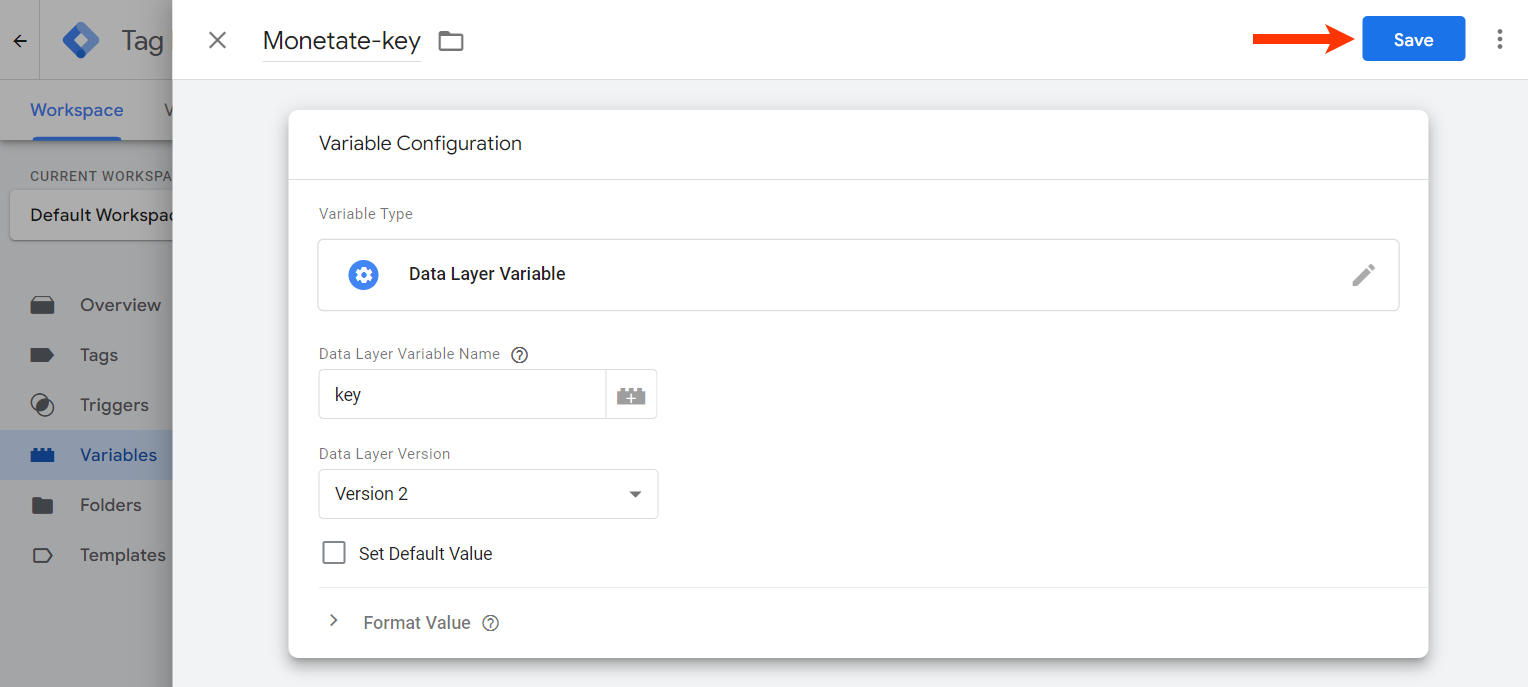
- Give the variable a name that matches exactly the parameter you're sending in the custom report that you set up in Monetate.
- Click Save.
- Repeat steps 3b through 3f as necessary so that you have a variable for each parameter you're sending in the custom report.
- Click Variables in the left-hand navigation.
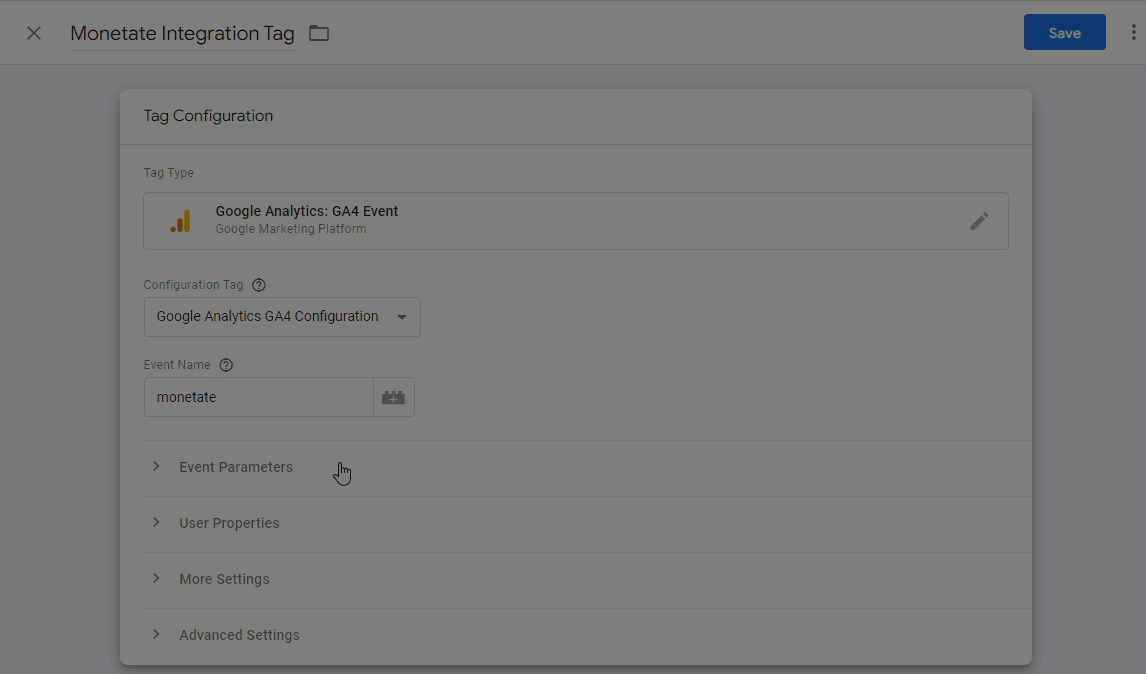
- Create a Google Analytics 4 event tag.
- Click Tags in the left-hand navigation.
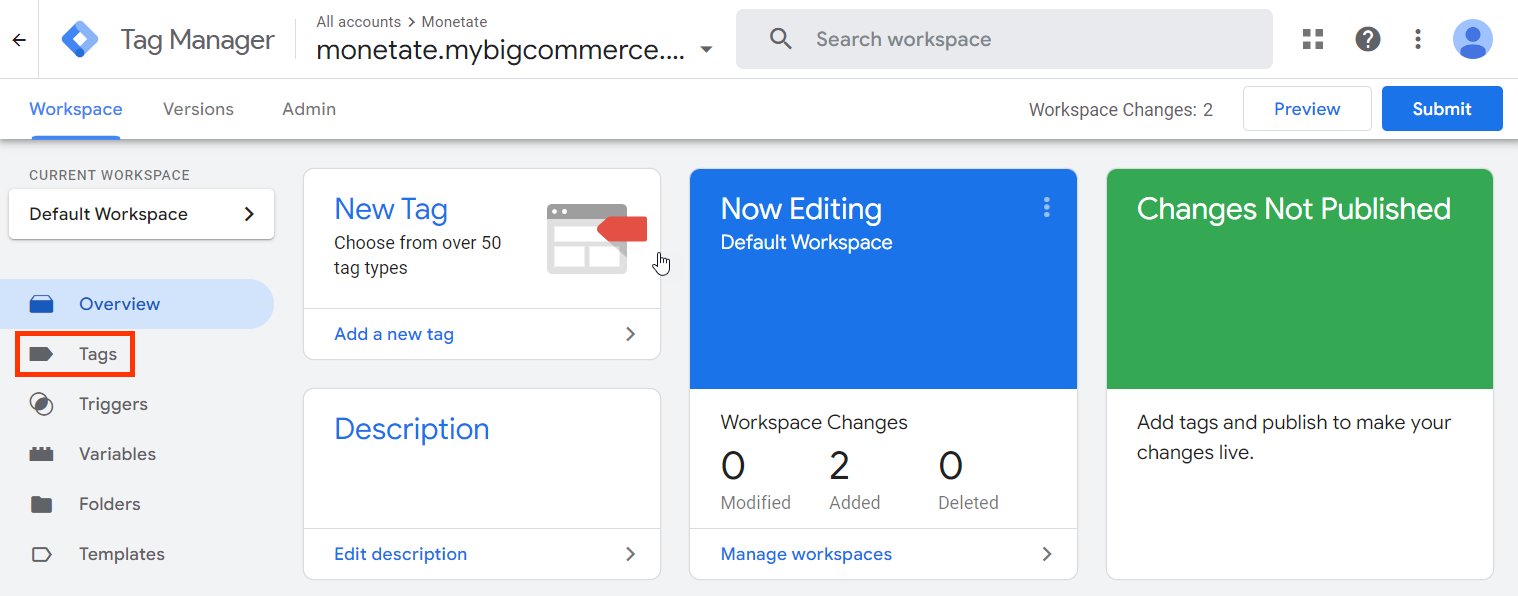
- Click New.

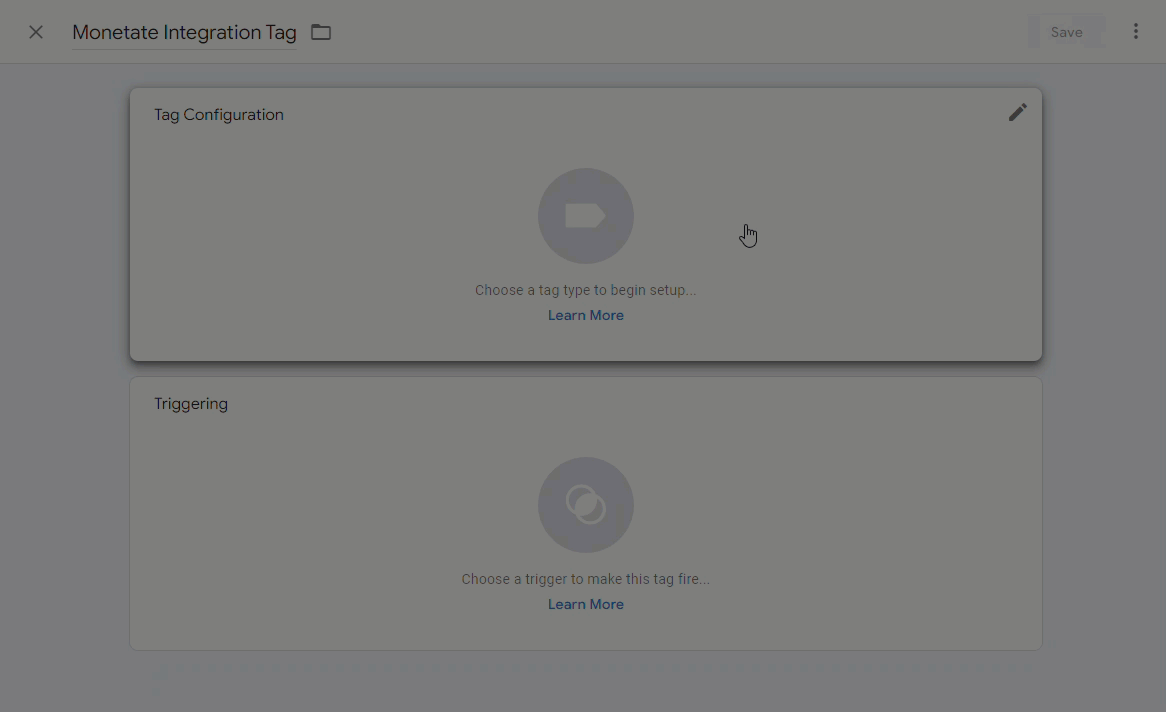
- Click
Untitled Tagand name the tag.
- Click the icon in the Tag Configuration panel, and then select Google Analytics: GA4 Event from Choose tag type.
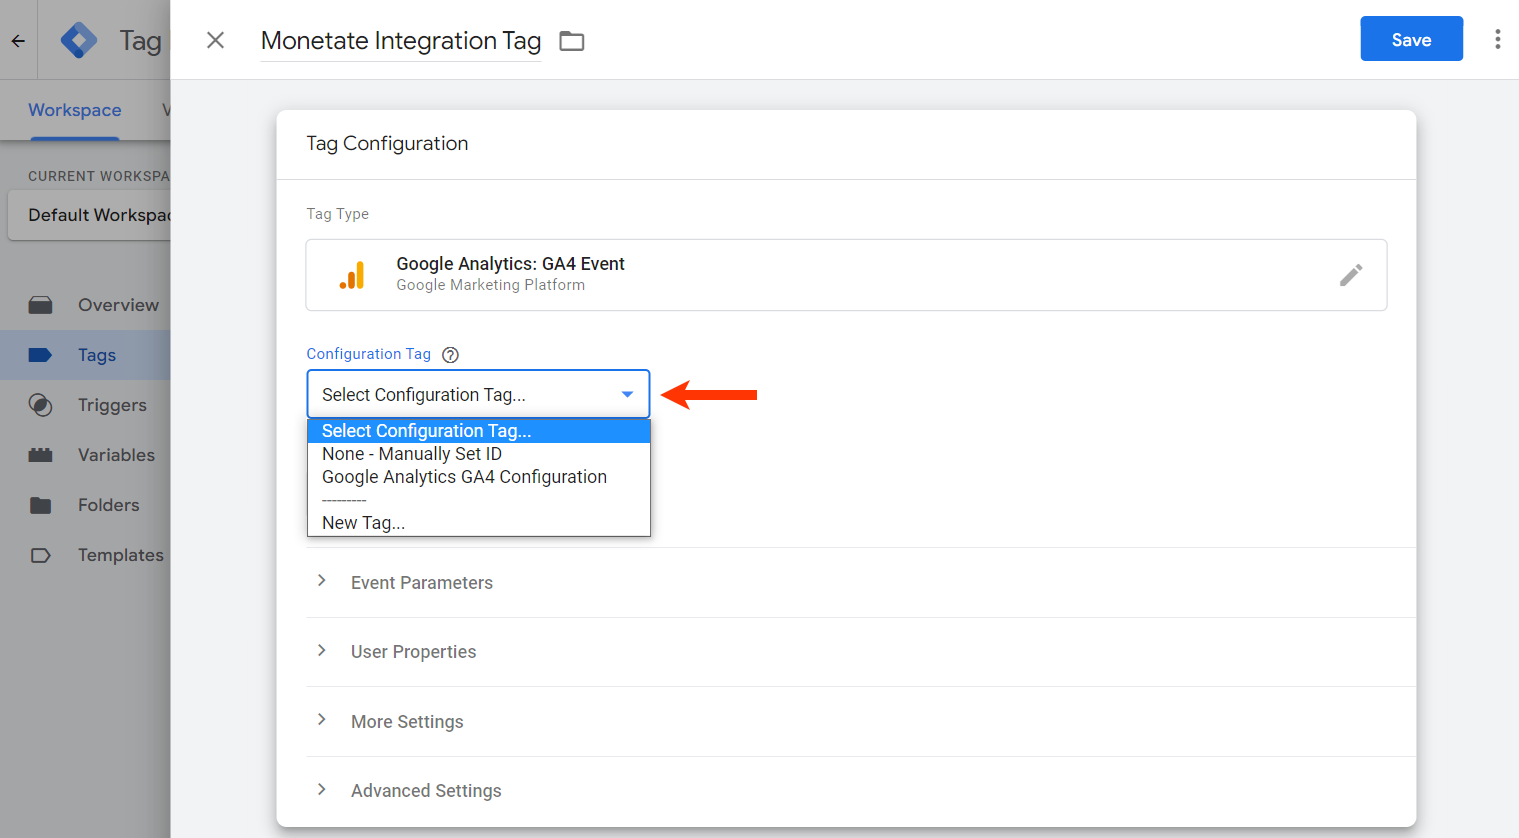
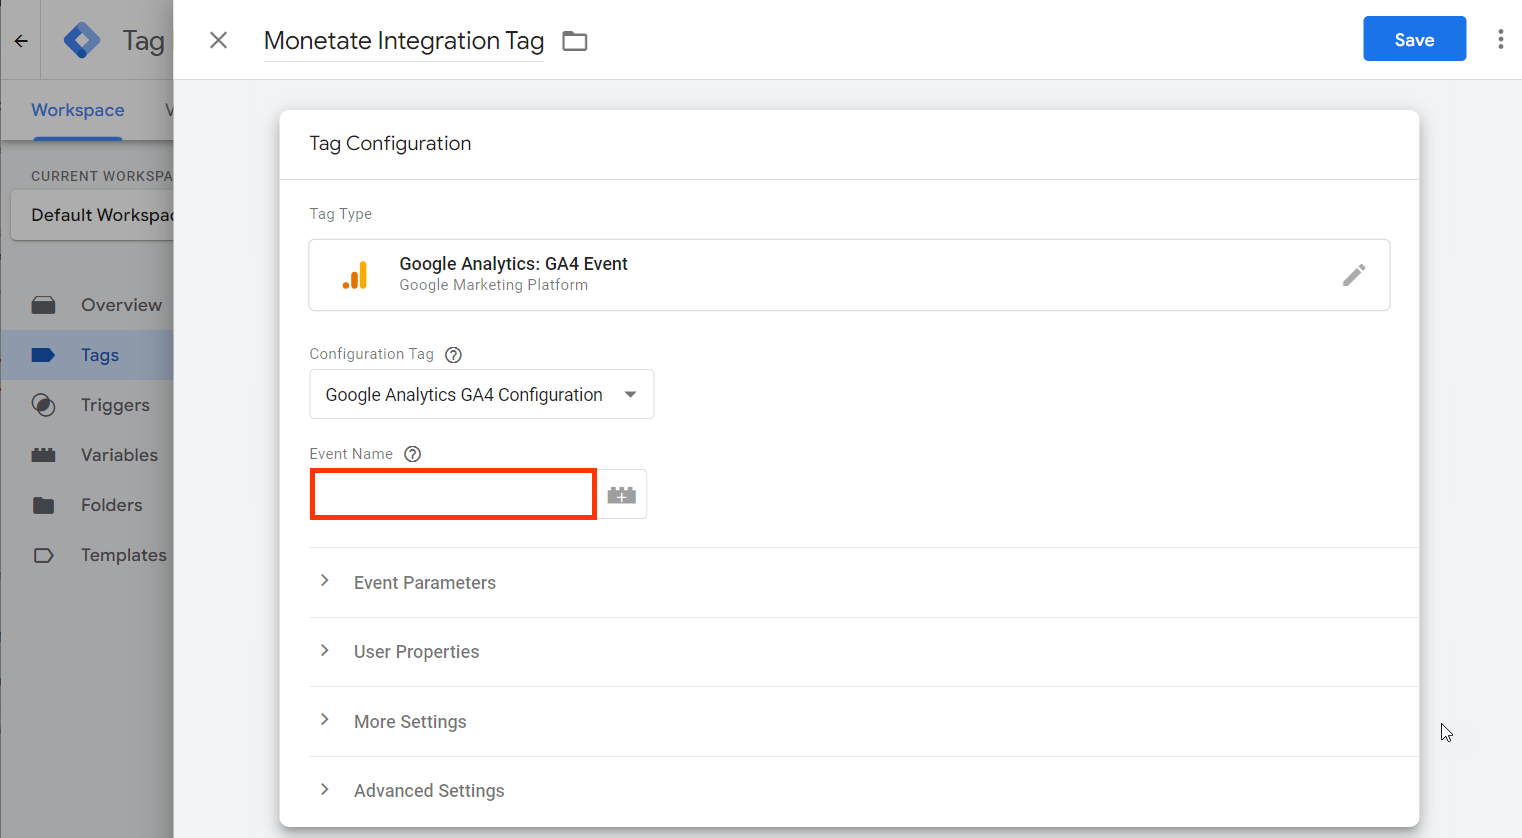
- Select from Configuration Tag either the Google Analytics: GA4 Configuration tag for your GA4 property that you previously created, or select None - Manually Set ID and then input your Google tag ID into Measurement ID.
- Give the event the same name as the event name that you input in step 2e when creating the trigger.
- Expand the Event Parameters section, and then click Add Row.
- Click the brick icon for Parameter Name, and then select one of the data layer variables that you defined in step 3.
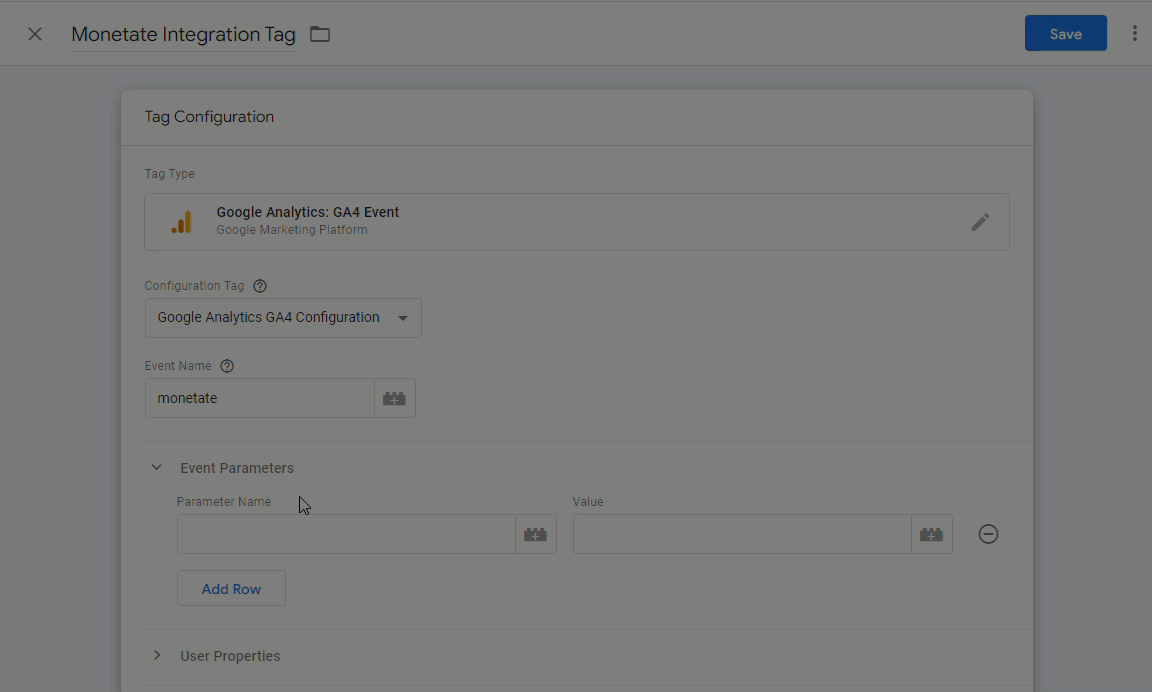
- Click the brick icon for Value, and then select the data layer variable that you selected in the previous step.
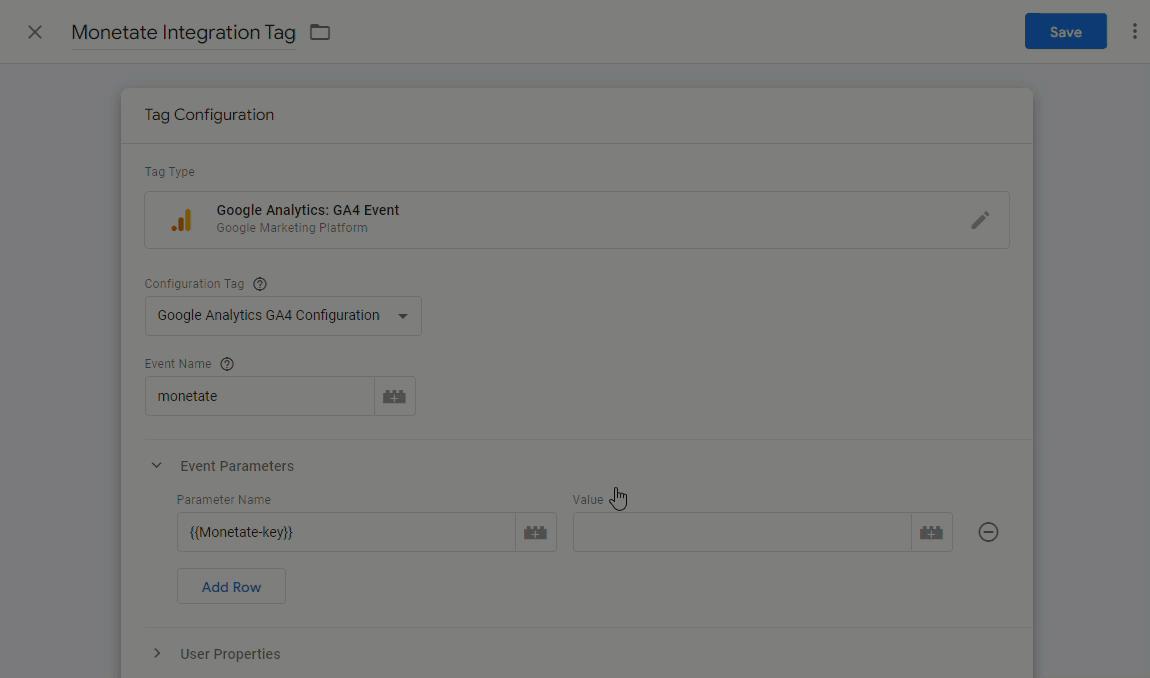
- As necessary, click Add Row and then repeat the two previous steps to add an event parameter for each variable to be pushed to the data layer.
- Click the icon in the Triggering panel, and then select the custom event that you created in step 3.

- Click Save.

- Click Tags in the left-hand navigation.
- Publish the changes.
- Click Submit.

- Name the version, input a brief description of the changes you made to the workspace, and then click Publish.
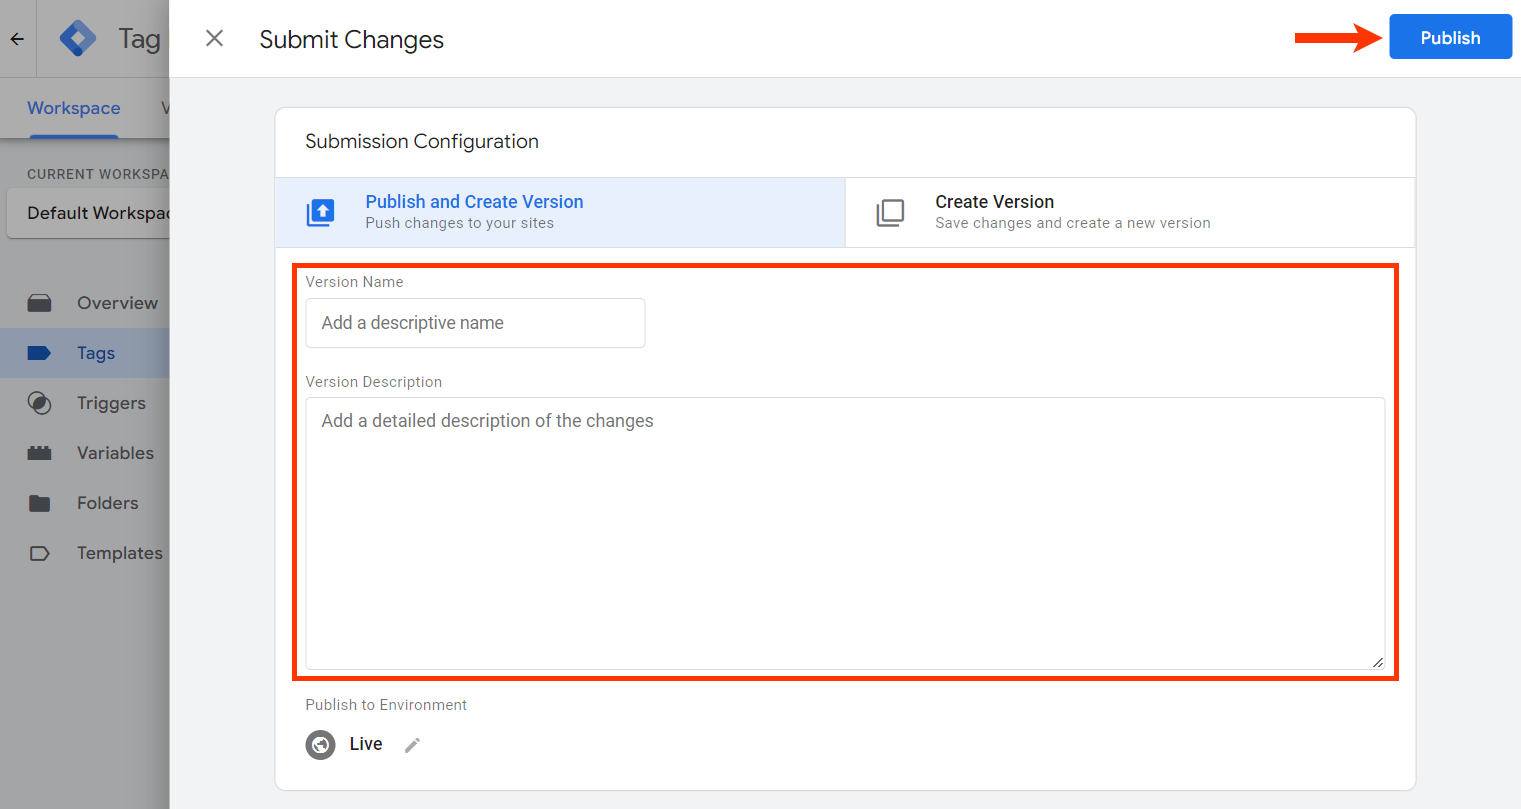
- Click Submit.
Typically within 5 minutes the changes that you published are live on your site.
Enabling the New Report in Active Experiences
Follow these steps to add the new GA4 report to an individual Web experience.
- Click the settings icon in the top navigation bar and then select Integration.
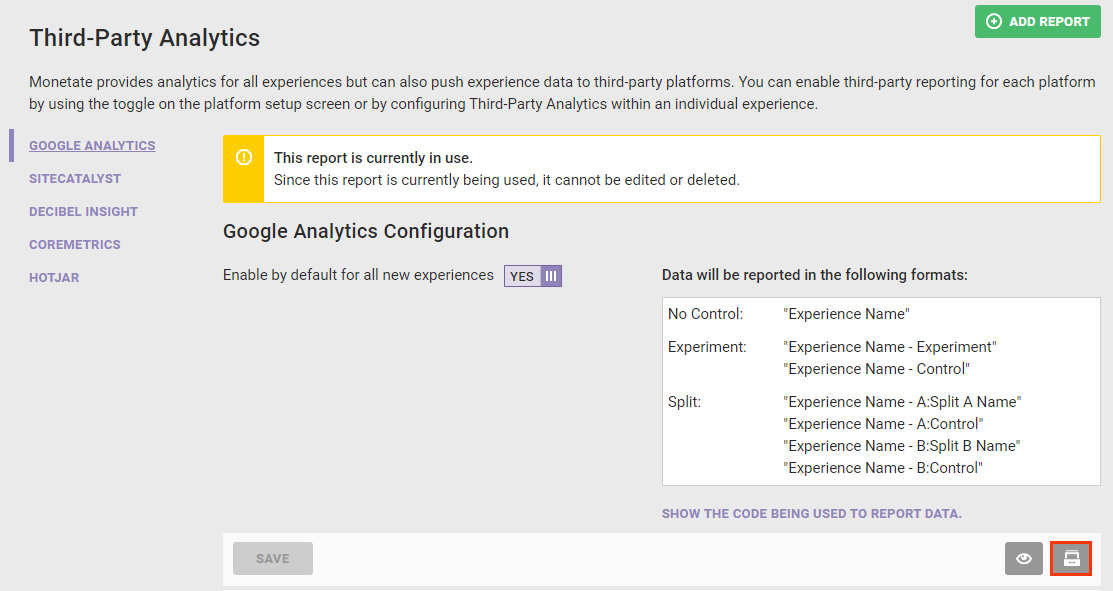
- Click GOOGLE ANALYTICS in the list of third-party analytics reports.
- Scroll down to the View Associated Experiences table.
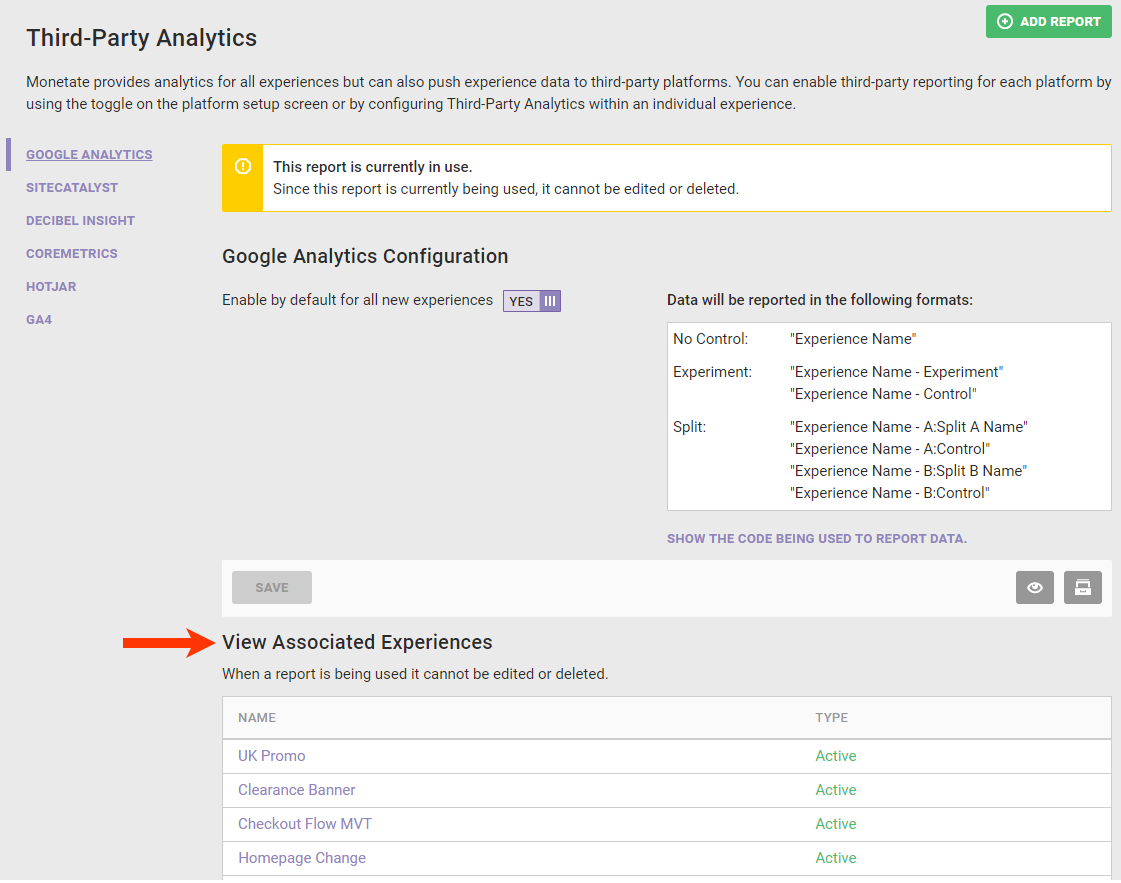
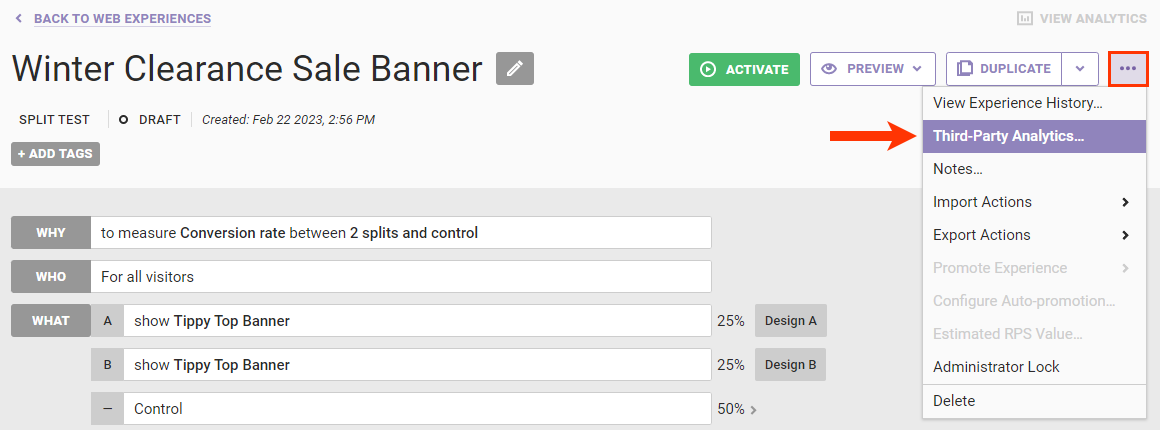
- Click the name of an experience in the table to open it in Experience Editor.
- Click the additional options menu (...) on the Experience Editor page, and then click Third-Party Analytics.
- Find the new report on the Third-Party Analytics modal, and then toggle its setting to YES.
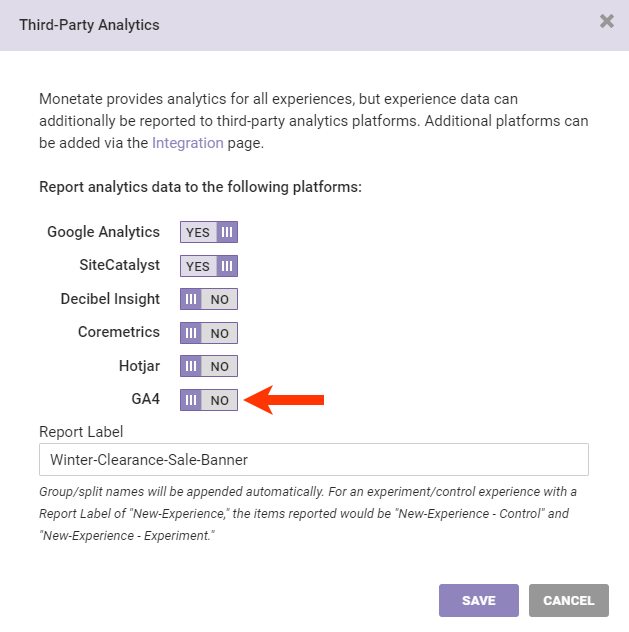
- If you have a legacy Google Analytics report and you don't plan to archive that report and if it's currently enabled for this experience, then toggle its setting to NO.
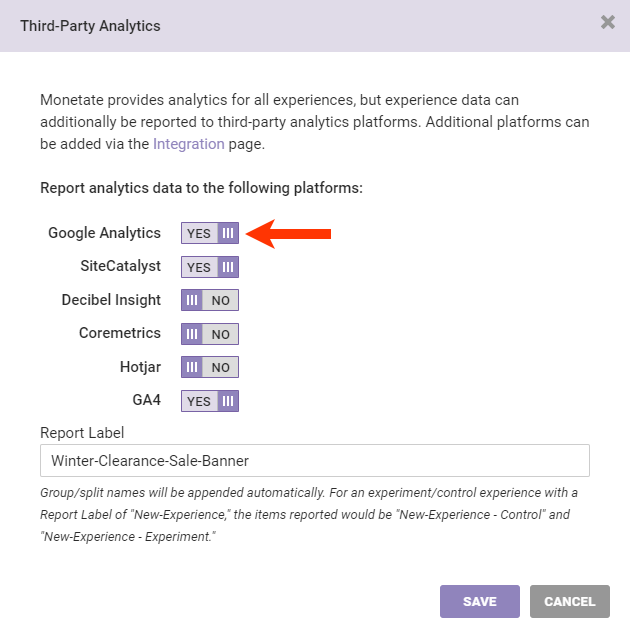
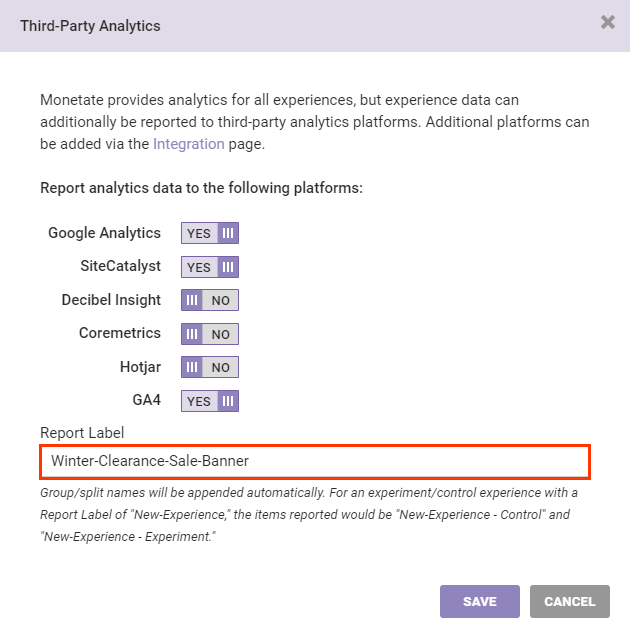
- If you want to see a specific string for this specific experience in all the third-party analytics platforms enabled for it, enter that string into Report Label.
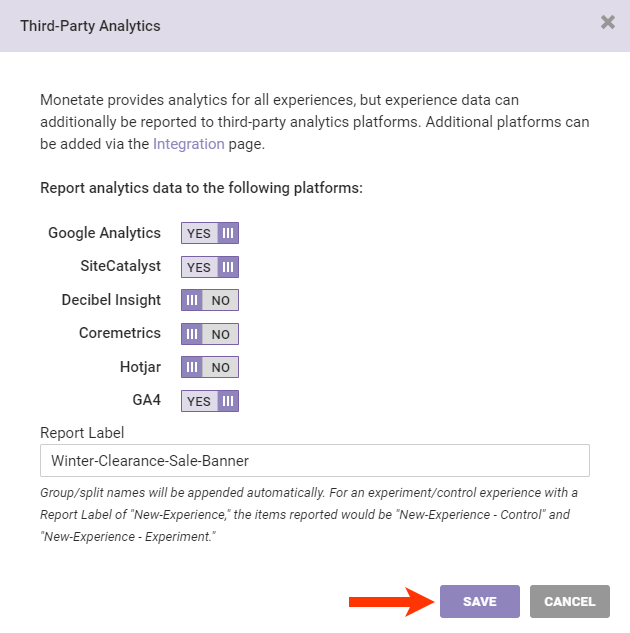
- Click SAVE to close the modal.
If you have a legacy Google Analytics report, repeat these steps for each active Web experience in the View Associated Experiences table that you want reported to your GA4 setup. After you've added the new report to all active Web experiences that you want reported to your GA4 setup, you can then archive the legacy Google Analytics report.
If you don't have a legacy Google Analytics report, repeat the process starting at step 5 until you've added the new report to all active Web experiences that you want reported to your GA4 setup.
You can view a table of experiences that Monetate is reporting to a GA4 setup on its respective custom report configuration screen of the Third-Party Analytics tab of the Integration page of the Monetate platform settings.
To disable Google Analytics reporting for a single experience, click its name in this table to open it in Experience Editor, then click the additional options menu (...), click Third-Party Analytics, and then toggle Google Analytics to NO in the Third-Party Analytics modal.
Archiving a Legacy Google Analytics Report
After you've enabled the new GA4-compatible report for each active Web experience, you can optionally archive the legacy Google Analytics report(s).
Follow these steps to archive a legacy Google Analytics report.
- Click the legacy Google Analytics report in the list of third-party analytics reports.
- Click the archive icon.
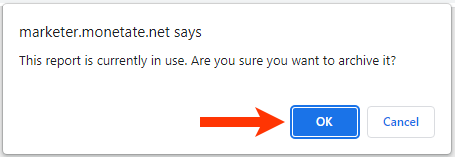
- Click OK to confirm that you want to archive the report.
After you click OK, Monetate disables and removes the legacy Google Analytics report from the Third-Party Analytics modal for all existing experiences.