Instead of re-creating default rules or scheduled campaigns that you've configured for one site into other sites that you have in Personalized Search, you can export them in a JSON file from the site in which you first set them up and then import them into the other site(s).
The method for importing and exporting the JSON file allows you to import default rules as a scheduled campaign and vice versa.
Prerequisites
Ensure the following before you import boosting rules, pinned products, and excluded products en masse into one or more sites:
- Ensure the categories in both the export source product catalog and the import destination product catalog(s) have the same set of product attributes and attribute values in the same language. Personalized Search ignores any mismatched or unmatched product attributes in the source during the import.
- Note any pinned product rules or excluded product rules in the import destination site(s) because they're cleared before these two types of rules are imported from the JSON file.
- Temporarily disable any boosting rules in the export source product catalog that you don't want automatically enabled on import into the destination site(s). You can re-enable those rules in the export source product catalog after you create the JSON file.
- Determine if you want the boosting rules in the export source to replace the boosting rules you've already created in the import destination(s), or if you want to add them as new rules.
After you import rules into a destination product catalog, the changes aren't applied until you click SAVE & PUBLISH. Therefore, take time to review the boosting rules, pinned products, and excluded products for each product category to ensure the changes are as you expected before you commit to them.
Exporting and Importing Default Rules
You can export the default rules that govern boosting and burying, pinned products, and excluded products for one or more product categories.
Exporting Default Rules
Follow these steps to create a JSON file that contains the default rules for boosting, pinning, and excluding products for one or more product categories in one of your sites.
- Click COMPONENTS in the top navigation bar, select Personalized Search, and then click the appropriate product catalog on the Personalized Search list page.

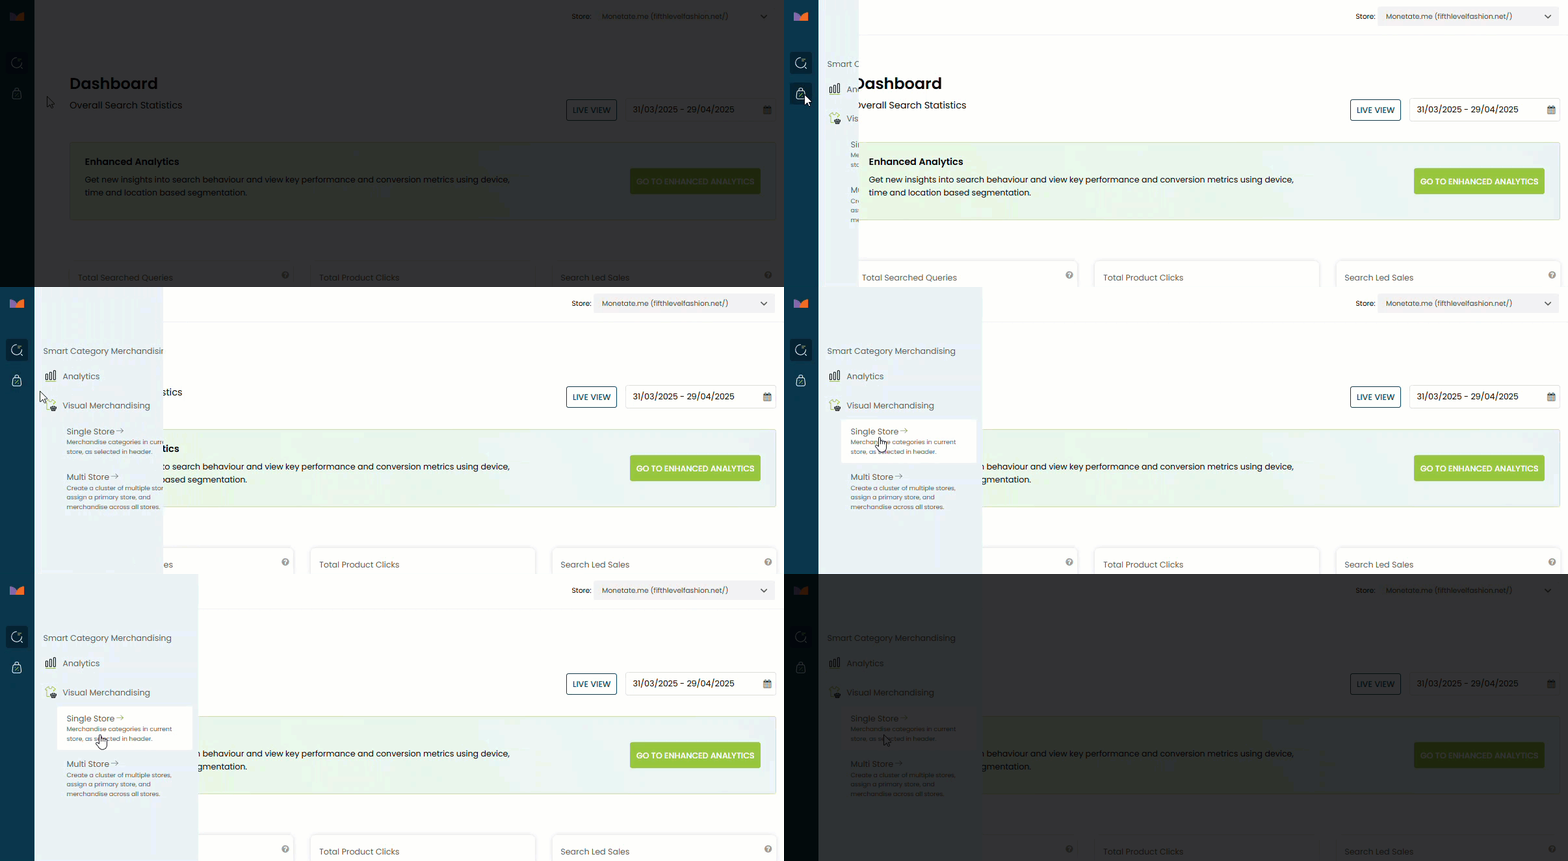
- Click the Smart Category Merchandising icon in the left-hand vertical toolbar, and then select Single Store.
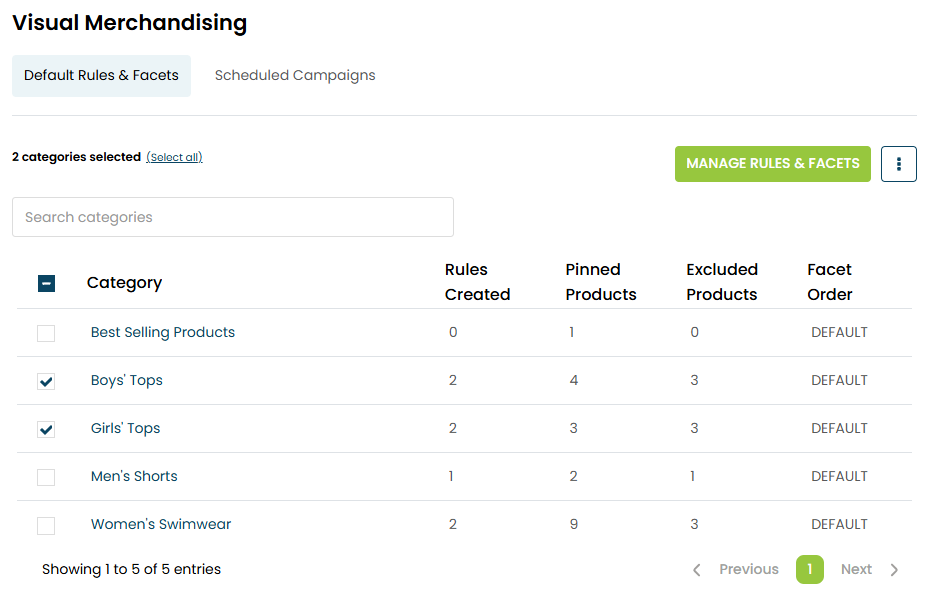
- Select one or more product categories whose default rules you want to export.
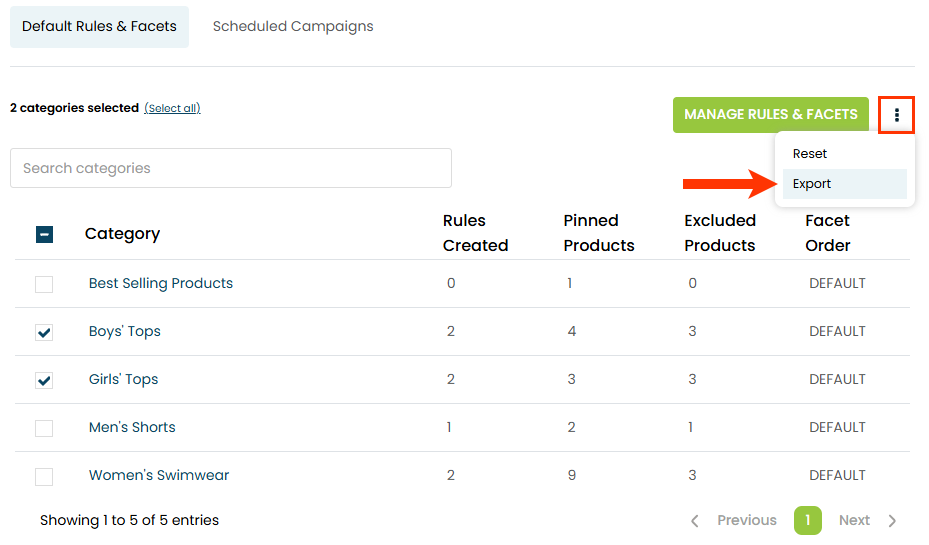
- Select Export from the additional options menu (...).
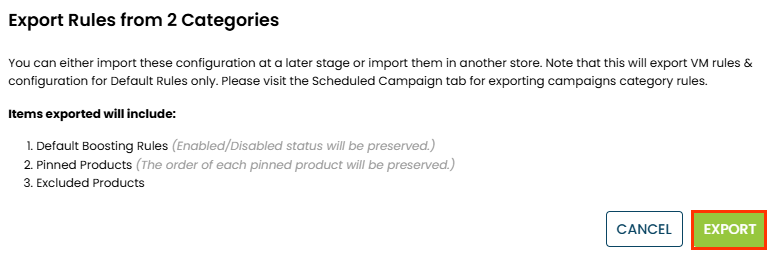
- Click EXPORT in the Export Rules modal.
The JSON file downloads to your browser's default download location.
Importing Default Rules
Follow these steps to import the JSON file into the destination site.
- Click COMPONENTS in the top navigation bar, select Personalized Search, and then click the appropriate product catalog on the Personalized Search list page.

- Click the Smart Category Merchandising icon in the left-hand vertical toolbar, and then select Single Store.

- Select the destination from Store.

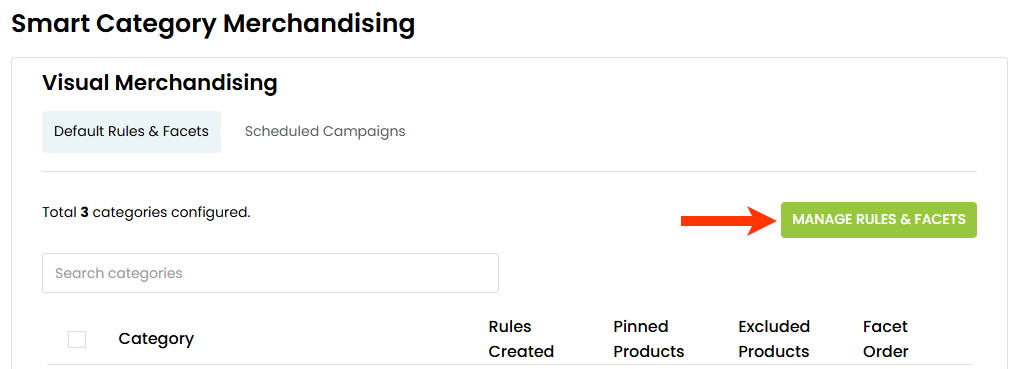
- Click MANAGE RULES & FACETS.
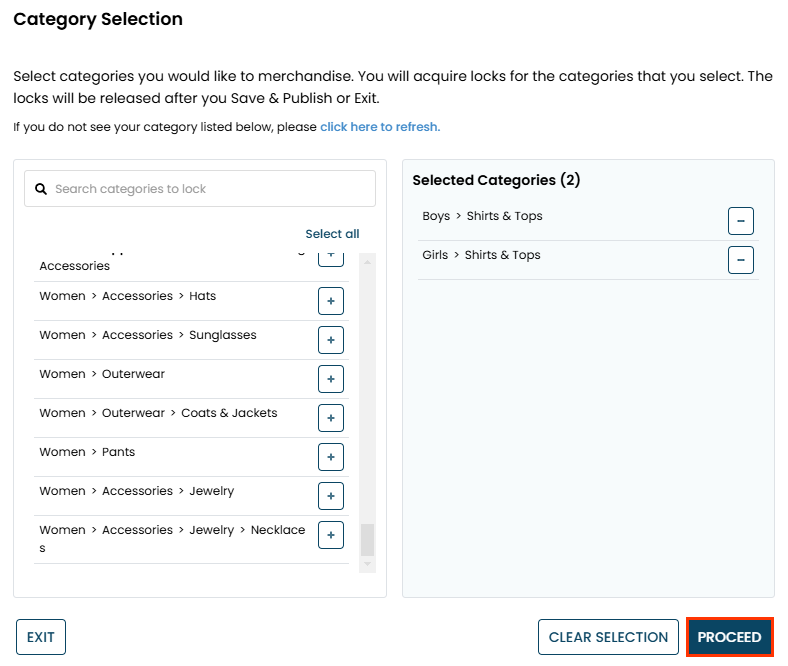
- On the Category Selection modal, select each product category included in the source JSON file, and then click PROCEED.
- Click IMPORT.

- Import the JSON file that you created and downloaded in Exporting Default Rules.
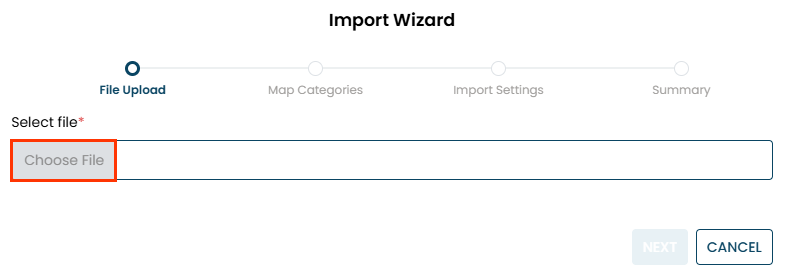
- Click Choose File in the Import Wizard modal, and then navigate to and select the JSON file.
- Select which rules you want to import, and then click NEXT.

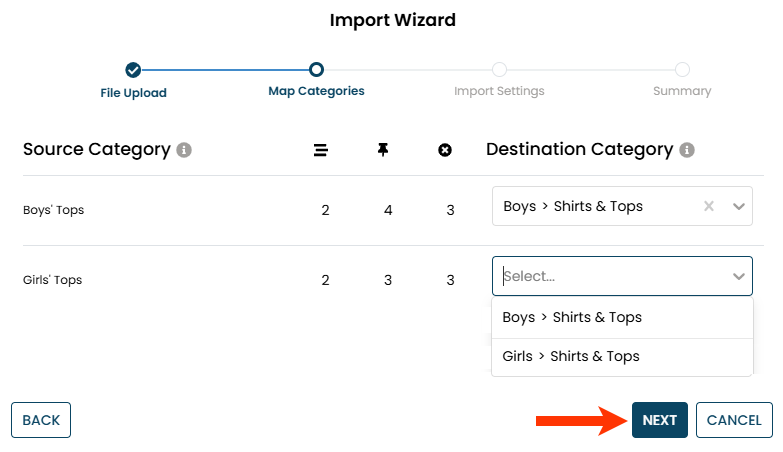
- If necessary, select the destination product category that aligns to each product category included in the source JSON file, and then click NEXT.
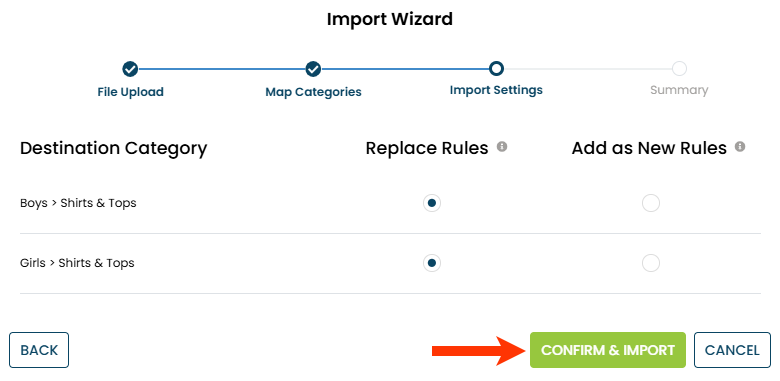
- Select if you want the rules that you're importing to replace any existing rules in each product category or to be added to each product category as new rules, and then click CONFIRM & IMPORT.
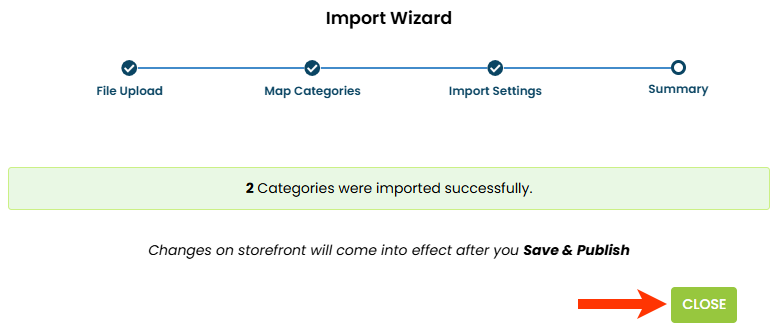
- Click CLOSE.
- Click Choose File in the Import Wizard modal, and then navigate to and select the JSON file.
- If necessary, add new or revise existing default boosting rules, pinned product rules, and product exclusion rules for any product category that you imported.
- Optionally, customize the facets for any product category that you imported as explained in Manage Facets for Category Pages.
- Click SAVE & PUBLISH.

You must wait up to 10 minutes before you can see the changes to the category's facets on your site.
Exporting and Importing Scheduled Campaigns
Unlike with exporting product category default rules, you can only export and import one scheduled campaign at a time. The operation includes the rules for boosting and burying, pinned products, and excluded products for the campaign's constituent category or categories.
Exporting a Scheduled Campaign
Follow these steps to create a JSON file that contains the rules for boosting, pinning, and excluding products for one or more product categories in a scheduled campaign that you've created for one of the sites that you have in Personalized Search.
- Click COMPONENTS in the top navigation bar, select Personalized Search, and then click the appropriate product catalog on the Personalized Search list page.

- Click the Smart Category Merchandising icon in the left-hand vertical toolbar, and then select Single Store.

- Click the Scheduled Campaigns tab.
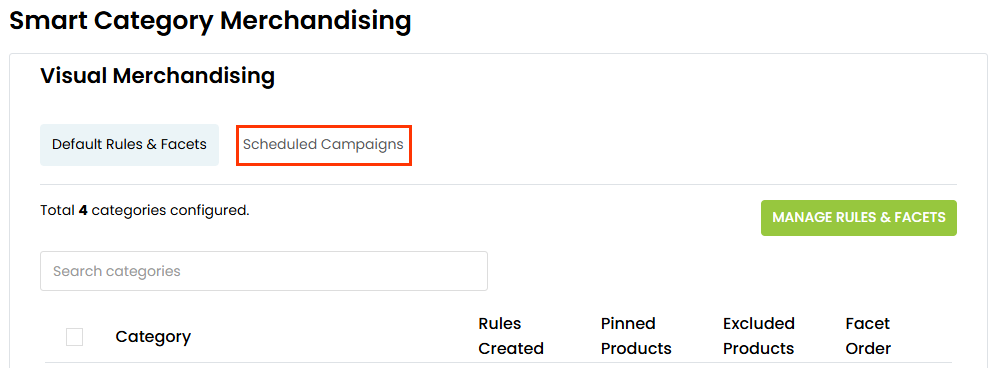
- Click EXPORT.

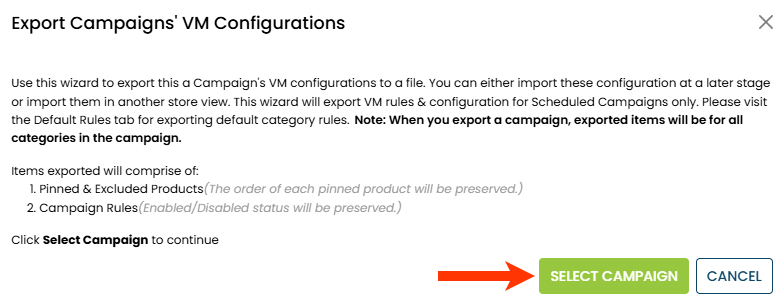
- Click SELECT CAMPAIGN on the Export Campaigns' VM Configurations modal.
- Select the scheduled campaign and then click EXPORT.

The JSON file downloads to your browser's default download location.
Importing a Scheduled Campaign
Follow these steps to import a JSON file containing a scheduled campaign's rules into a site as a new or existing scheduled campaign.
- Click COMPONENTS in the top navigation bar, select Personalized Search, and then click the appropriate product catalog on the Personalized Search list page.

- Click the Smart Category Merchandising icon in the left-hand vertical toolbar, and then select Single Store.

- Select the destination from Store.

- Click the Scheduled Campaigns tab.

- As necessary, select the destination scheduled campaign, or click CREATE NEW.

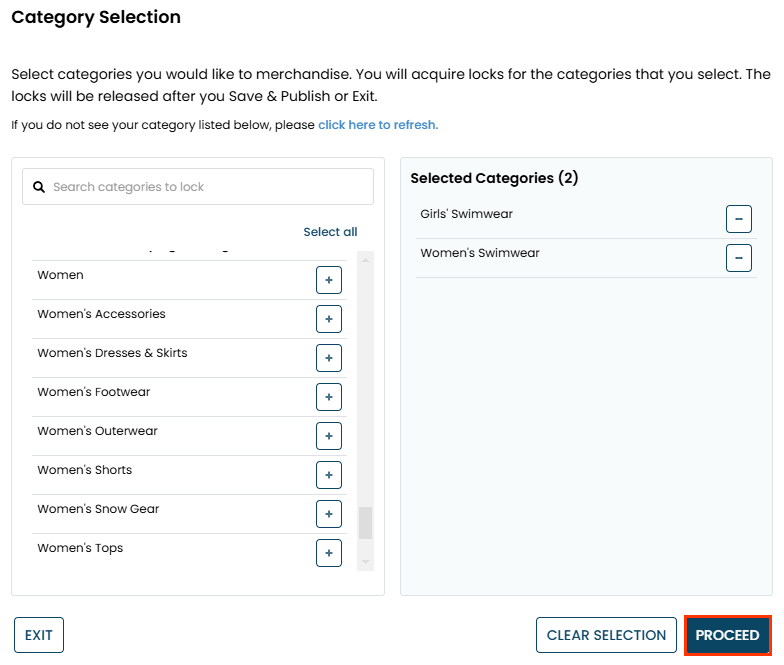
- On the Category Selection modal, select each product category included in the source scheduled campaign, and then click PROCEED.
- If necessary, name the scheduled campaign.

- Click IMPORT.

- Import the JSON file you created and downloaded in Exporting a Scheduled Campaign.
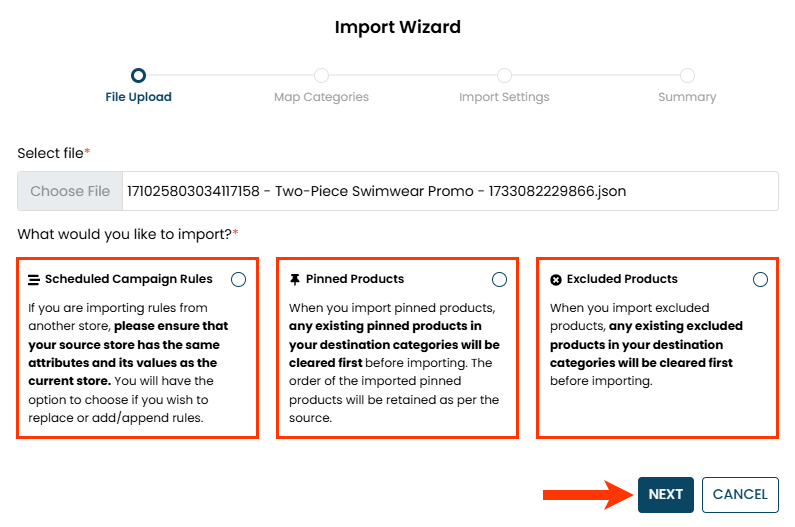
- Click Choose File in the Import Wizard modal, and then navigate to and select the JSON file.

- Select which rules you want to import, and then click NEXT.
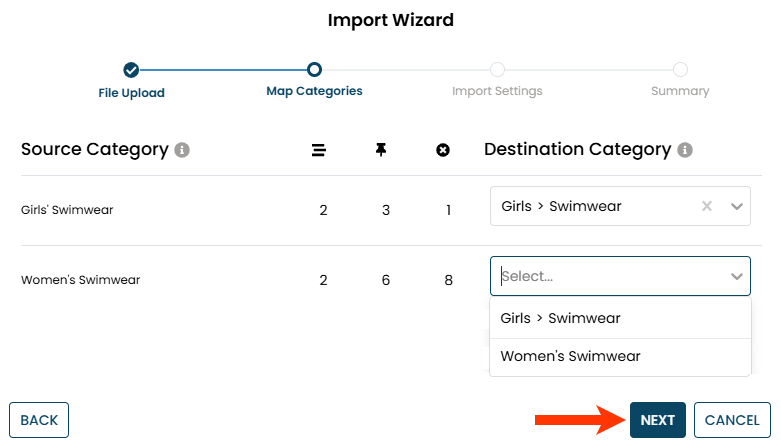
- If necessary, select the destination product category that aligns to each product category included in the source scheduled campaign, and then click NEXT.
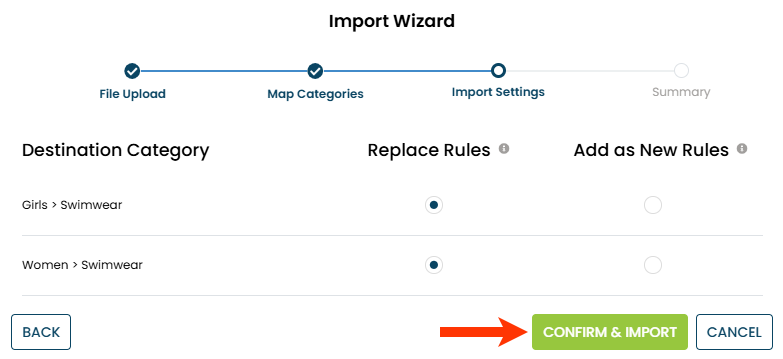
- Select if you want the rules that you're importing to replace any existing rules in the campaign or to be added to the campaign as new rules, and then click CONFIRM & IMPORT.
- Click CLOSE.

- Click Choose File in the Import Wizard modal, and then navigate to and select the JSON file.
- If necessary, customize each category's facets for the campaign as explained in step 11 of Create Scheduled Campaigns.
- Click PREVIEW to confirm the rules you've configured yield results as you anticipate.
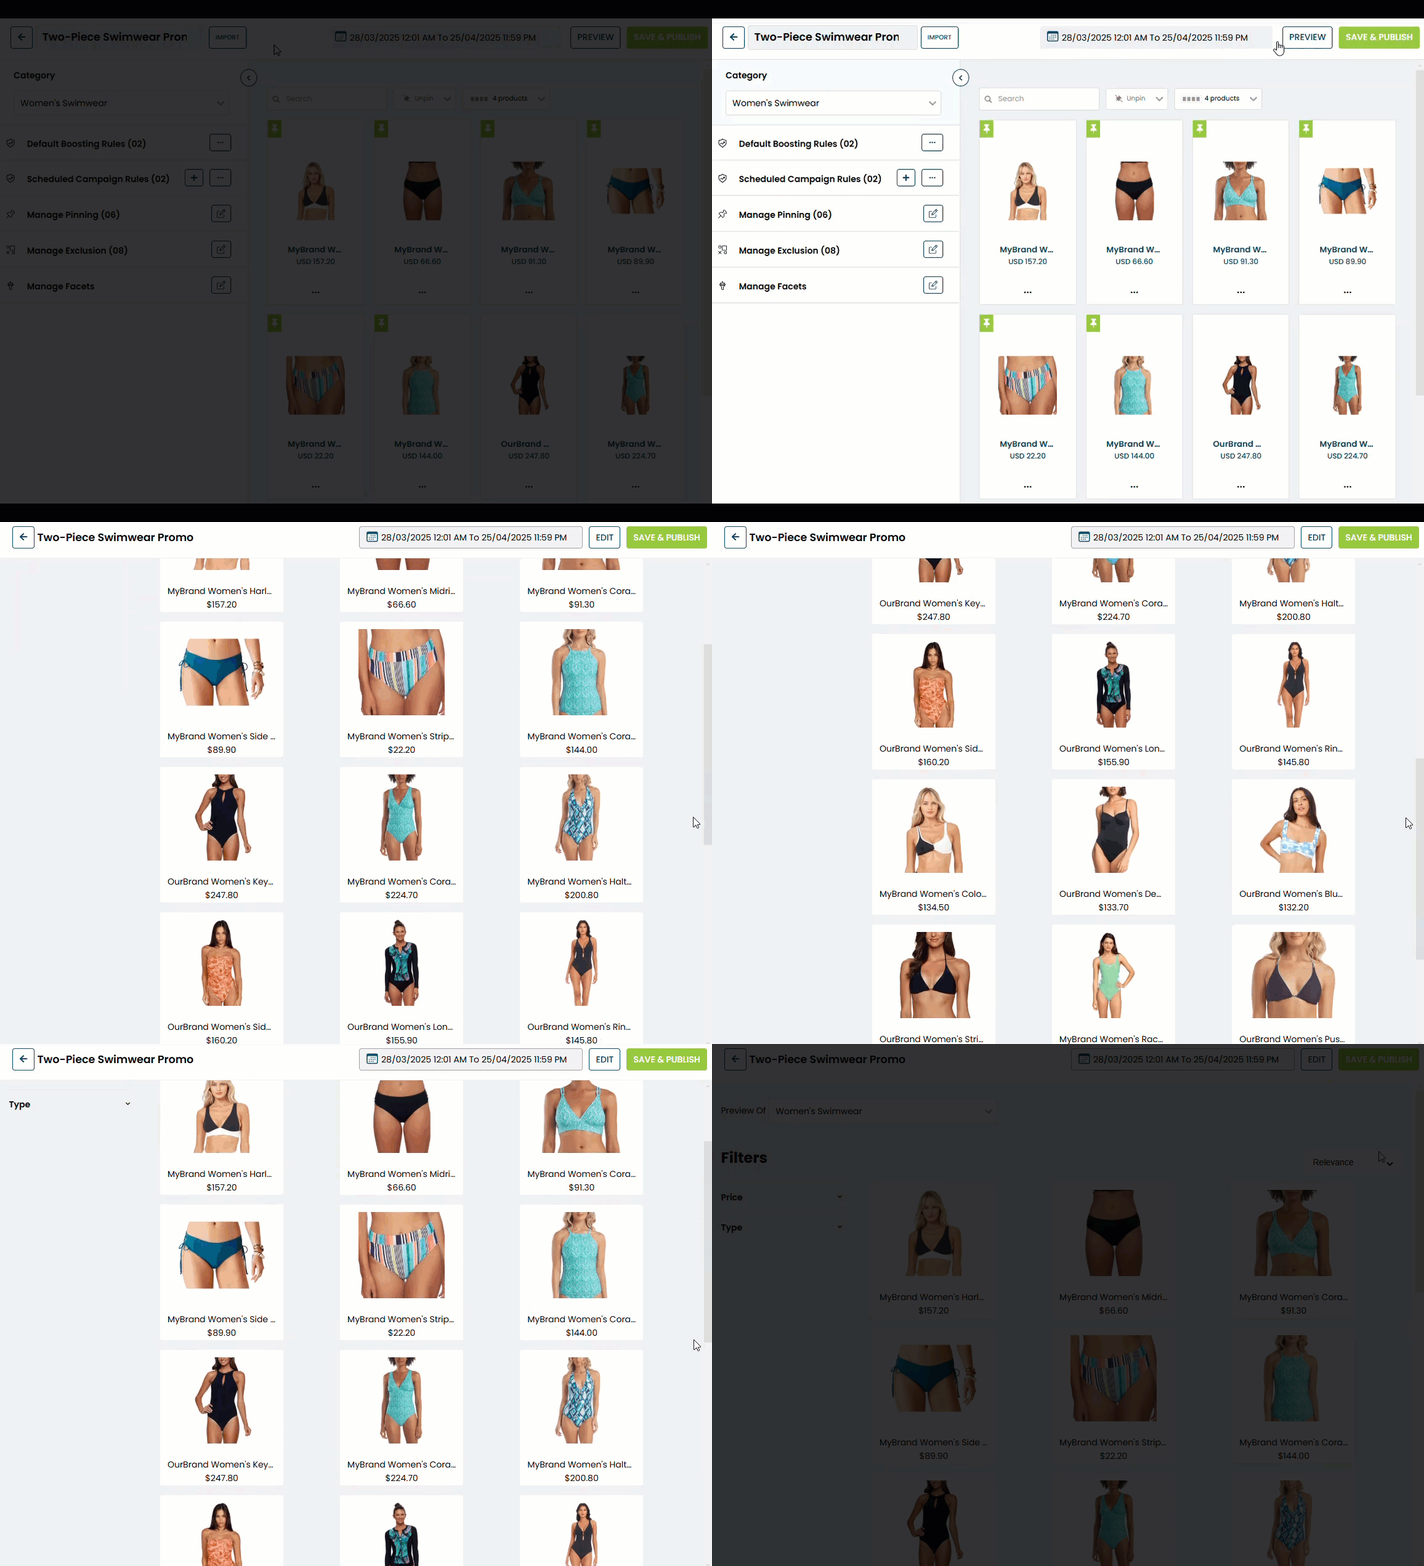
- Schedule the campaign as explained in step 14 of Create Scheduled Campaigns.

- Click SAVE & PUBLISH.

Refer to Create Scheduled Campaigns for more information about editing scheduled campaigns and how to manage conflicting campaigns.