Most indexed attributes, or facets, from the mapped product catalog appear as filter options on product category pages.

You can customize which filters appear and in what order they appear for each product category on the Default Rules & Facets tab of the Visual Merchandising page.
You can either fully control the order of the facets for a category page, or you can engage Personalized Search's machine learning models to revise the facet order based on how your customers interact with your site's category pages and search. If you opt to use the machine learning option, you can still hide, pin, and order facets yourself.
Refer to Retrieve and Apply Facets for the key-value pairs that you must include in the Personalized Category Page query request to the Personalized Search API.
Prerequisites
If you navigate to the Default Rules & Facets tab of the Visual Merchandising page for any site that's part of a cluster either by selecting Single Store from the Smart Category Merchandising menu in the left-hand vertical toolbar or by selecting the site from Store in the upper-right corner of the Personalized Search interface, then you see a message warning you that the site is part of a cluster.

If you want to override the cluster's default facet configurations for a single linked site that is not the primary site, then you have two options:
- Create a scheduled campaign by following the steps in Create Scheduled Campaigns
- Remove the linked site from the cluster by following the steps in Editing Cluster Membership in Create a Multi-Site Cluster
To override the cluster's default facet configurations for a cluster's primary site, you can create a scheduled campaign or delete the cluster.
Setting a Facets Rule
The default order of the default set of facets for Personalized Category Pages is set on the Facets tab of the Personalized Search Customizations page. A facets rule overrides that default, allowing you to hide facets as well as to arrange the order of the facets for a category's pages.
Follow these steps to create a facets rule for a category for one site.
- Click COMPONENTS in the top navigation bar, select Personalized Search, and then click the appropriate product catalog on the Personalized Search list page.

- Click the Smart Category Merchandising icon in the left-hand vertical toolbar, and then select Single Store.
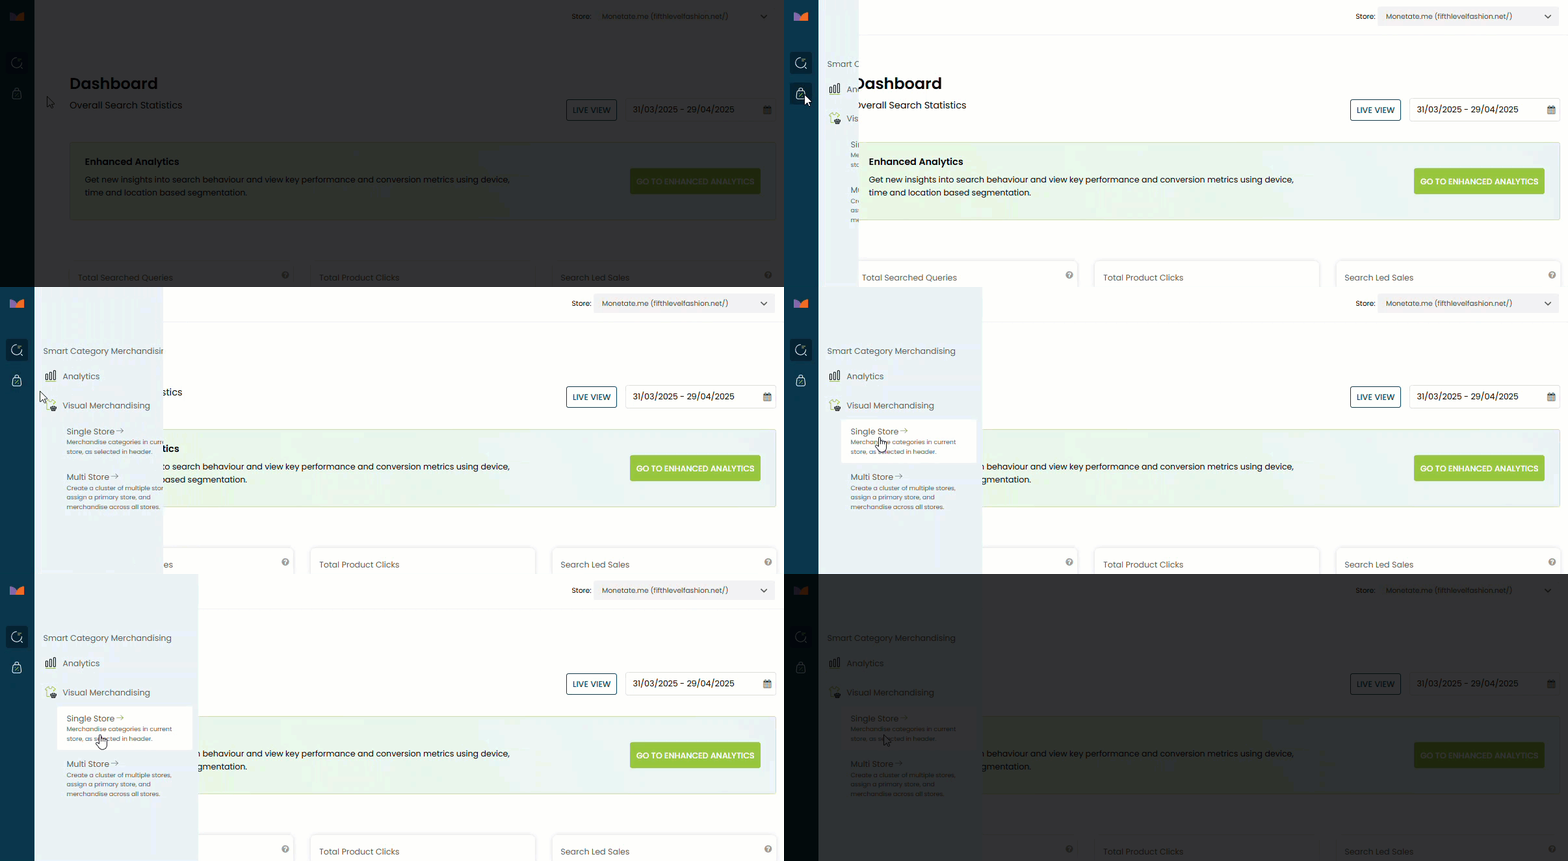
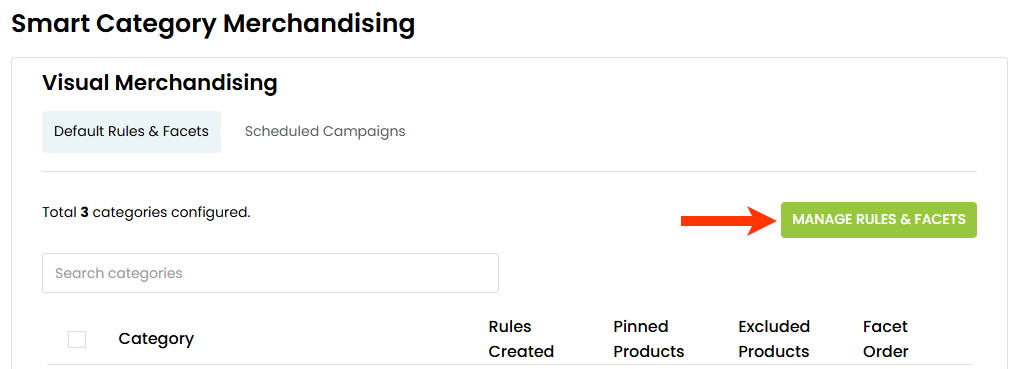
- Click MANAGE RULES & FACETS.
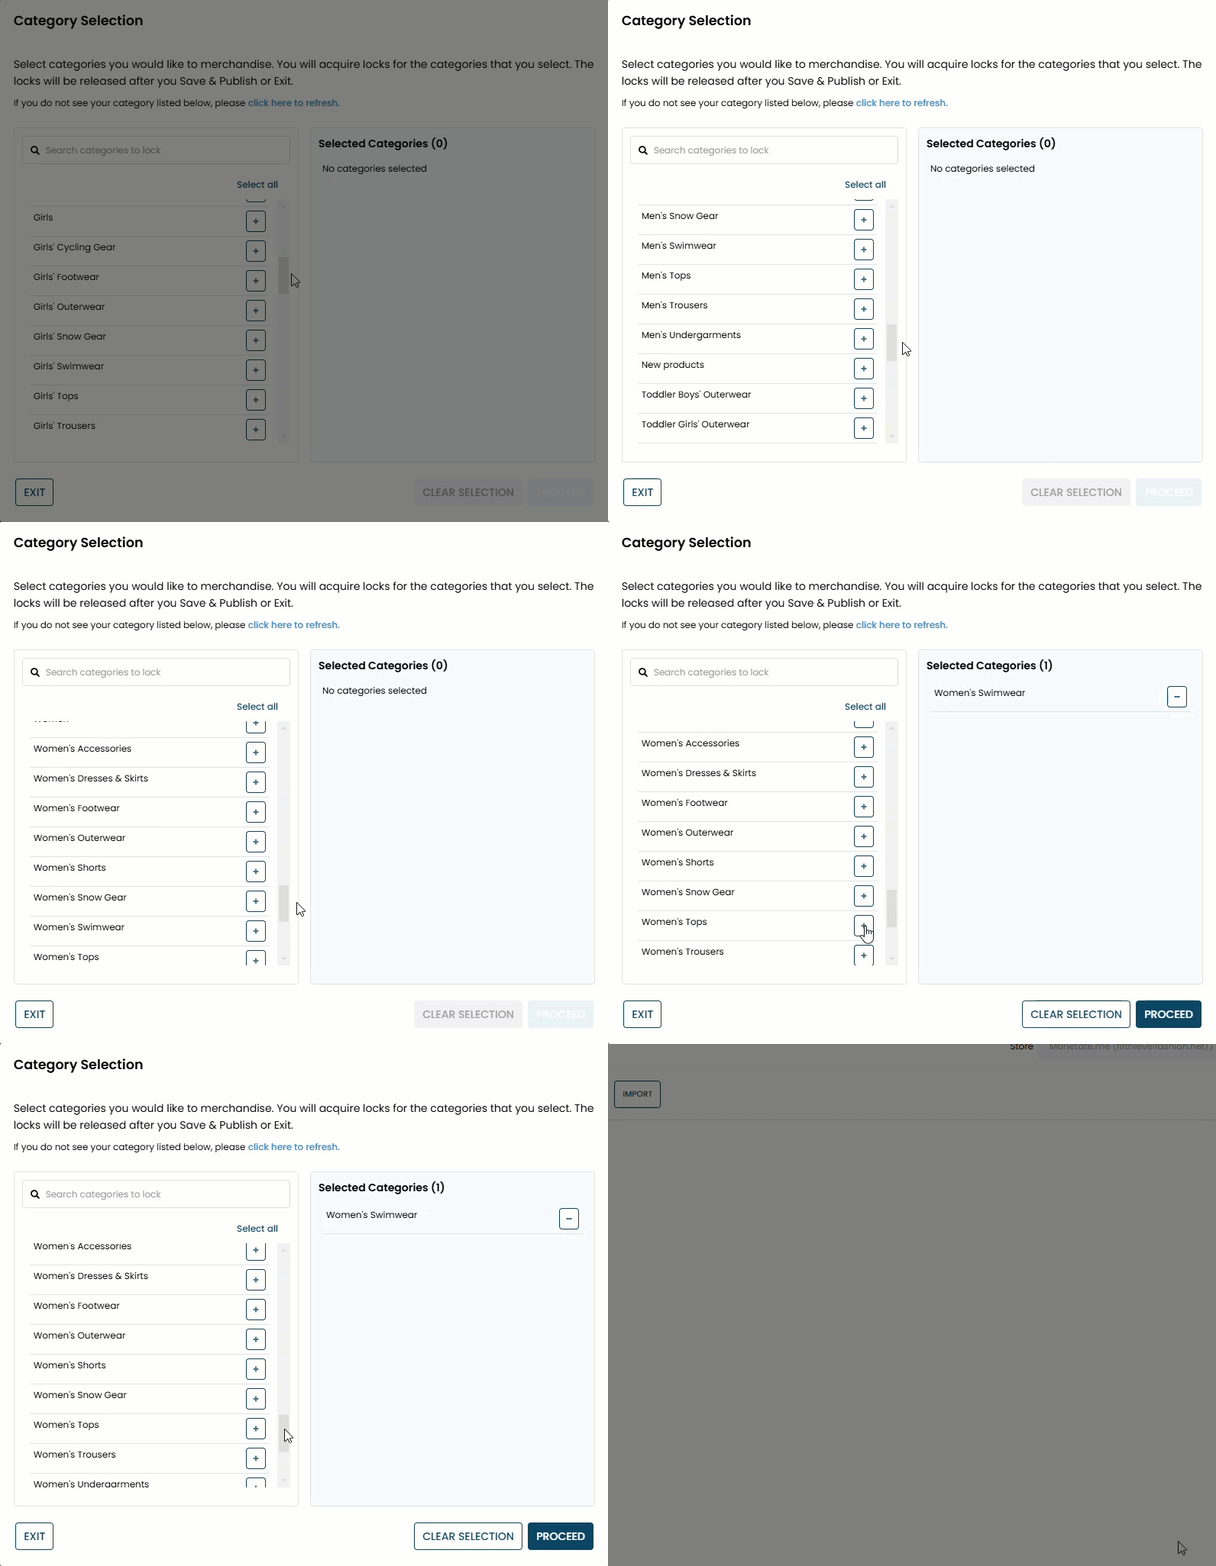
- On the Category Selection modal, click the plus sign icon (+) to select the product category for which you want to manage facets, and then click PROCEED.
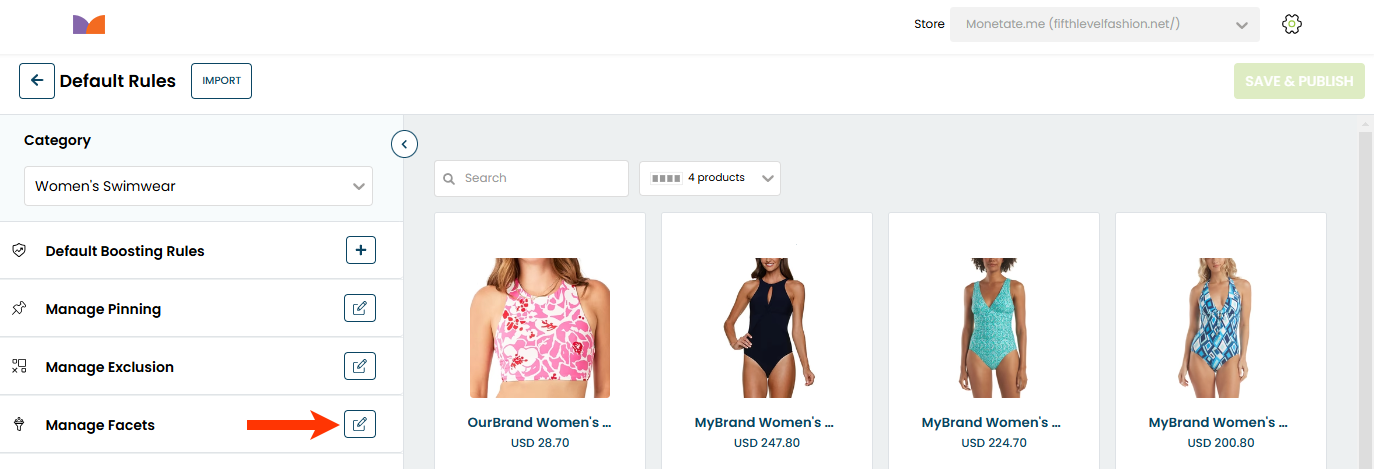
- On the Default Rules page, click the edit icon for Manage Facets.
- If necessary, select AI from FACET ORDER to engage the machine-learning option. Skip to step 10 if you don't plan to exclude or pin any facets.
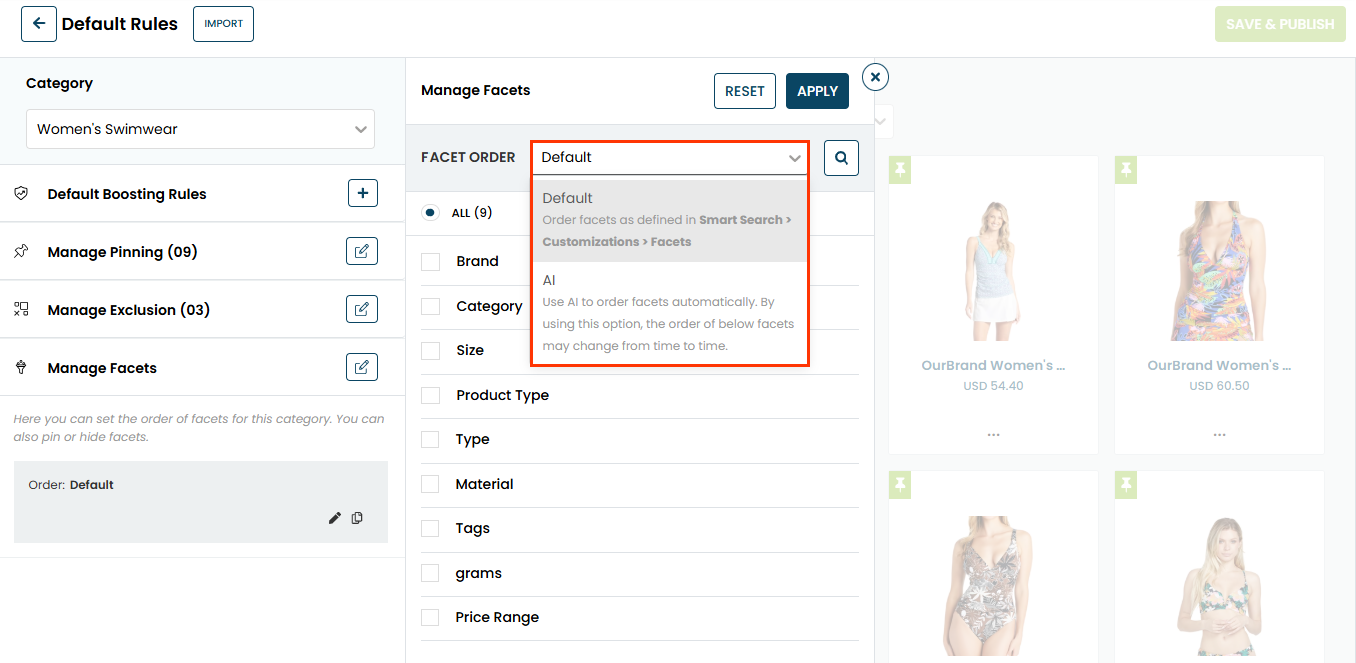
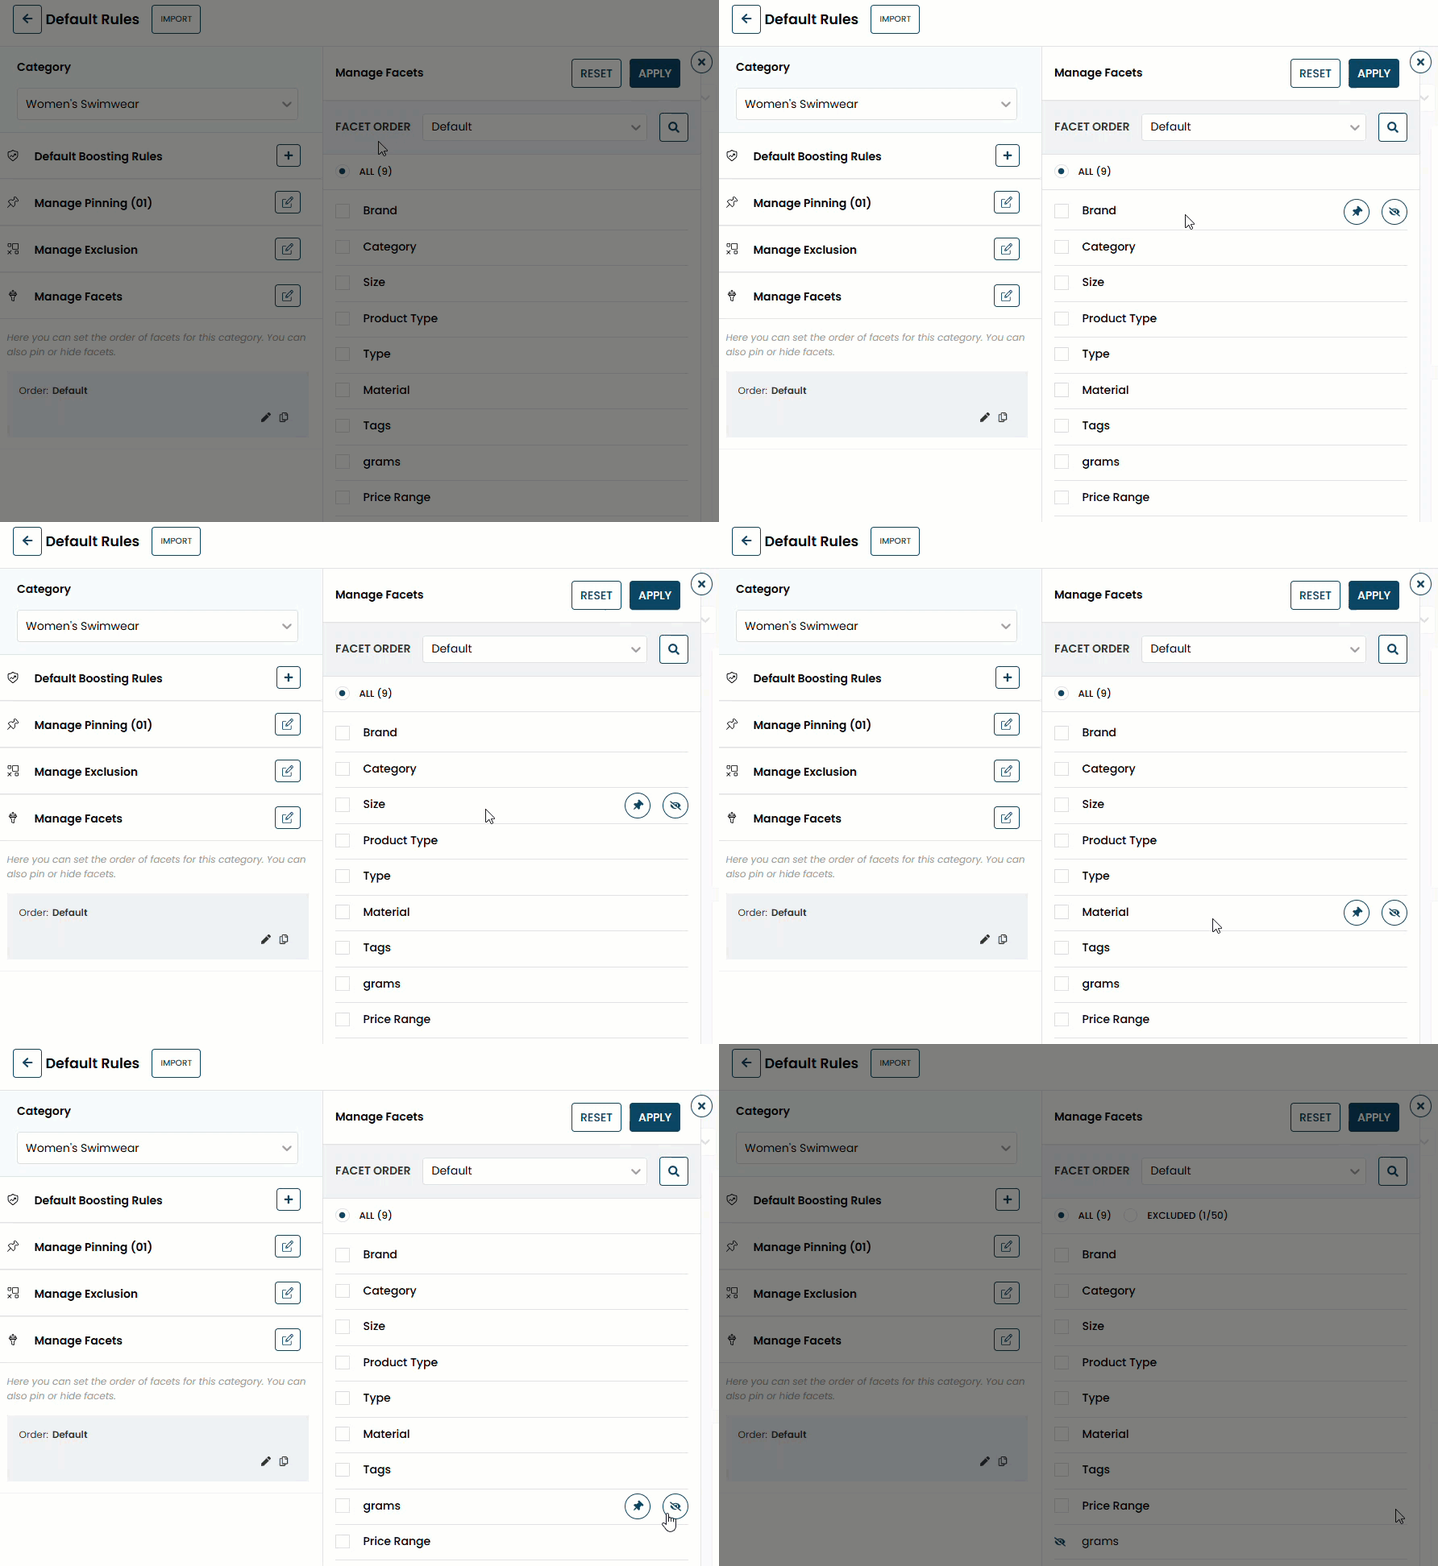
- As necessary, exclude any facet(s) from the category's pages.
- To exclude facets individually, place your mouse pointer on the facet's name, and then click the exclusion icon that appears at the end of its row in the table.
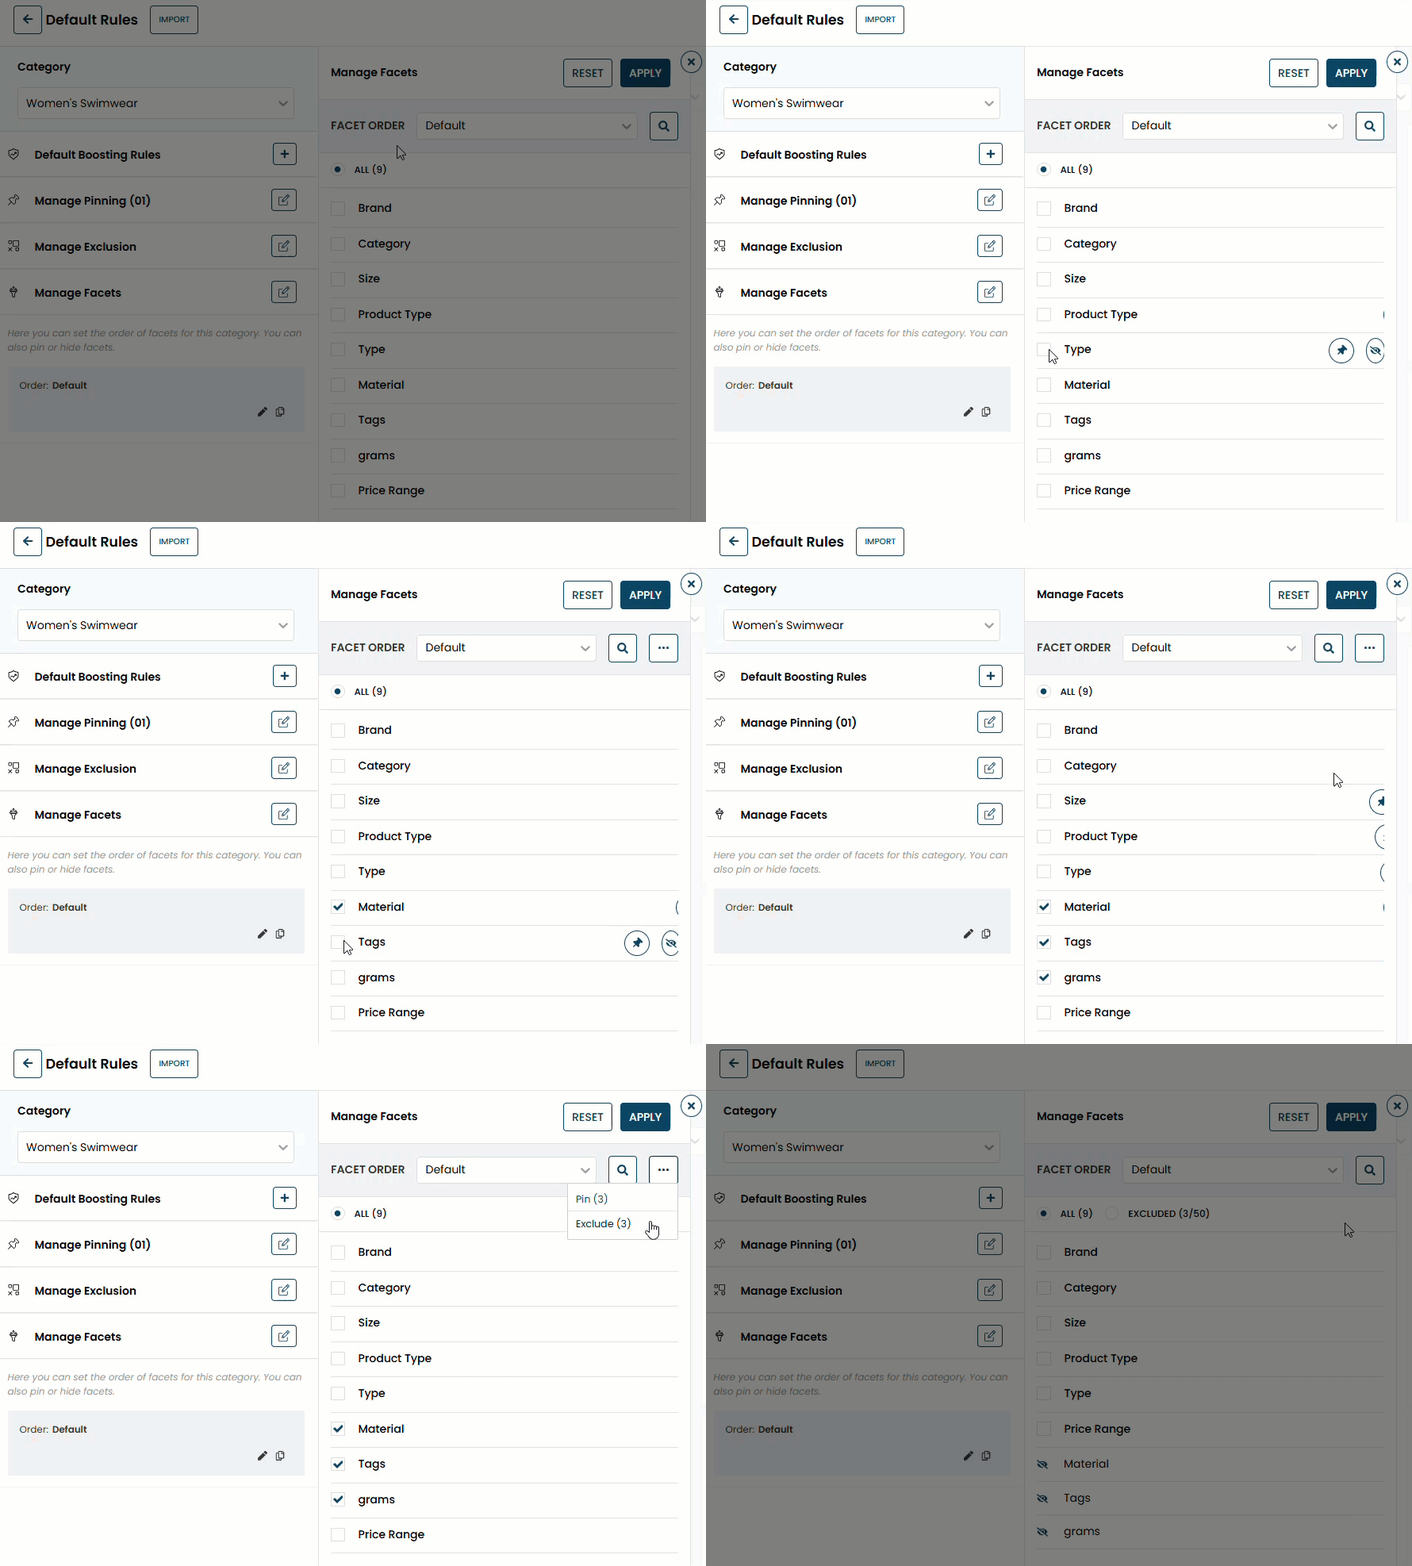
- To exclude multiple facets at once, select them and then select Exclude from the additional options menu (...).
- To exclude facets individually, place your mouse pointer on the facet's name, and then click the exclusion icon that appears at the end of its row in the table.
- As necessary, pin any facet(s) to the top of the facets list for the category's pages.
- To pin facets individually, place your mouse pointer on the facet's name, and then click the pin icon that appears at the end of its row in the table.
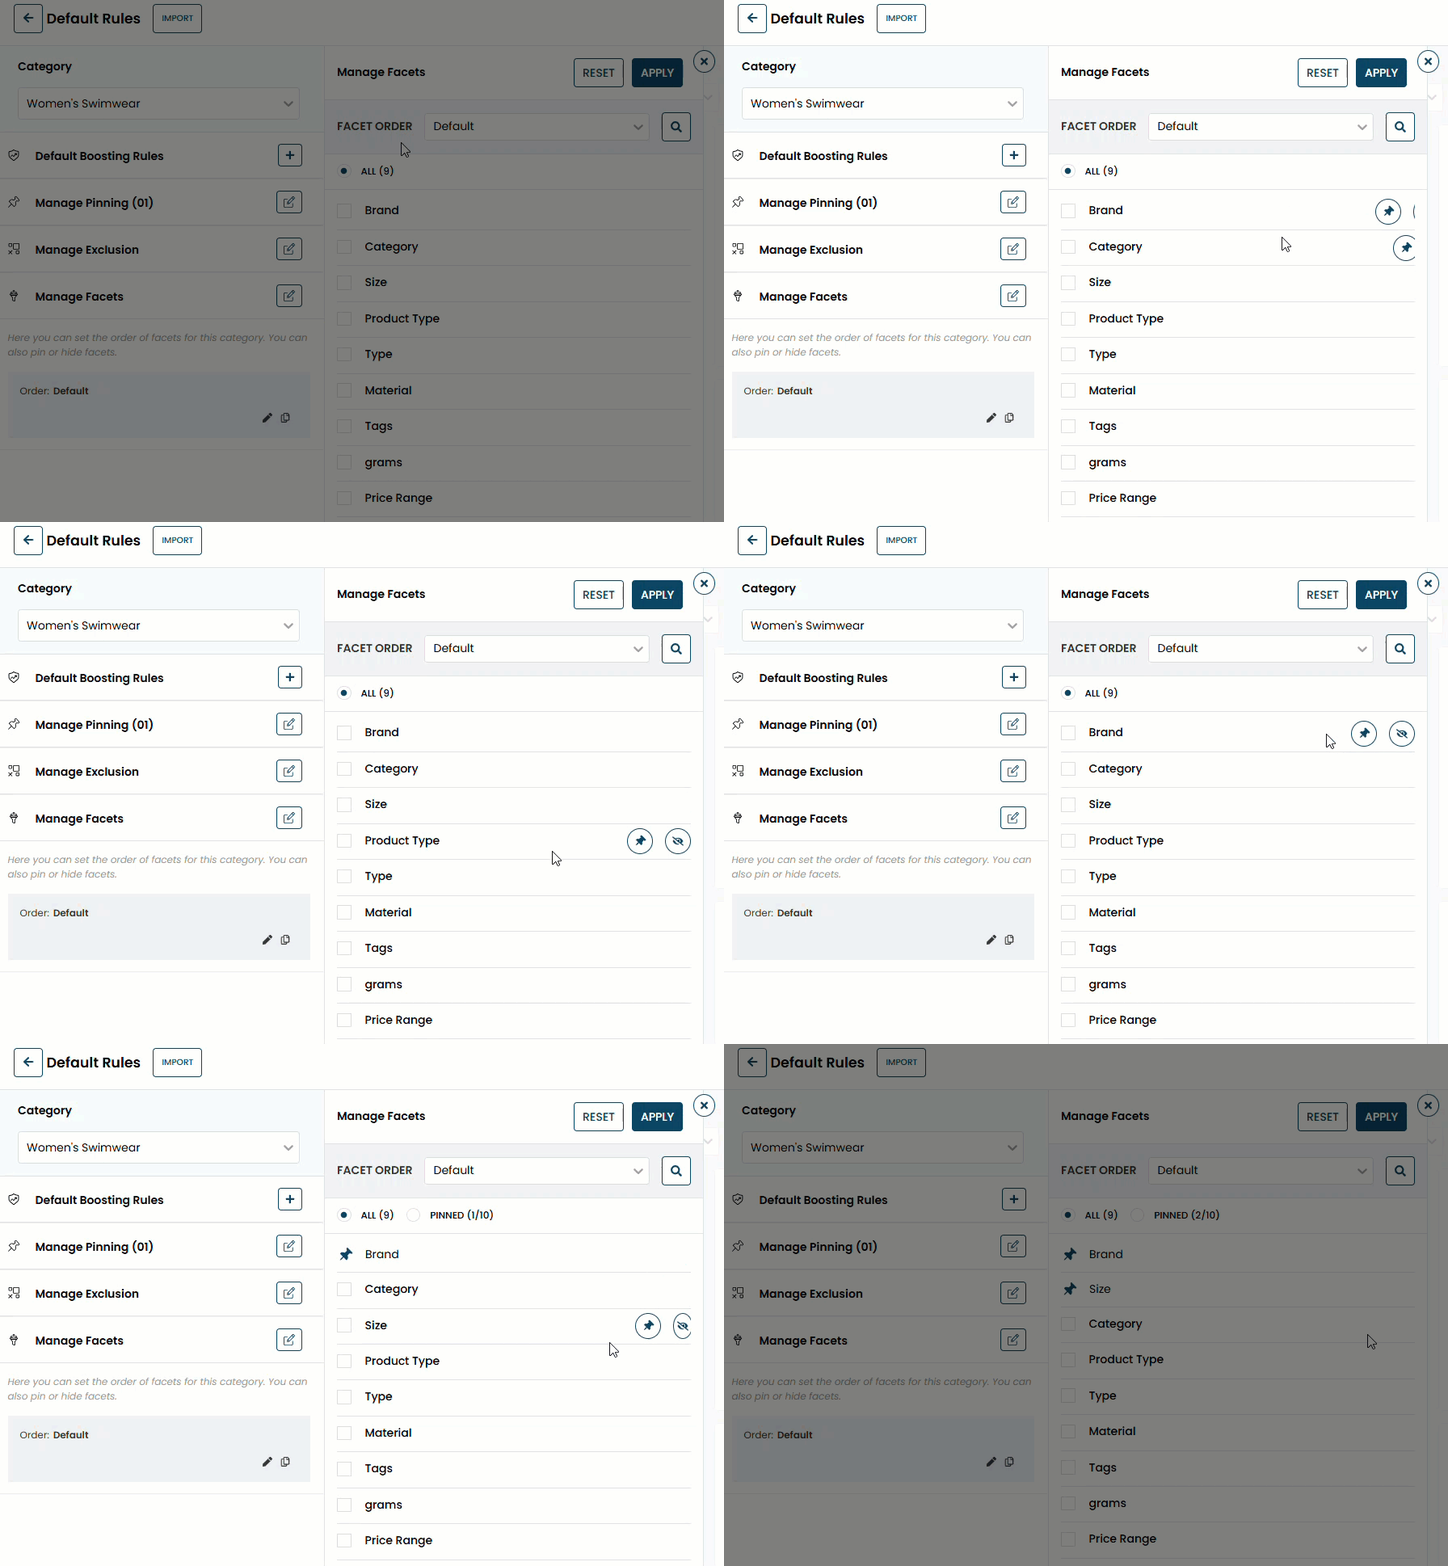
- To pin multiple facets at once, select them and then select Pin from the additional options menu (...).
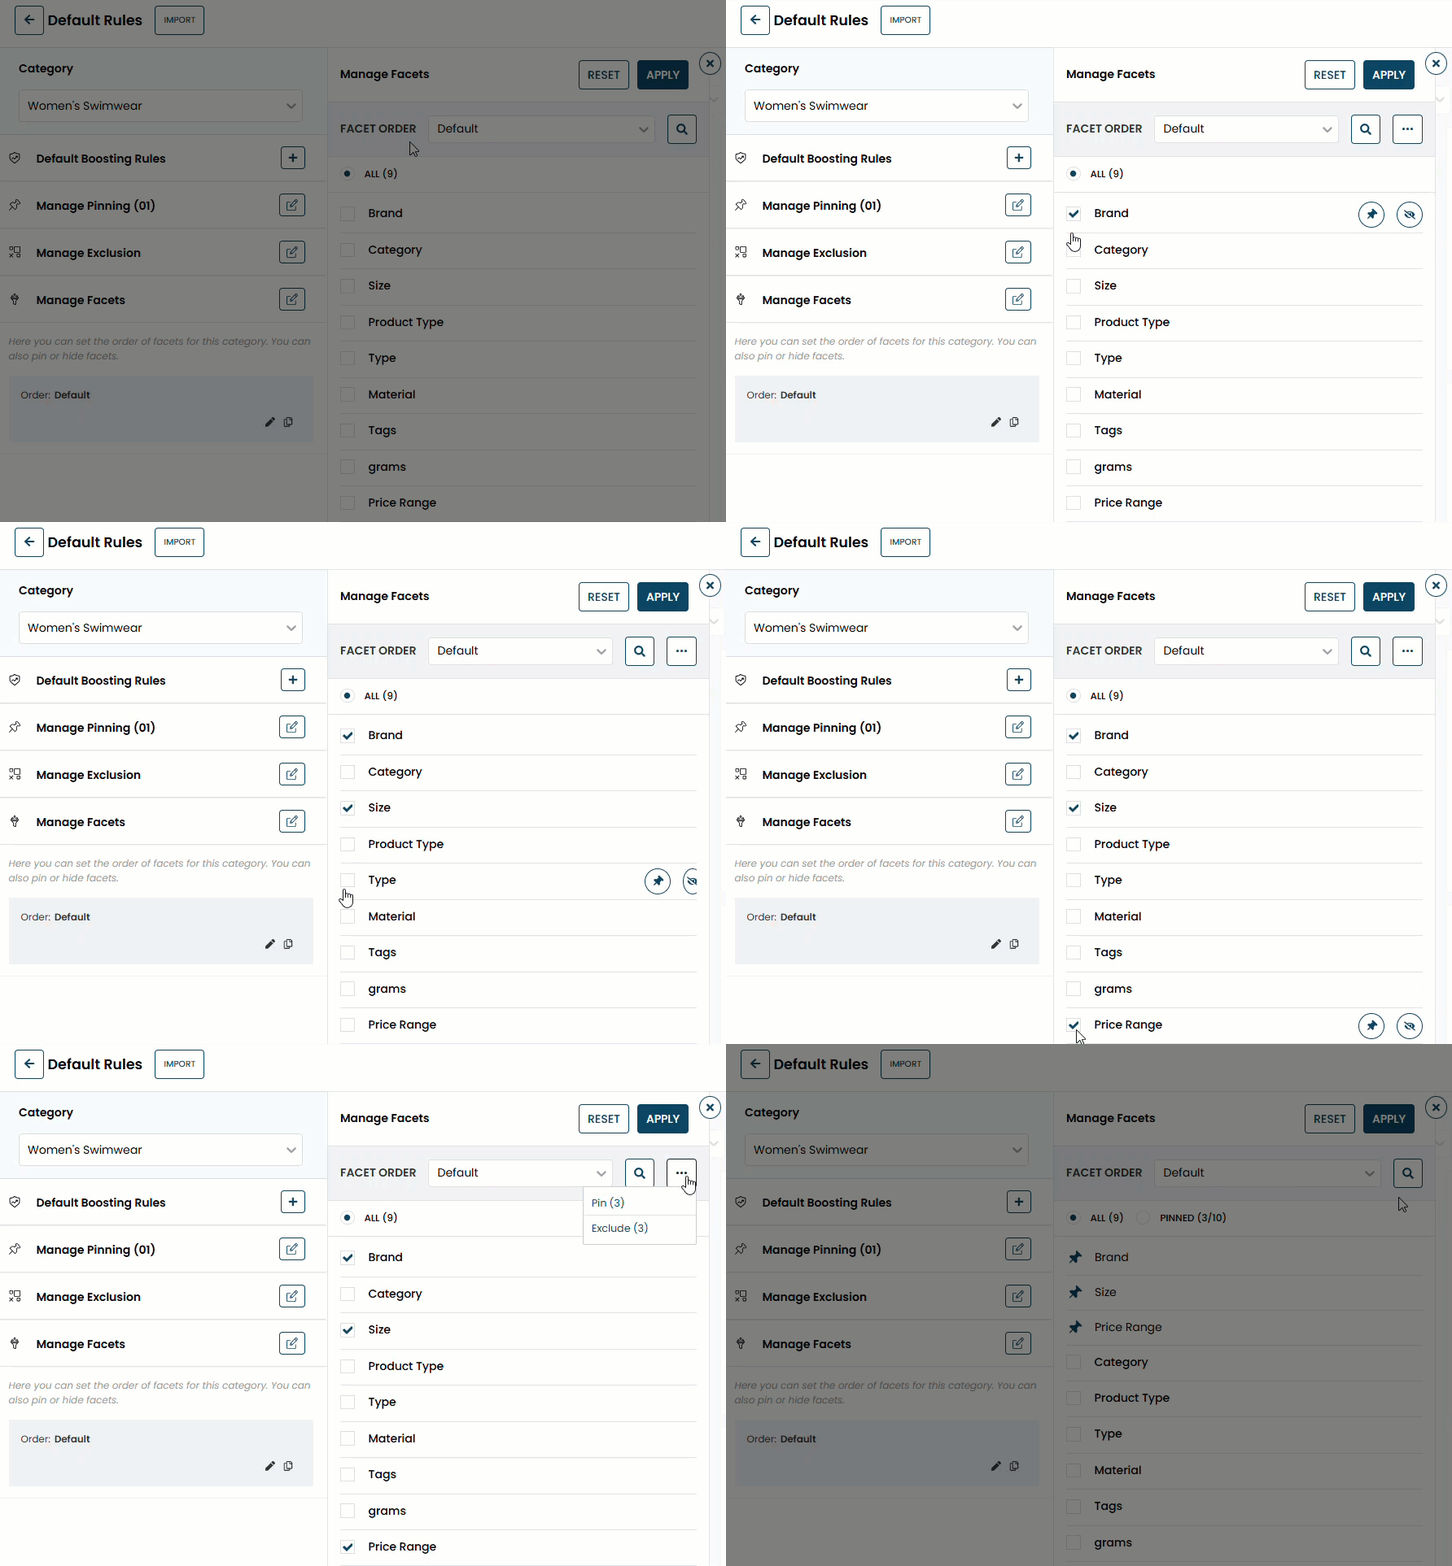
- To pin facets individually, place your mouse pointer on the facet's name, and then click the pin icon that appears at the end of its row in the table.
- As necessary, rearrange the pinned facets.
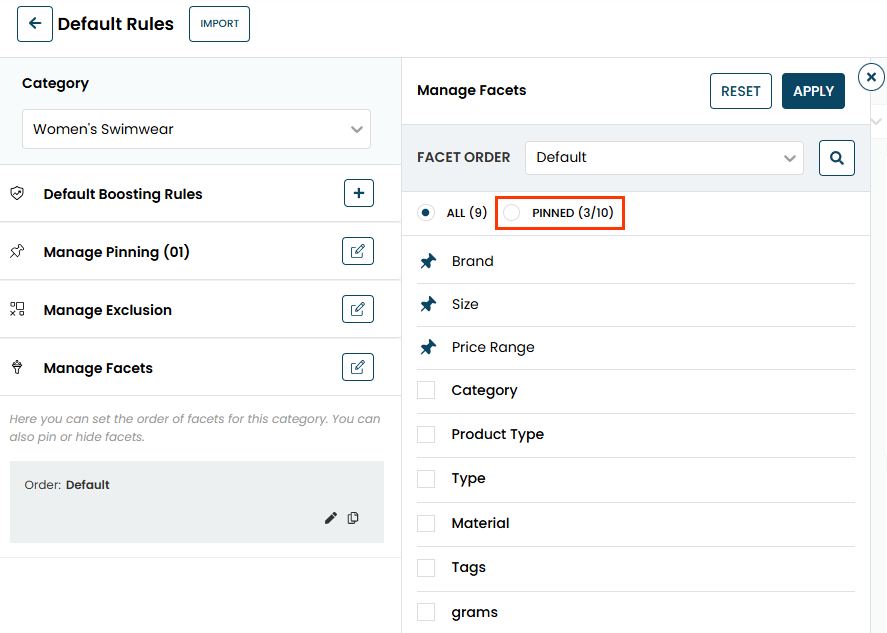
- Select PINNED.
- As necessary, drag and drop a facet into the position where you want it to appear in the list on the category's pages on your site.
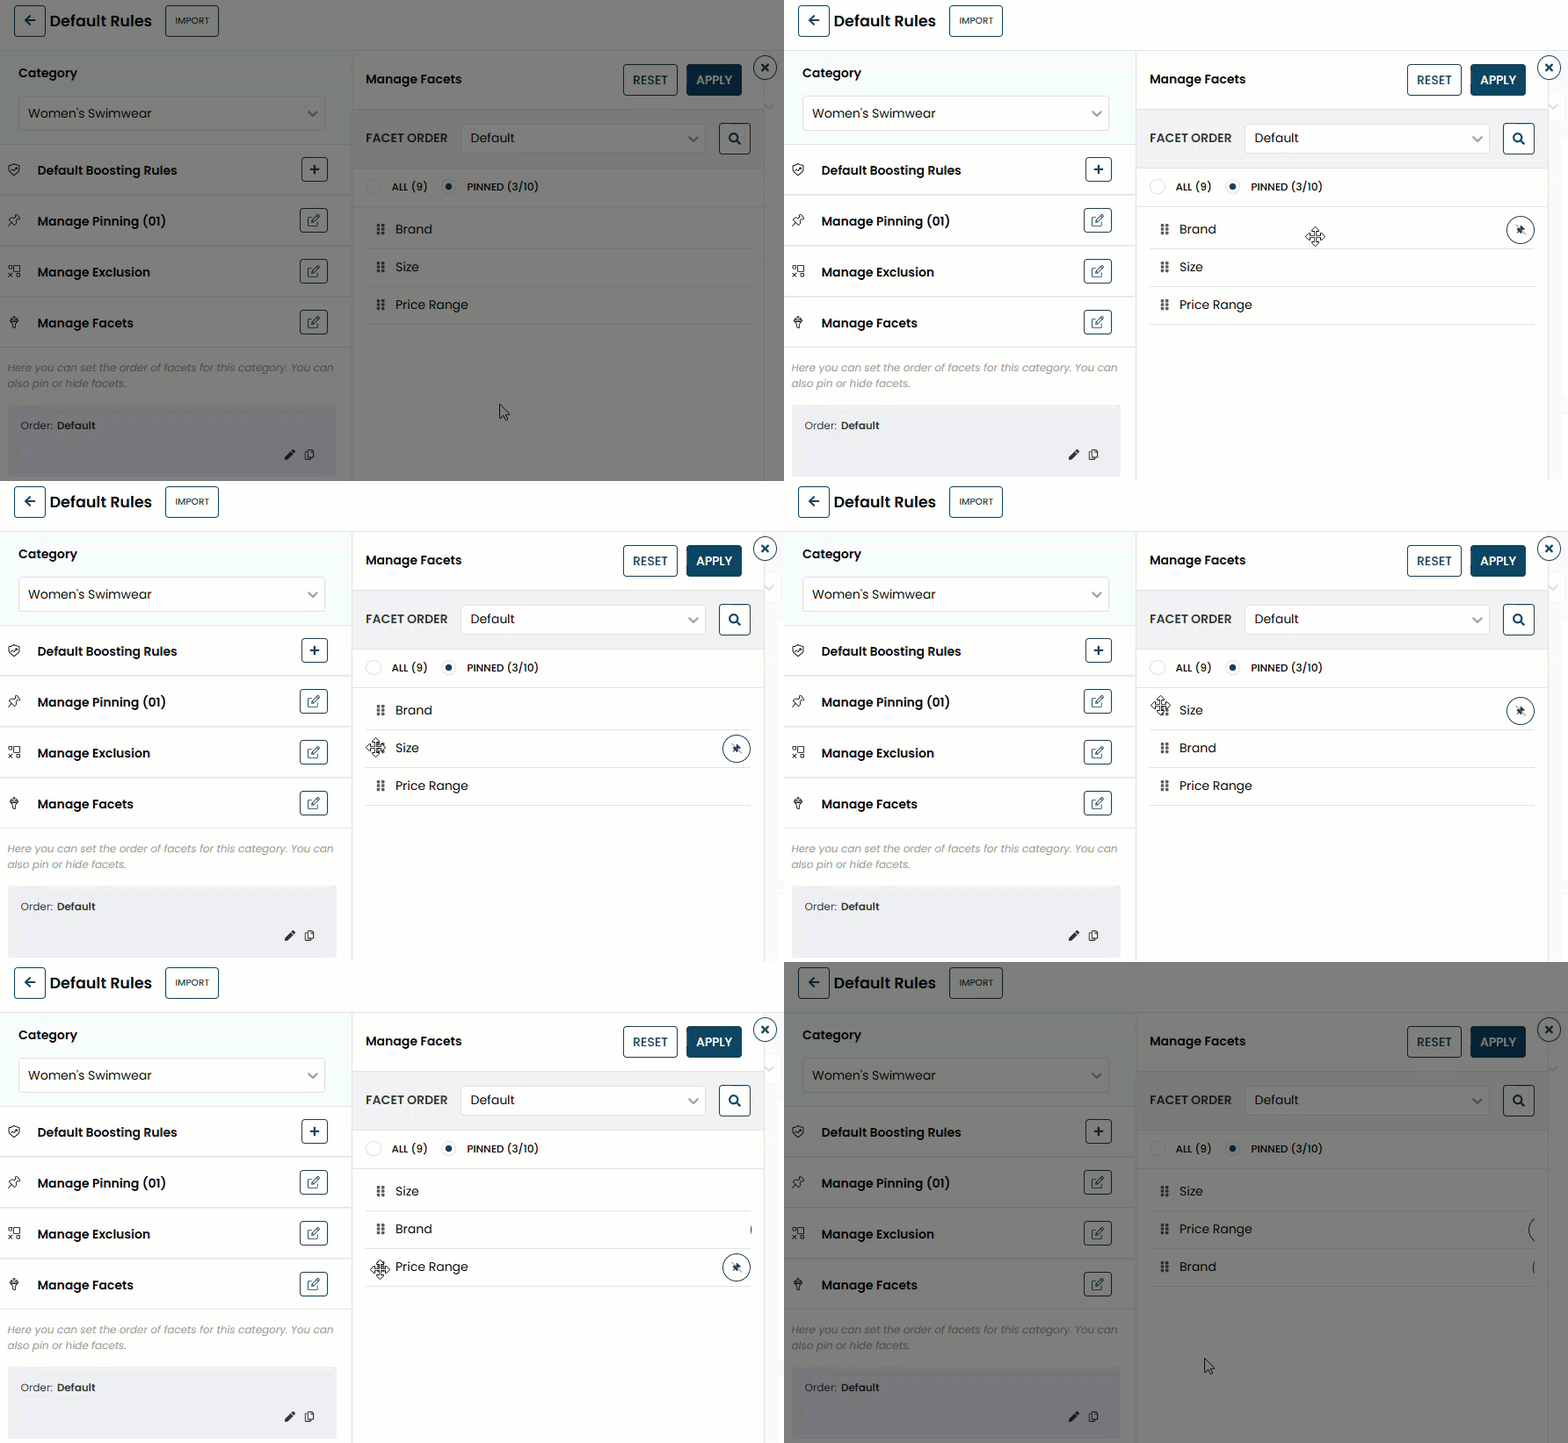
- Select PINNED.
- Click APPLY.
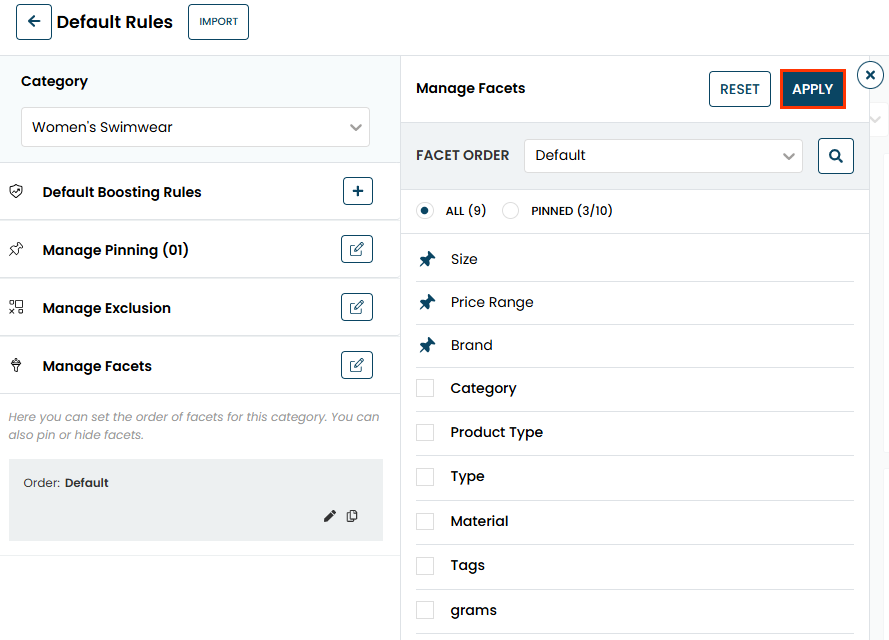
- Click SAVE & PUBLISH after you finish setting any additional rules.

You must wait up to 10 minutes before you can see the changes to the category's facets on your site. If you selected AI in step 6 and didn't make any other changes to the facets, you won't see immediate changes to the facet order.
Editing a Facets Rule
Follow these steps to revise an existing facets rule, regardless if FACET ORDER is set to Default or AI.
- Click the Smart Category Merchandising icon in the left-hand vertical toolbar, and then select Single Store.

- Click MANAGE RULES & FACETS.

- On the Category Selection modal, click the plus sign icon (+) to select the product category for which you want to manage facets, and then click PROCEED.

- On the Default Rules page, click the edit icon for Manage Facets.

- Click the pencil icon to edit the existing facets rule.
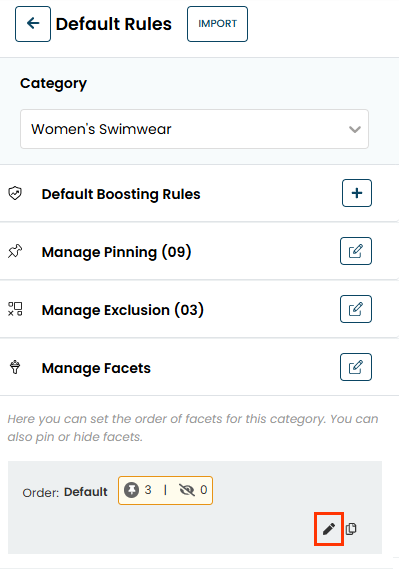
- As necessary, revise the facet settings.
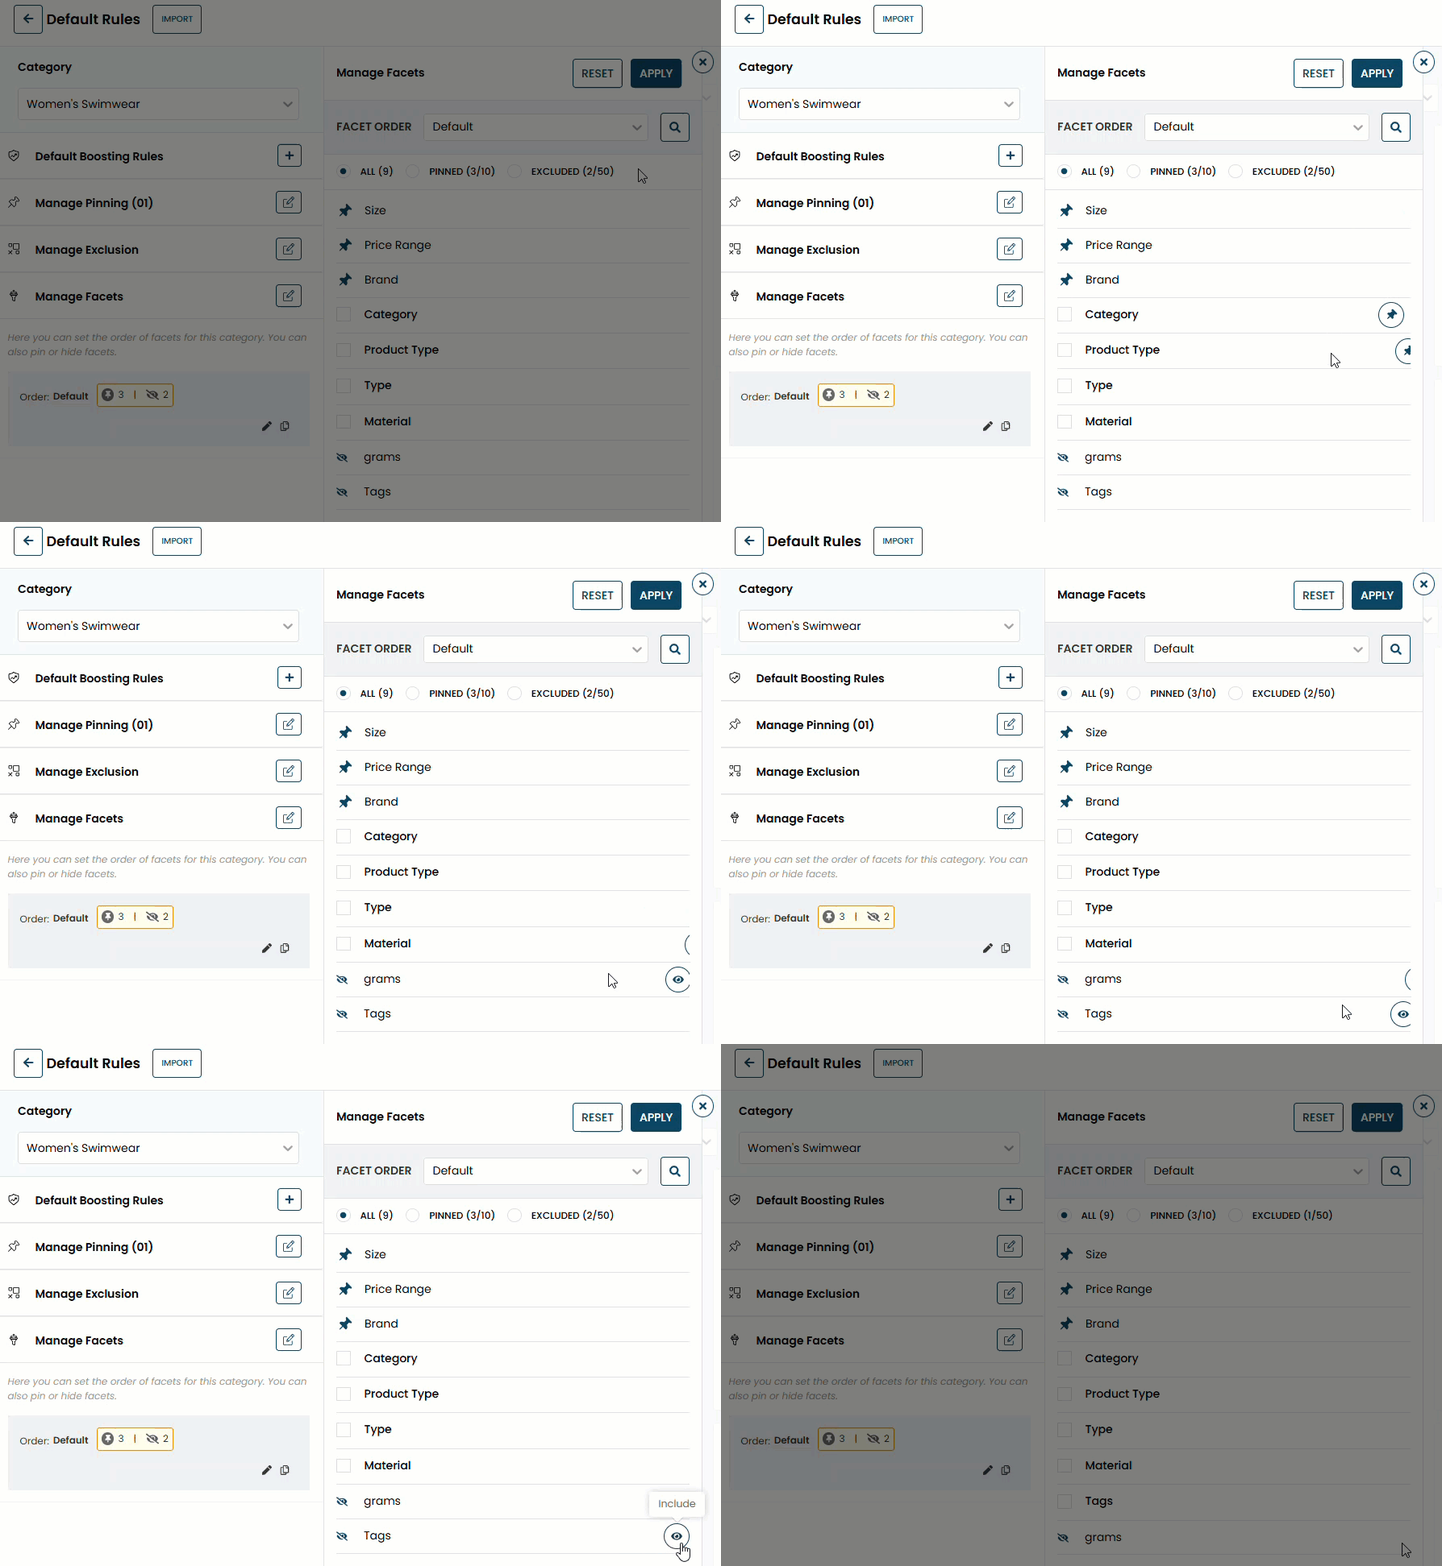
- To restore a hidden facet, place your mouse pointer on its row in the table, and then click the show icon. The facet is restored to the position in the order that it held before it was hidden.
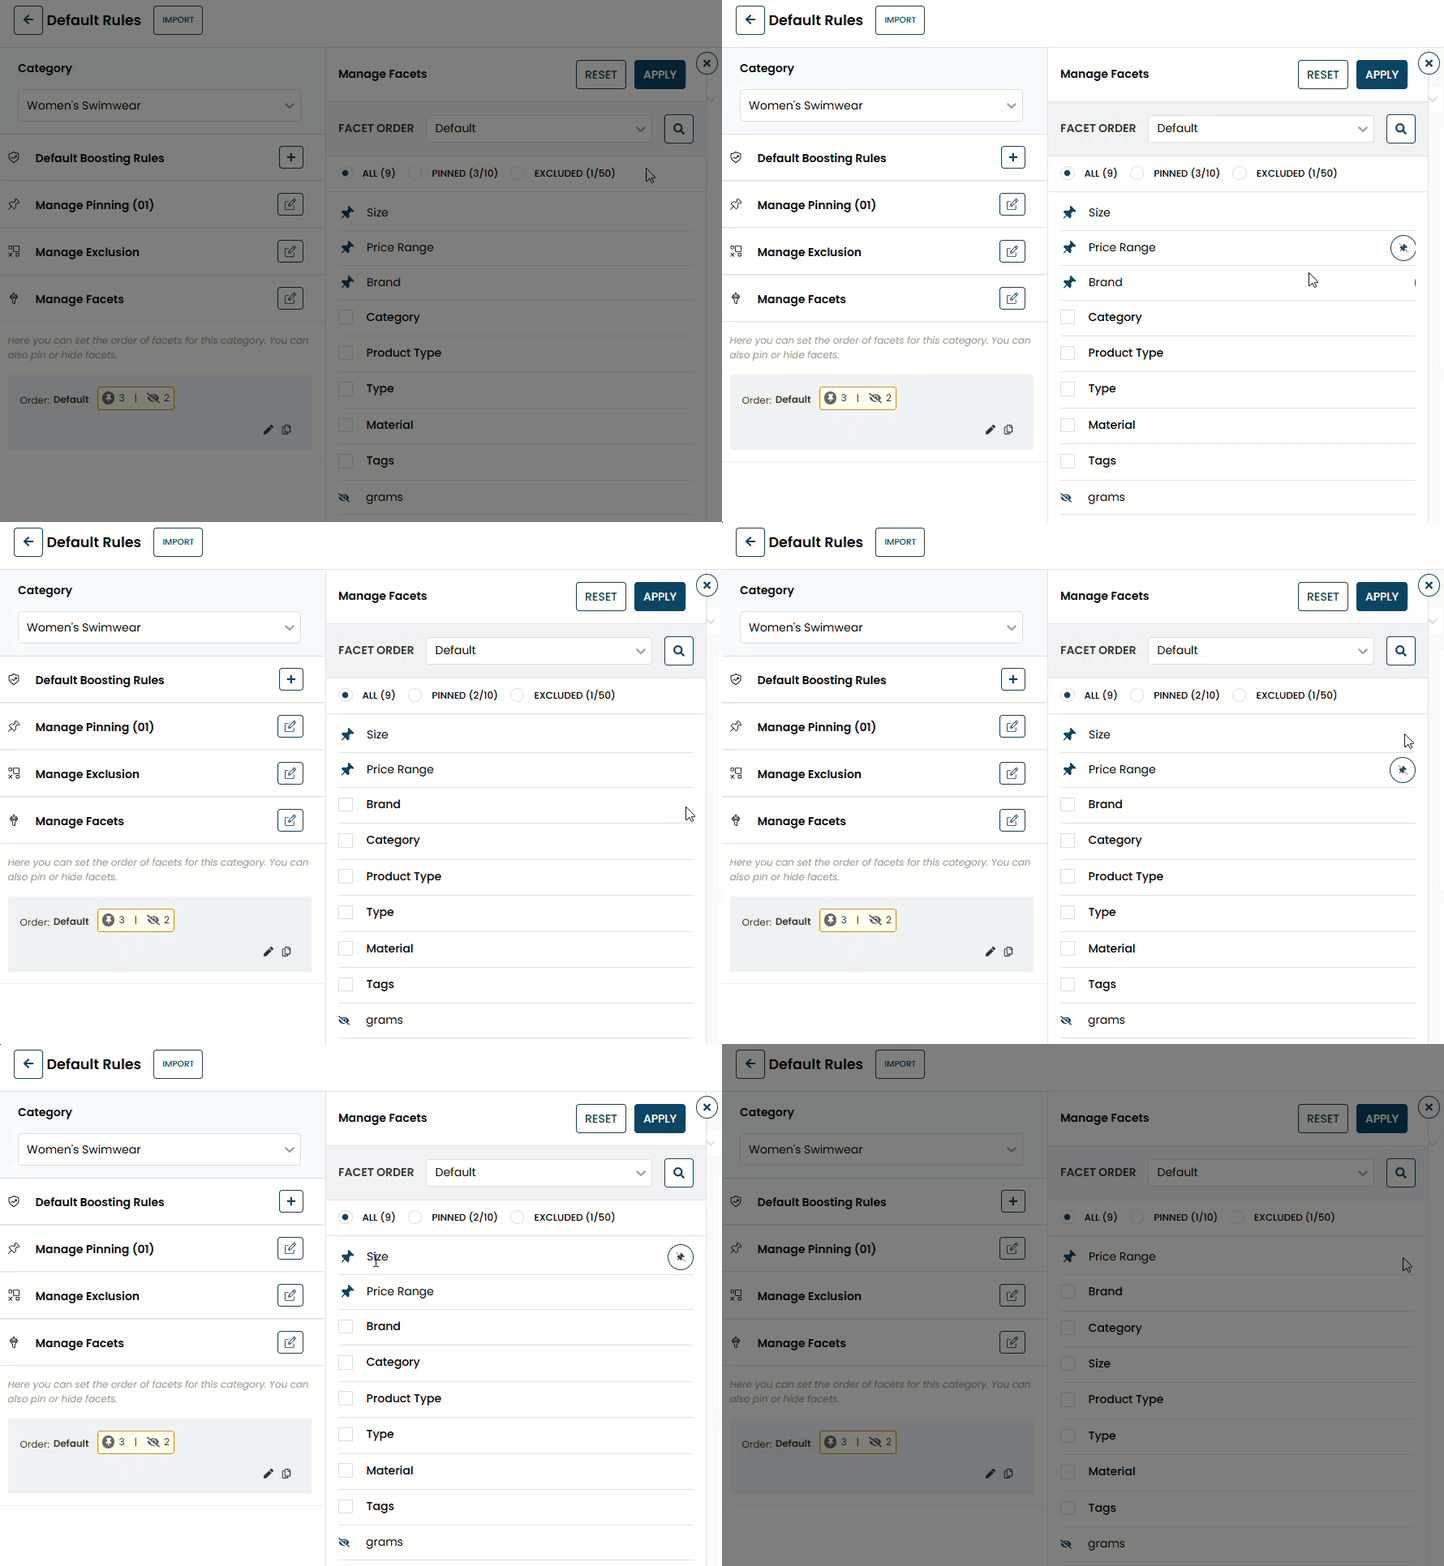
- To unpin a facet, place your mouse pointer on its row in the table, and then click the unpin icon. The facet is restored to the position in the order that it held before it was pinned.
- As necessary, follow steps 7 through 9 in Settings a Facets Rule to hide, pin, or reorder pinned facets.
- To restore a hidden facet, place your mouse pointer on its row in the table, and then click the show icon. The facet is restored to the position in the order that it held before it was hidden.
- Click APPLY.
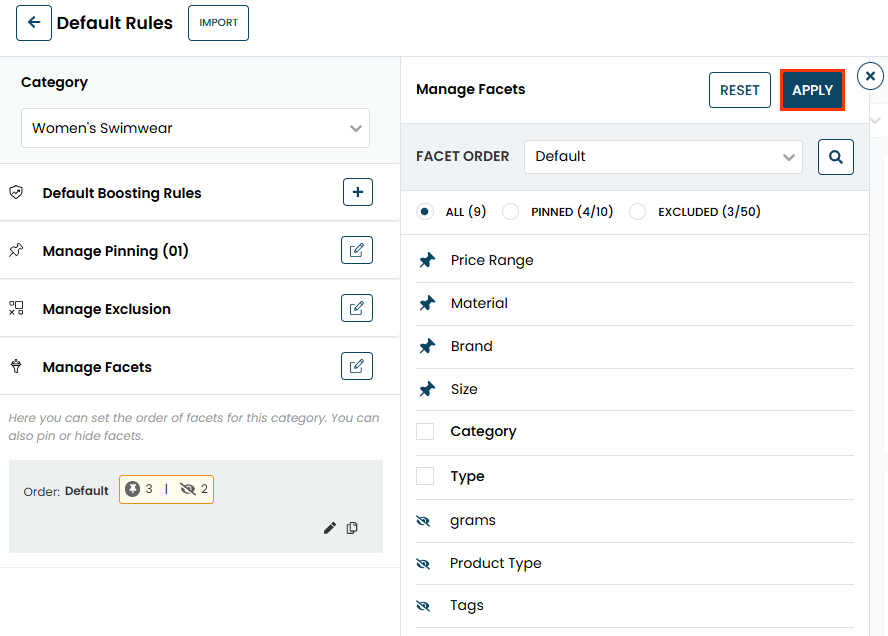
- Click SAVE & PUBLISH after you finish setting any additional rules.

You must wait up to 10 minutes before you can see the changes to the category's facets on your site.
Copying a Facets Rule into Other Categories
Copying a facets rule into one or more other categories available on one site requires you to lock them to prevent any colleague who has access to Personalized Search from performing any rule work that would conflict with the actions you're taking.
Follow the steps to copy a facets rule into one or more product categories.
- Click the Smart Category Merchandising icon in the left-hand vertical toolbar, and then select Single Store.

- On the Default Rules & Facets tab, click the product category that contains the rule that you want to copy.
- On the Category Selection modal, click the plus sign icon (+) for each product category to which you want to add the copied rule, and then click PROCEED.
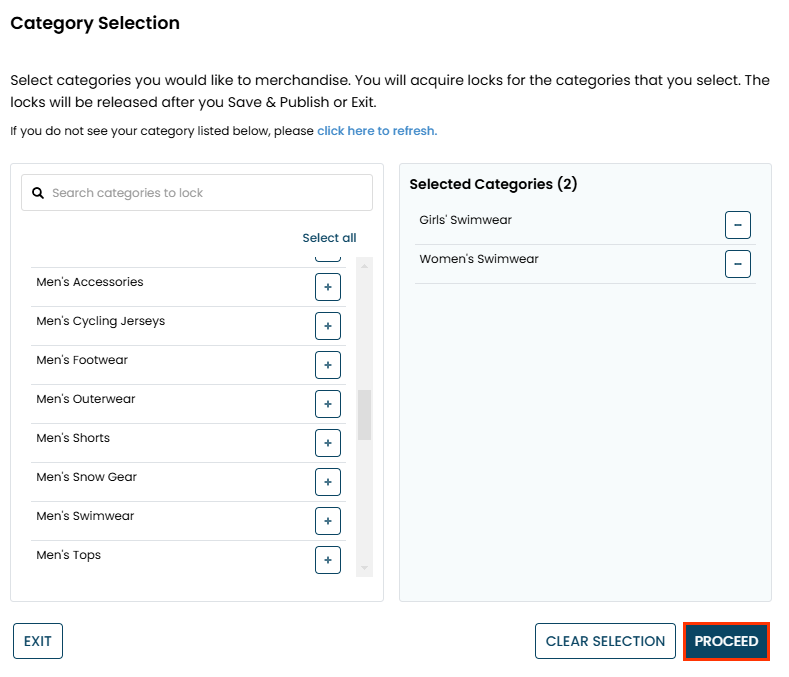
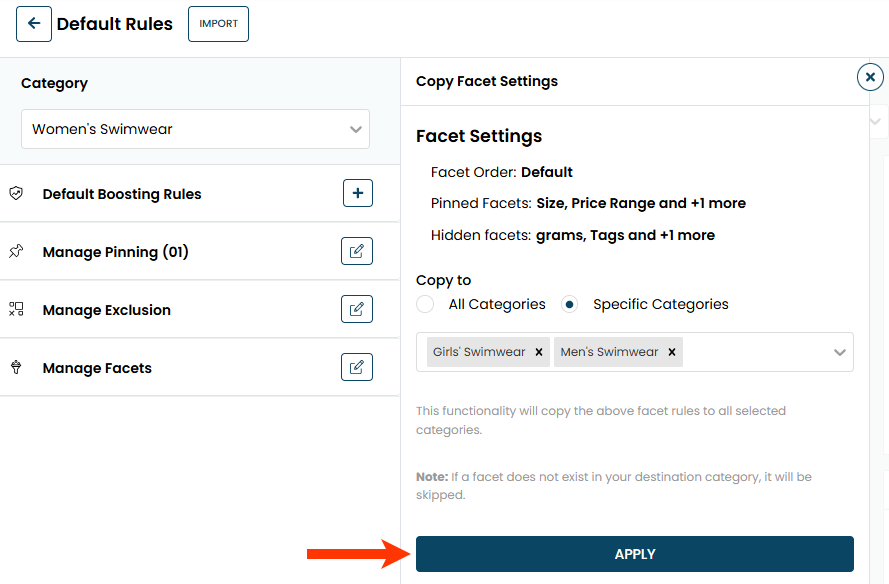
- On the Default Rules page, click the edit icon for Manage Facets, and then click the copy icon for the facets rule.
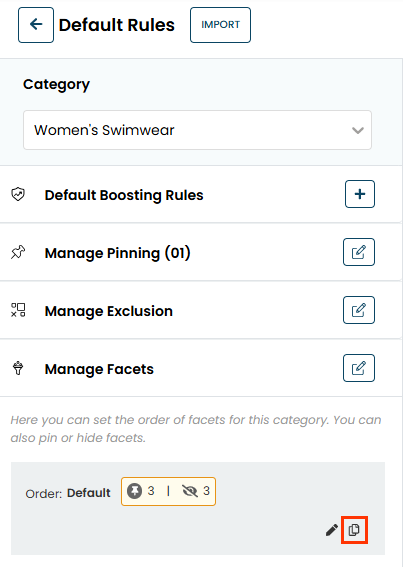
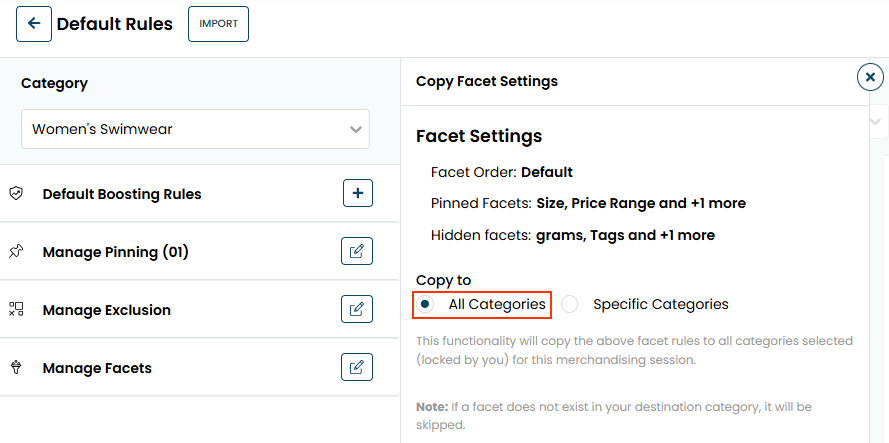
- Select to which categories you want to copy the rule.
- Select All Categories if you want to copy the rule into all the categories you selected in step 3.
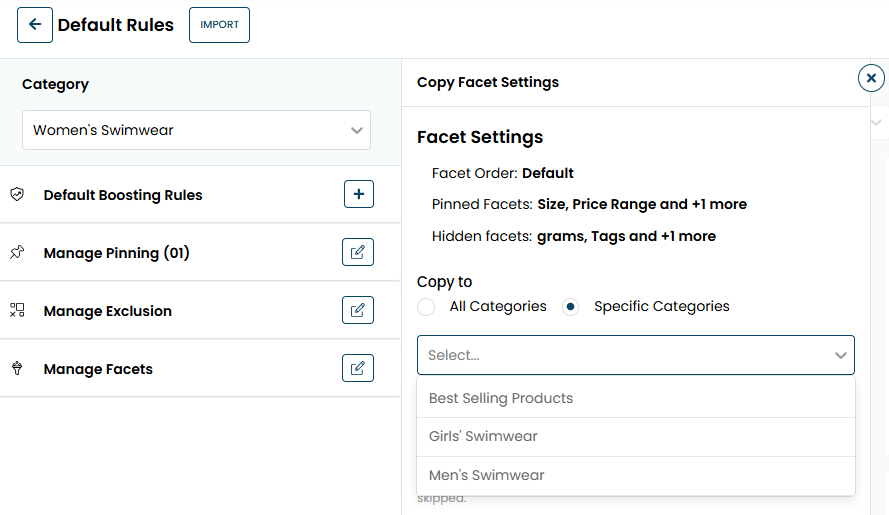
- Select Specific Categories if you want to copy the rule into a limited number of the categories you selected in step 3, and then select those categories from the list.
- Select All Categories if you want to copy the rule into all the categories you selected in step 3.
- Click APPLY.
- Click SAVE & PUBLISH after you finish setting any additional rules.

You must wait up to 10 minutes before you can see the impact of the rules on their targeted category pages on your site.
If a facet doesn't exist in a destination category, it's still copied over as pinned or excluded but has a DELETED/DISABLED tag.

Any facet with this tag is not visible on the relevant category's pages.