The default boosting rules you can set on the Visual Merchandising page are similar to the merchandising rules you can set for Personalized Site Search and that are somewhat similar to Boost and Bury filters for Product Recommendations.
This type of rule allows you to specify one or more product catalog attribute conditions that products must meet when you want to boost them higher or to bury them lower on the category pages. A product's score that results from meeting a default boosting rule is then combined with the product's Self Learning Score (SLS), a score that Personalized Search automatically assigns based on machine learning that determines which products are most relevant to search terms. The default value of a product's SLS is zero and is automatically updated as customers use your site search.
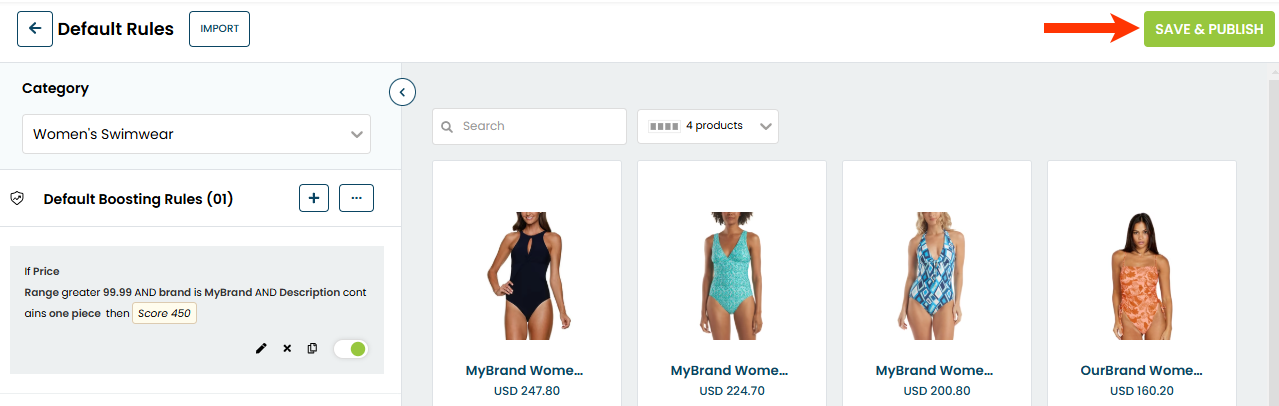
For example, if you want products from a specific brand to appear on the first page for a category, then you can specify a rule to boost that specific brand. Conversely, you can bury certain products deeper in the category's pages using similar rules.
You can build two types of attribute-value conditions when creating a default boosting rule:
- Single attribute: A filter-like condition equation that is [product attribute] + [operator] = [value(s)] (for example, Product Type is any of = Coats & Jackets, Gloves, Hats).
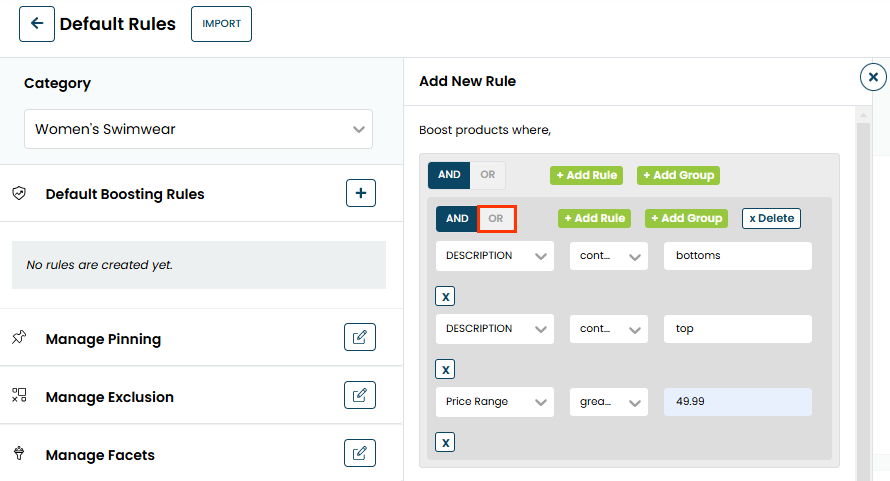
- Conditions Combination: Two or more attribute-based conditions that are combined into one using AND/OR logic (for example, Price Range is greater than = 24.99 AND Brand is equal to = MyBrand)
You can use multiple rules to further refine a boosting strategy. Whether a boost triggers with multiple rules depends on whether you've set the rule to AND or OR. When the rules are set to AND, every attribute must match the specified value for boosting to trigger. When the rules are set to OR, at least one of the attributes must match.
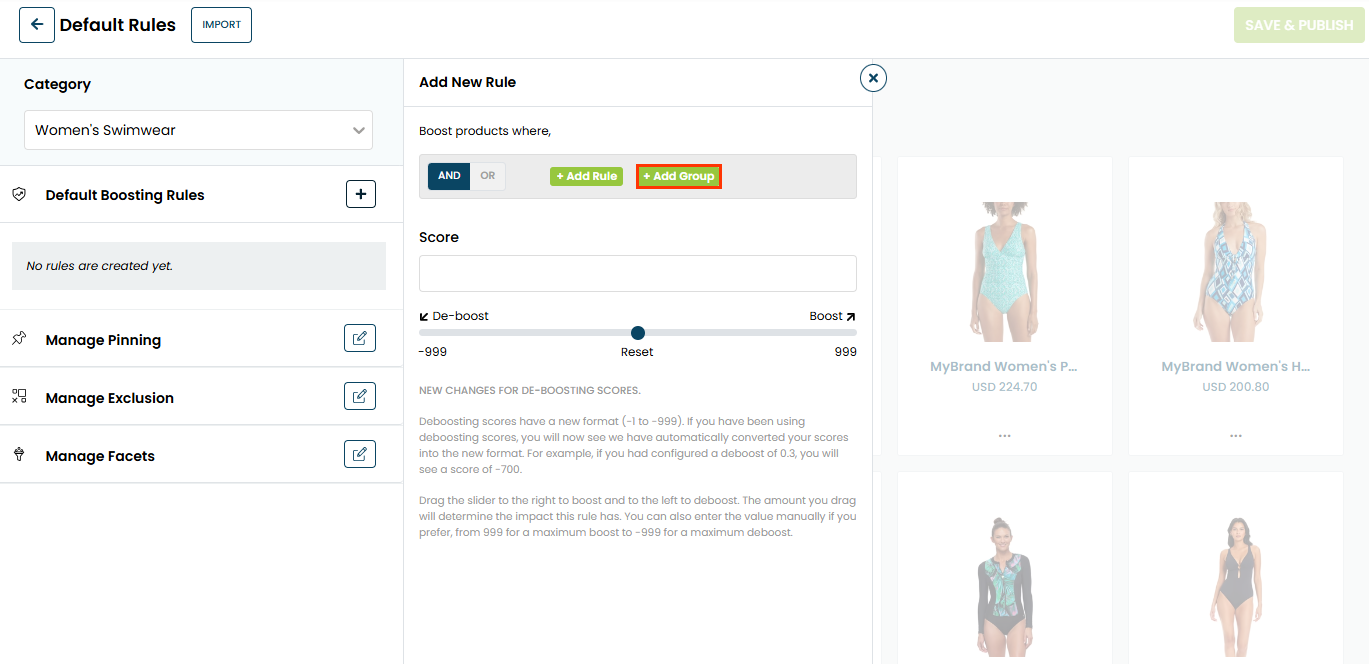
You can also group rules together to further refine your strategy. For the purposes of conditional evaluation, the rules of a group evaluate together.
Prerequisites
If you navigate to the Default Rules & Facets tab of the Visual Merchandising page for any site that's part of a cluster either by selecting Single Store from the Smart Category Merchandising menu in the left-hand vertical toolbar or by selecting the site from Store in the upper-right corner of the Personalized Search interface, then you see a message warning you that the site is part of a cluster.

If you want to override the cluster's default boosting rules for a single linked site that is not the primary site, then you have two options:
- Create a scheduled campaign by following the steps in Create Scheduled Campaigns
- Remove the linked site from the cluster by following the steps in Editing Cluster Membership in Create a Multi-Site Cluster
To override the cluster's default boosting rules for a cluster's primary site, you can create a scheduled campaign or delete the cluster.
Setting a Default Boosting Rule with Single-Attribute Conditions
Follow these steps to set a default boosting rule that uses one or more single-attribute conditions for one site.
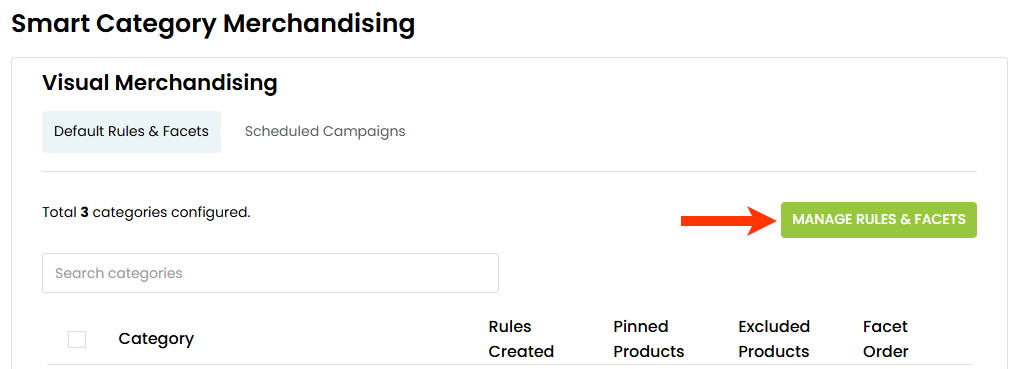
- Click COMPONENTS in the top navigation bar, select Personalized Search, and then click the appropriate product catalog on the Personalized Search list page.
- Click the Smart Category Merchandising icon in the left-hand vertical toolbar, and then select Single Store.
- Click MANAGE RULES & FACETS.
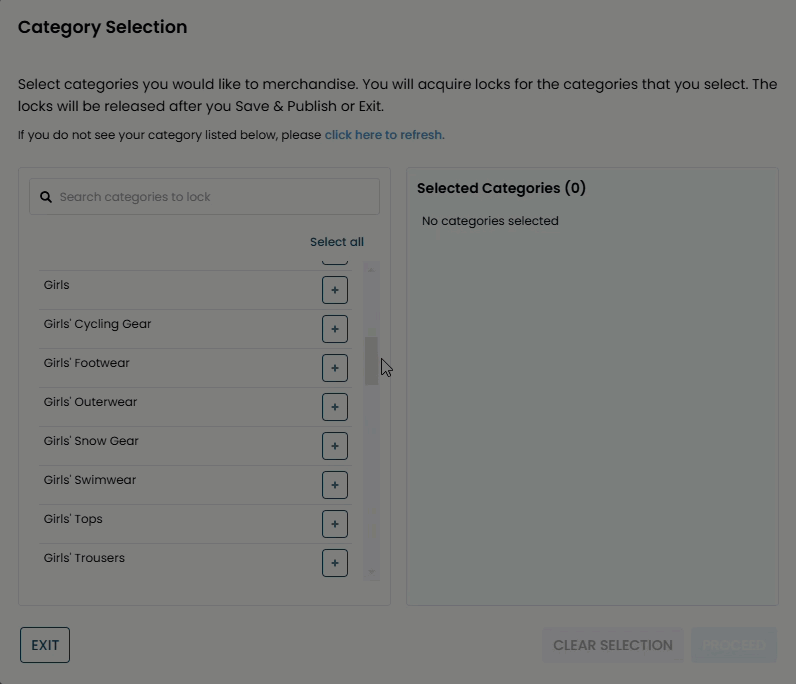
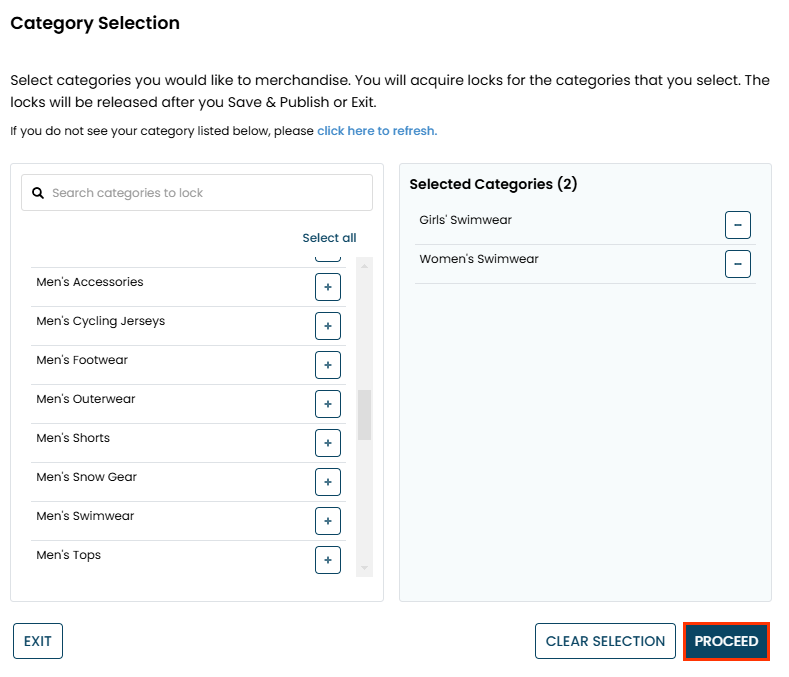
- On the Category Selection modal, click the plus sign icon (+) to select each product category for which you want to configure shared default boost and bury rules, and then click PROCEED.
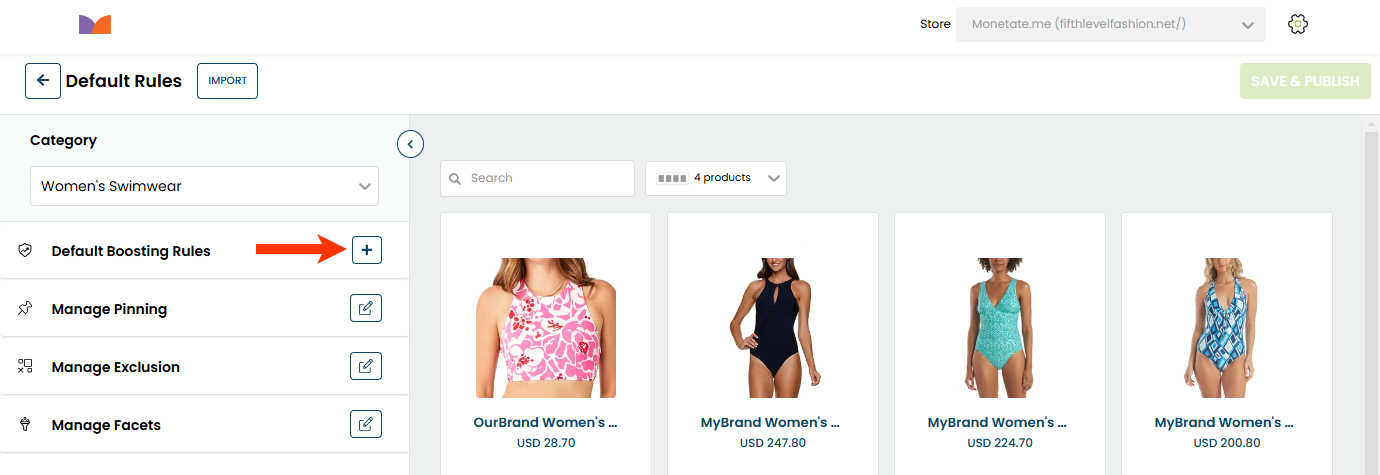
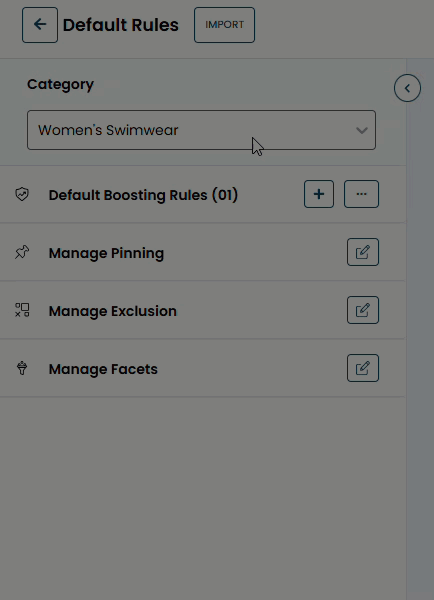
- On the Default Rules page, click the plus sign (+) for Default Boosting Rules.
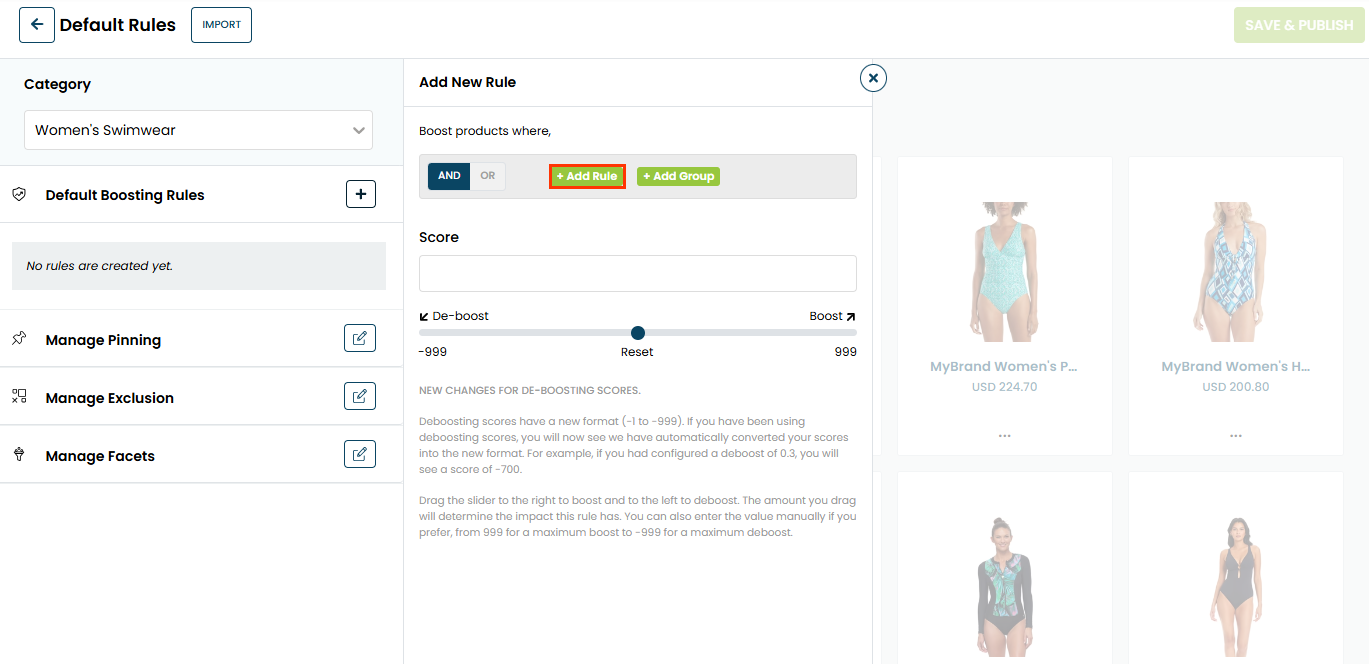
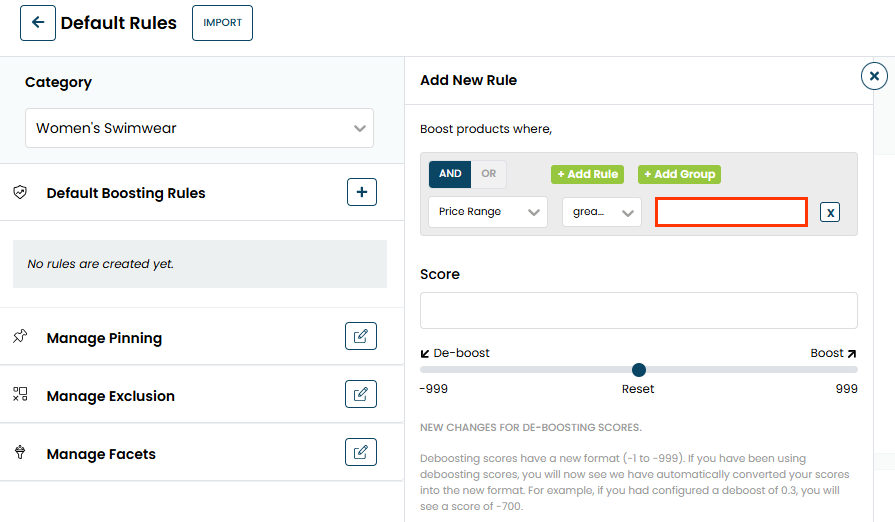
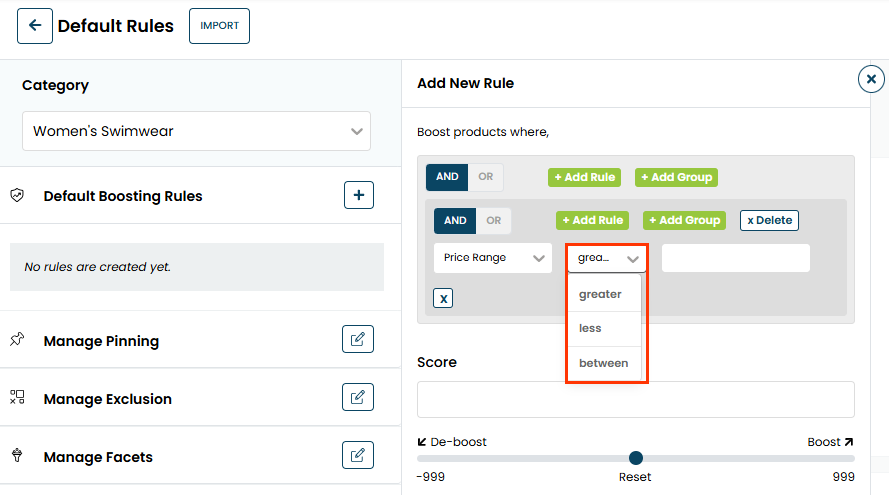
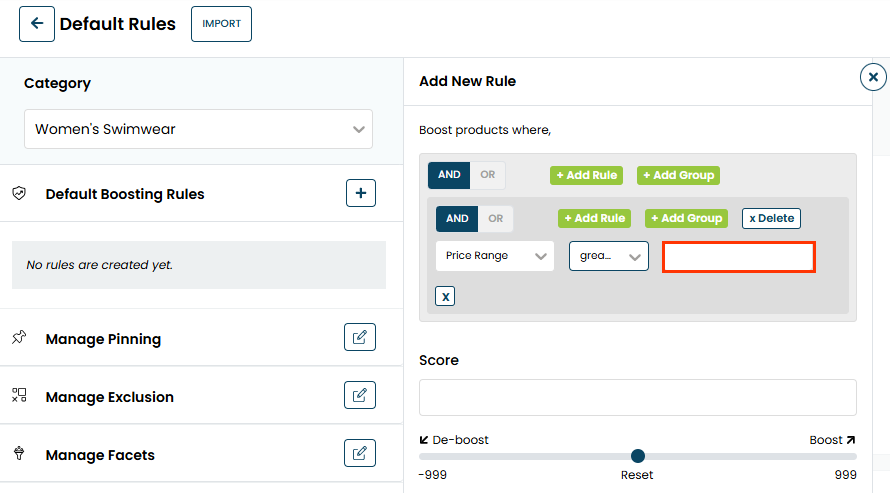
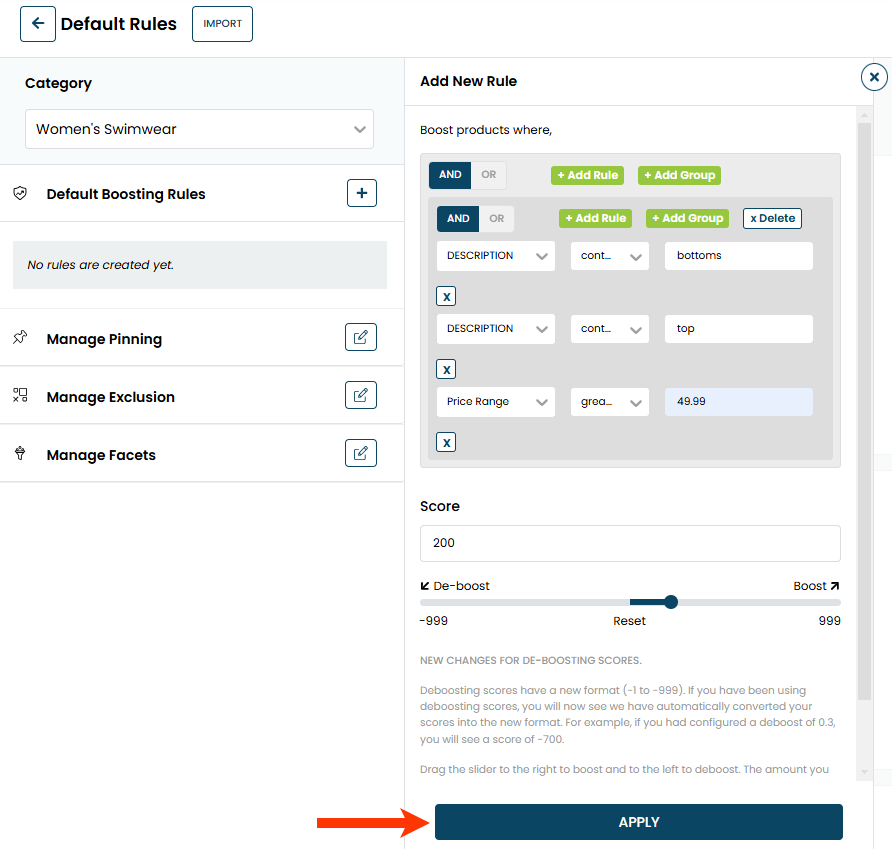
- Create an attribute-value condition.
- Click Add Rule.
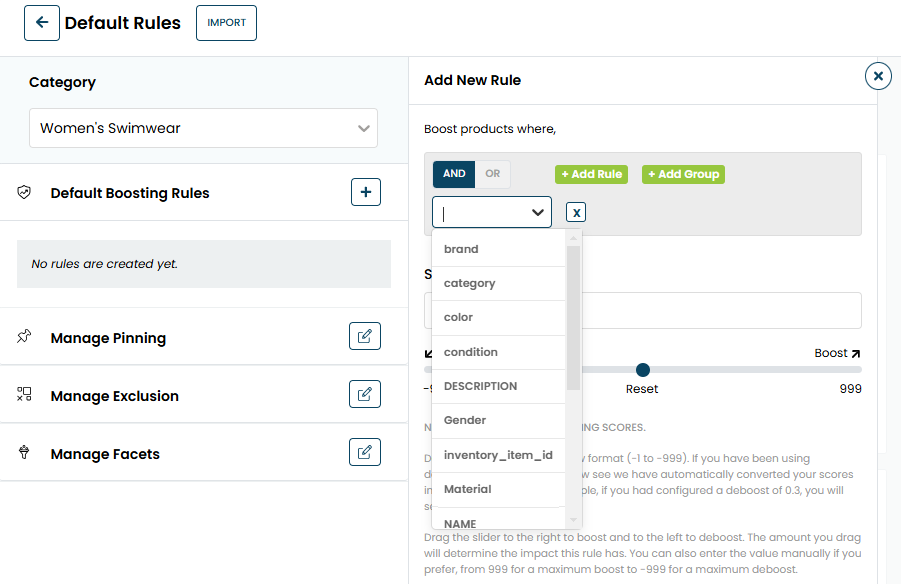
- Select a product attribute.
- If applicable, select an operator.
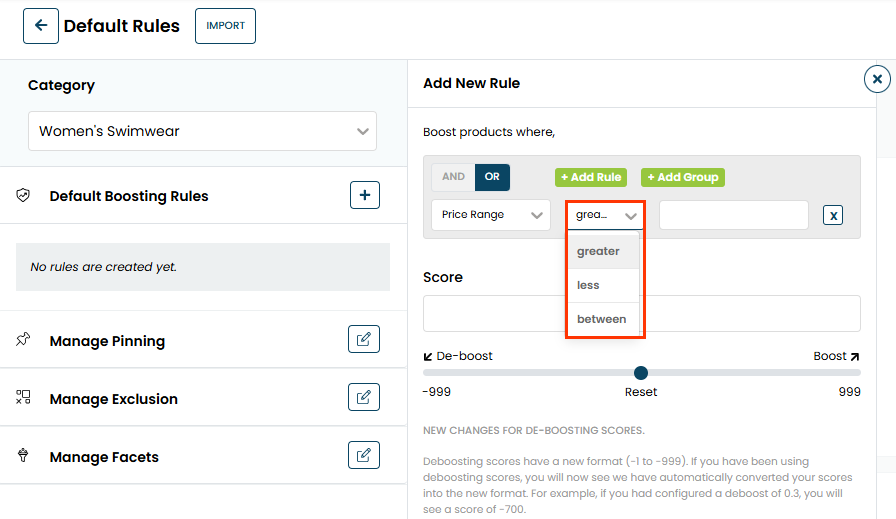
- As appropriate, select or input a value.
- If necessary, repeat steps 6a through 6d to add additional single-attribute conditions, or follow the steps in Setting a Default Boosting Rule with Conditions Combinations to add one or more conditions that use multiple attributes.
- If necessary, click OR to change the logic connector between the conditions.
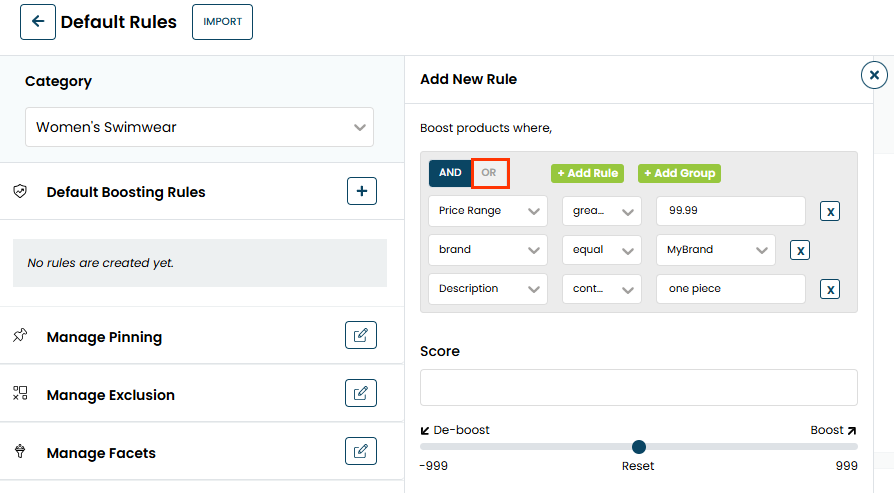
- Click Add Rule.
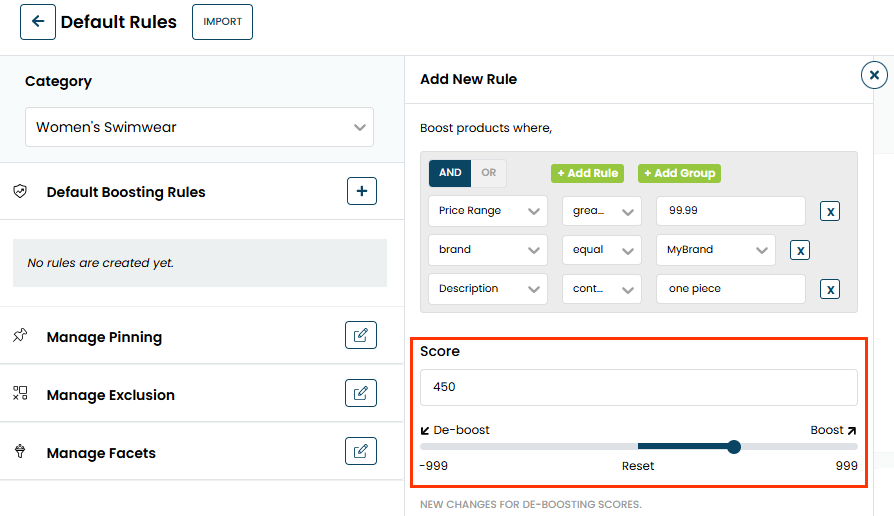
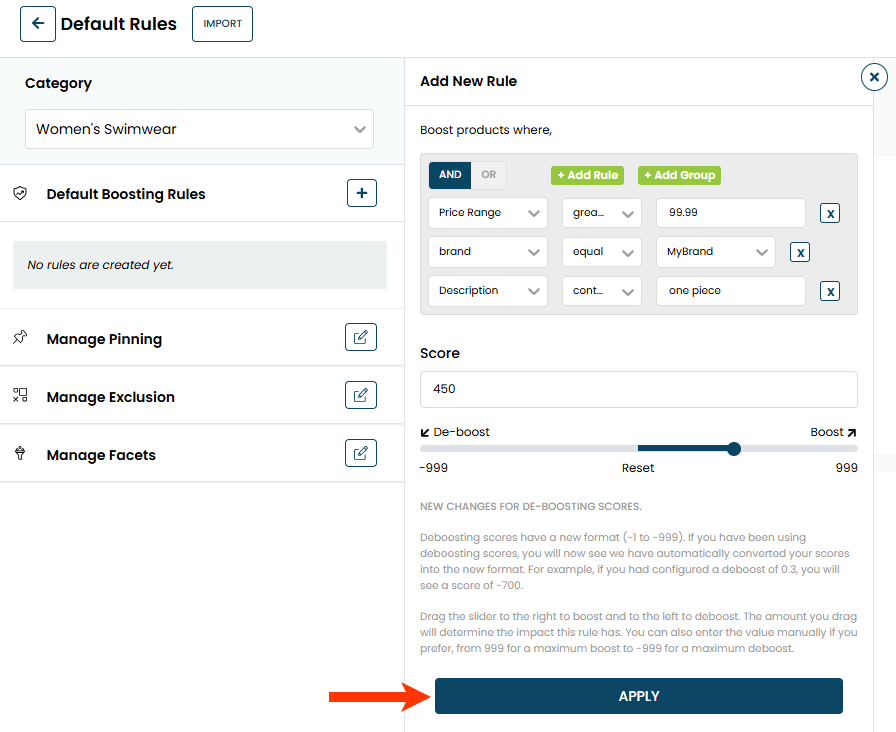
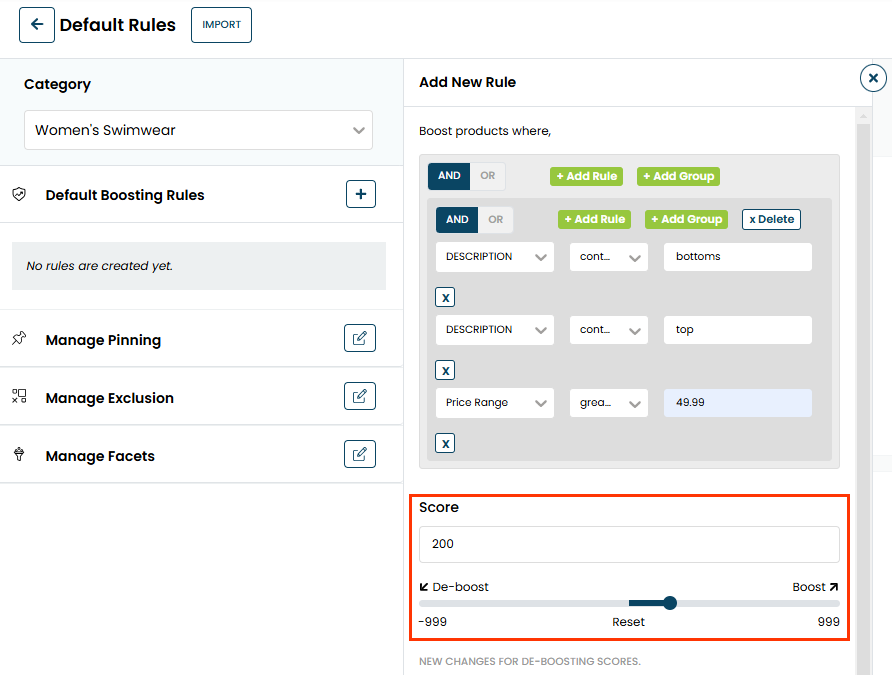
- Use the slider or type a numeral into Score to set how much you want to boost or bury any products that meet the rule's condition(s).
- Click APPLY.
- Click SAVE & PUBLISH after you finish setting any additional rules.
You must wait up to 10 minutes before you can see the impact of the rules on their targeted category pages on your site.
Setting a Default Boosting Rule with Conditions Combinations
Follow these steps to set for one site a default boosting rule that combines multiple single-attribute conditions that are joined by AND or OR logic.
- Click COMPONENTS in the top navigation bar, select Personalized Search, and then click the appropriate product catalog on the Personalized Search list page.
- Click the Smart Category Merchandising icon in the left-hand vertical toolbar, and then select Single Store.
- Click MANAGE RULES & FACETS.
- On the Category Selection modal, click the plus sign icon (+) to select each product category for which you want to configure shared default boost and bury rules, and then click PROCEED.
- On the Default Rules page, click the plus sign (+) for Default Boosting Rules.
- Create a group of attribute-value conditions.
- Click Add Group.
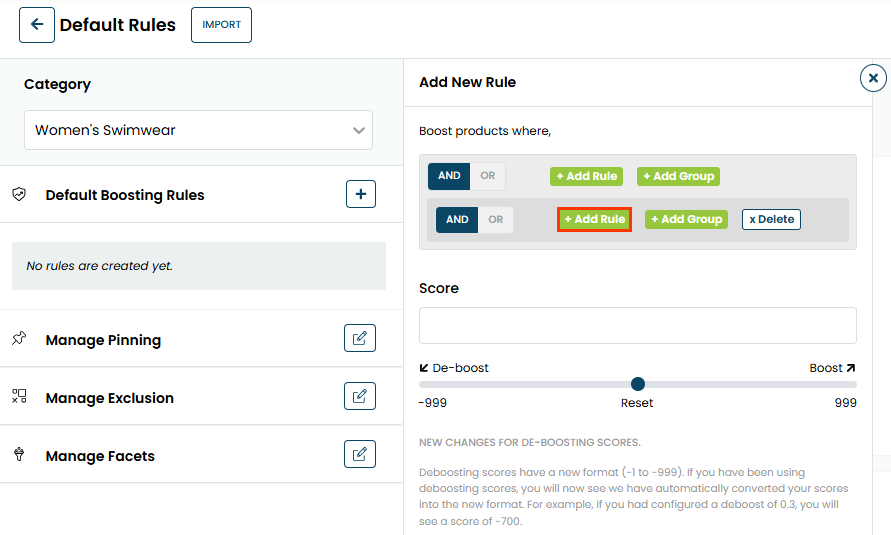
- Click Add Rule.
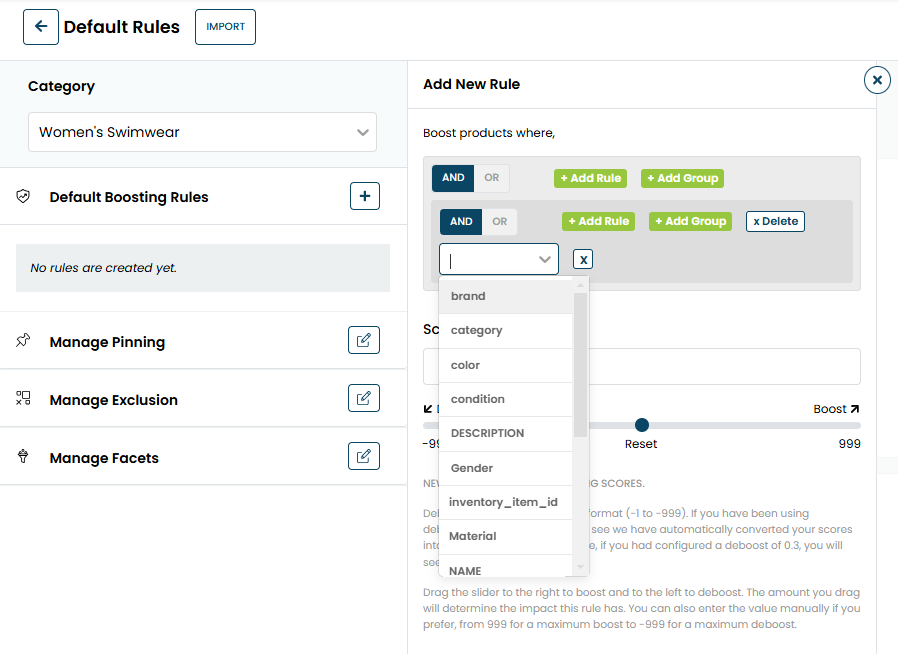
- Select a product attribute.
- If applicable, select an operator.
- As appropriate, select or input a value.
- Repeat steps 6b through 6e as many times as necessary to add additional single-attribute rules to the group.
- If necessary, click OR to change the logic connector between the conditions within the group.
- As necessary, follow steps 6a through 6g to add additional combined conditions, or follow the steps in Setting a Default Boosting Rule with Single-Attribute Conditions to add one or more standalone single-attribute conditions.
- Click Add Group.
- Use the slider or type a numeral into Score to set how much you want to boost or bury any products that meet the rule's condition(s).
- Click APPLY.
- Click SAVE & PUBLISH after you finish setting any additional rules.

You must wait up to 10 minutes before you can see the impact of the rules on their targeted category pages on your site.
Managing Default Boosting Rules
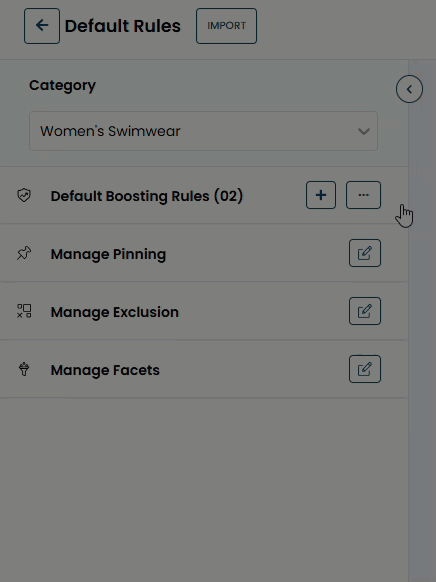
You can delete or disable all the default boosting rules by selecting Delete All or Disable All from the additional options menu (...) that appears to the right of the plus sign (+) for Default Boosting Rules.

To edit an individual rule, click the pencil icon under its definition. You can delete a rule by clicking the X. Toggle Rule Status to the disabled position if you need to suspend the rule.
You must click SAVE & PUBLISH after completing the rule revisions. You must wait up to 10 minutes before you can see the impact of the rules on their targeted category pages on your site.
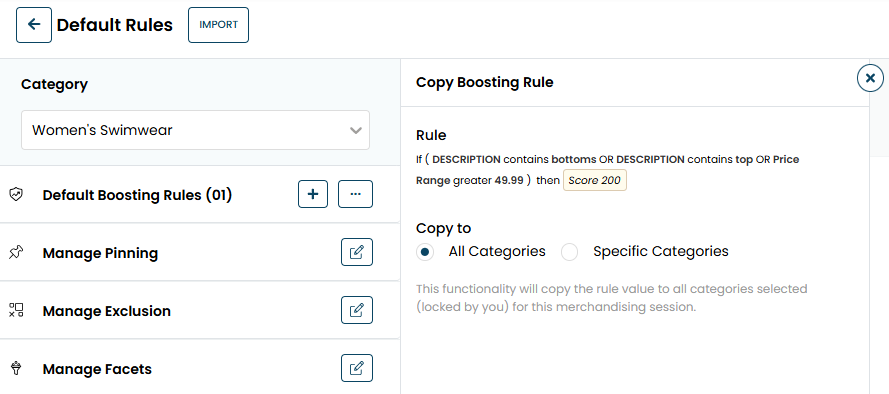
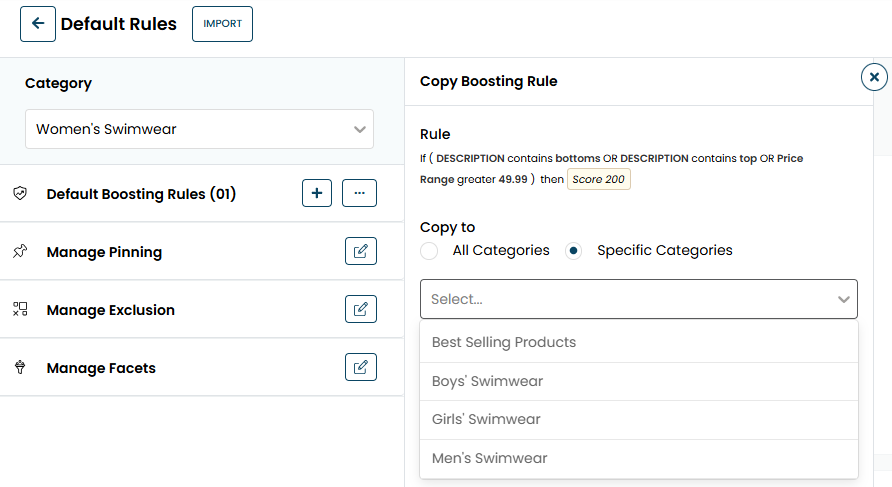
Copying Default Boosting Rules into Other Categories
Copying a boosting rule into one or more other categories available on one site requires you to lock them to prevent any colleague who has access to Personalized Search from performing any rule work that would conflict with the actions you're taking.
Follow the steps to copy a boosting rule into one or more product categories.
- Click the Smart Category Merchandising icon in the left-hand vertical toolbar, and then select Single Store.
- On the Default Rules & Facets tab, click the product category that contains the rule that you want to copy.
- On the Category Selection modal, click the plus sign icon (+) for each product category to which you want to add the copied rule, and then click PROCEED.
- Click Default Boosting Rules and then click the copy icon for the rule that you want to copy.
- Select to which categories you want to copy the rule:
- Select All Categories if you want to copy the rule into all the categories you selected in step 3.
- Select Specific Categories if you want to copy the rule into a limited number of the categories you selected in step 3, and then select those categories from the list.
- Select All Categories if you want to copy the rule into all the categories you selected in step 3.
- Click APPLY.
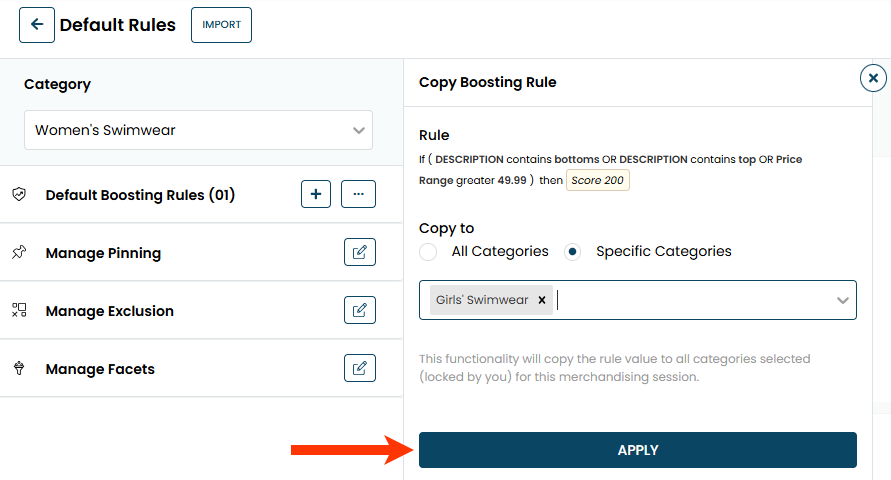
- Click SAVE & PUBLISH.
You must wait up to 10 minutes before you can see the impact of the rules on their targeted category pages on your site.