Within the Monetate platform you can use a wizard to upload a CSV file and determine various field types to create a customer dataset schema, after which you can then upload a full file to create the dataset.
When you integrate your Monetate account with your AgilOne account, you can skip the process of defining field types for customer datasets by using its predefined schema and uploading that CSV file to the platform via SFTP.
| Header | Field Type |
|---|---|
customer_id |
String |
email |
String |
primary_organization |
String |
primary_store |
String |
primary_brand |
String |
closest_store |
String |
email_status |
String |
do_not_email |
String |
total_revenue_group |
String |
last_12_months_group |
String |
frequency_group |
String |
recency_days_group |
String |
average_discount_rate |
String |
customer_age |
Number |
customer_birth_month |
Number |
customer_gender |
String |
likelihood_to_buy |
String |
likelihood_to_engage |
String |
product_cluster |
String |
likelihood_to_convert |
String |
behavior_cluster |
String |
execution_id |
Number |
Setting Up the Integration
Follow these steps to establish the AgilOne integration.
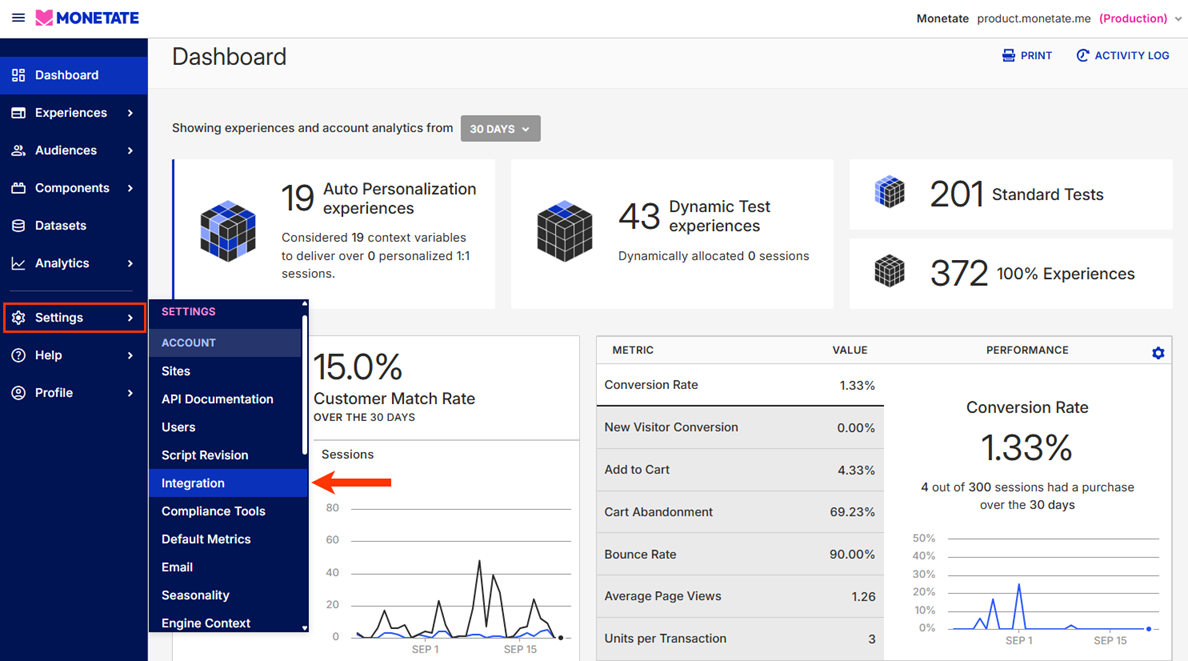
- Click the settings cog in the top navigation bar and then select Integration.
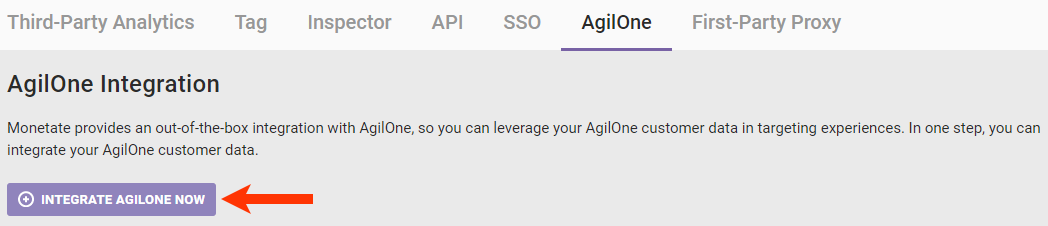
- Click the AgilOne tab on the Integration page.

- Click INTEGRATE AGILONE NOW.
- Name the AgilOne dataset and then click INTEGRATE.

Now that you have integrated AgilOne, you're ready to upload the dataset schema via SFTP.
Setting Up the SFTP Upload
Follow these steps to create SFTP user credentials for specifically for uploading AgilOne data.
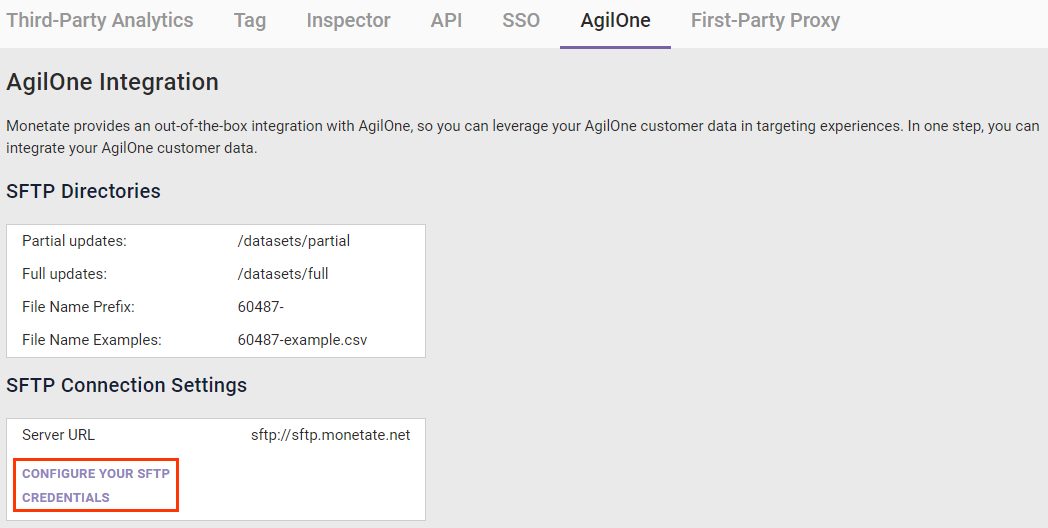
- Click CONFIGURE YOUR SFTP CREDENTIALS on the AgilOne tab.
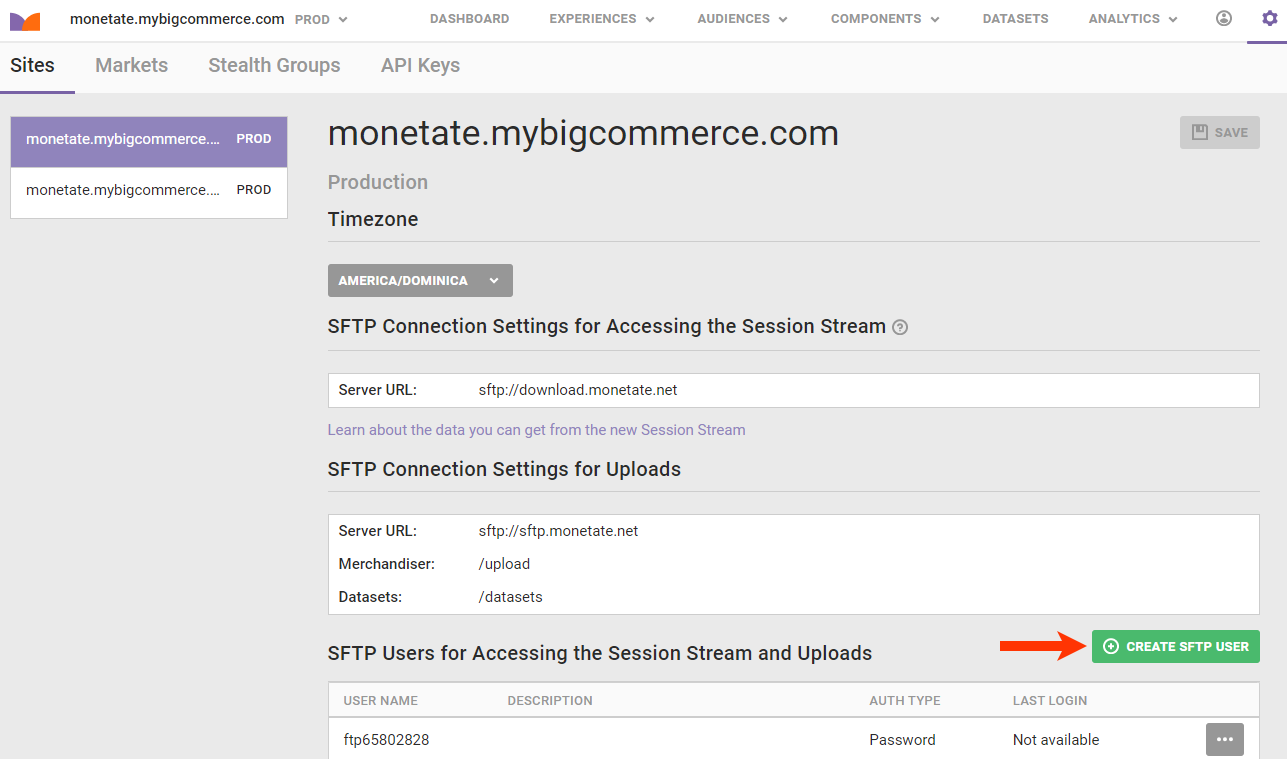
- Click CREATE SFTP USER on the Sites tab of the Monetate platform settings.
- Configure the user credentials.
- Input a description for the SFTP user.
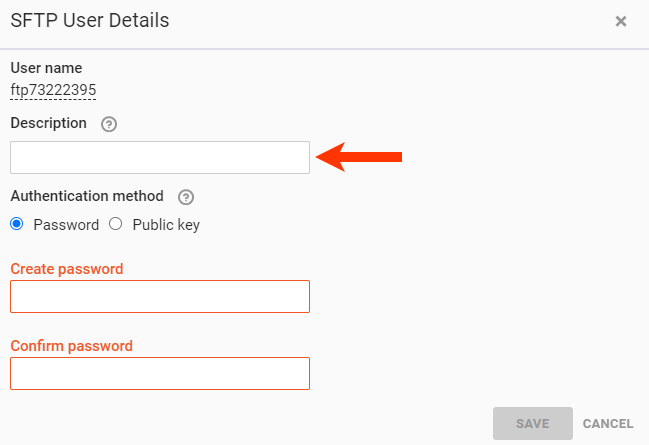
- Select the authentication method.
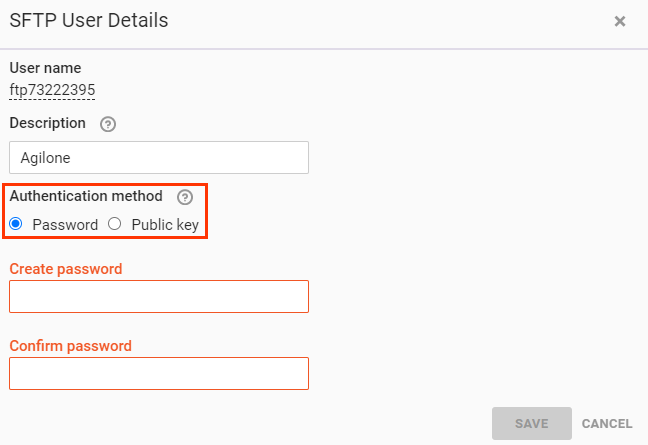
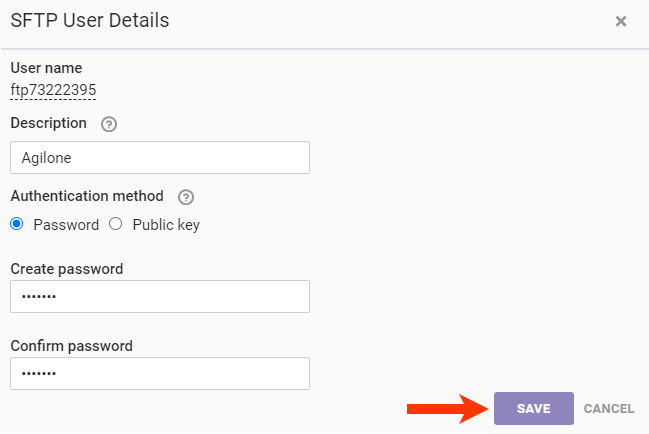
- Input the required credentials as determined by the authentication method you selected in the previous step.
- If you selected Password, your password doesn't have to meet any format requirements.
- If you selected Public key, then paste a RFC 4716-formatted OpenSSH public key into the field. See Public Key Requirements in Manage SFTP Users for more information.
- Click SAVE.
- Input a description for the SFTP user.
- Configure your SFTP client with the following information from the Sites tab:
- Host —
sftp://sftp.monetate.net - Port —
22 - Protocol —
SFTP
- Host —
You can now upload the CSV file containing the AgilOne schema to the /datasets directory using your SFTP client.
Once the upload is complete, you can view the newly created customer dataset by navigating to the Customer Attributes view of the Datasets list page or the Customer Datasets list page, as appropriate for your version of the Monetate platform, and then clicking the AgilOne dataset to view its details page.
If the platform encountered an error during the upload, then a warning message appears on the datasets list page. Click that message to view the File Upload Error modal that contains the specific error(s) encountered.
Depending on your version of the Monetate platform, you can see all the headers present in the CSV file you uploaded on the Attributes tab or the Overview tab of the dataset details page shows. See Customer Attributes Dataset Details Page or Customer Dataset Details Page, as appropriate, to better understand the information you can find on and what actions you can take from the dataset's details page.