You don't need to upload a full file when you create a new Recommendations dataset schema. A file that contains the required headers and at least three rows will suffice.
Follow these steps to create a Recommendations dataset.
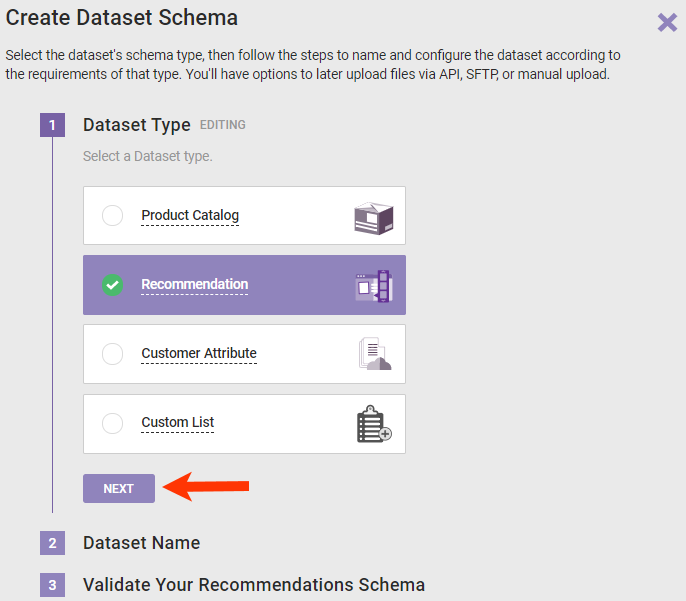
- Click Datasets in the left-hand navigation, and then, if necessary, select Product Data.
- Click CREATE DATASET.

- Click Recommendations and then click NEXT.
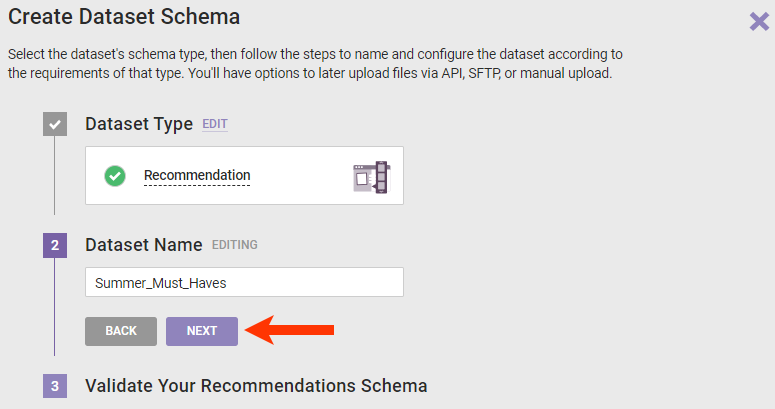
- Name the dataset and then click NEXT.
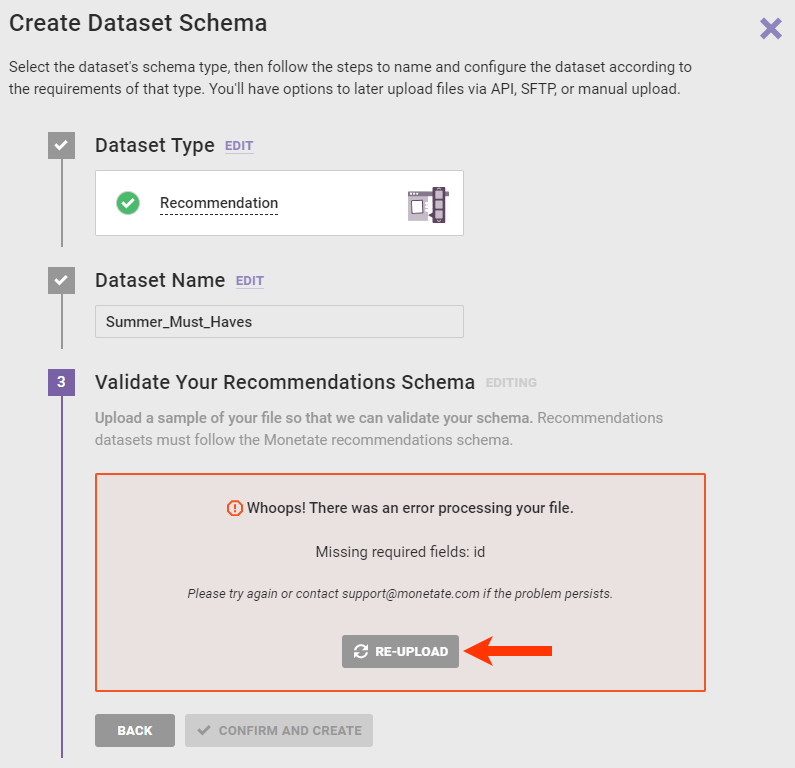
- Drag and drop the file into the upload area, and then wait for the platform to validate the data.
- If the file fails validation, an error message appears that states the problem encountered. Revise the file, click RE-UPLOAD, and then drag and drop the revised file into the upload area.
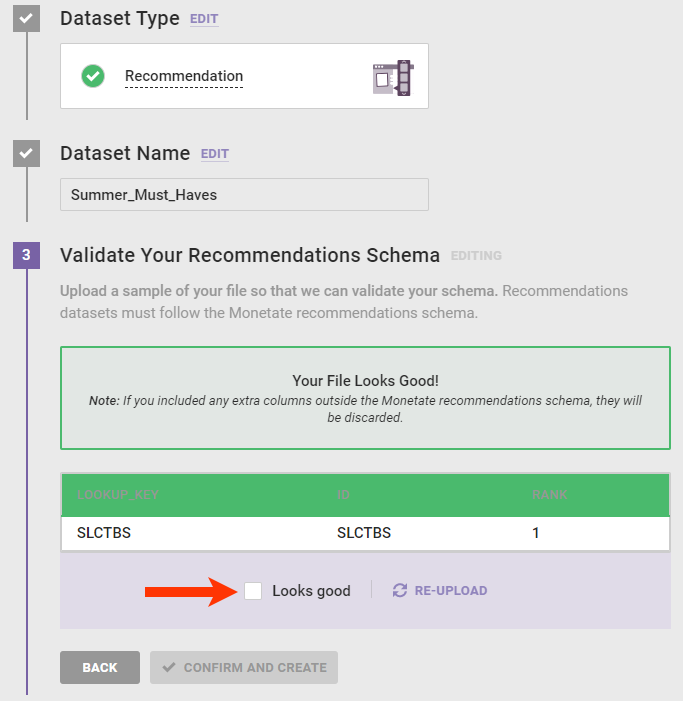
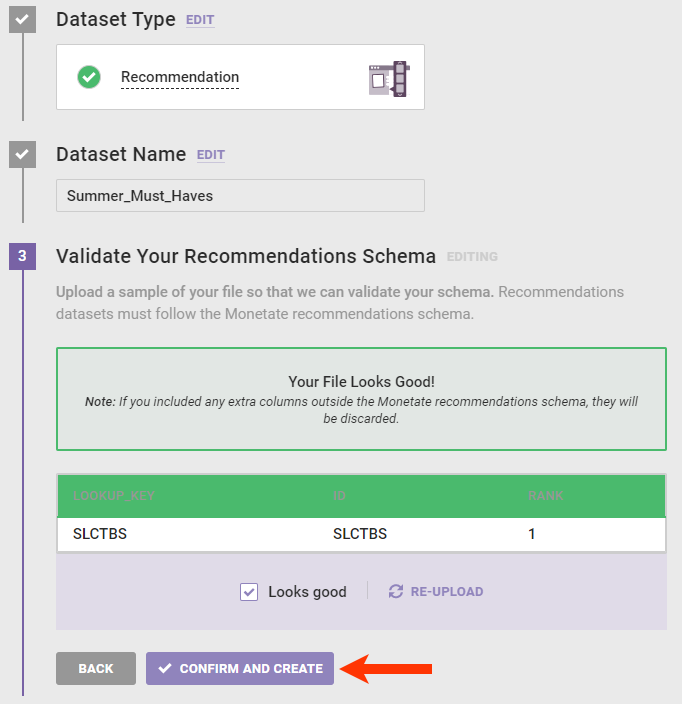
- If no errors are detected, ensure the sample shown is correct and then select Looks good.
- If the file fails validation, an error message appears that states the problem encountered. Revise the file, click RE-UPLOAD, and then drag and drop the revised file into the upload area.
- Click CONFIRM AND CREATE.
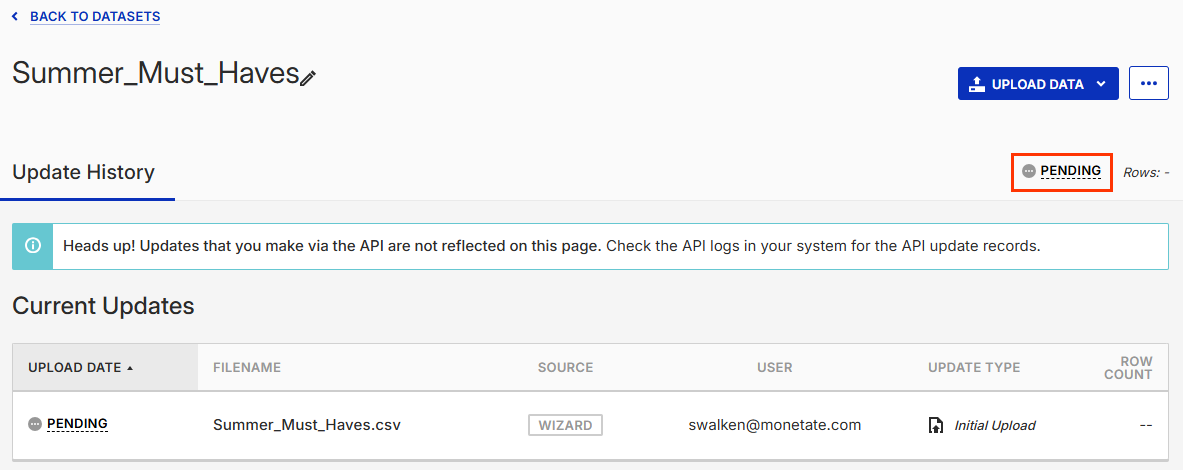
Once Monetate finishes creating the schema, the details page for the newly created Recommendations dataset loads, with the Current Updates table showing the file you just uploaded listed and the PENDING status at the top-right corner. This status appears until the platform finishes processing the dataset.
With the schema created, you can now update the dataset as needed, especially if you used a file that only contained a few rows. A full update replaces the entire dataset, and a partial update allows you to add new rows or update existing ones. See Update a Recommendations Dataset for more information.
You can access the dataset's files on the Update History tab of its details page in the Monetate platform.