You can update a dataset through the Upload Data wizard in the Monetate platform, via the Data API, or using SFTP.
If you need to add or update rows in a Content Pages dataset, you can perform this update through the Data API, via SFTP, or by using the Upload Data wizard in the platform.
If you need to add custom attributes to the dataset schema, you cannot use the Upload Data wizard nor use SFTP. You must use the Data API or the Add Attribute modal accessible from the Attributes tab of the dataset's details page.
If you need to revise the product catalog dataset(s) associated with the Content Pages dataset, then follow the steps in Edit Associated Product Catalog Datasets. You can't change these associations through a dataset update.
Furthermore, you cannot add a Content Type value nor revise it when updating a Content Pages dataset.
Updating or Adding Rows
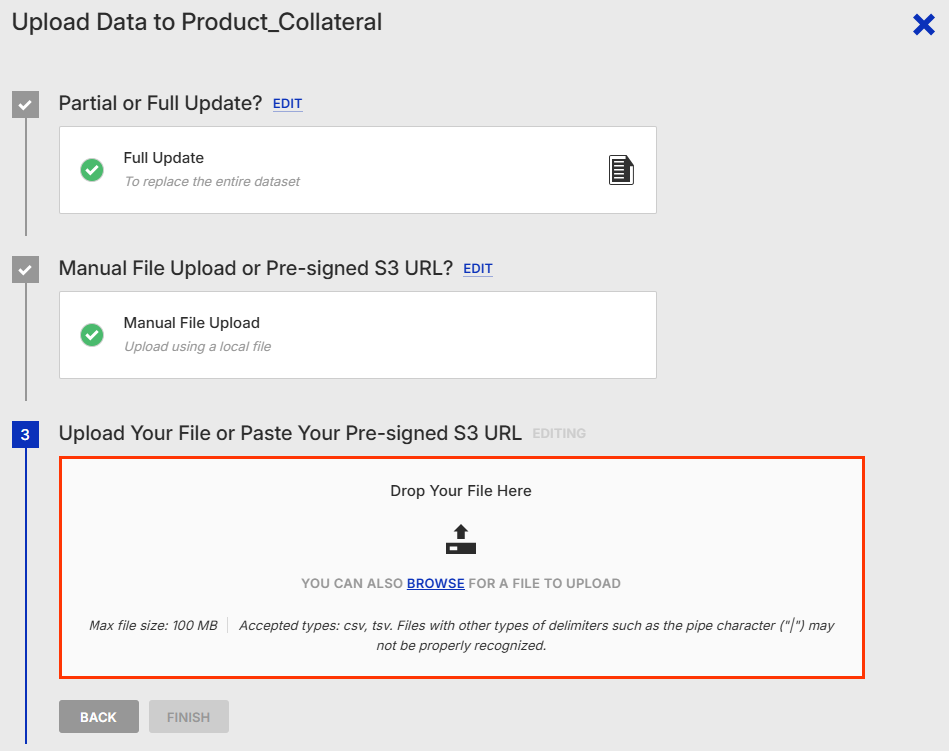
When using the Upload Data wizard to update a Content Pages dataset, you can either drag and drop a file directly into the wizard, or you can input a URL to a dataset file that you store on Amazon S3. Regardless of which of these two upload options you select, the file that you use must be in the CSV or TSV format. Refer to Content Pages Datasets Overview for additional requirements.
Uploading a File Directly
Follow these steps to update a Content Pages dataset by uploading a file directly to the Monetate platform using the Upload Data wizard.
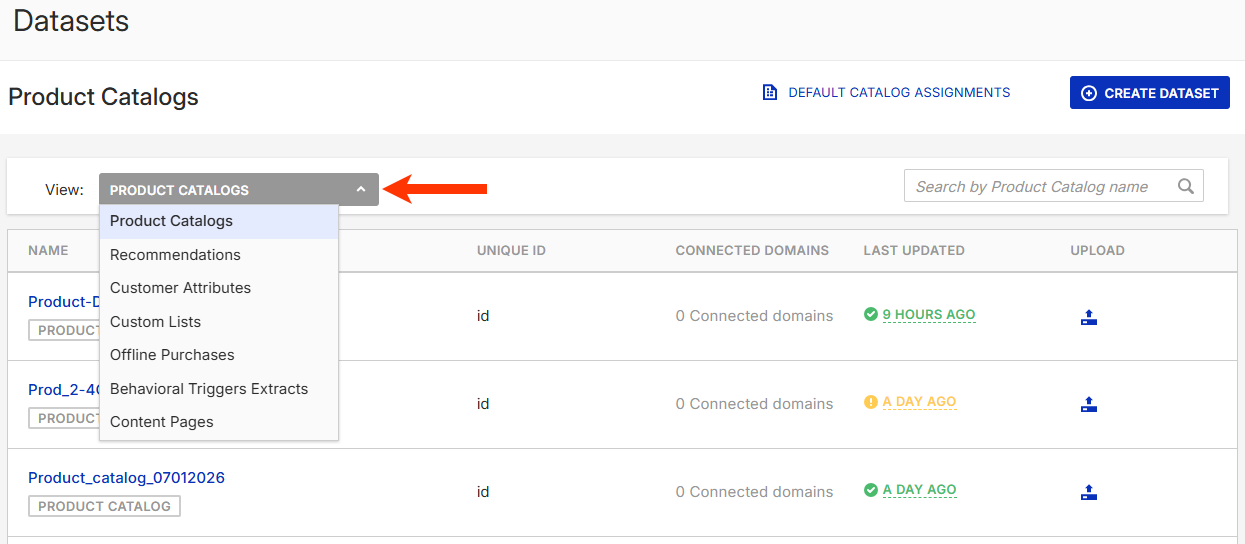
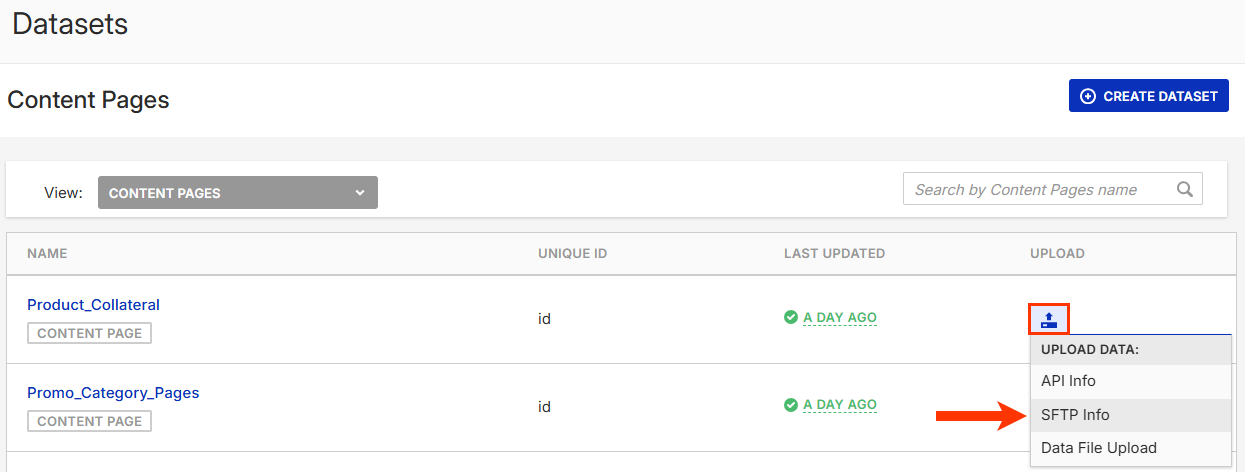
- Click Datasets in the left-hand navigation, and then, if necessary, select Product Data.
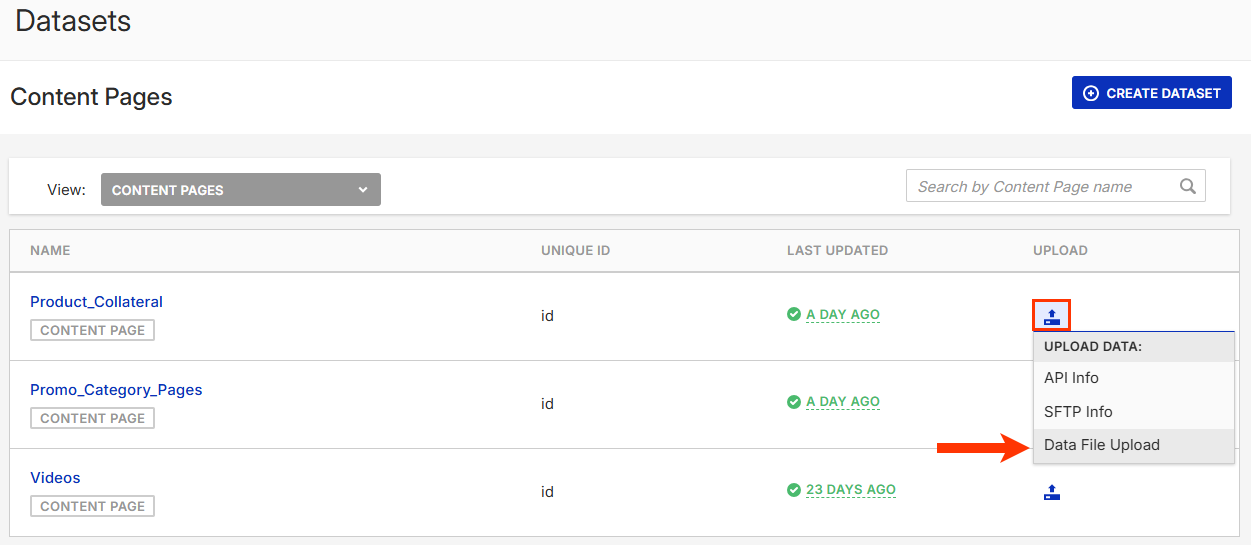
- Select Content Pages from View on the Datasets list page.
- Find the Content Pages dataset that you want to update, click the upload icon for its entry, and then select Data File Upload.
- Select the type of update you want to perform, and then click NEXT.
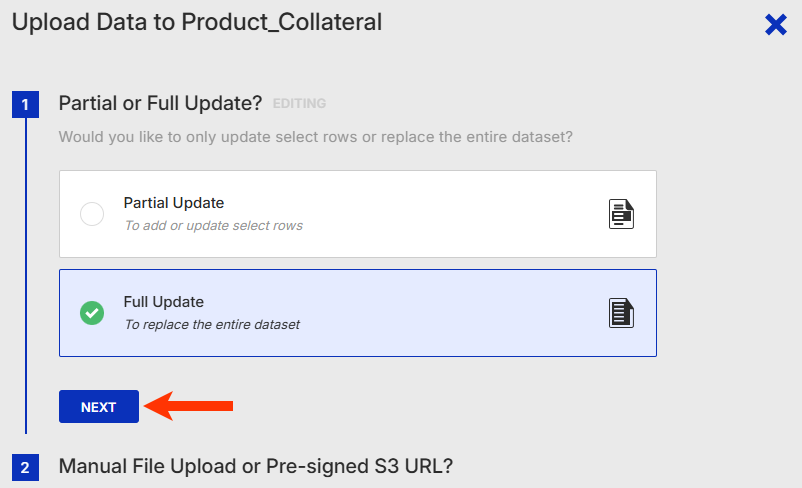
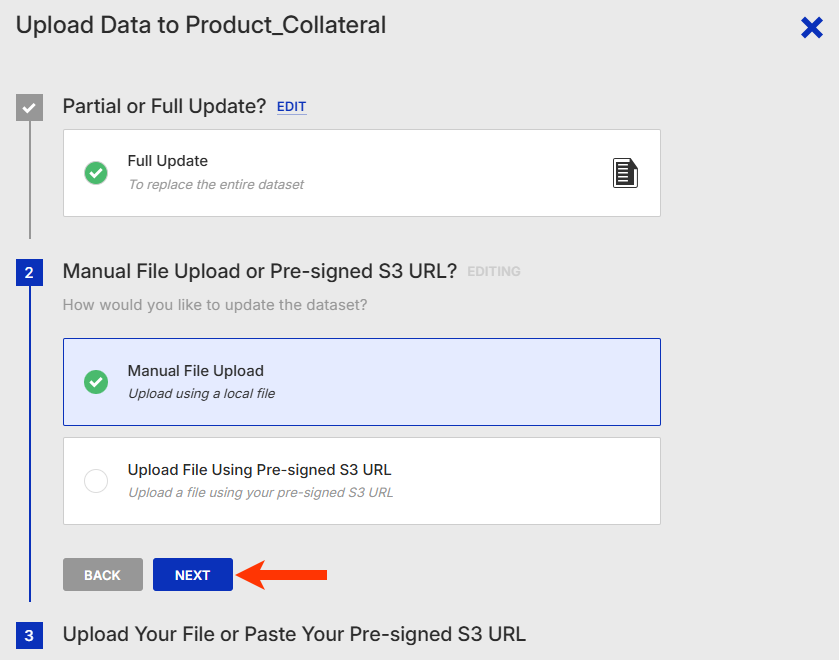
- Select Manual File Upload and then click NEXT.
- Drag and drop the file into the wizard.
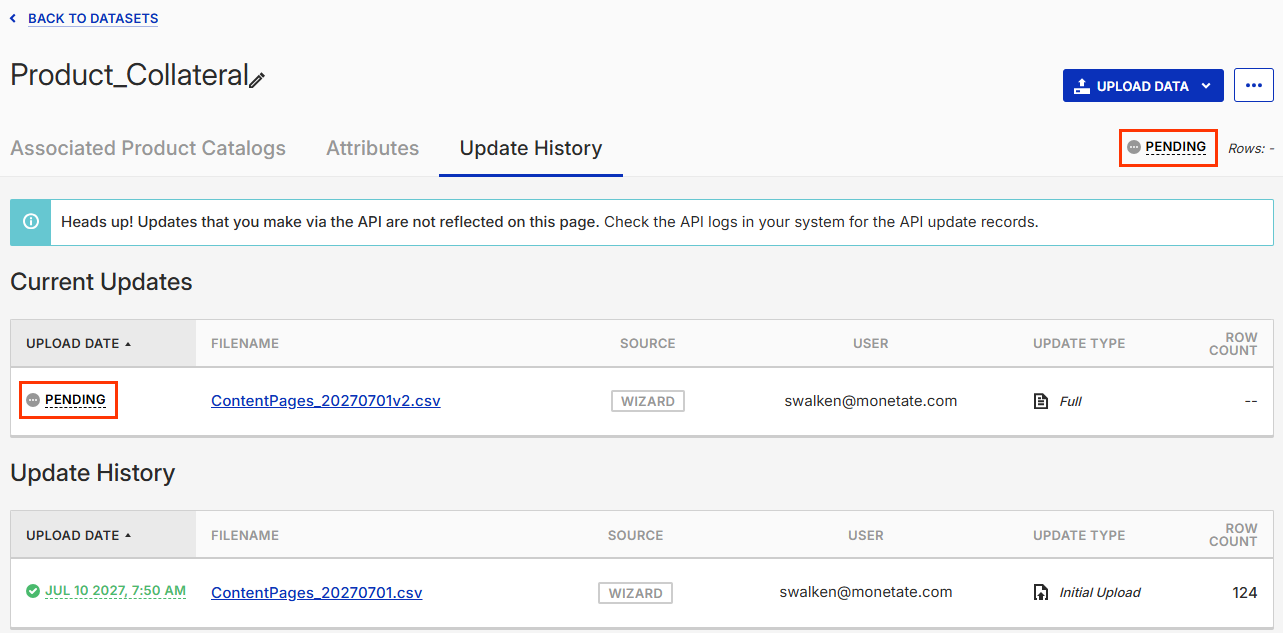
When you select the Content Pages view of the Datasets list page loads, PENDING appears in the LAST UPDATED column for the dataset.
On the Update History tab of the dataset's details page, PENDING appears where the timeframe of the last update normally appears as well as in the UPLOAD DATE column of the Current Updates table.
If the file failed to upload or the platform encountered other errors, you see messages indicating the problem. See Failed Updates in this documentation for more information.
Uploading a File Using an Amazon S3 URL
Follow these steps to add rows to or update existing rows in a Content Pages dataset by uploading a dataset file using an Amazon S3 pre-signed URL.
- Generate the pre-signed URL for the file you want to upload.
- Click Datasets in the left-hand navigation, and then, if necessary, select Product Data.
- Select Content Pages from View on the Datasets list page.
- Find the Content Pages dataset that you want to update, click the upload icon for its entry, and then select Data File Upload.
- Select the type of update you want to perform, and then click NEXT.
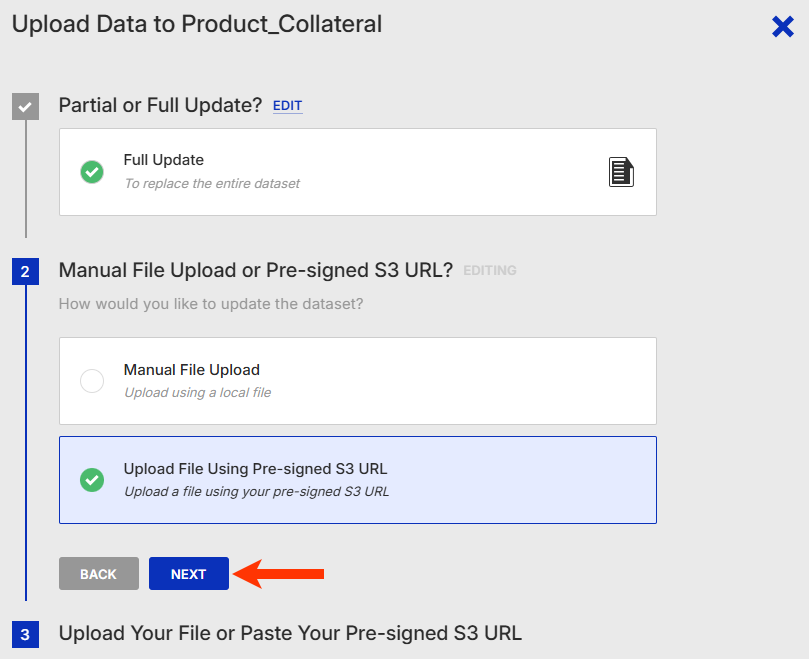
- Select Upload File Using Pre-signed S3 URL, and then click NEXT.
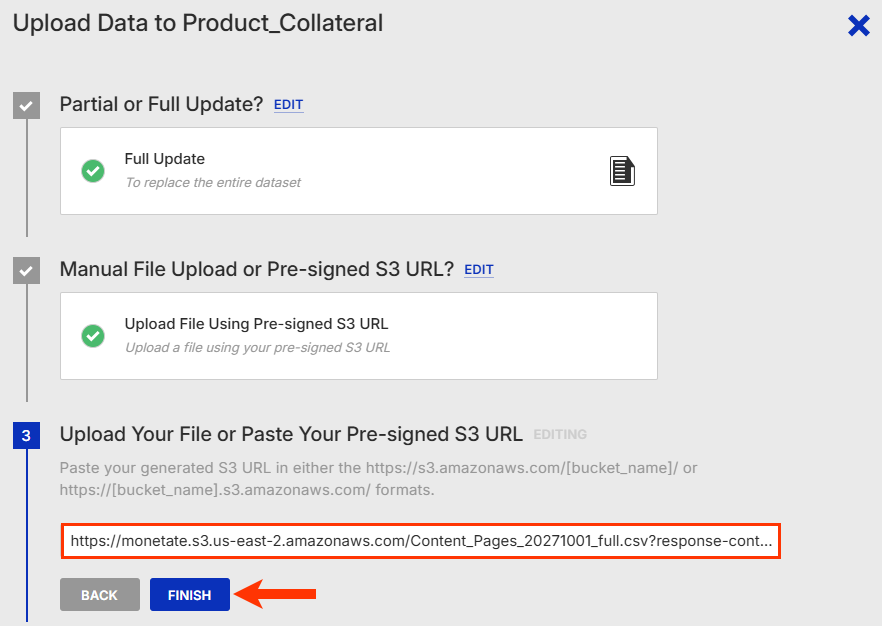
- Paste the Amazon S3 URL into the field, and then click FINISH.
The Upload Data wizard closes and Monetate ingests the file. When you select the Content Pages view of the Datasets list page, a message briefly appears that informs you that the file was successfully uploaded from the Amazon S3 URL. Additionally, PENDING appears in the LAST UPDATED column for the dataset.
On the Update History tab of the dataset's details page, PENDING appears where the timeframe of the last update normally appears as well as in the UPLOAD DATE column of the Current Updates table.

If the file failed to upload or the platform encountered other errors, you see messages indicating the problem. See Failed Updates in this documentation for more information.
Using SFTP
You can perform both full and partial updates to a Content Pages dataset using SFTP. If you upload a Gzip file, ensure that it has the .gz file extension because Monetate doesn't accept files with the .gzip file extension.
Setting Up Automatic Updates
To set up automatic updates for a Content Pages dataset, add the following information to your SFTP client.
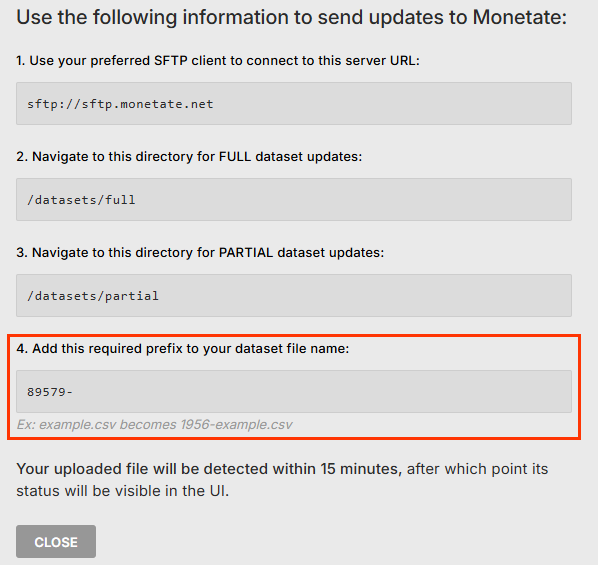
- Host —
sftp://sftp.monetate.net - Port —
22 - Protocol —
SFTP
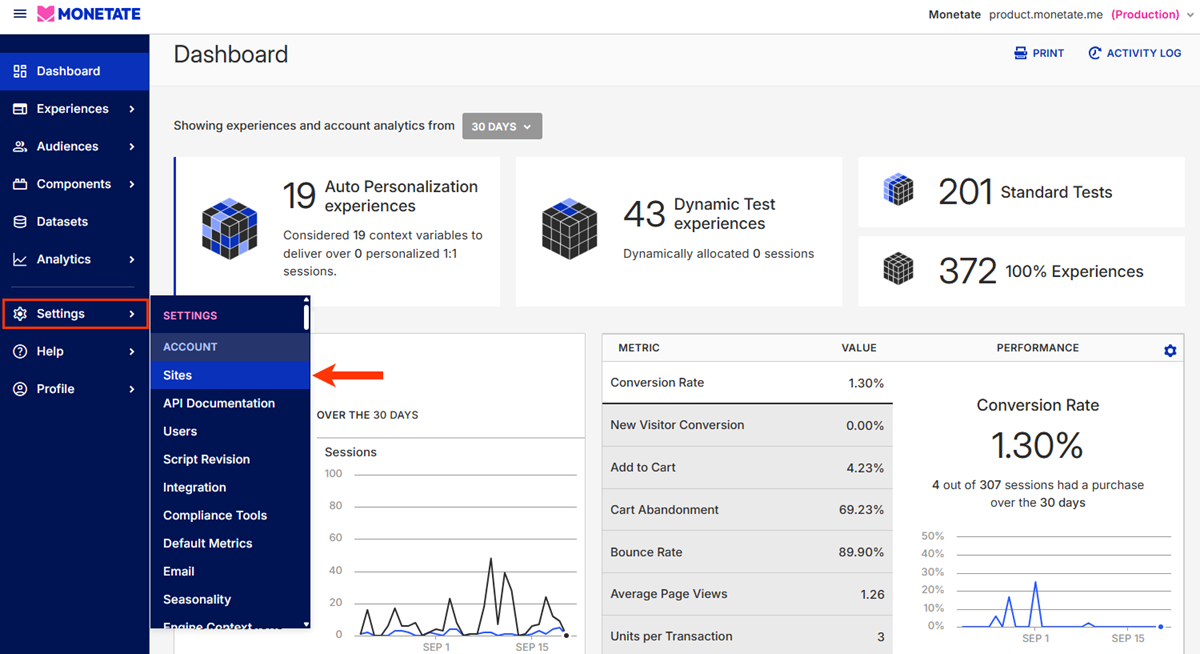
The username and password you can find within Monetate by clicking Settings in the left-hand navigation, and then selecting Sites.
From that same page you can create new SFTP credentials or change an existing SFTP user password. See Manage SFTP Users for more information.
File-Drop Directories and Naming Conventions
There are two file-drop directories:
/datasets/full— Use this location for full file updates/datasets/partial— Use this location for partial file updates
Follow this format when naming an update file: {datasetid}-examplefilename.csv
Replace {datasetid} with the unique ID for the Recommendations dataset you're updating. You can find this information in the platform by following these steps:
- Click Datasets in the left-hand navigation, and then, if necessary, select Product Data.
- Select Content Pages from View on the Datasets list page.
- Find the Content Pages dataset that you want to update, click the upload icon for its entry, and then select SFTP Info.
- Scroll to the bottom of the page to find the dataset ID.
Once you upload a file to the platform's SFTP server, it automatically updates the dataset.
Using the Data API
Refer to the Monetate Data API documentation in the Monetate Developer Hub for the POST endpoint to update a Content Pages dataset using this option.
Before you can send the update, you must first configure your account's API users and then create public keys for those users. API keys allow you to generate authentication credentials that are separate from login credentials for the platform. You can revoke these credentials at any time. See Manage API Keys for more information on configuring API users and public keys.
Establishing Authentication
Monetate's authentication model allows your applications to authenticate directly to Monetate using a JSON Web Token (JWT) signed with your private key.
The Monetate Auth API allows your application to request these access tokens. After you create your public-private key pair and submit your public key to Monetate, you then use your private key to sign an API request, and then your public key is used to verify it so that you receive a token.
For help constructing the JWT assertion, refer to the Monetate Auth API documentation in the Monetate Developer Hub.
You can access the files on the Update History tab on the dataset's details page in the Monetate platform. Monetate retains a dataset file for 180 days from the date it was uploaded. Once a file is out of this retention period, it still appears on the dataset's Update History tab, but you cannot download it.
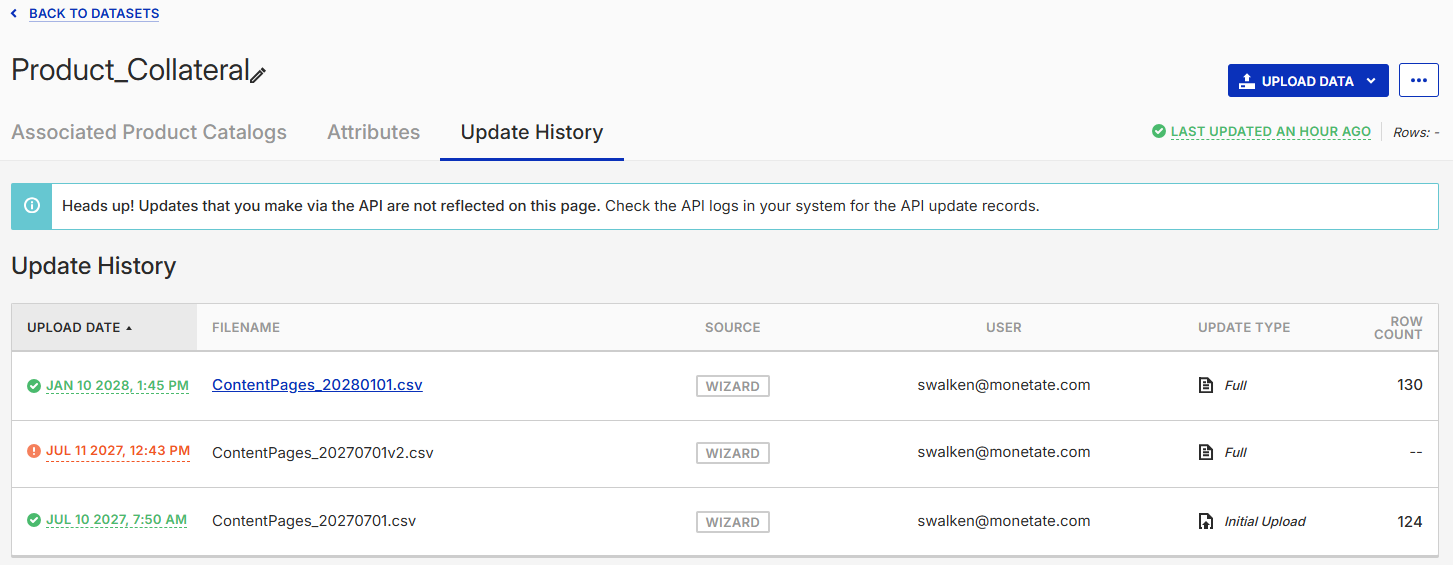
If a file is available for download, its filename appears in blue in the Update History table.
Adding Attributes
To add one or multiple custom attributes to a Content Pages dataset, you can send a full file update using the Data API. You also can use the Add Attribute modal that's accessible from the dataset's details page to perform this type of update.
Using the Add Attribute Modal
Follow these steps to add attributes to a product catalog dataset's schema without uploading a file.
- Click Datasets in the left-hand navigation bar.
- Select Content Pages from View on the Datasets list page.
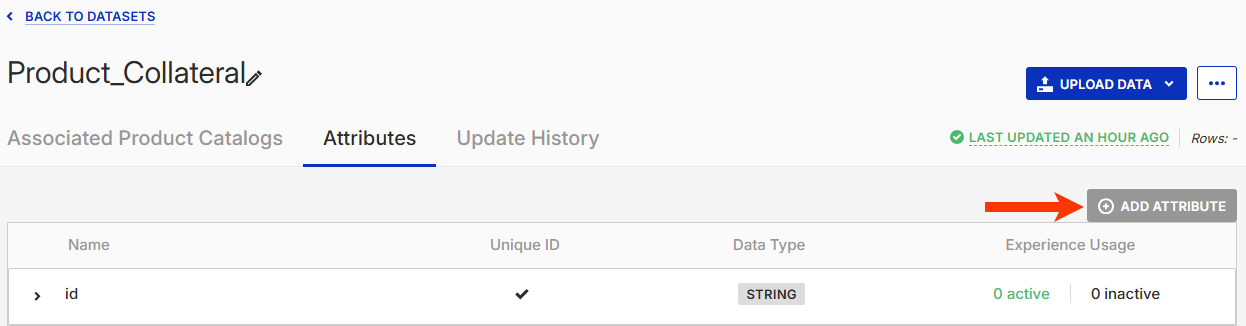
- Click the Attributes tab of the dataset's details page.

- Click ADD ATTRIBUTE.
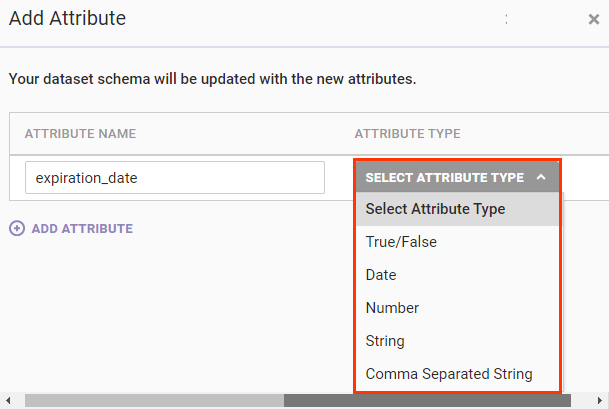
- Type the new attribute's name into ATTRIBUTE NAME.
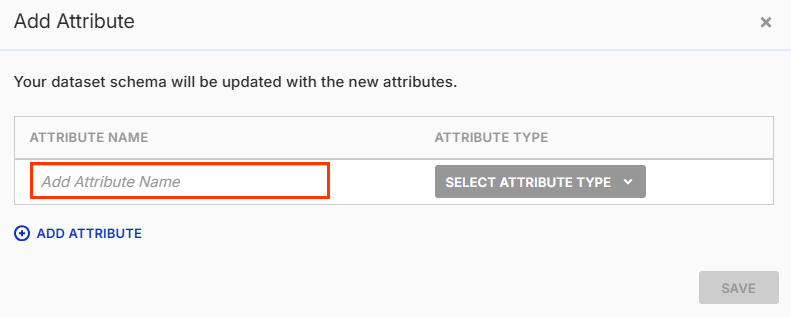
- Select the new attribute's data type from ATTRIBUTE TYPE.
- If necessary, click ADD ATTRIBUTE to generate another set of fields for another attribute, and then repeat steps 4 and 5 for the additional new attribute.
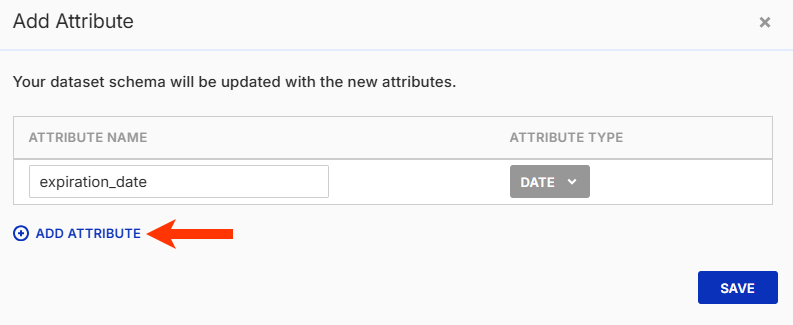
- Click SAVE.
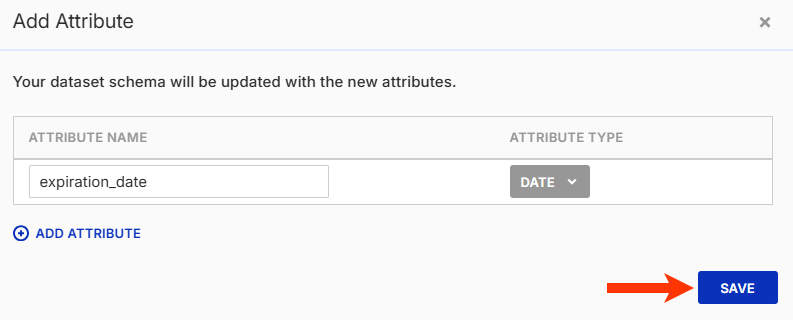
The new attributes appear at the bottom of the table. There is no indication the new attributes have no data associated with them.
Because the attribute now exists in the Content Pages dataset schema in the platform, you can perform a partial update with a file that contains values for the new attributes.
Failed Updates
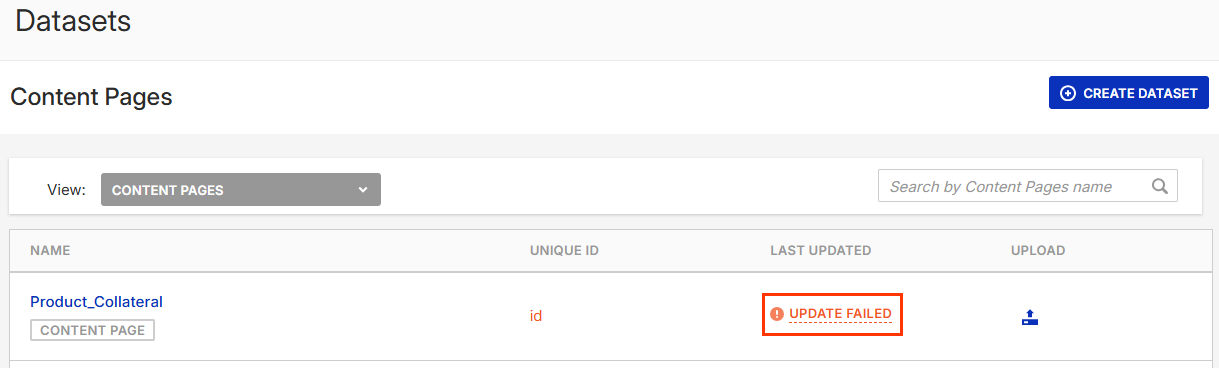
If the platform encounters an error with the update, you see UPDATE FAILED in multiple places within the platform:
- In the LAST UPDATED column for the dataset's entry on the Content Pages view of the Datasets list page
- In place of the last update's timeframe on the Update History tab of the dataset's details page, and the exact date and time of the failed update appears in red in the UPLOAD DATE column of the Update History table
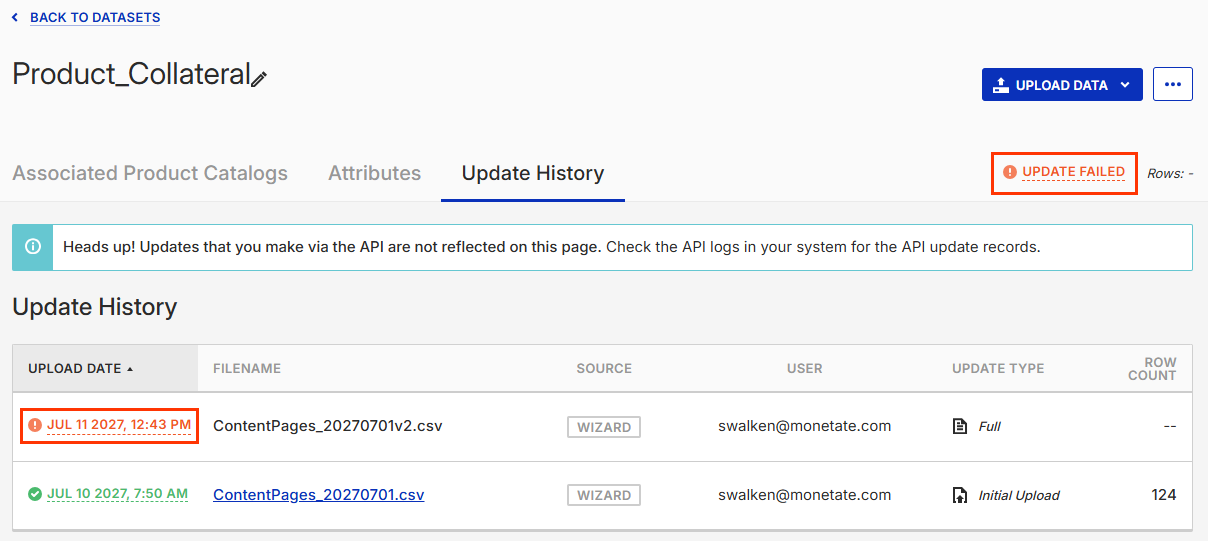
Click UPDATE FAILED on either the Content Pages view of the Datasets list page or the Update History tab of the dataset's details page to view the File Upload Error modal containing the reason(s) for the failure.
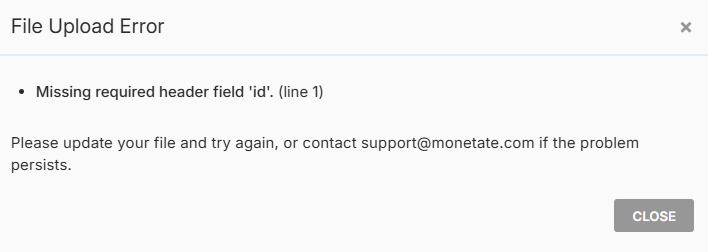
Refer to Dataset Specifications in the Content Pages dataset overview to ensure the update file conforms to the criteria for this type of dataset.