Follow these steps set up an integration with Contentsquare.
- Click the settings cog in the top navigation bar, and then select Integration.
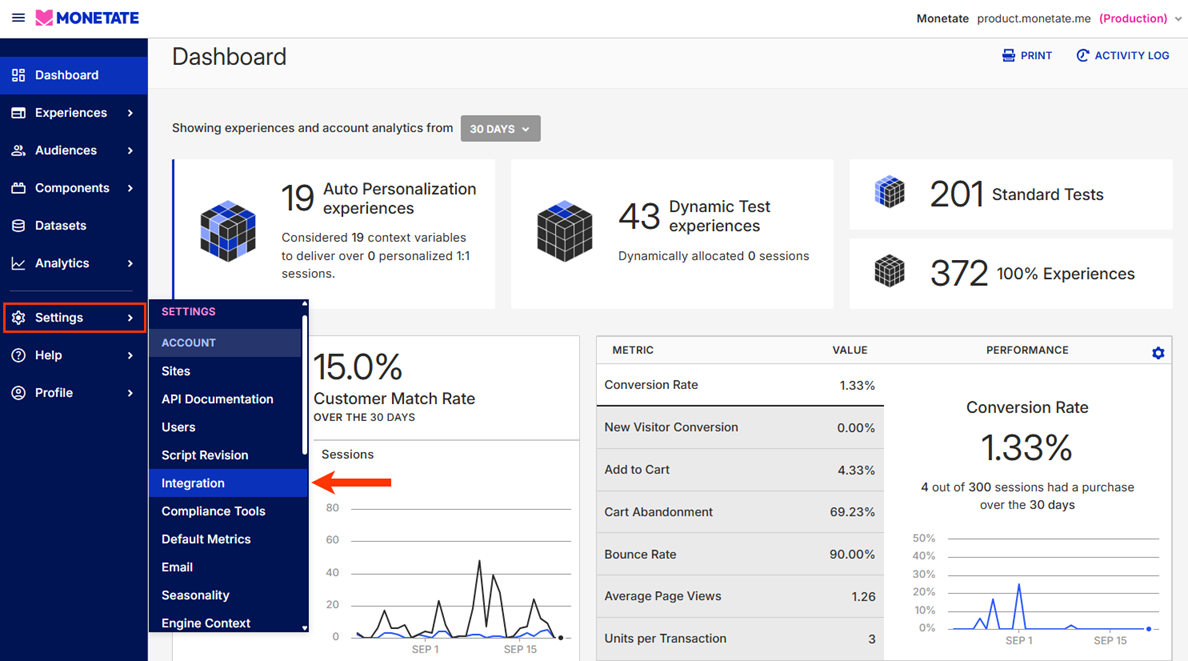
- On the Third-Party Analytics tab, take one of the following actions:
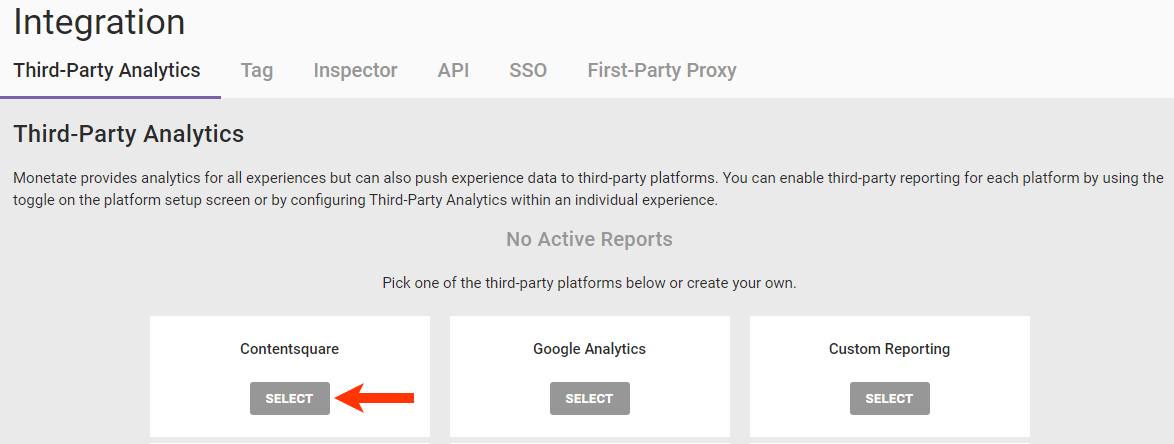
- If the account doesn't have any third-party analytics custom reports, then click SELECT for Contentsquare.
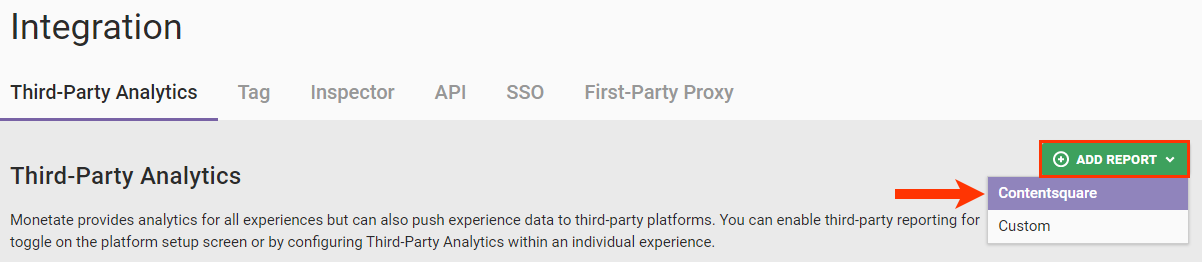
- If the account already has a third-party analytics report, then click ADD REPORT and then, if necessary, select Contentsquare.
- If the account doesn't have any third-party analytics custom reports, then click SELECT for Contentsquare.
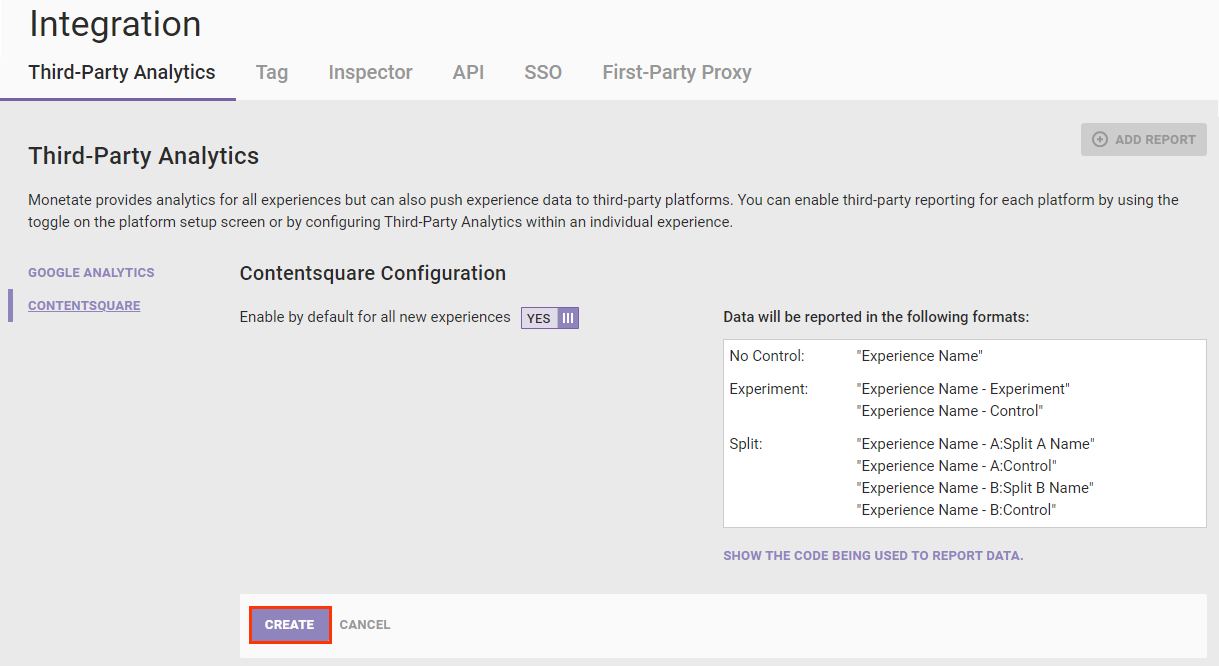
- Optionally, set Enable by default for all new experiences to YES if you want Monetate to push experience data for all new experiences to Contentsquare.
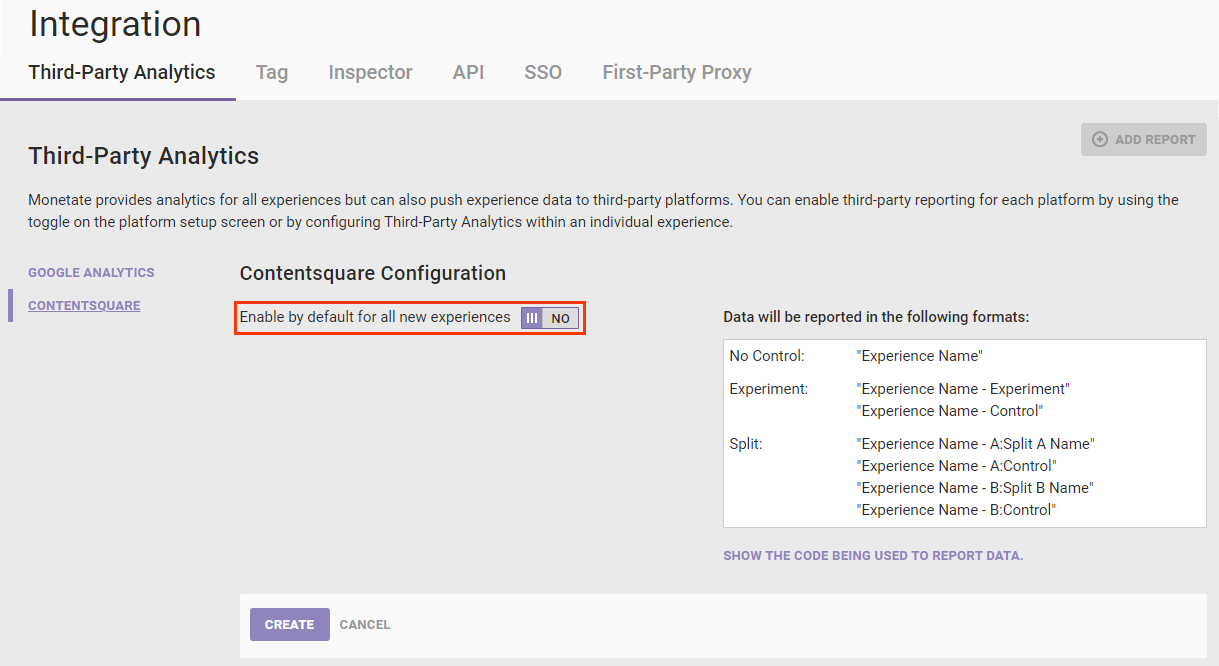
- Optionally, preview the code pushed to Contentsquare by clicking SHOW THE CODE BEING USED TO REPORT DATA.
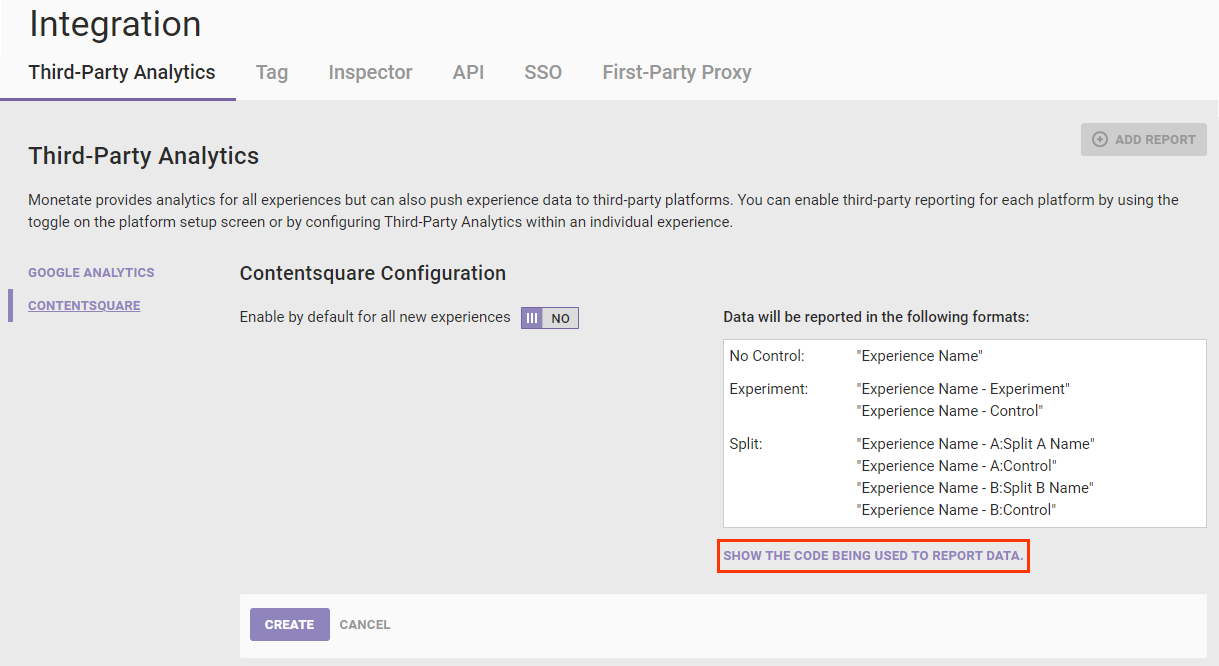
- Click CREATE.
Viewing Experience Data in Contentsquare
You can list and view Monetate experiences and variants directly in Contentsquare.
- Click the settings cog in the top navigation bar, and then select Integration.
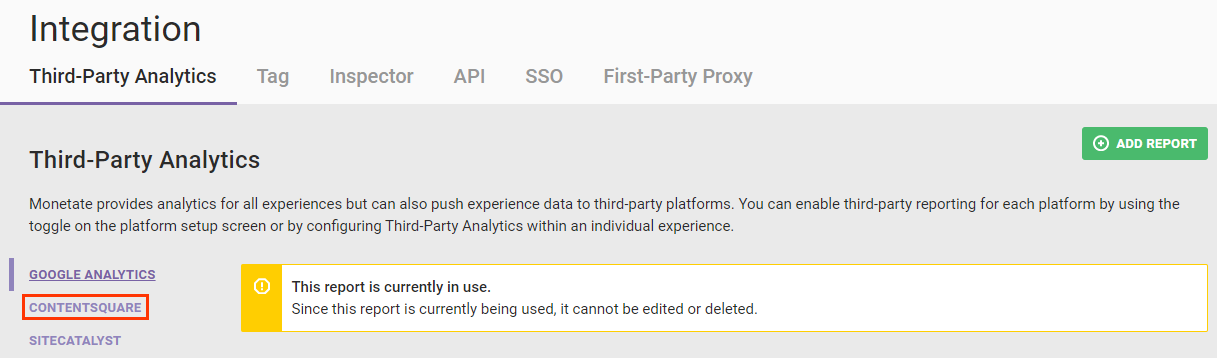
- Click CONTENTSQUARE on the Third-Party Analytics tab.
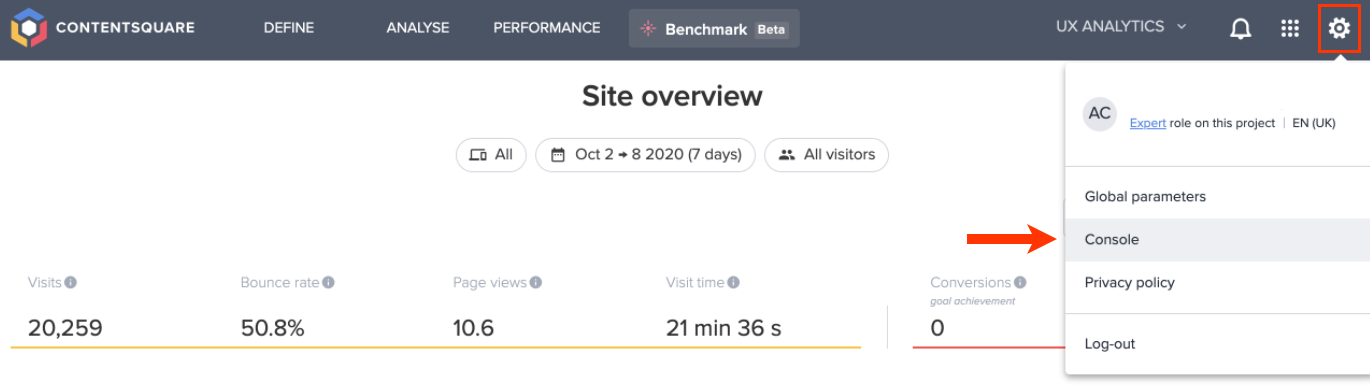
- Log into your Contentsquare account in a new browser tab. Click the settings cog and then select Console.
- Access the project you want to use Monetate with.
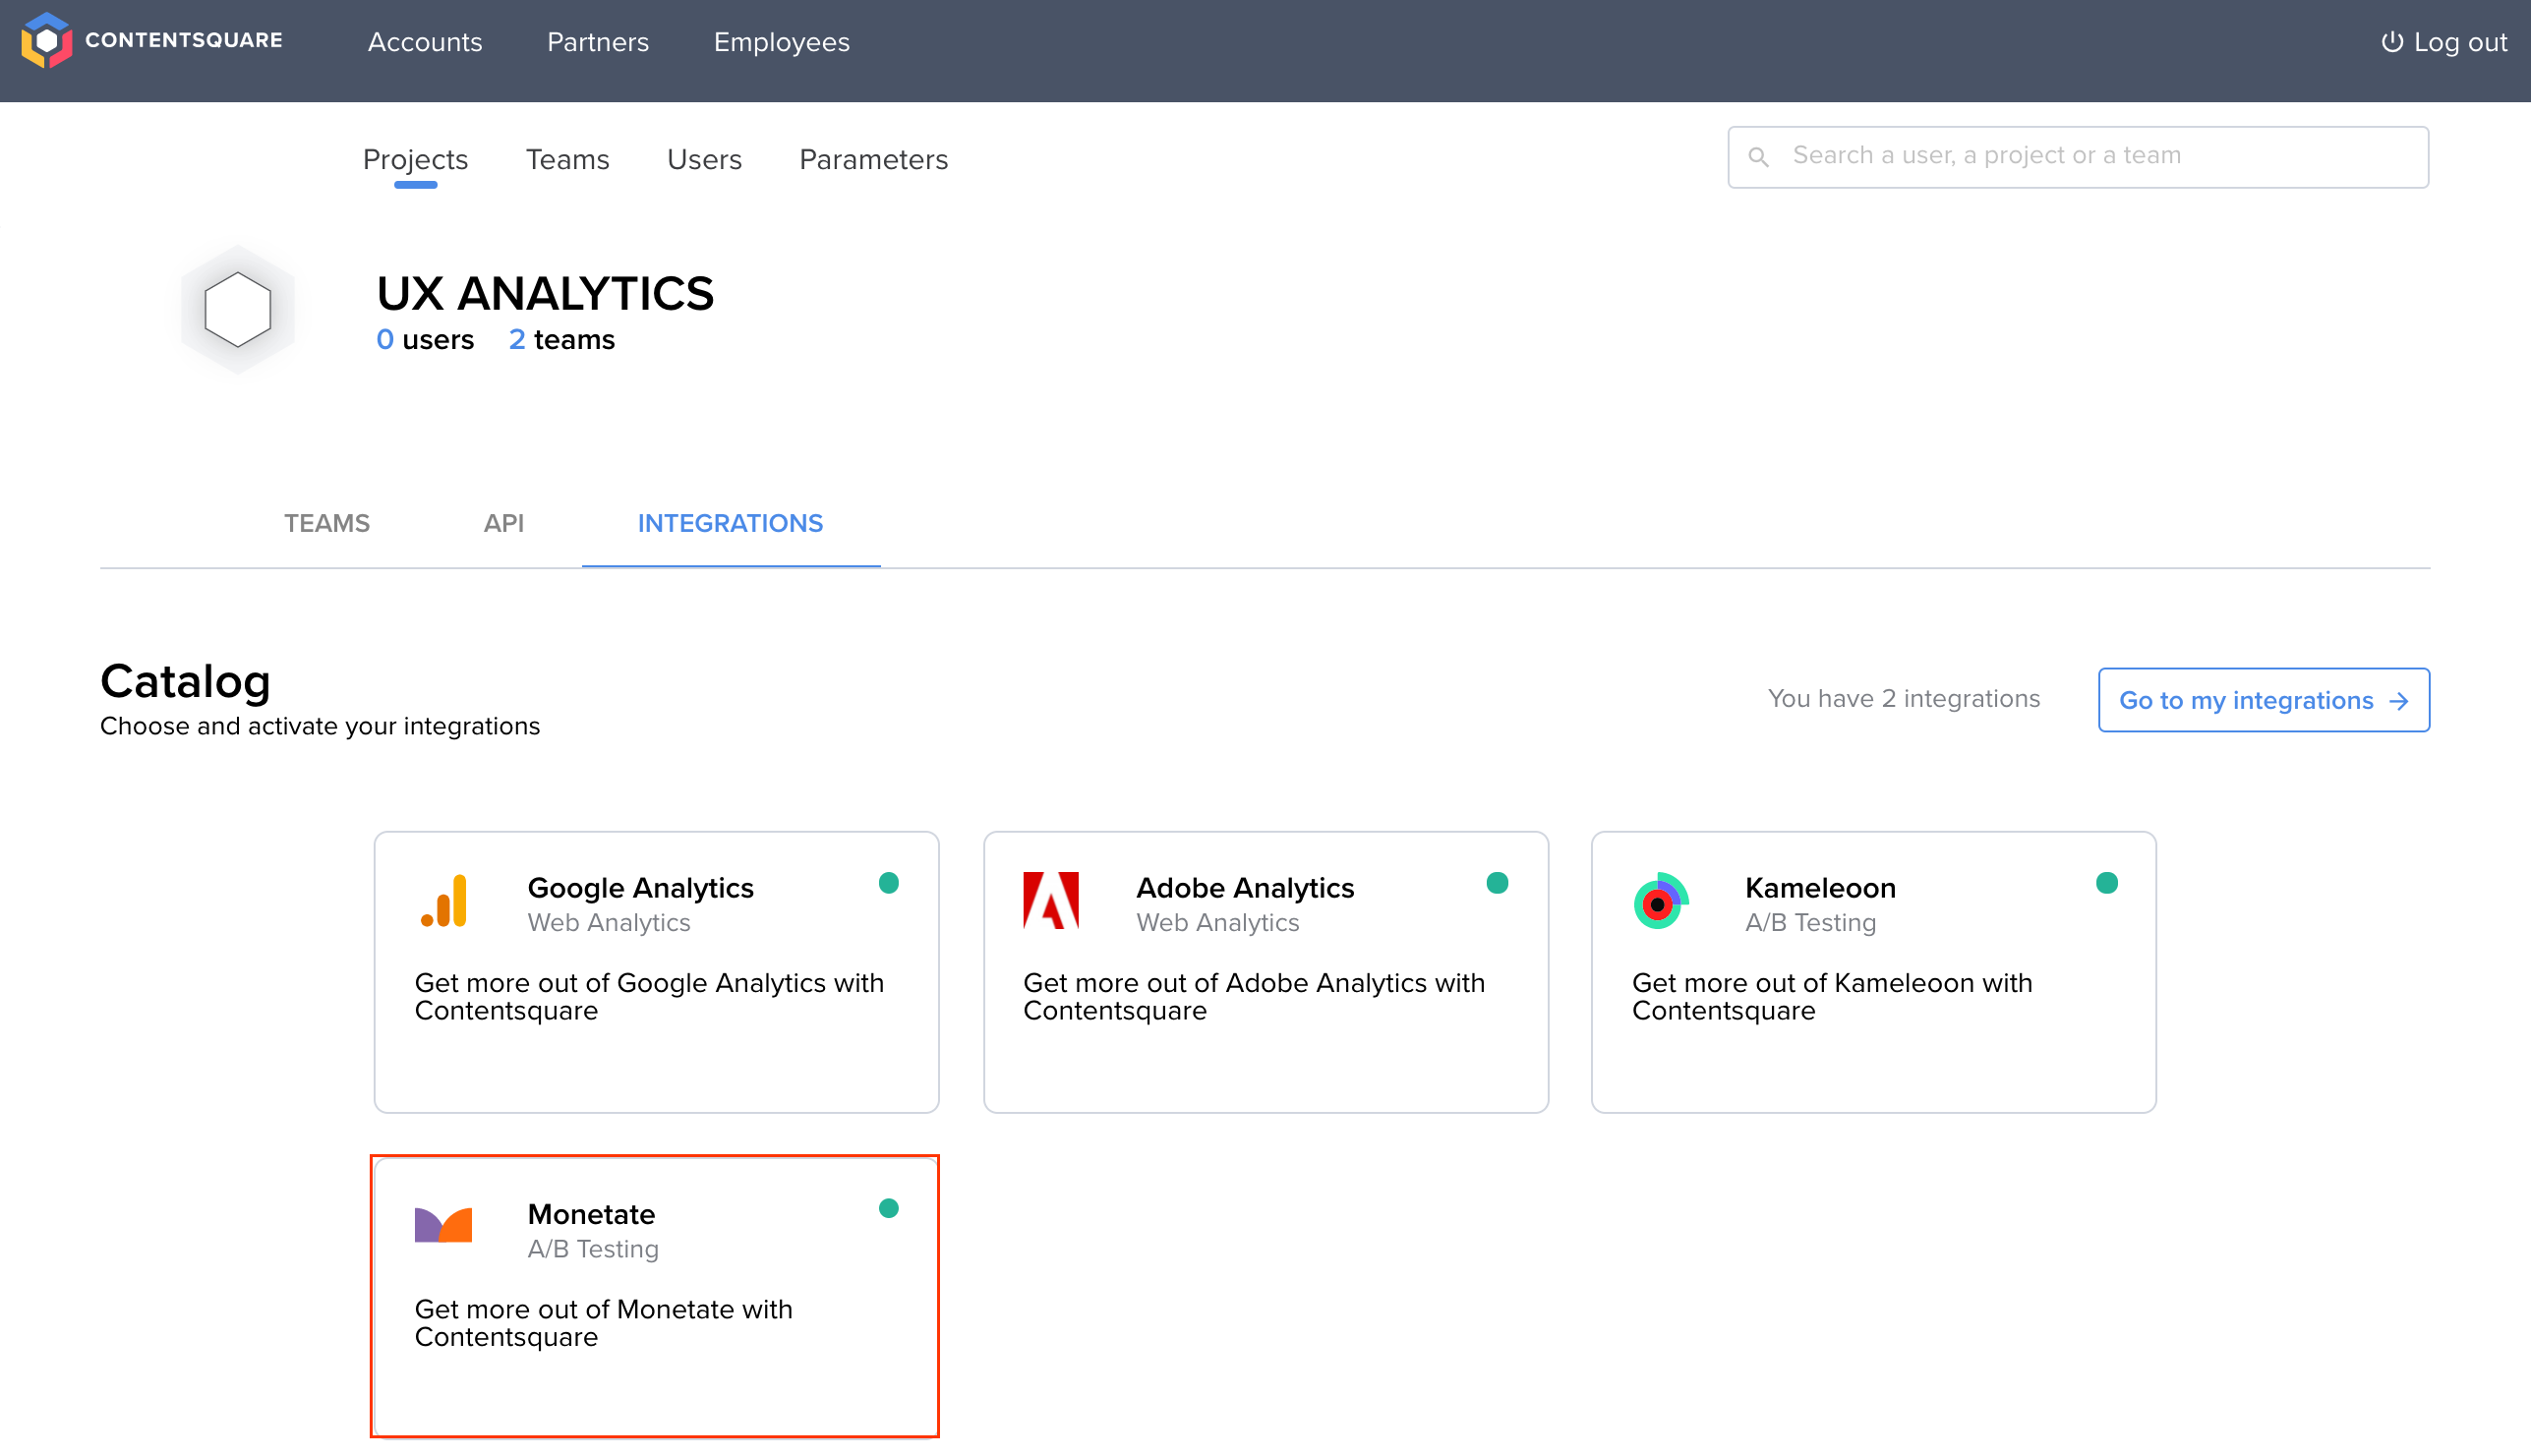
- Click the INTEGRATIONS tab.
- Select Monetate.
- Click ADD NEW.
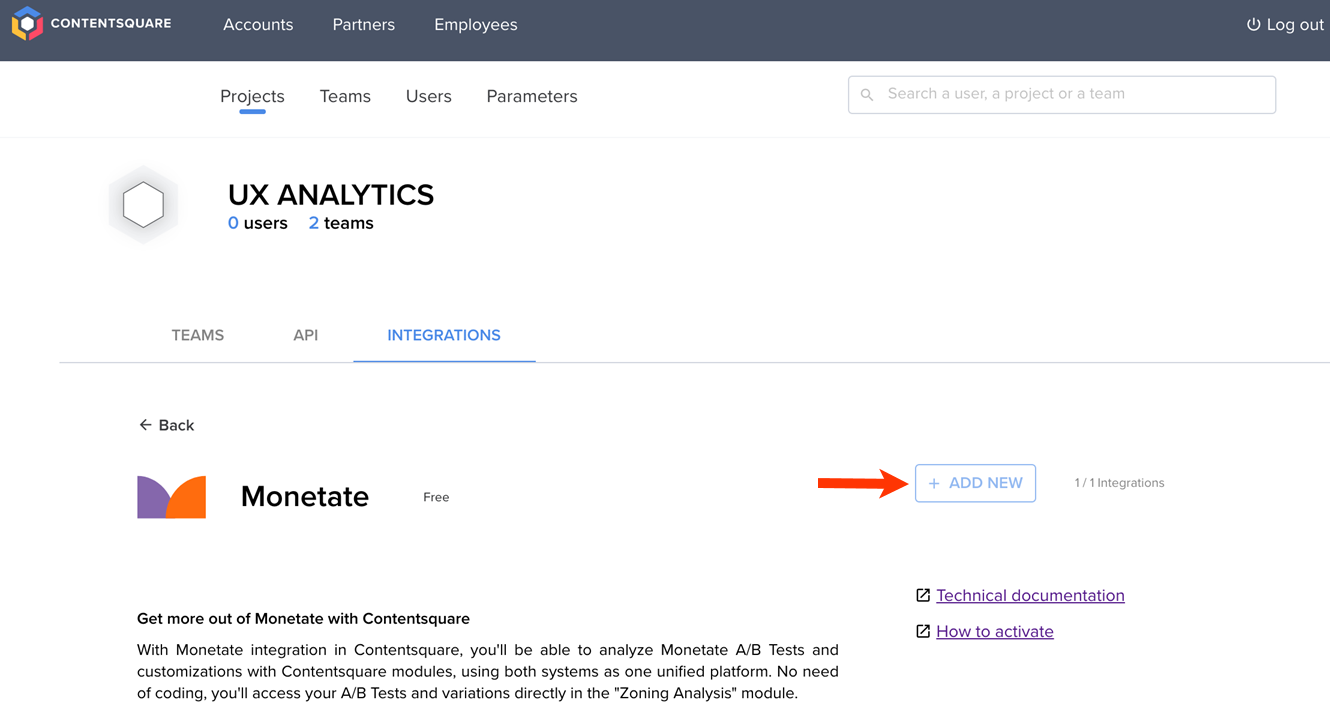
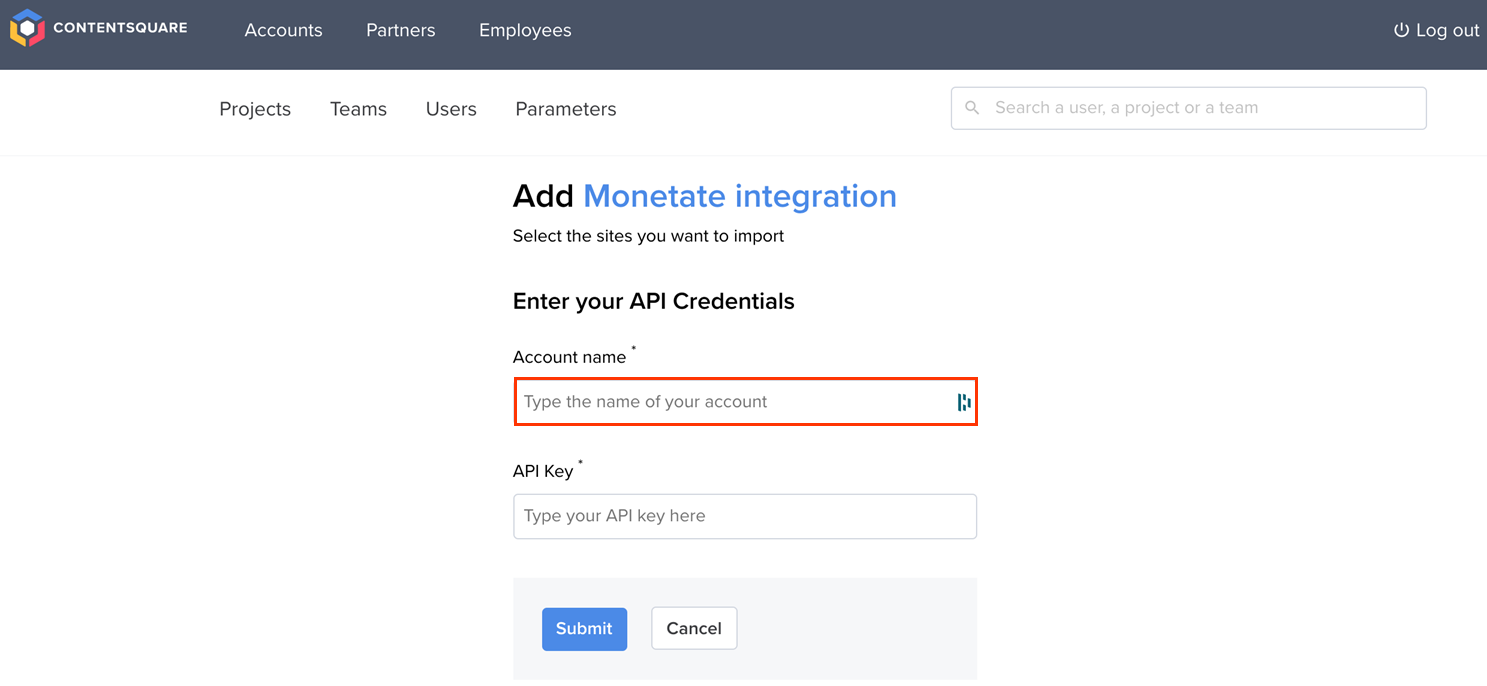
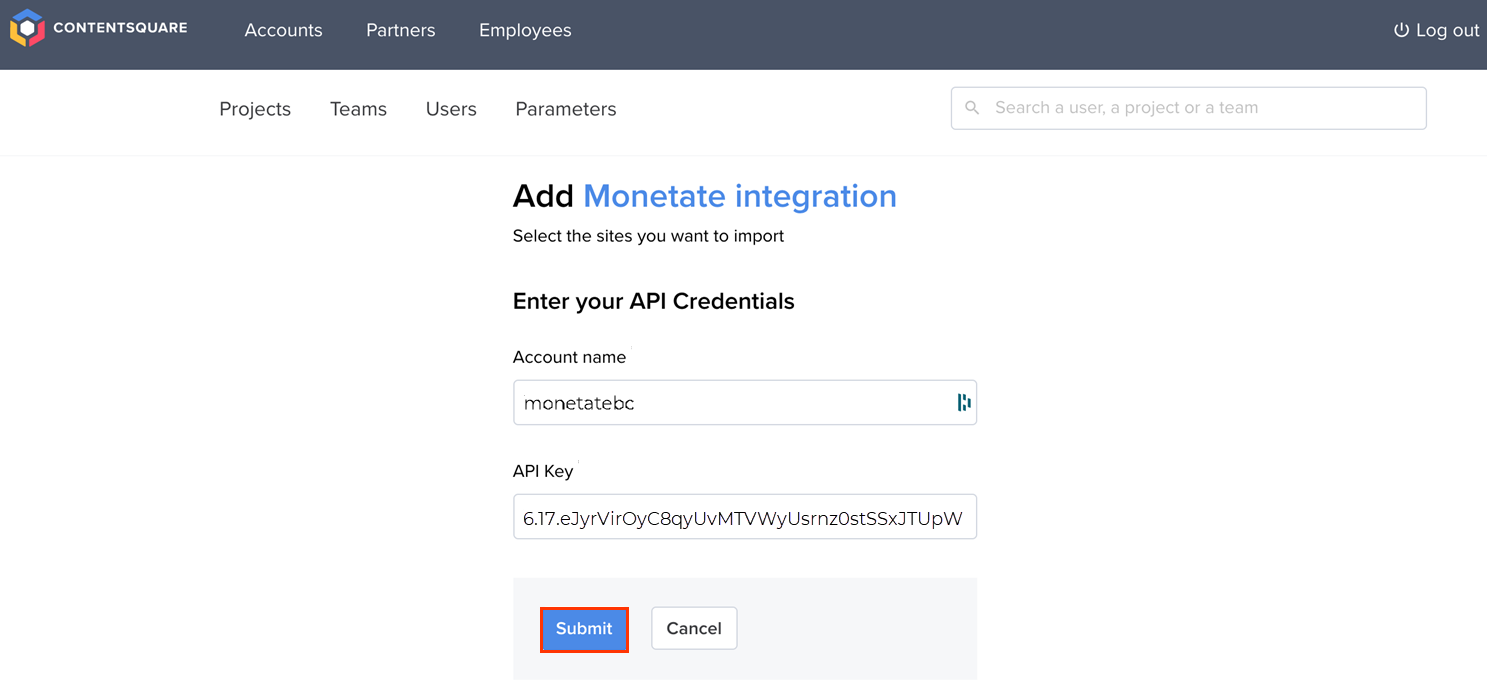
- Input the API credentials.
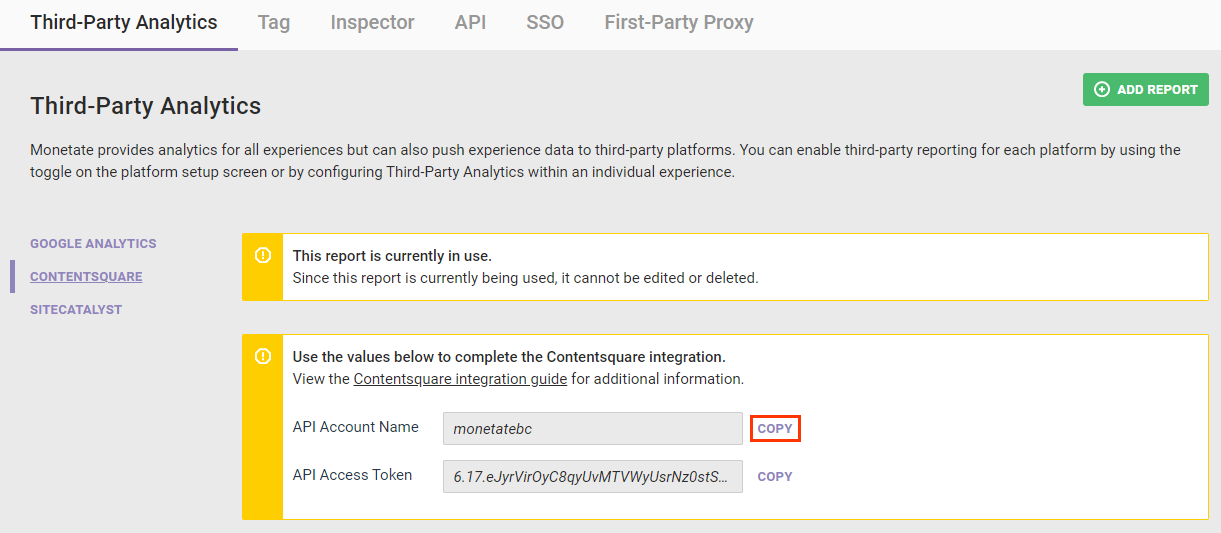
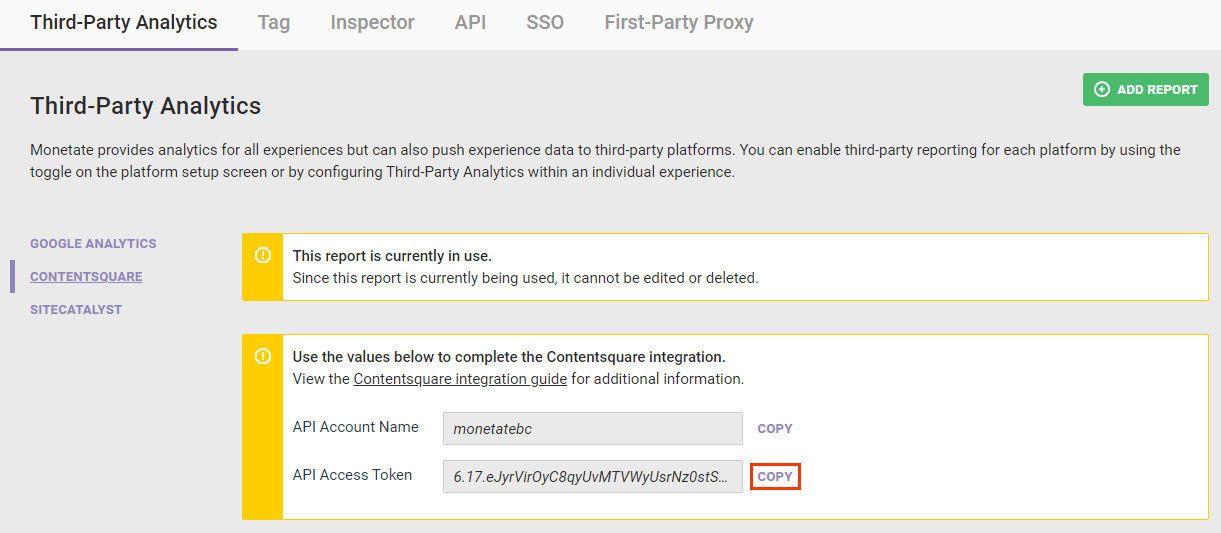
- Return to the browser tab in which Monetate is active. Click COPY next to API Account Name.
- Paste the text into Account name in Contentsquare.
- Click COPY next to API Access Token.
- Paste the text into API Key in Contentsquare.
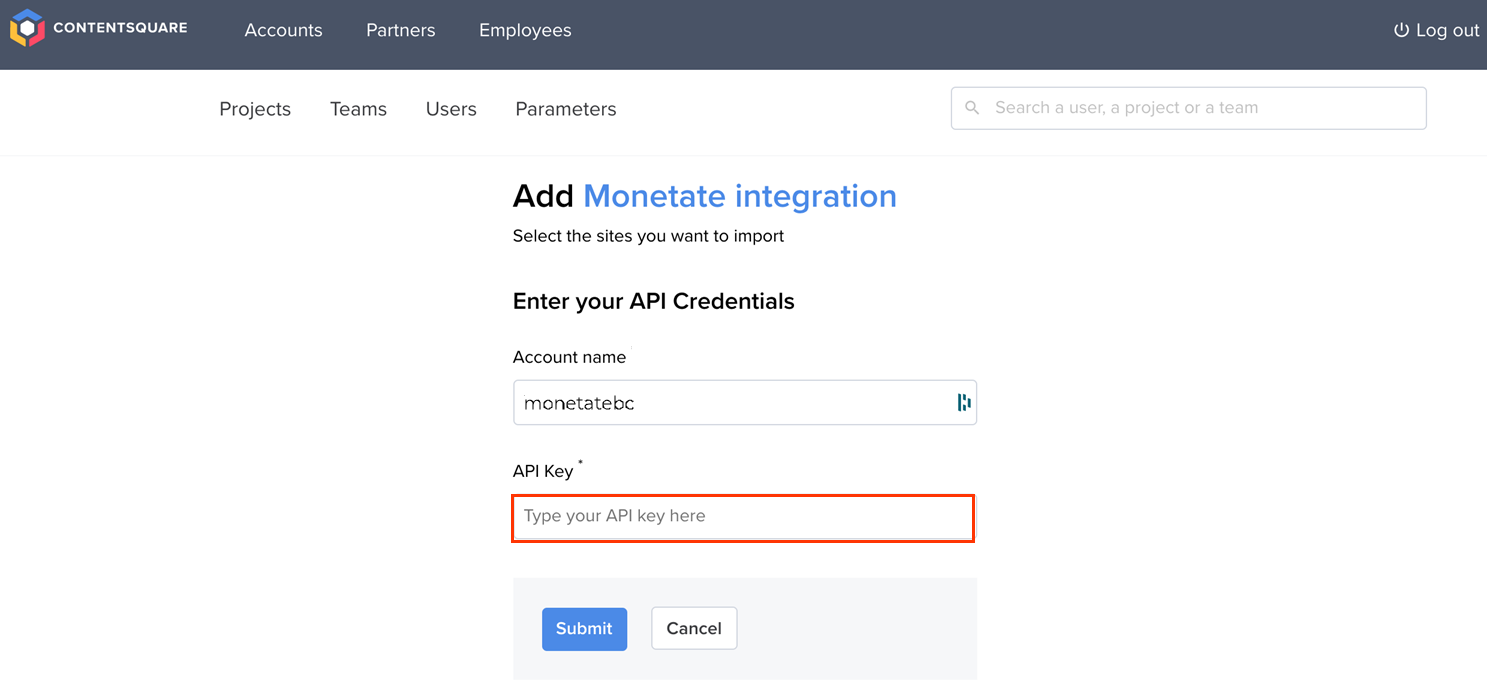
- Click Submit.
- Return to the browser tab in which Monetate is active. Click COPY next to API Account Name.
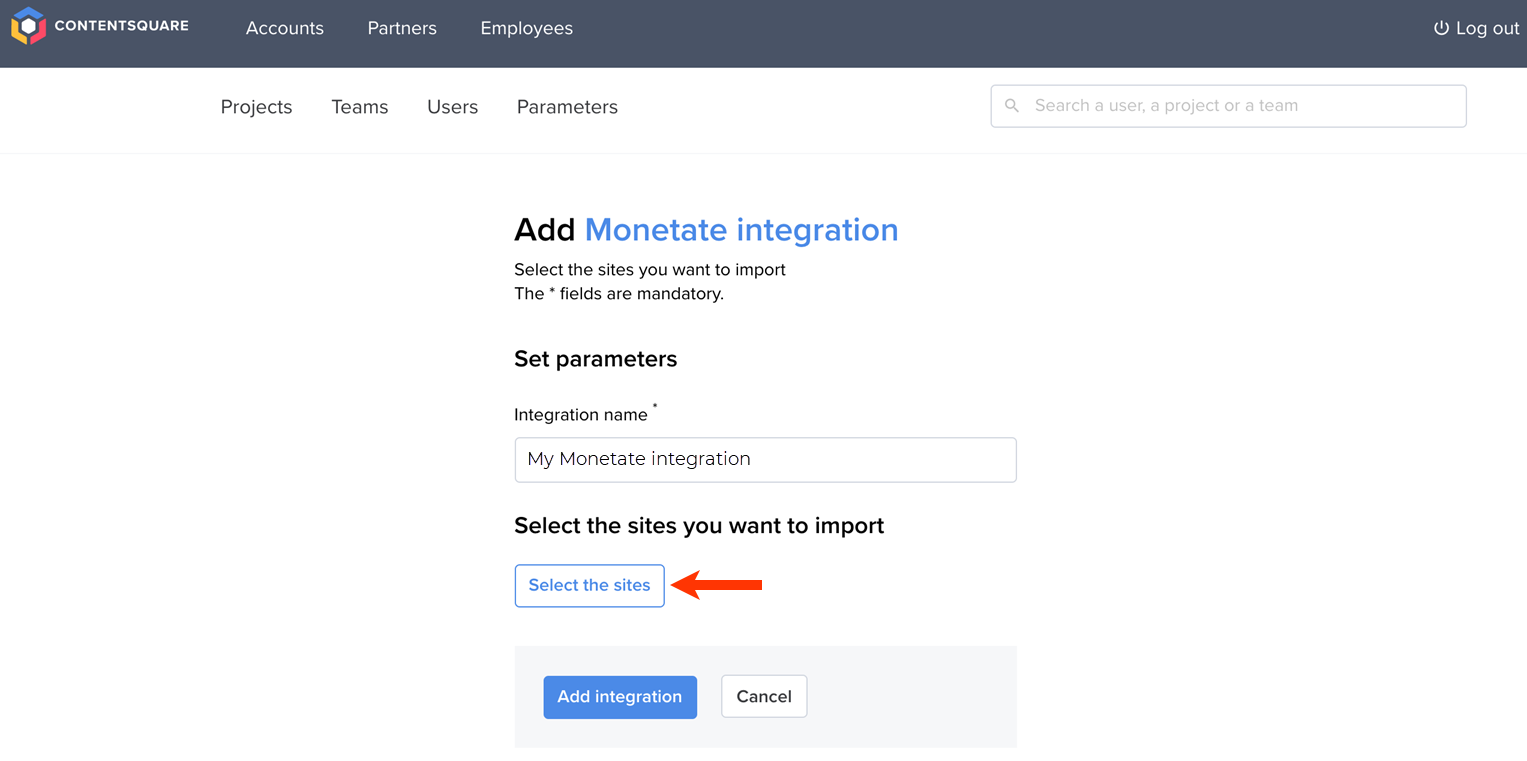
- Name the integration.

- Select the sites that you want to import.
- Click Select the sites.
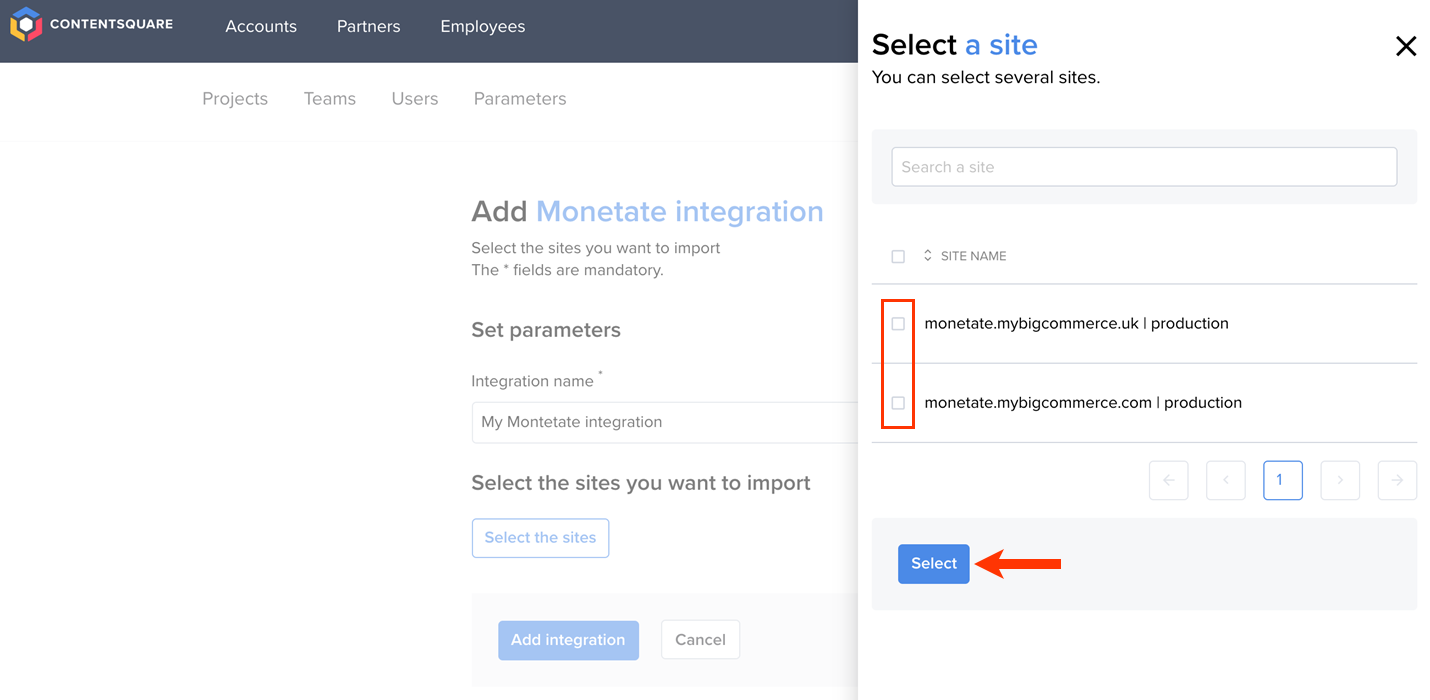
- Select one or more sites for which you want segments imported, and then click Select.
- Click Select the sites.
- Click Add integration.
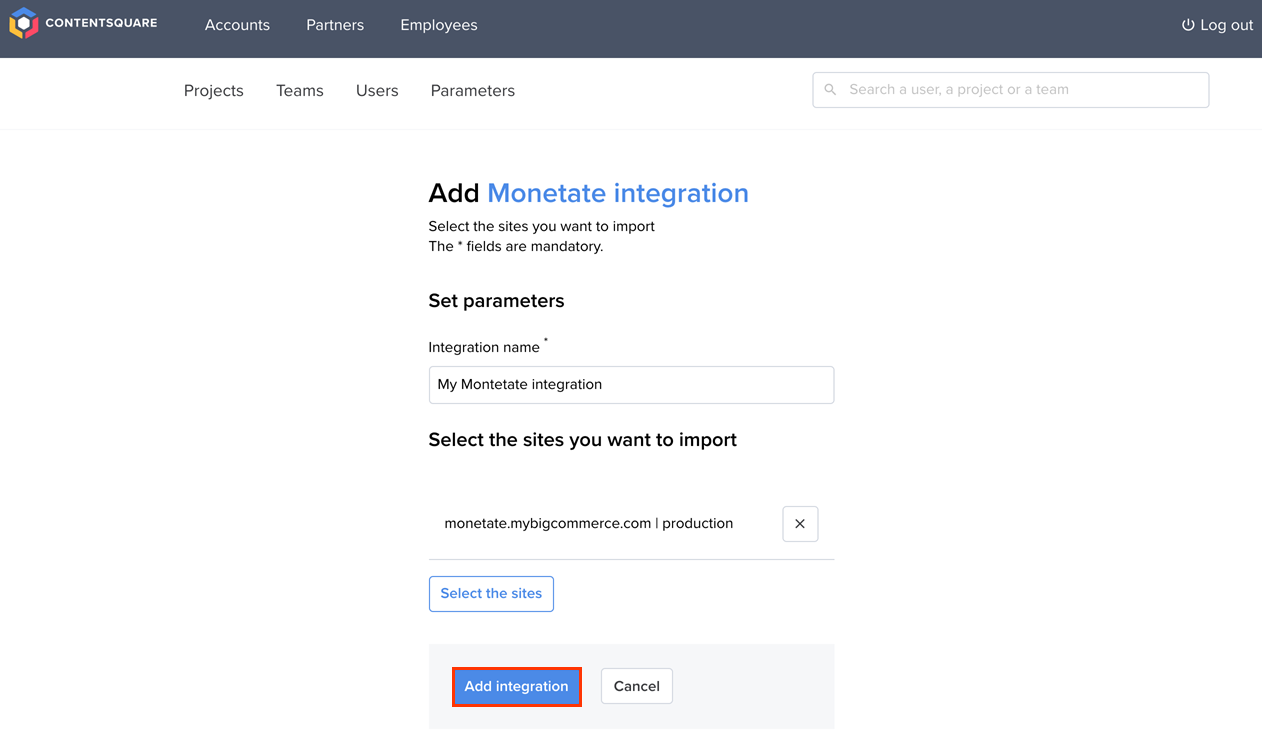
The integration in Contentsquare is now complete.
Enabling Contentsquare at the Experience Level
Follow these steps to enable Contentsquare reporting for an individual active Web experience.
- Navigate to the experience that you want reported to Contentsquare, and then open it in Experience Editor.
- Click the additional options menu (...) on the Experience Editor page, and then click Third-Party Analytics.
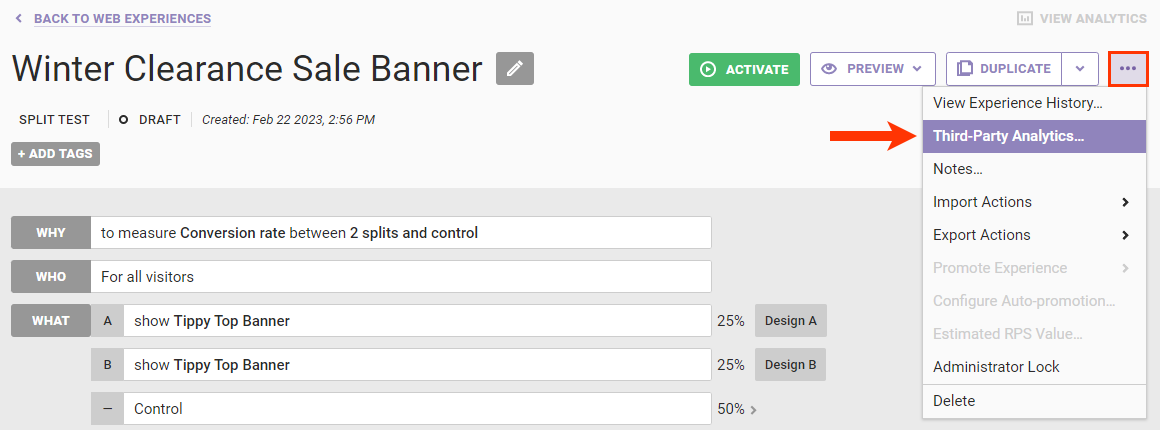
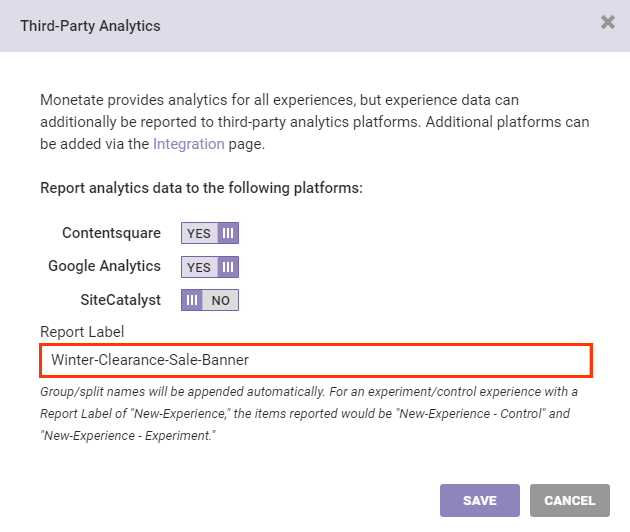
- Toggle Contentsquare to YES to have Monetate push the experience's data to Contentsquare.
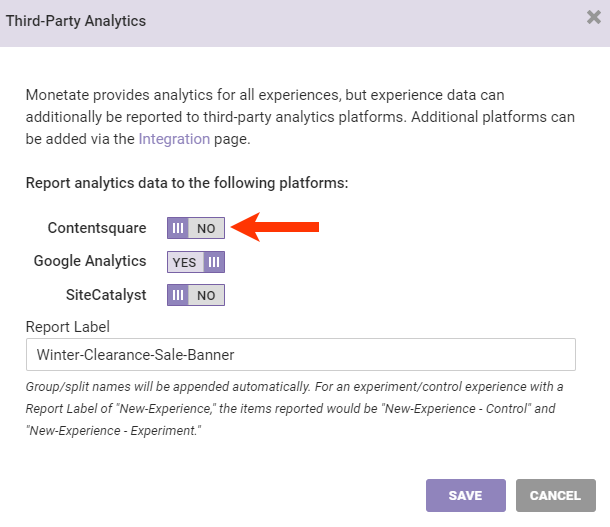
- If you want to see a specific string in the third-party platform(s) for this specific experience, enter it into Report Label.
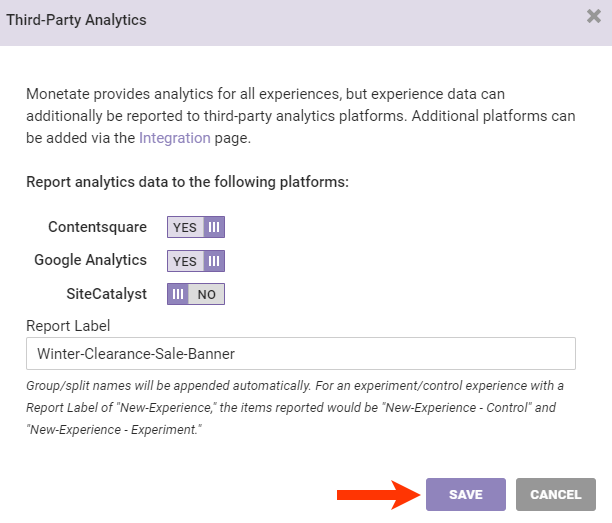
- Click SAVE to close the modal.
You can view a table of experiences that Monetate is reporting to Contentsquare on the Contentsquare Configuration screen of the Third-Party Analytics tab of the Integration page of the Monetate platform settings.
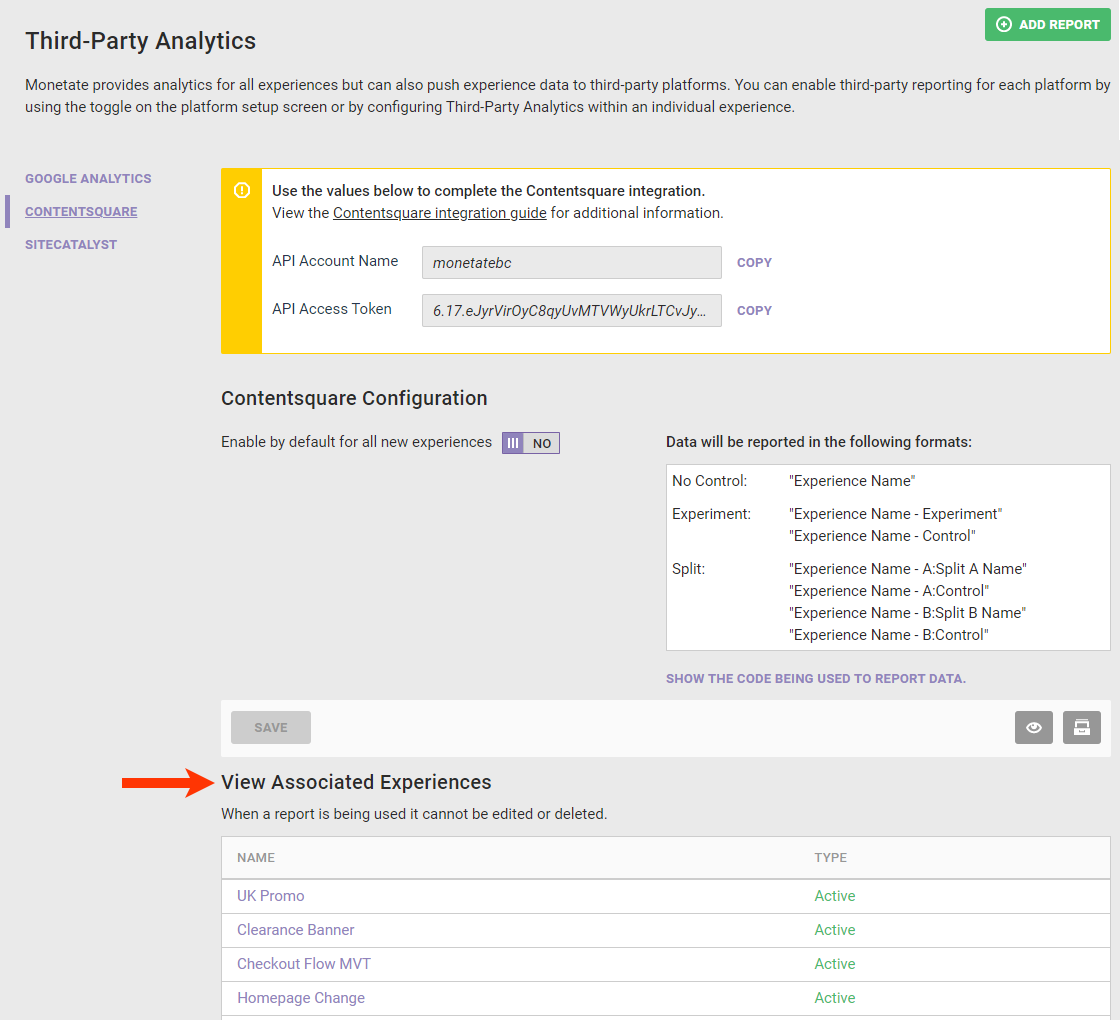
To disable Contentsquare reporting for a single experience, click its name in this table to open it in Experience Editor, then click the additional options menu (...), click Third-Party Analytics, and then toggle Contentsquare to NO in the Third-Party Analytics modal.
Testing the Integration
Follow these steps to test the connection between Monetate and Contentsquare by using the Contentsquare Tracking Setup Assistant.
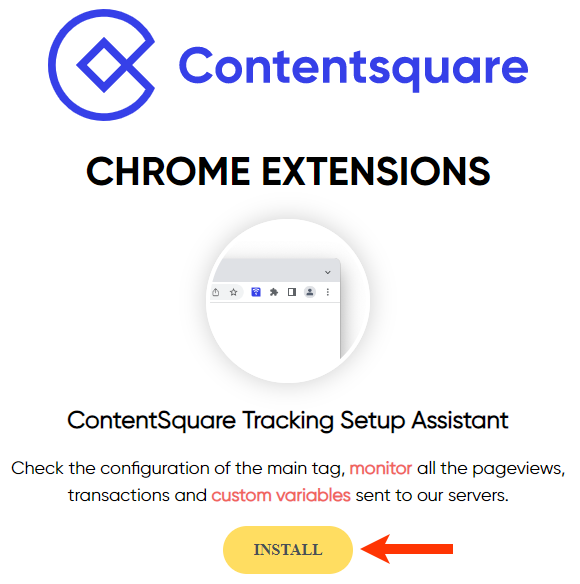
- In a Google Chrome browser window or tab, load Contentsquare Chrome Extensions, and then click INSTALL.
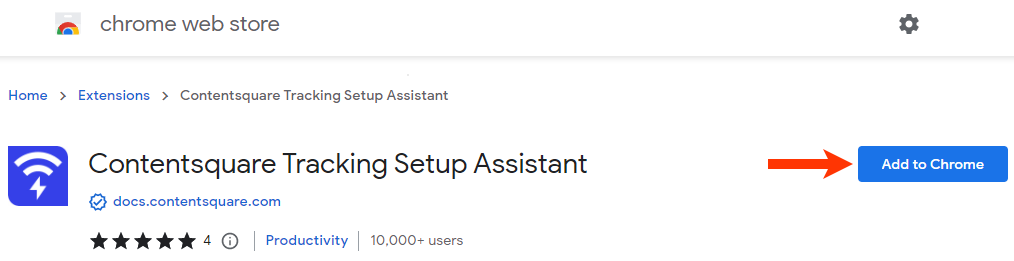
- In the Chrome Web Store, click Add to Chrome.
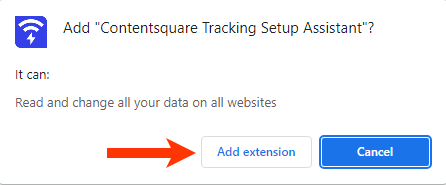
- Click Add extension.
- Navigate to a page on your site on which an experience with Contentsquare reporting enabled is currently running.
- Launch the Contentsquare Tracking Setup Assistant extension, and then expand the dynamic variables tracked accordion to confirm that experiences and variants are being reported to Contentsquare for your session.
An experience's campaign ID is sent to Contentsquare as a dynamic variable. It is appended to the end of its corresponding entry in the Contentsquare Tracking Setup Assistant extension with an underscore (for example, AB_Mon_CSQDemo_1160975).
Evaluating an Experience in Contentsquare
When you define new Zoning, you see an option to choose an experience preview URL.
The Zoning Setup page displays a list of all experiences for your account. When you select an experience, Contentsquare provides you with a list of all possible variants for that experience.

Choose a variant, and the page then refreshes to show the website as configured from that Monetate experience and also preselects a custom Segment for only visitors who have seen that specific variant/experience.

Find additional information about using the Contentsquare integration with Monetate in the Contentsquare Knowledge Base.