Interaction events can be based on these types of actions customers take on your site:
- Click: Track when customers click a specific element, such as a banner, image, or link, on your site
- Form Submit: Track when customers successfully as well as unsuccessfully submit a form, such as a newsletter sign-up or search query
- Exit Link: Track when customers click a link that redirects them to an external site, such as your company's page on a social media platform, or any page on which the Monetate tag isn't present
- Generic: Track other types of customer interactions, such as touch events and mouseovers, using any JavaScript event available in the DOM
For content that the Monetate platform inserts onto your site, click-based interaction events often have a timing issue. Therefore, either use URL parameters on the landing page and tracking their existence with that event type, or code API events into the HTML or JavaScript of the action. See Build API Events for more information.
Because the Form Submit event tracks both the successful and unsuccessful submissions, you may want to add an additional HTML element or URL event to track one versus the other.
If you consider yourself an advanced user, you can use the Generic event type to build an event for any interaction a customer could have with your site that falls outside the first three interaction types. For example, you can build a Generic event to track a mouseover can be used to track how many people hover over your navigation or logo.
Here are some use cases for in-browser JavaScript targets.
navigator.userAgent — Track usage of in-store kiosks or browsers not available in the WHO targets of an experience via their user agent string, for example
Mozilla/5.0 (Windows NT 10.0) AppleWebKit/537.36 (KHTML, like Gecko) Chrome/42.0.2311.135 Safari/537.36 Edge/12.10136
document.referrer — Track customers who last viewed a particular URL, for example http://example.com/search/
document.title — Track customers who view a webpage with specific title text as shown in the browser's title bar or in the page's browser tab, for example http://example.com/secret-sale/
Building an Interaction Event
Follow these steps to build an interaction-based event.
- Click COMPONENTS in the top navigation bar and then click Events.

- Click CREATE EVENT.

- Click the type of interaction-based event that you want to build.

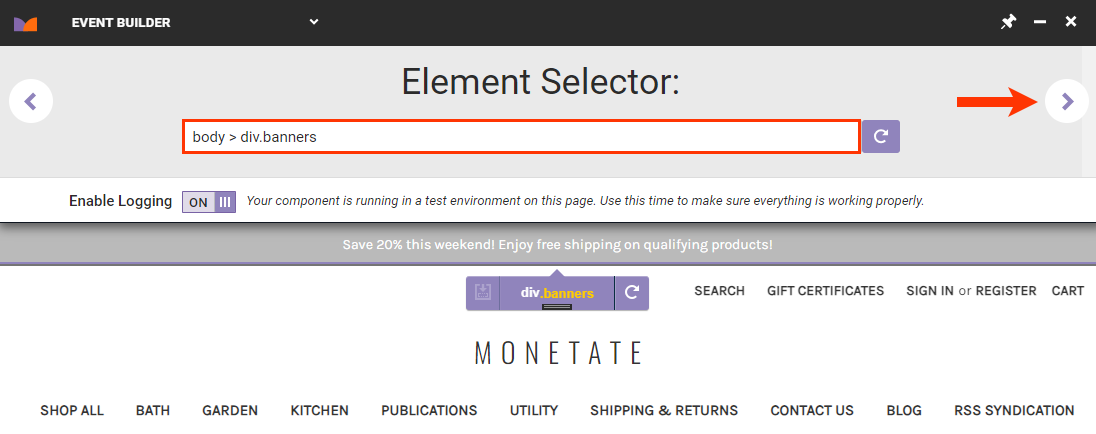
- Use the element selector to choose the element you want to track, and then click the forward arrow.
- If you selected Generic in step 3, then on the Details tab input into Event Type the specific DOM event type you selected for the event you're building.

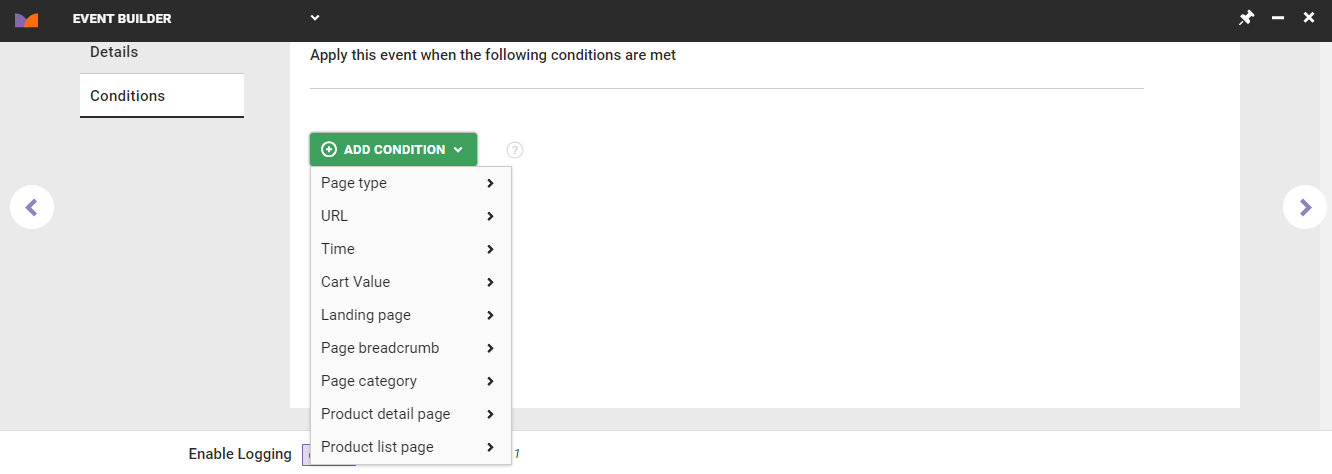
- Optionally, configure a condition to limit the event to a specific page type, URL, time, page category, or landing page. Click the Conditions tab, click ADD CONDITION, select a condition category and specific filter option, and then configure the condition equation. Click the forward arrow.
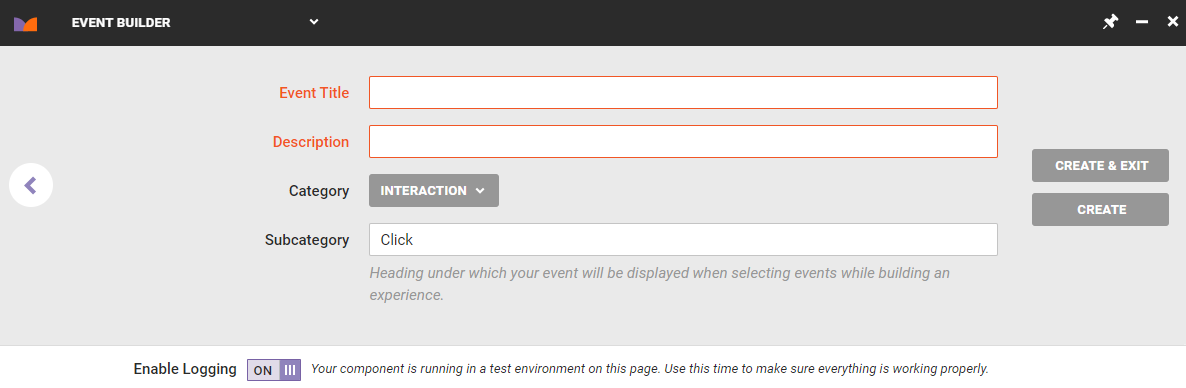
- Type a name for the event into Event Title, type a summary into Description, and then click CREATE & EXIT.