You can create a Web experience that tracks clicks or other interactions with products on sale by creating a custom event in Event Builder to track these clicks.
Creating the Custom Event
Follow these steps to create the click-tracking custom event in Event Builder.
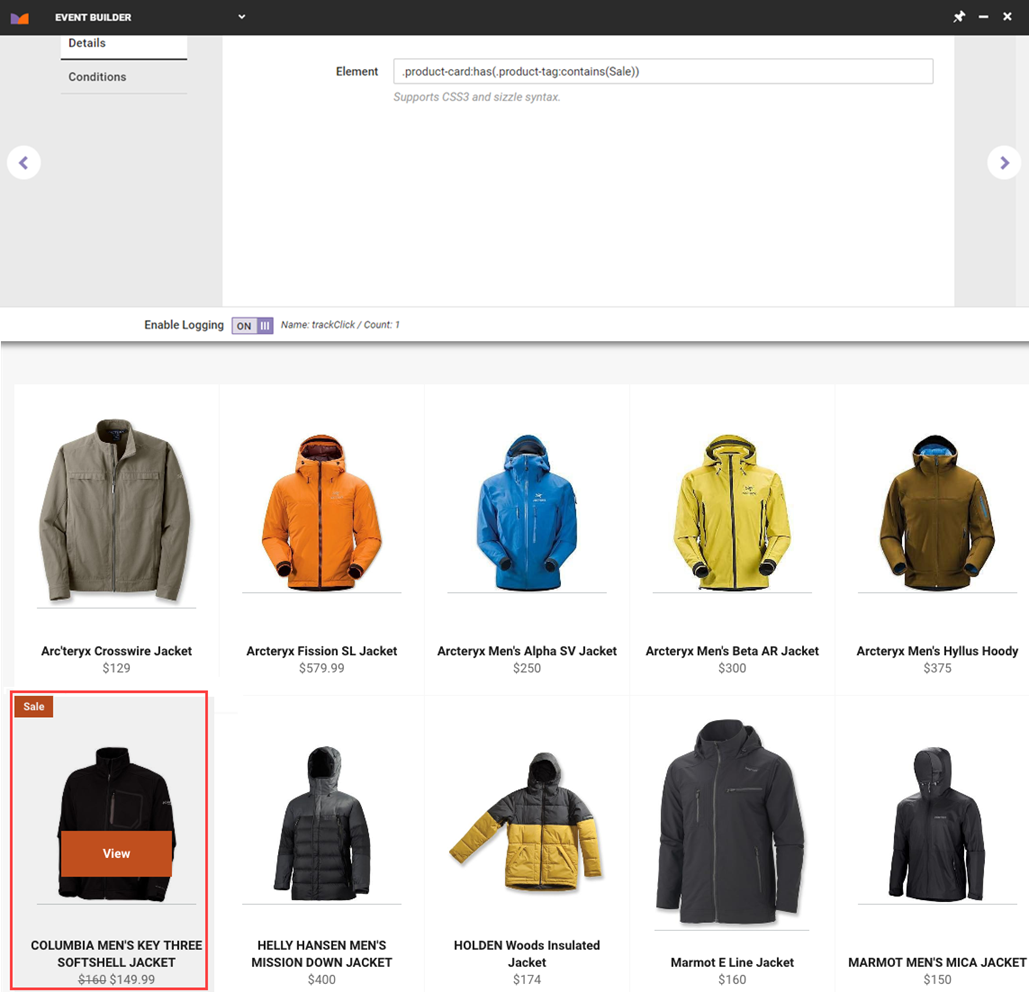
- Load your site in a browser, navigate to a page that contains products tagged with a "Sale" badge, and then launch your browser's developer tools to find the element needed for the event.

- As necessary, expand the code to determine if and how you may need to revise the selector so that the custom event counts clicks only when the element contains the text "Sale." (In this example, the selector must be written to find the class
product-cardif it has the<div>element with the classproduct-tagthat contains the text "Sale.")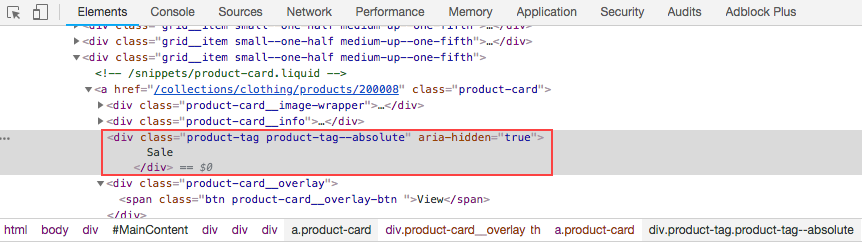
- Click COMPONENTS in the top navigation bar of the Monetate platform, and then click Events.

- Click CREATE EVENT.

- Navigate to a page that contains products tagged with a "Sale" badge, and then click Click on the Interaction tab.
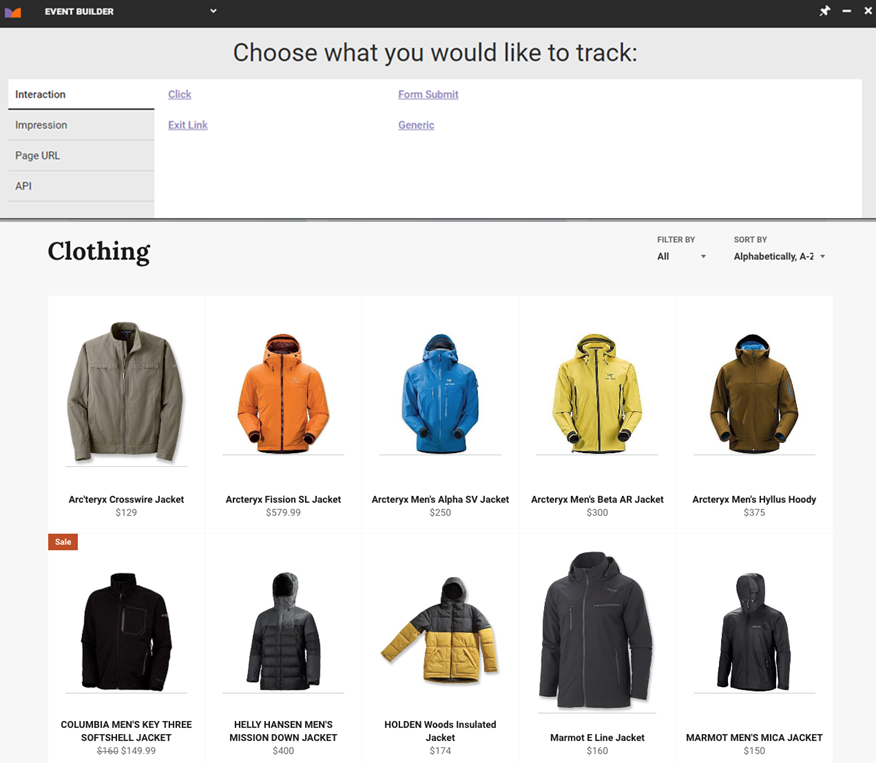
- Find a rough element selector for a product container with a sale product.
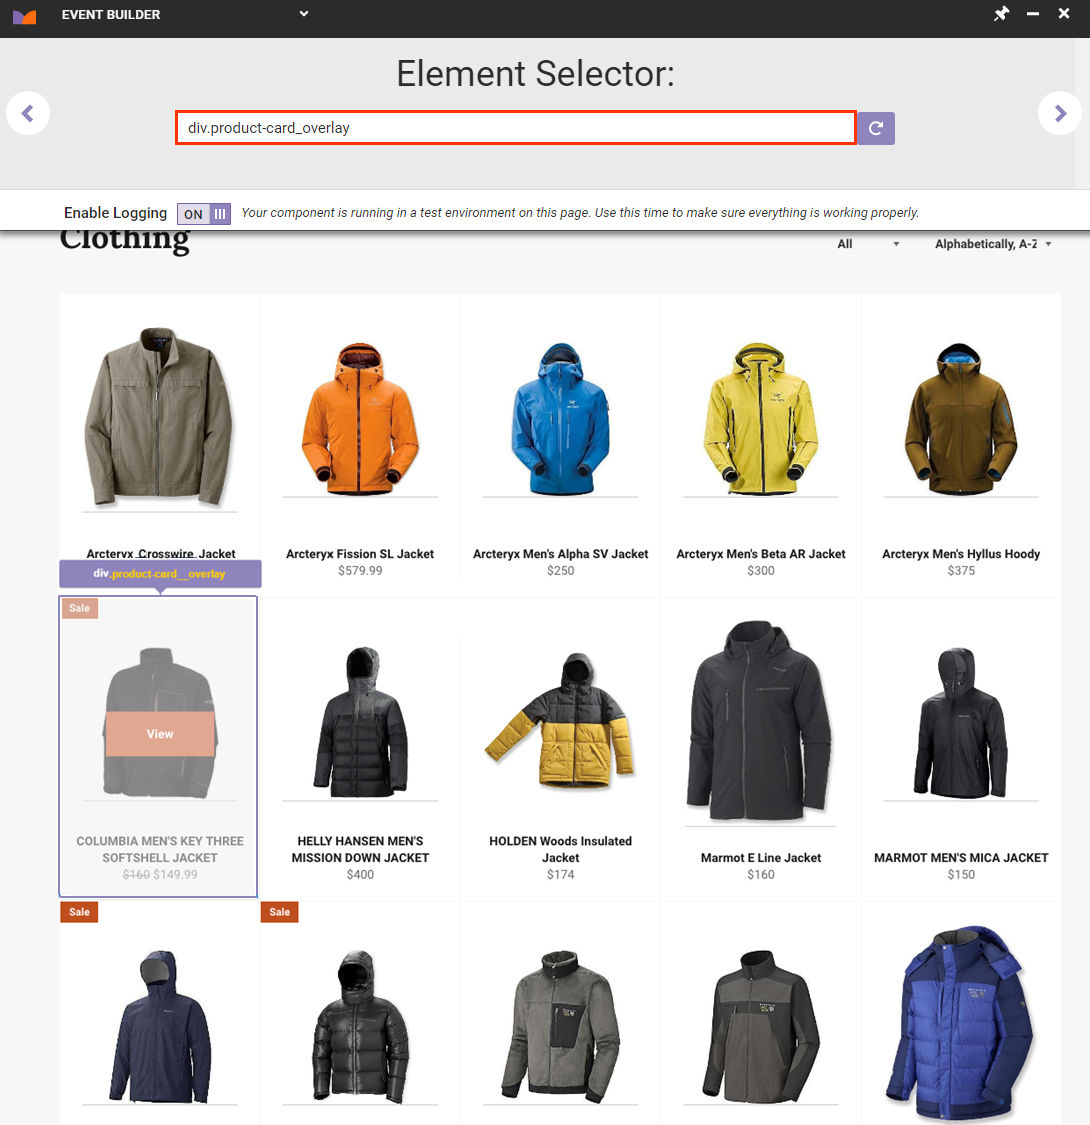
- On the Details tab, revise the select as needed. To test the selector is accurate, press and hold the Shift key, click an element, and then verify that the click count increases when clicking an item that has the "Sale" badge.
- If necessary, on the Conditions tab, add conditions to limit when the event should track clicks. (In this example, the event should only track clicks on index and search pages, so it requires a Page type = condition with the values
indexandsearch.)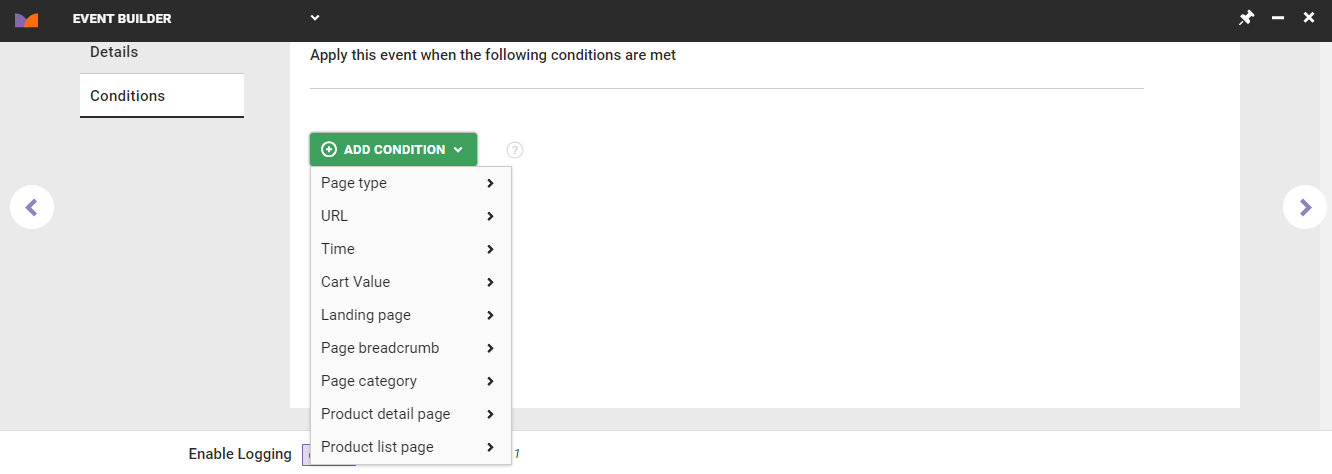
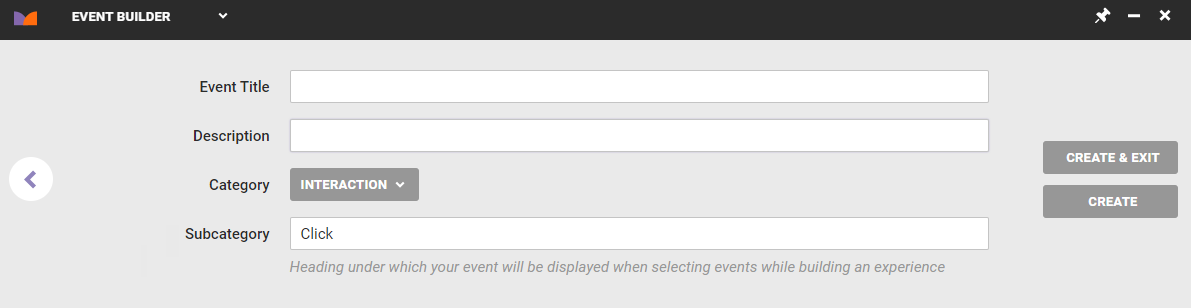
- Give the event a title and a description, and then click CREATE & EXIT.
The event is now ready to be used in a Web experience.
Creating the Experience
Follow these steps to create a Web experience to deploy the click-tracking event on your site.
- Click EXPERIENCES in the top navigation bar, and then select Web.

- Click CREATE EXPERIENCE.

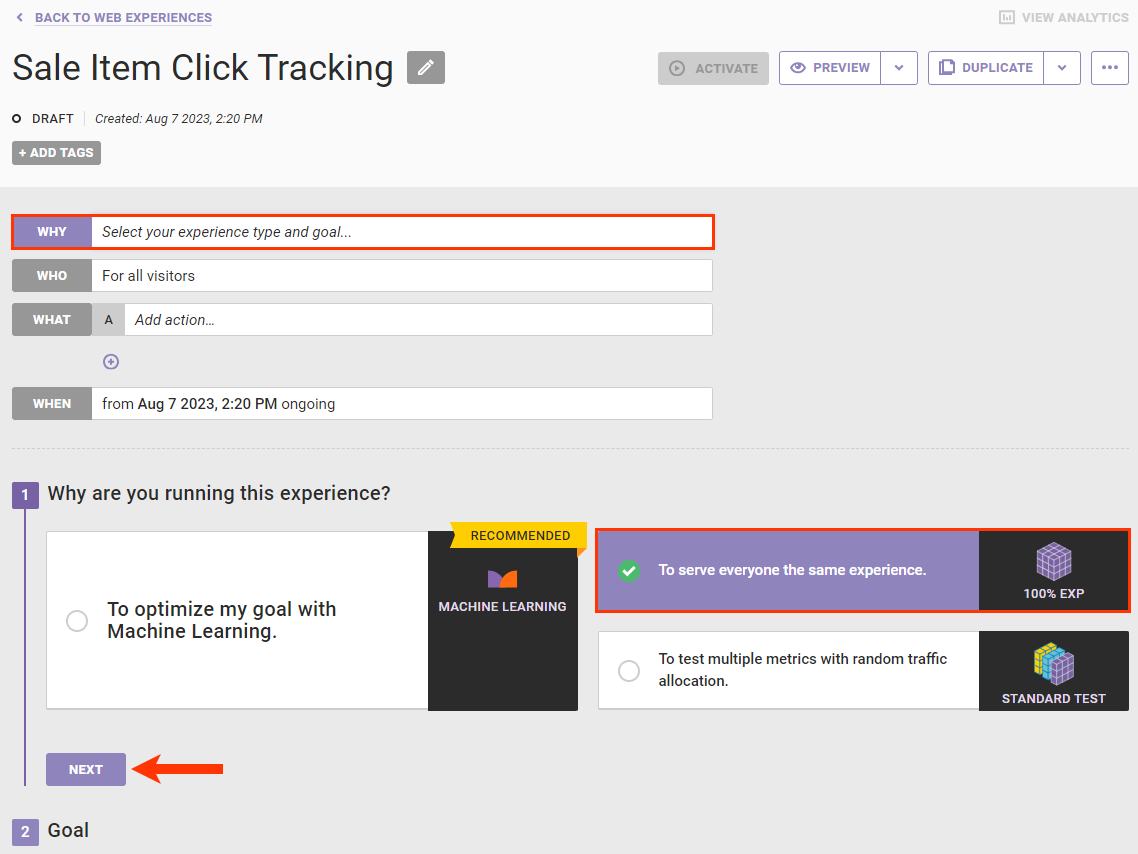
- Click WHY, select To serve everyone the same experience, and then click NEXT.
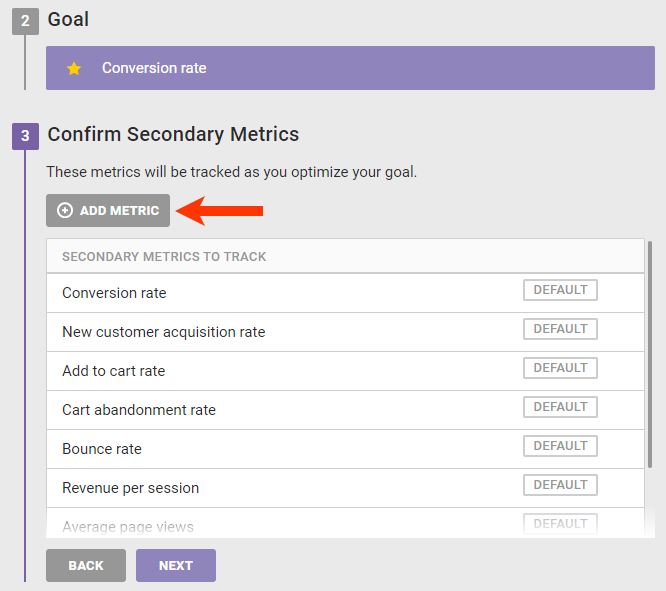
- Select a goal metric and then click NEXT.

- Click ADD METRIC.
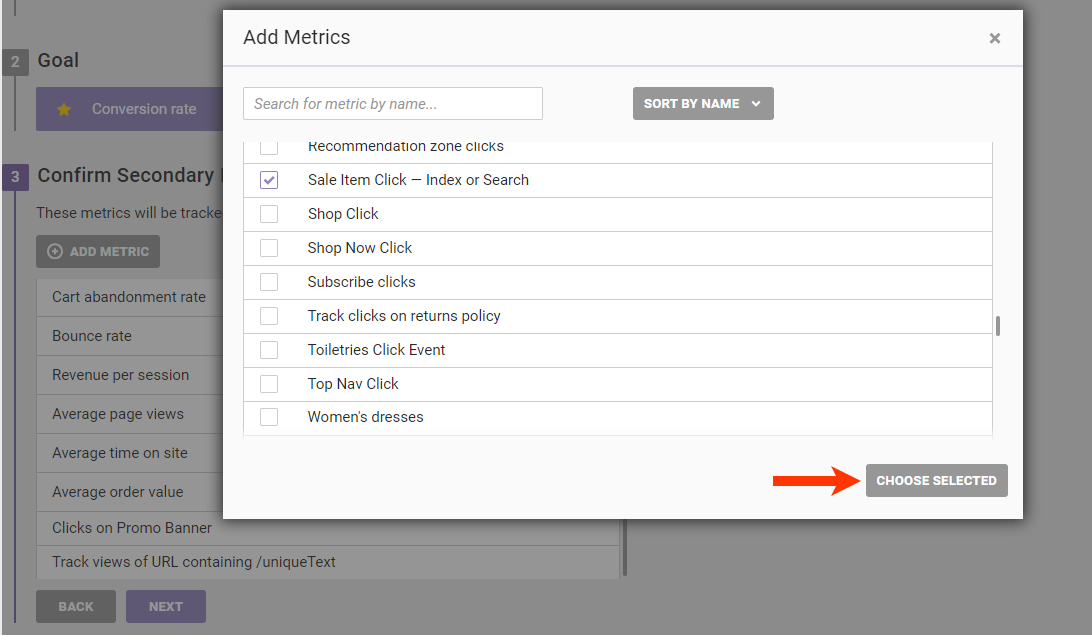
- Select the click event you created in Event Builder, and then click CHOOSE SELECTED.
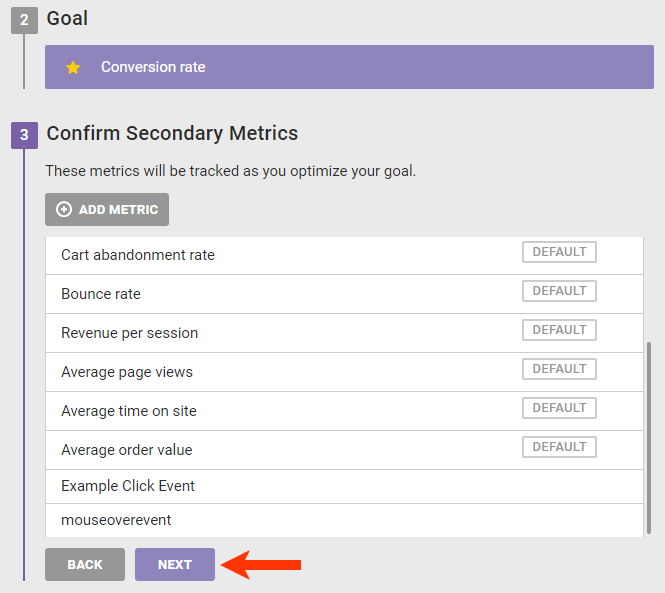
- Make any additional adjustments to the secondary metrics as necessary, and then click NEXT.
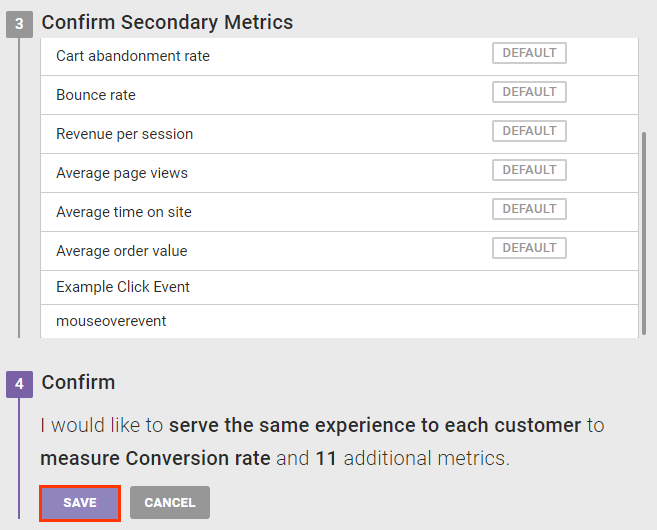
- Confirm that you've configured the WHY settings as required and then click SAVE.
- Configure the WHO settings, if necessary. For this use case, the experience should target all site visitors, so there's no need to change the WHO settings.
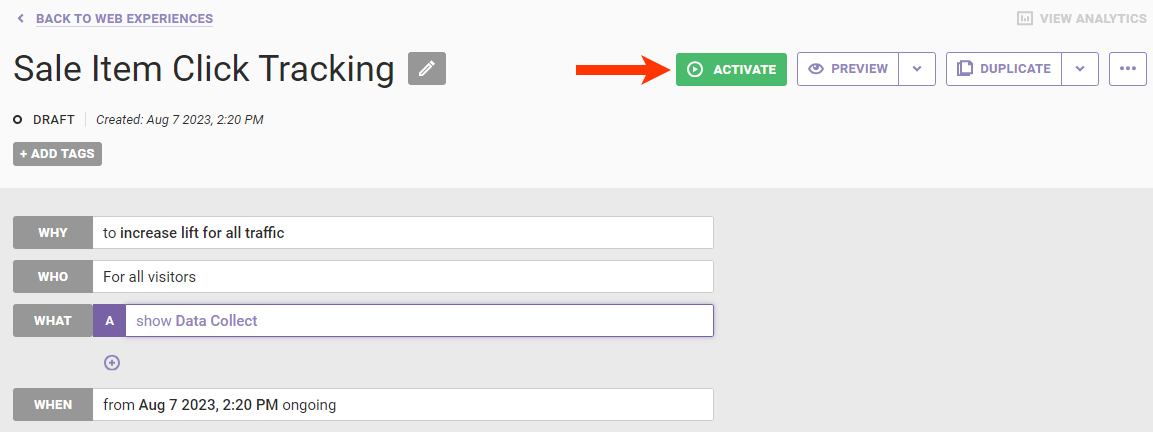
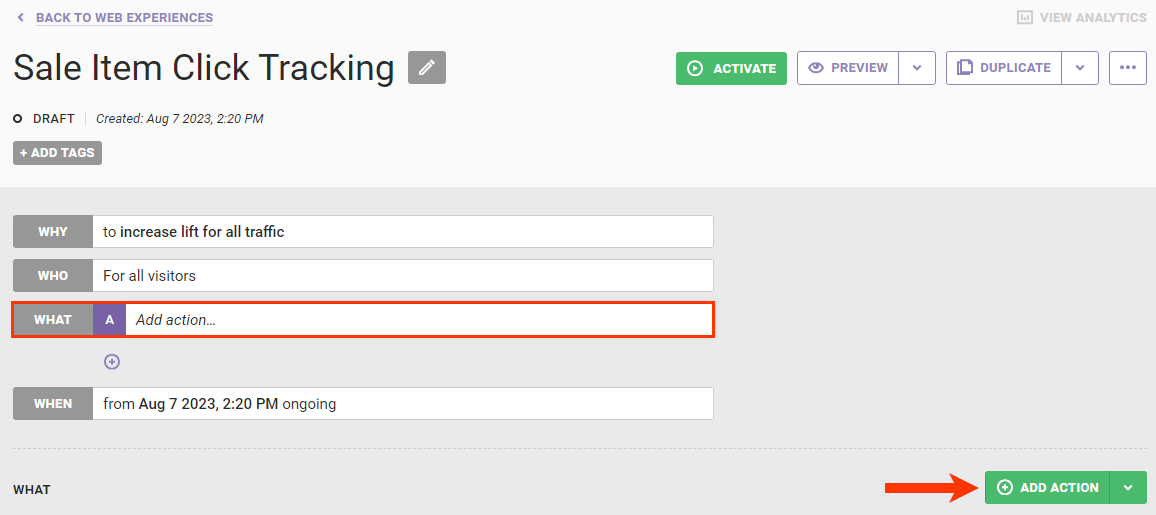
- Configure the WHAT settings with a Data Collect action.
- Click WHAT and then click ADD ACTION.
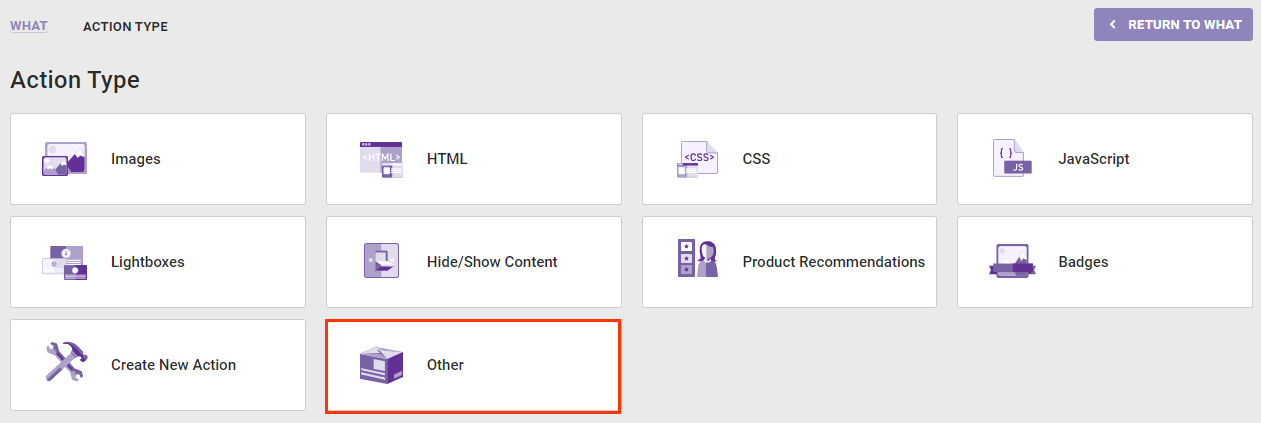
- Click Other.
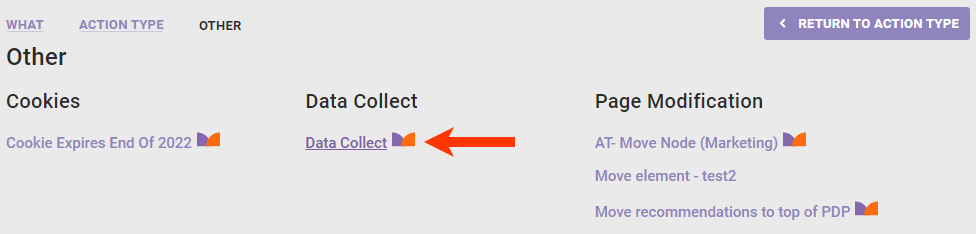
- Click Data Collect.
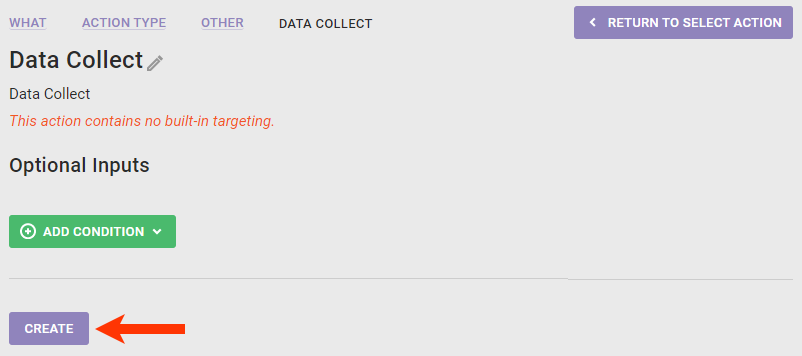
- The action requires no action conditions, so click CREATE.
- Click WHAT and then click ADD ACTION.
- Because you tested the event when creating it in Event Builder and the experience only collects data, you don't need to preview it. Click ACTIVATE.